72 duster Build progress
good ole Michigan, yesterday was 90 degrees and today it was 50 and rain!.
I have been working on the duster pretty steady but most of what I have been doing is pretty boring to post pictures of (wire wheeling metal and spraying primer and blah blah blah).....yesterday I didnt get to work on the duster because first our dryer broke which put me in a crappy mood because we can't afford another one with my wife being laid off and bills stacking up and not getting and bites here on fabo on my parts for sale thread....and then to top it off a caliper froze up on our jeep and I had to rip it all apart and it ended up having 2 frozen slides and one frozen piston ,so I ended up getting a new caliper and bracket and installing them and that fixed the problem!.
anyhow.....that stuff aside.
today I got busy on the duster!!!
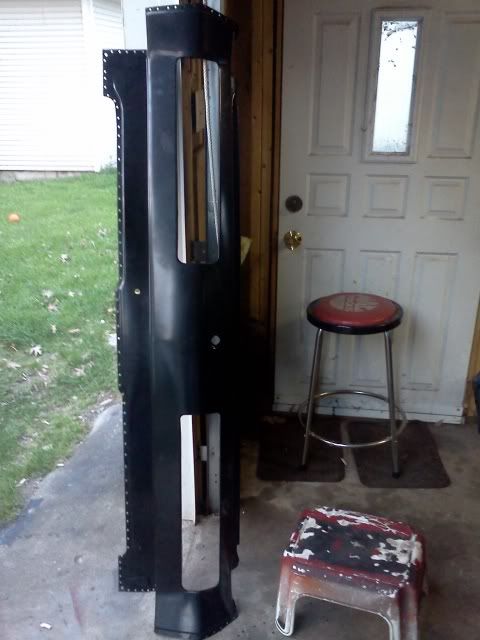
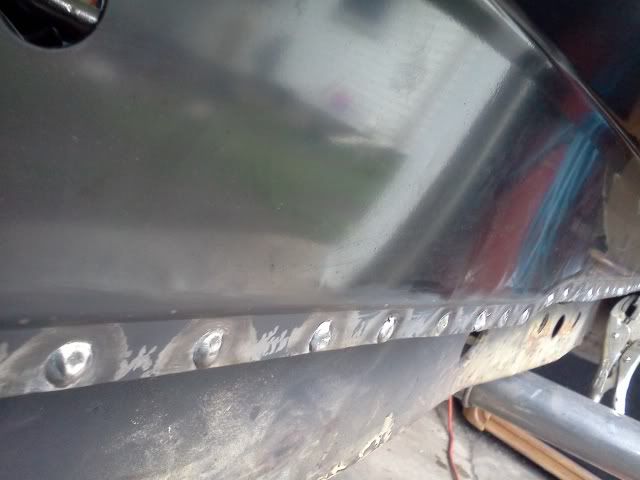
first I busted out my air punch tool and made all my spot weld holes
Then I wheeled off all of the coating on the panel around all my spot weld areas (and on the car where all my spot welds would be going) and then I stick it into place and did some tweaking here and there until things looked the way I wanted and I clamped vise grips around it to lock it in place where I wanted it.
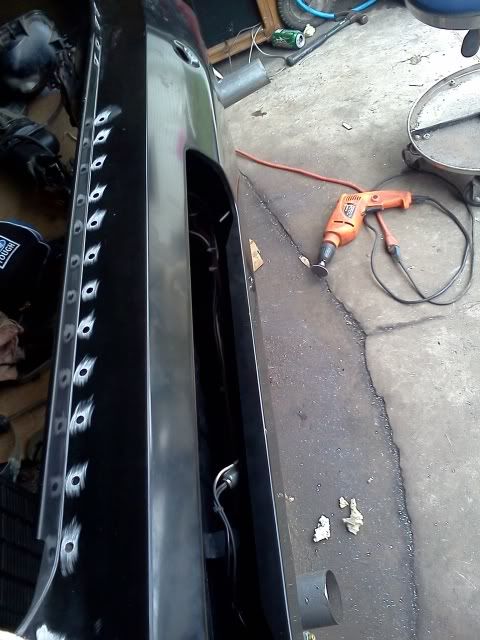
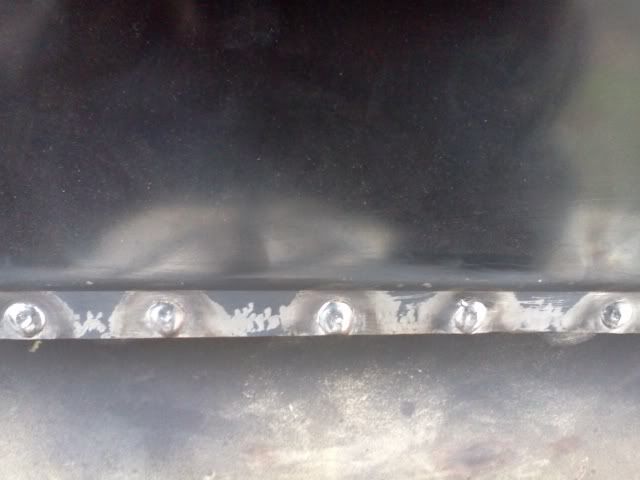
Then I tack welded the corners of the panel so it would not move any during any hammering I had to do.......and then when I started welding it all up I started on the very ends and then on the bottom I worked my way from the center out until I had all my plugs welded....in between each weld I took out my hammer and tapped the metal down so I would get a nice flush panel to panel fitment.
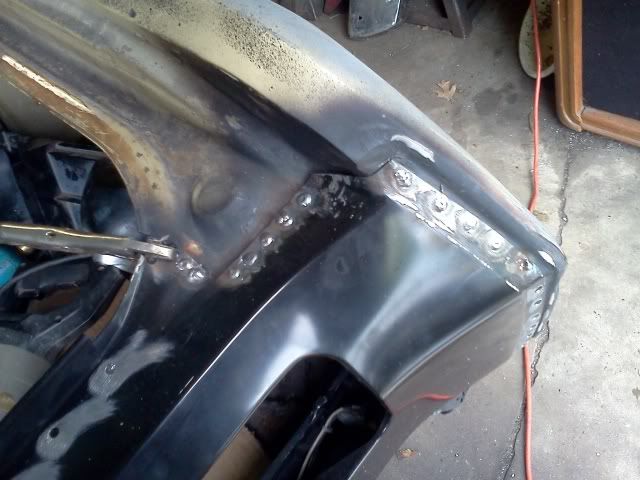
I got it all welded in place but I still have to weld all my spot weld holes that hold my tail light brackets in but that shouldn't take long at all. and then I just have to grind down my welds and spray some primer and move onto the quarter panel patch installs.
I had the new welder buzzing pretty good! so I don't have a ton of grinding to do thankfully!
then I tossed the lock back in it so I can get in and out of it incase the trunk drops and the latch locks on me ( I keep having to reach through the tail light hole with a screw driver on the back side of the lock mechanism to pop the trunk and it was getting annoying lol).....and I tossed the tail lights in real quick to get an idea of how it looked and how everything was lining up.
all looks good!
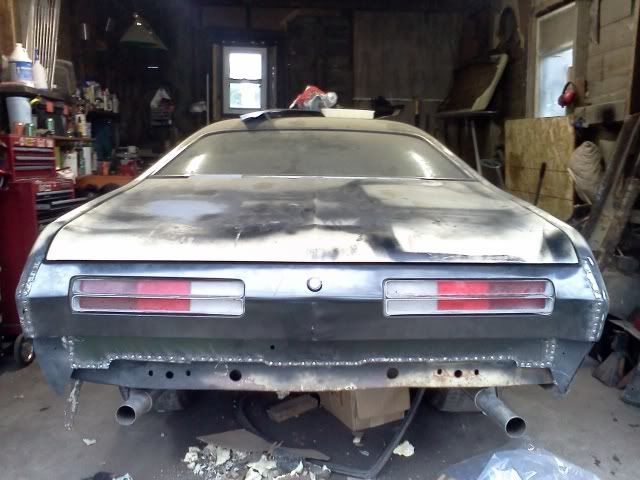
I did the tail panel prior to tackeling the quarter panels because I thought it would be the "easier job" HA.....so far I have proved myself wrong.....reason being is because the car had been hit in the corner of the tail panel before and it had some rust issue and I had to do alot of straightening and I had to make my own trunk extension end caps and I had to rebuild the lip of the trunk floor that the tail panel is welded to and it has been tricky to say the least ....but it is coming along anyhow!
I still have to cut the old lower quarters off,rebuild the trunk extensions out of new metal and then I can weld the new panels in.
Here is a quick video I took that just shows the tail panel welds and stuff......click the picture to see the video.

let me know what you guys think!
good ole Michigan, yesterday was 90 degrees and today it was 50 and rain!.
I have been working on the duster pretty steady but most of what I have been doing is pretty boring to post pictures of (wire wheeling metal and spraying primer and blah blah blah).....yesterday I didnt get to work on the duster because first our dryer broke which put me in a crappy mood because we can't afford another one with my wife being laid off and bills stacking up and not getting and bites here on fabo on my parts for sale thread....and then to top it off a caliper froze up on our jeep and I had to rip it all apart and it ended up having 2 frozen slides and one frozen piston ,so I ended up getting a new caliper and bracket and installing them and that fixed the problem!.
anyhow.....that stuff aside.
today I got busy on the duster!!!
first I busted out my air punch tool and made all my spot weld holes
Then I wheeled off all of the coating on the panel around all my spot weld areas (and on the car where all my spot welds would be going) and then I stick it into place and did some tweaking here and there until things looked the way I wanted and I clamped vise grips around it to lock it in place where I wanted it.
Then I tack welded the corners of the panel so it would not move any during any hammering I had to do.......and then when I started welding it all up I started on the very ends and then on the bottom I worked my way from the center out until I had all my plugs welded....in between each weld I took out my hammer and tapped the metal down so I would get a nice flush panel to panel fitment.
I got it all welded in place but I still have to weld all my spot weld holes that hold my tail light brackets in but that shouldn't take long at all. and then I just have to grind down my welds and spray some primer and move onto the quarter panel patch installs.
I had the new welder buzzing pretty good! so I don't have a ton of grinding to do thankfully!
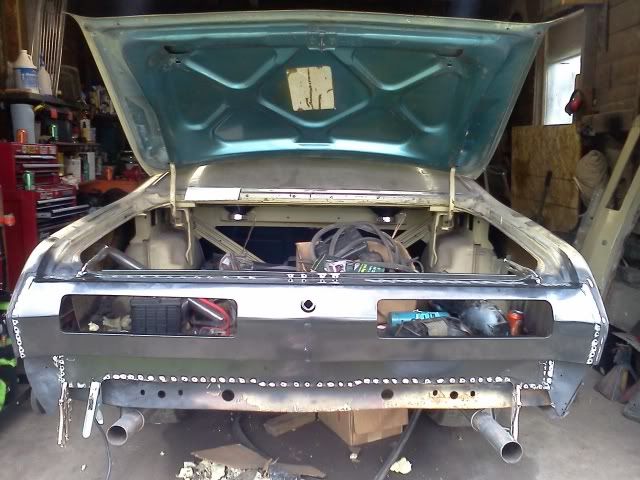
then I tossed the lock back in it so I can get in and out of it incase the trunk drops and the latch locks on me ( I keep having to reach through the tail light hole with a screw driver on the back side of the lock mechanism to pop the trunk and it was getting annoying lol).....and I tossed the tail lights in real quick to get an idea of how it looked and how everything was lining up.
all looks good!
I did the tail panel prior to tackeling the quarter panels because I thought it would be the "easier job" HA.....so far I have proved myself wrong.....reason being is because the car had been hit in the corner of the tail panel before and it had some rust issue and I had to do alot of straightening and I had to make my own trunk extension end caps and I had to rebuild the lip of the trunk floor that the tail panel is welded to and it has been tricky to say the least ....but it is coming along anyhow!
I still have to cut the old lower quarters off,rebuild the trunk extensions out of new metal and then I can weld the new panels in.
Here is a quick video I took that just shows the tail panel welds and stuff......click the picture to see the video.
let me know what you guys think!