The Great Pumpkin - '71 Duster
Well, things have picked back up recently for the Great Pumpkin. Got my truck running well enough to where it does not need much attention so I re-focused on getting the 416 done in time for the season.
So I cleared some hurdles by finally getting the motor sealed up. There was a lot of hemming and hawing on my part on how to do these jobs 'the right way'. Like usual, I overthought it and ended up wasting a lot of time. I even started two threads here on how to seal intakes and oil pans. I wound up getting so many different answers that it made it worse. I took what I thought was right from each thread, put it in a little instruction list and went for it. Sometimes you just have to turn of your brain and jump in. It wasn't like I hadn't done this kind of thing before. In hindsight I don't understand why it became such a big deal. Just one of those self-inflicted problems I guess.
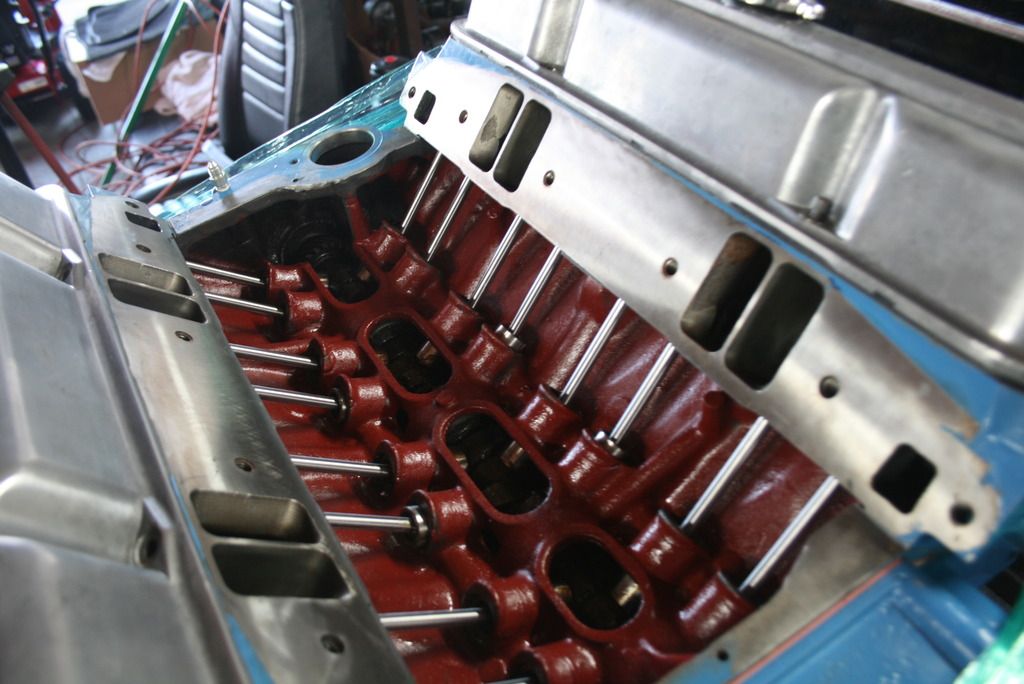
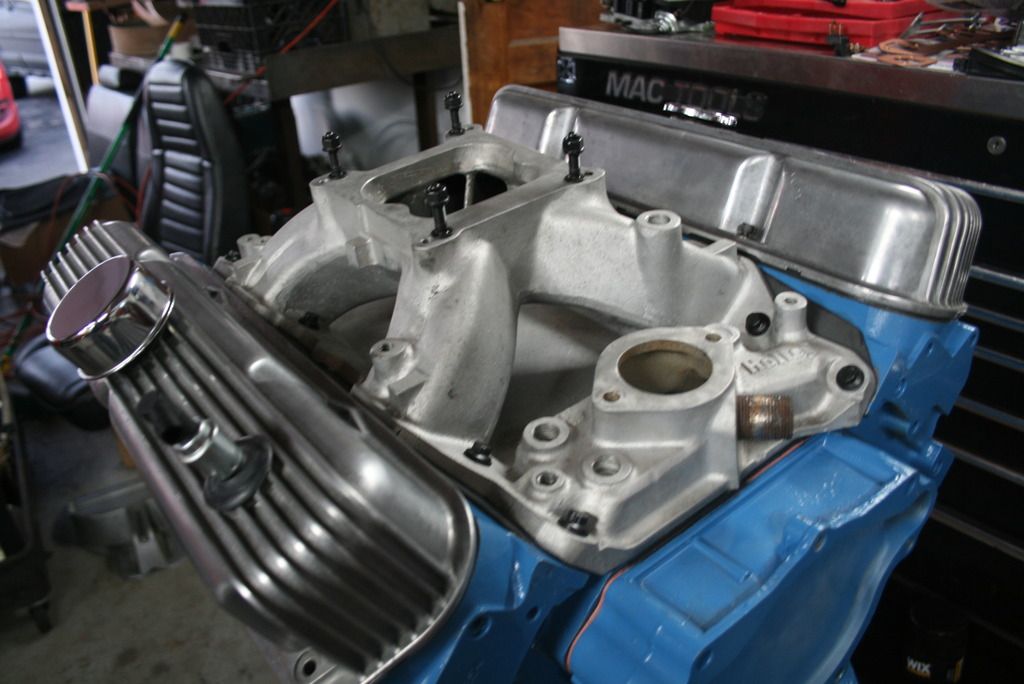
The intake went on OK. I ditched the cork end rails and used the Right Stuff for the block. I spent some time and made sure the intake ports lined up with the ports on the heads as best as I could - I wouldn't want to mitigate my gasket matching efforts. Bottom line is that it's on and it ain't going anywhere. I even got all the pipe plugs in and temp gauge fitting in and mounted the throttle cable and return brackets.
Clean!
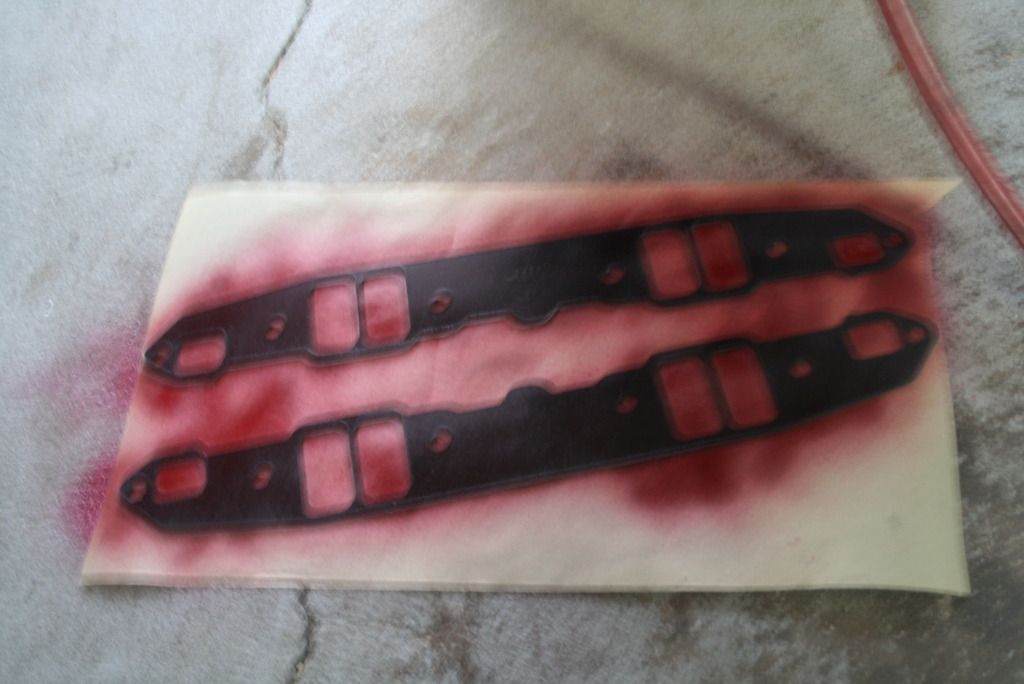
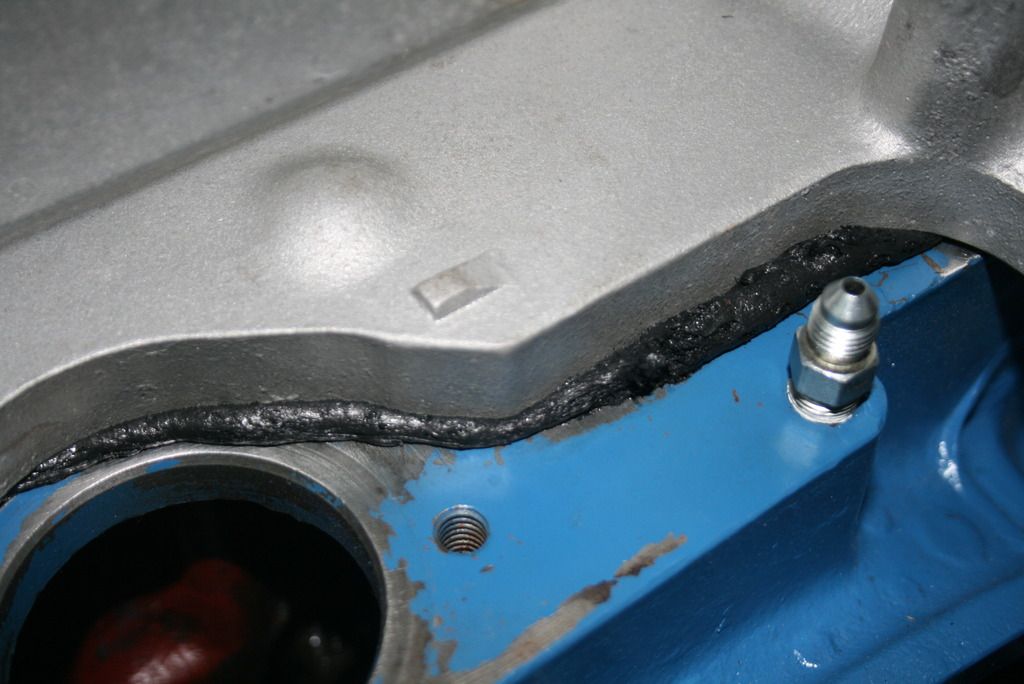
Sticky stuff on the gaskets.
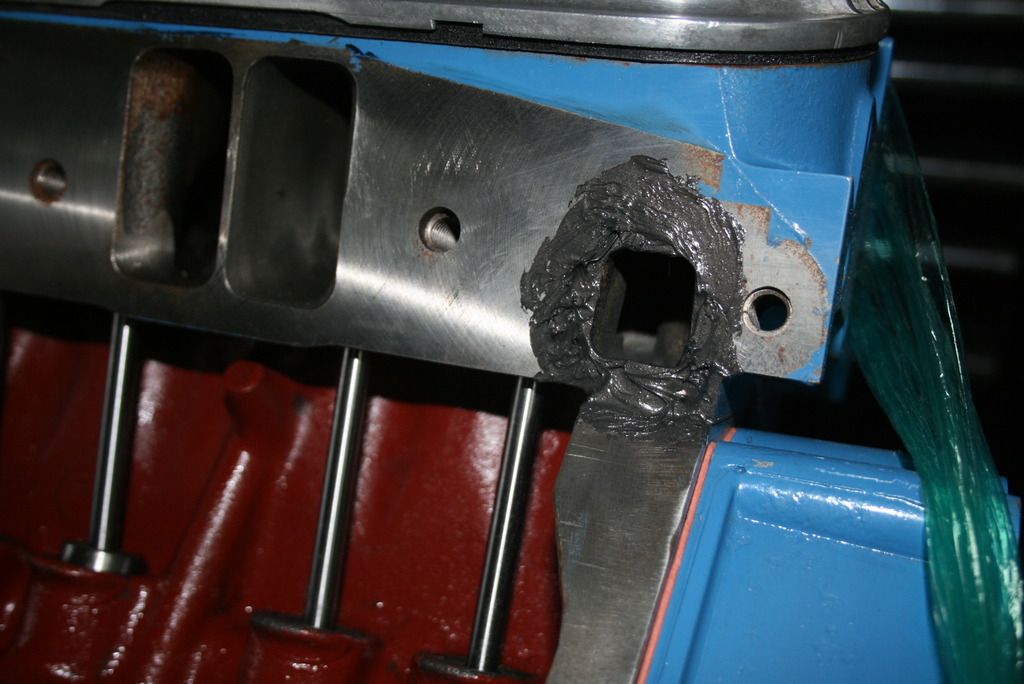
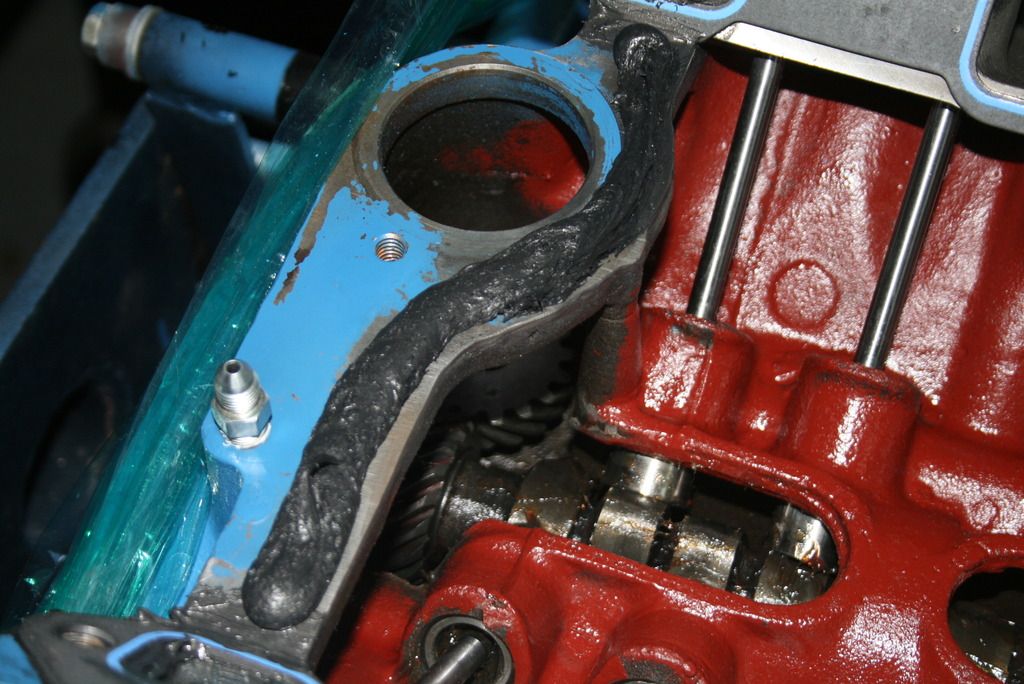
Goop around the cooling passages.
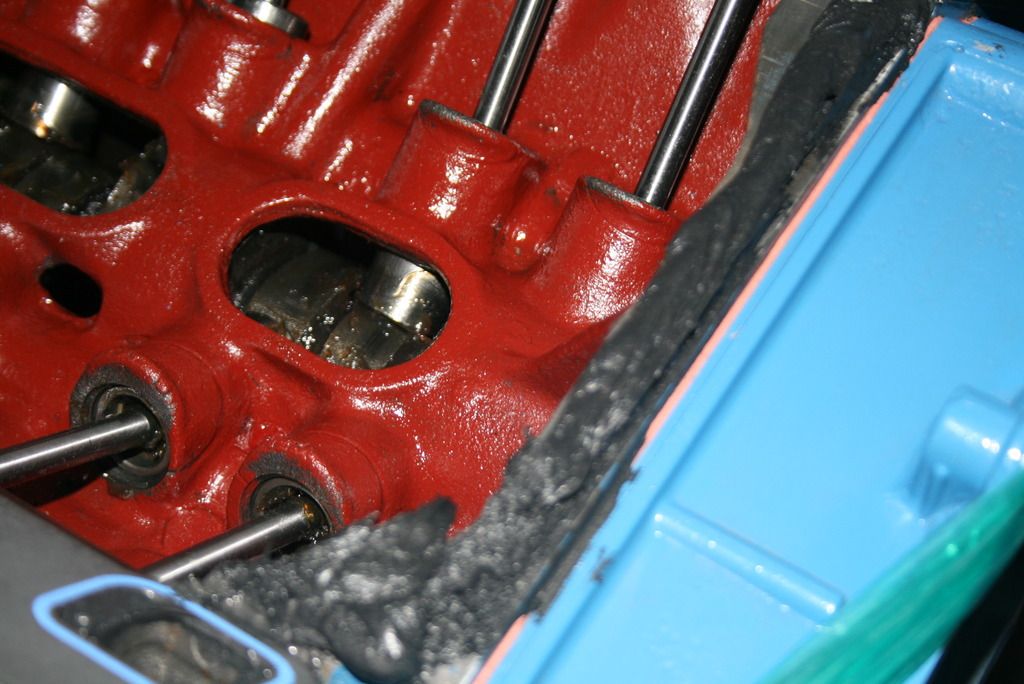
Right Stuff
Done.
The oil pan went on pretty easily as well but I ran into a problem and had to remove it which was my worst nightmare. I was installing the coil bracket onto my intake without anything covering the hole for the distributor. There are three little screws that attach the coil to the bracket and one of them flipped out of my fingers and down the hole. I remember looking at the open hole while I was removing the screws thinking that I should cover it - 5 seconds later, the screw was in the oil pan. Doh!
I was ******* pissed - I mean I had just gotten over the hurdle of putting the thing on and now I have to take it off. I tried using a magnet through the drain plug hole to see if I could snatch it but it was not working. No choice, the pan had to came off.
Luckily, it came right off without too much fuss and the gaskets didn't rip. I used RTV sparingly so there was not a lot of mess to clean up. My big mistake was turning the motor over on the stand to get it off - when I turned it, the screw fell and ended up getting lodged between the top of a rod and piston top. I tried turning the crank over gently to dislodge it but it wouldn't budge. I ended up rotating the motor on the stand so the piston was upside-down and it finally rolled loose. All in all it took a good 15 minutes to get it out of there without doing any damage. Frustrating to say the least.
So then the pan went back on. I used a little more RTV this time. Once back over, first thing I did was to stab a distributor in there! I'm no dummy!
So I'm back on the horse after the screw-down-the-hole debacle. Currently, I am working on getting the fuel pump on and oriented. It's a Clay Smith 6 vane pump which is much bigger than your average Carter pump. The body is much wider and interferes with things on either side. Since there is no room for the the fittings and fuel lines, you need to use an Edelbrock bottom plate which obviously has the fittings come out the bottom. The bottom plate is much thicker than the one that comes on the pump so I had to go to the hardware store and got some longer screws. The original inlet and outlets get plugged with pipe plugs. Then, you need to source source some fittings for the bottom. I have a bunch of that stuff on hand so it is just a matter of figuring out which combination of adapter fittings, hose ends and hoses will work best.
Once the fuel pump is on, there's only a few more things left. The front accessories are easy enough. The one last decision I 'need' to make is which distributor I want to use. I have both the standard MP mechanical advance distributor and an older 'tach drive' from the late '80s. It's actually NOS. The 'problem' is that the tach drive is based on an older Prestolite points-style distributor so I need to get new plug wires to fit the old black cap. The current distributor has a Firecore 'HEI' style cap and wires. I was never happy with the plug ends on those wires though so I yanked 'em off to install some molded ones I got from Taylor but have yet to finish that job. I love to make more work for myself.
In other news, I got new brakes. To me, it's sort of unbelievable considering all the jive I went through to make the current ones work. Honestly though I was never happy with them. Hauling the car to a stop at the end of the track was downright scary. A low 12 second car should be able to use the first or second turn off, I always had to use the last turn off, standing on the pedal. In addition, they would not hold the car against the converter at the line, it would creep in the beams so I couldn't launch at anything much above idle which really hurt my 60 ft. times.
Guess I just had to give up on the KH/SSBC deal. I think they were fine for regular driving but did not seem adequate for my application. I think the piston area was not large enough and the rotors are small. Again, they were OK on the street though so it seemed strange that they would not do what I wanted in certain situations. Guess I found their limits.
The other thing for re-doing the brakes was wheels and ditching the small bolt pattern. Not much choice for SBP around unless you get lucky and find a cool vintage wheel but I wasn't really looking. It's a moot point though - I can rock my Fenton Gyros now and have 1/2" front studs.
Centerlines B Gone!

So I went with the Wilwood minimum offset kit for 10" drums. Had to pull my crusty-*** spindles off the shelf and start cleaning them up. I will need to get new tires as well for the wheels. The Kelly Metrics on the car were pretty old so it has been in the back of my mind to replace them anyway. They're not even made anymore. The tires themselves are actually in good shape, no dry rot or unusual wear and they handled fine but I just want the car to be the best it can be so I'd rather not skimp on brakes and tires.
So that's all I can manage to write about for now. I will get some pics up of the fuel pump and brakes when I get to them.
Thanks for your continued support.
More to come.
Well, things have picked back up recently for the Great Pumpkin. Got my truck running well enough to where it does not need much attention so I re-focused on getting the 416 done in time for the season.
So I cleared some hurdles by finally getting the motor sealed up. There was a lot of hemming and hawing on my part on how to do these jobs 'the right way'. Like usual, I overthought it and ended up wasting a lot of time. I even started two threads here on how to seal intakes and oil pans. I wound up getting so many different answers that it made it worse. I took what I thought was right from each thread, put it in a little instruction list and went for it. Sometimes you just have to turn of your brain and jump in. It wasn't like I hadn't done this kind of thing before. In hindsight I don't understand why it became such a big deal. Just one of those self-inflicted problems I guess.
The intake went on OK. I ditched the cork end rails and used the Right Stuff for the block. I spent some time and made sure the intake ports lined up with the ports on the heads as best as I could - I wouldn't want to mitigate my gasket matching efforts. Bottom line is that it's on and it ain't going anywhere. I even got all the pipe plugs in and temp gauge fitting in and mounted the throttle cable and return brackets.
Clean!
Sticky stuff on the gaskets.
Goop around the cooling passages.
Right Stuff
Done.
The oil pan went on pretty easily as well but I ran into a problem and had to remove it which was my worst nightmare. I was installing the coil bracket onto my intake without anything covering the hole for the distributor. There are three little screws that attach the coil to the bracket and one of them flipped out of my fingers and down the hole. I remember looking at the open hole while I was removing the screws thinking that I should cover it - 5 seconds later, the screw was in the oil pan. Doh!
I was ******* pissed - I mean I had just gotten over the hurdle of putting the thing on and now I have to take it off. I tried using a magnet through the drain plug hole to see if I could snatch it but it was not working. No choice, the pan had to came off.
Luckily, it came right off without too much fuss and the gaskets didn't rip. I used RTV sparingly so there was not a lot of mess to clean up. My big mistake was turning the motor over on the stand to get it off - when I turned it, the screw fell and ended up getting lodged between the top of a rod and piston top. I tried turning the crank over gently to dislodge it but it wouldn't budge. I ended up rotating the motor on the stand so the piston was upside-down and it finally rolled loose. All in all it took a good 15 minutes to get it out of there without doing any damage. Frustrating to say the least.
So then the pan went back on. I used a little more RTV this time. Once back over, first thing I did was to stab a distributor in there! I'm no dummy!
So I'm back on the horse after the screw-down-the-hole debacle. Currently, I am working on getting the fuel pump on and oriented. It's a Clay Smith 6 vane pump which is much bigger than your average Carter pump. The body is much wider and interferes with things on either side. Since there is no room for the the fittings and fuel lines, you need to use an Edelbrock bottom plate which obviously has the fittings come out the bottom. The bottom plate is much thicker than the one that comes on the pump so I had to go to the hardware store and got some longer screws. The original inlet and outlets get plugged with pipe plugs. Then, you need to source source some fittings for the bottom. I have a bunch of that stuff on hand so it is just a matter of figuring out which combination of adapter fittings, hose ends and hoses will work best.
Once the fuel pump is on, there's only a few more things left. The front accessories are easy enough. The one last decision I 'need' to make is which distributor I want to use. I have both the standard MP mechanical advance distributor and an older 'tach drive' from the late '80s. It's actually NOS. The 'problem' is that the tach drive is based on an older Prestolite points-style distributor so I need to get new plug wires to fit the old black cap. The current distributor has a Firecore 'HEI' style cap and wires. I was never happy with the plug ends on those wires though so I yanked 'em off to install some molded ones I got from Taylor but have yet to finish that job. I love to make more work for myself.
In other news, I got new brakes. To me, it's sort of unbelievable considering all the jive I went through to make the current ones work. Honestly though I was never happy with them. Hauling the car to a stop at the end of the track was downright scary. A low 12 second car should be able to use the first or second turn off, I always had to use the last turn off, standing on the pedal. In addition, they would not hold the car against the converter at the line, it would creep in the beams so I couldn't launch at anything much above idle which really hurt my 60 ft. times.
Guess I just had to give up on the KH/SSBC deal. I think they were fine for regular driving but did not seem adequate for my application. I think the piston area was not large enough and the rotors are small. Again, they were OK on the street though so it seemed strange that they would not do what I wanted in certain situations. Guess I found their limits.
The other thing for re-doing the brakes was wheels and ditching the small bolt pattern. Not much choice for SBP around unless you get lucky and find a cool vintage wheel but I wasn't really looking. It's a moot point though - I can rock my Fenton Gyros now and have 1/2" front studs.
Centerlines B Gone!
So I went with the Wilwood minimum offset kit for 10" drums. Had to pull my crusty-*** spindles off the shelf and start cleaning them up. I will need to get new tires as well for the wheels. The Kelly Metrics on the car were pretty old so it has been in the back of my mind to replace them anyway. They're not even made anymore. The tires themselves are actually in good shape, no dry rot or unusual wear and they handled fine but I just want the car to be the best it can be so I'd rather not skimp on brakes and tires.
So that's all I can manage to write about for now. I will get some pics up of the fuel pump and brakes when I get to them.
Thanks for your continued support.
More to come.