273 302 318 340 build

-
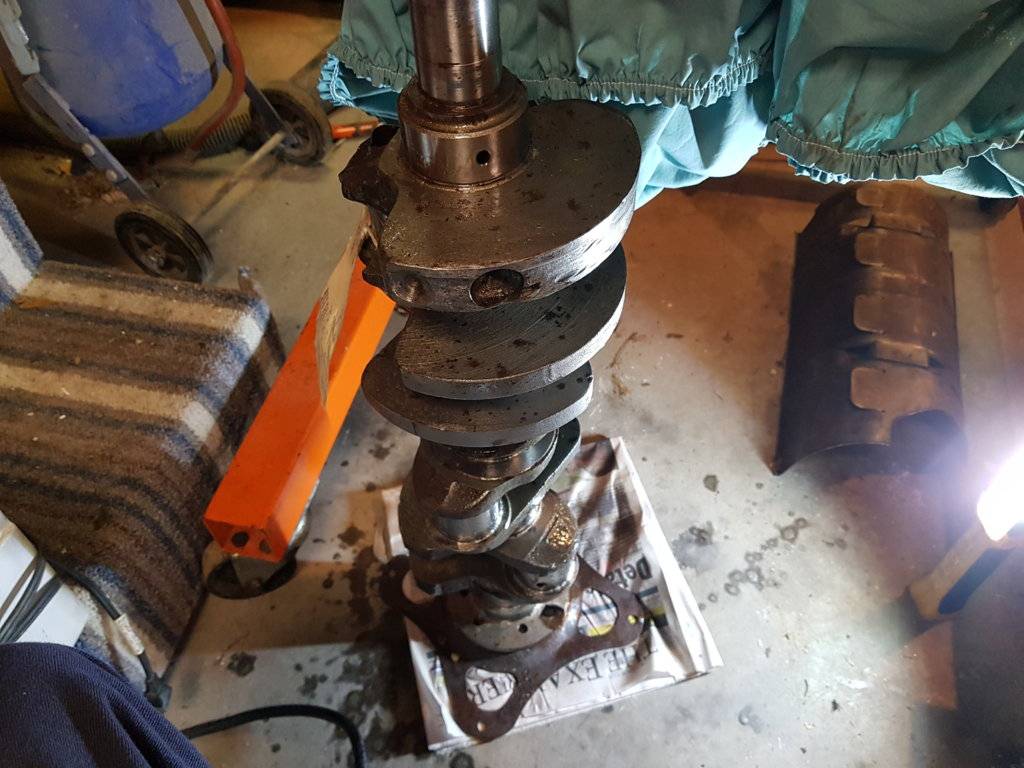
Ok so double checked and 5 main reads 2.480" same as others. This is how I have the crank stored and how it was when I measured the journals. Not the best position to measure in i know but it gives me an indication at least.
Thanks again for "proofreading" for me. Lol
Not necessary and can be off if you don't have properly calibrated equipment or of you are a bit off on setting the measuring equipment.

BTW #2 main is .005" different from the other 4. Typo?

20171127_202221.jpg
 
It's not likely to have happened but maybe someone got distracted and did not finish that last journal....I read on one site yesterday about a crappy running Pontiac and upon disassembly, the crank was found to have one rod journal ground off of proper index by 12 degrees! How the heck did that get out of the foundry in the first place, and then past QC at the machining stage? LOL
 
Well I'm hoping my measuring is off. I cleaned the hell outta the bottom end and plastigaged 1-5 mains. Coffee filters worked great. Took a lot of cleaning to get the filters clean.
Here' what I got.
#1 .038"
#2 .051"
#3 .051"
#4 .038"
#5 .038"
Installed dry. Original bolts (best I can tell). Didn't install windage tray which only affects #2 &4 anyway.
Hand snugged all caps starting at #3 main and working outwards alternating end to end. 25 to start, then 60 then ending at 85.
Both the bearing half and the main journals themselves are fairly consistent BUT way off. Obviously I'm going to redo/recheck. Any ideas? Some pics.
Oh bearings are Ertel. 5M540P-020

20171203_164950.jpg


20171203_194001.jpg
 
DOH!! Im a dumbass. Thanks to YouTube, I was watching "how to" videos and they mentioned to check the "ruler units" with the plastigauge as one side is mm and the other ide is inches. Dumb me checked using the wrong side....EVERY TIME LOL. So converted the clearances all range from 0.001496"- 0.002007874" All within spec. Got the adrenaline running lol.
Bottle brushed all oil gallery holes in both the block and the crank.
I'll drop the crank in for good this week hopefully and get the end play measured.
Cheers!

20171203_154103.jpg


20171203_144333.jpg


20171203_150510.jpg


20171203_150519.jpg


20171203_150542.jpg


View attachment 1715117760

20171203_204556.jpg


20171203_211835.jpg


20171203_211741.jpg
 
Question.... I had machine shop install bushing for a 4spd in my 69 (long ways down the road). For now behind it will be a 904. Can I leave pilot bushing installed with an auto behind it?
Thanks in advance!
 
So a little progress. Rear main seal(National #5414) is in after a few questions/concerns that were answered in a separate thread here on fabo (thank you!)
Crank installed, Lord what a bear taking it in and out. I remember carrying 2 -3 cases of beer at a time as a youngster.
Mains torqued to 85 lb/ft in 3 steps.
Started at #5 then 4/2/1. Cap#3 I left finger tight so I could get #3 bearing centred.
Pried crank fwd and torqued #3 down.
Crankshaft end lay was .006" I checked it a few times.
Next is checking rod journal clearance.
Question in the last pic I have gently/loosely laid a con rod and connected to crank.
Is it ok to check rod bearing clearance with plastigauge this way? Or should rod be in the bore?
Thanks all.

20171206_150934.jpg


20171206_151217.jpg


20171206_182046.jpg


20171206_182054.jpg


20171206_182236.jpg


20171206_183317.jpg


20171206_213050.jpg


20171206_213217.jpg


20171206_213635.jpg
 
A little more done tonight. After I had drilled small end of connecting rod for oil holes last week, I had to deburr the bushing. I used a piece of rubber fuel line and 1000 grit sand paper. Used same pin for test fit on all 8 rods. Better to mess up 1 vs all 8. All but one fit good. Just the slightest amount of wiggle on one of them. I'll have to check if there is a spec for that. Just enough wiggle to feel it.
Crank to rod journal clearances still need to be checked.
Thanks all.

20171207_230535.jpg


20171208_004216.jpg
 
When you plastigage those rod bearings, make sure you put the plastigage near the center of the bearing shells, not near the parting line. Maybe rotate the block to the side so that the rod is hanging down somewhere close to vertical?

Your mm versus inches on the mains made me chuckle...
 
So I checked rod clearance with a bore gauge. Not sure how accurately I did it. Bearings were installed in rod, clamped in vice between wood blocks and torqued to 45 lb/ft.
Rod bearing clearances ranges from 0.0005" to 0.0024" I may have to juggle/move bearing 1/2's around to get them somewhat equal. I numbered the gauges and rods to keep track.
I will plastigage them as a double check. Factory service manual specs are .0005 to 0.002 with absolute max of 0.003. I'm within spec but like I said would like to double check. Have to see how I can get them gauges. Yes I'll try to get it 90* away from bearing parting line.
Lol yeah the mm-inch...wth?? And I did that on everyone (with pics too lol)
Thanks again. As always appreciate the input.
When you plastigage those rod bearings, make sure you put the plastigage near the center of the bearing shells, not near the parting line. Maybe rotate the block to the side so that the rod is hanging down somewhere close to vertical?

Your mm versus inches on the mains made me chuckle...

20171208_163858.jpg
 
Last edited:
Not much shop time this weekend but off till Friday so hope to get out there before then. Had a fambly get together today so spent yesterday baking (Lori laid up from surgery) and at function today. Here is my 95 year old Gramma with my 2 week old granddaughter Aubrielle(grammas great great granddaughter)
Got home and ran to shop as tomorrow is gonna be a bitter ***** with -17 predicted and minimal heat in shop lol.
Mic'd all rod journals in 3 different spots and then again 90* apart. So essentially 6 times each or of rod journals. Much easier and more accurate then the previous way I did it with the crank standing on end.
All journals measured at 2.1040".
So very happy to see that. With those #'s though compared to numbers i have from rod bearings (measured with bore gaug and verniers) there is some excessive clearances. I will chalk that up to my limited use and skill of bore gauges. Way easier to use outside mic.
Plastigage this week.
Here' the "goldengirls"
Thanks all

View attachment 1715119749

IMG_0372.jpg
 
Last edited:
Yes on the ease of measurement for your tools. I use the telescope gauges mainly just on piston bores; I am good to maybe .0005" accuracy there. Since I don't do actual boring or piston fitting, I let the shops do that accurately with their better tools, and just do wear and QC checks. Occasionally I'll use them on other odd things. They are just too hard to use and get accurate results on the bearings. Plastigage....

And be aware that calipers have limits on accuracy too. You are now working in the range of accuracy where micrometers are really what are needed. (I measure my bore gauge settings with micrometers only.)

5 generations together is pretty rare!
 
When I measured the id of rod bearings, I did it with bore gauge then measured gauge with verniers. Then I rechecked that measurement with using only the verniers on the id. I averaged those 2 measurements to get clearances.
I have used the bore gauges before, but it's use wasn't as crucial as it is now and very limited. I can see how the accuracy is difficult to achieve.
Plastigage is next and the final check for rod clearances.
Everything is at same temp in the shop(cold lol), I wonder if it will affect my measurements?
Me my grandson Knox and Knox's new toy cousin. He absolutely loves her. Lol
Thanks again!

IMG_5120.JPG
 
Thanks for the kind words Larry. Seeing the grandbabies grow up and interact with each other is truly a blessing.
Winter could be worse....we could live in Buffalo lol
Nice looking pictures of your family Steve. Its's even Cold down here today. Had to use the Heat in my truck.lol...
 
Everything is at same temp in the shop(cold lol), I wonder if it will affect my measurements?
Well it all ought to shrink approximately the same in the rods and crank and block.... so relative measurements ought to not change much. It will throw off calipers and micrometers though, so absolute measurements will indeed change. Just haul it all into the living room LOL
 
I was thinking clearances would be same. Maybe I'll put it all under the Christmas tree to warm up?
Well it all ought to shrink approximately the same in the rods and crank and block.... so relative measurements ought to not change much. It will throw off calipers and micrometers though, so absolute measurements will indeed change. Just haul it all into the living room LOL
 
LOL... I still have pictures in the living room of my mobile home when I was a young gearhead.... engine parts all over the place... BUT they were clean engine parts LOL
 
-
Back
Top