1972 Daddy Daughter Duster

-

Divenut

Well-Known Member
Joined
Sep 22, 2011
Messages
3,519
Reaction score
1,782
Location
Naperville Illinois
Hey Folks,

I screwed up the pics on our original build thread we started back in 2011 (Funny thing about moving & renaming Photobucket pics...Doh!:banghead::violent1:) . And my kids will have none of that on "their" build thread. Apparently Dad isn't very social media savvy. Sooooo we're starting fresh with a condensed version.


Day 1 Oct 1, 2011
"Hi Everyone,

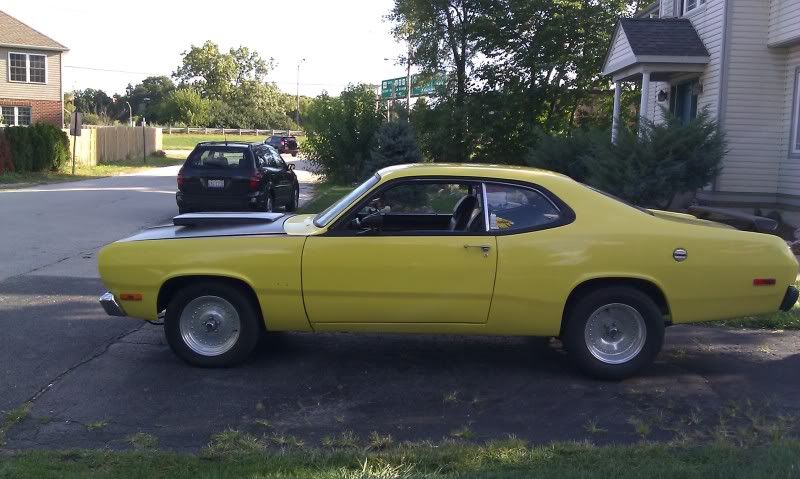
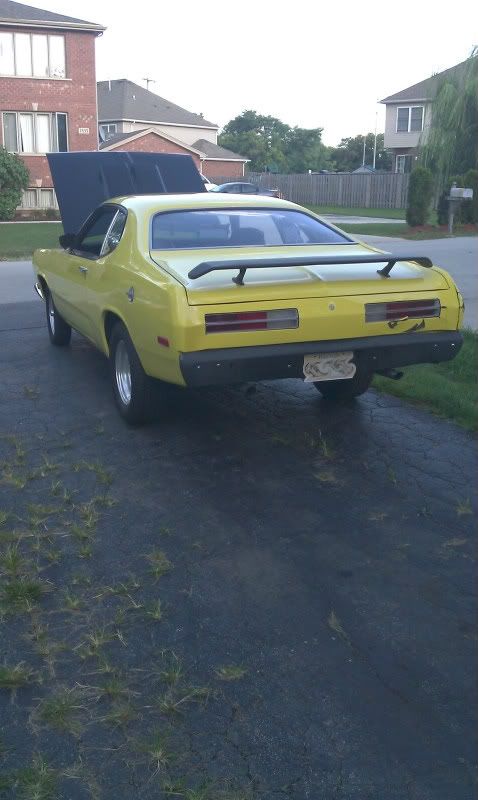
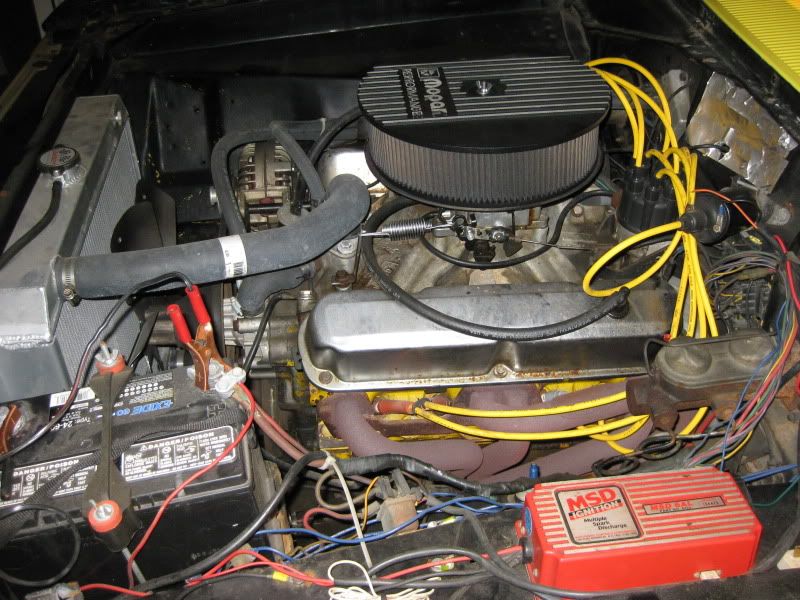
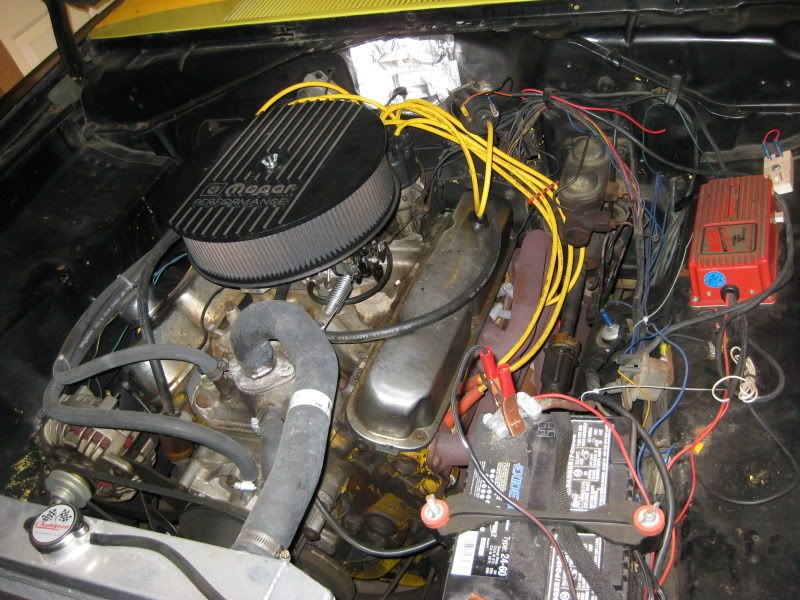
Thought I'd officially start my build thread. As some of you may know, I purchased my 72 Duster last week as a project for my daughter's and I to play with. Our plans are to put together a capable strip car that will also hit local cruises, shows etc. She has a 340, appears to have been cammed at some point but have no clue as to the specs, reverse manual valvebody 727, what appears to be a 3200-3400ish stall, Torker intake (May ditch it depending on it's street manners). Hooker headers, MSD 6AL, Champion Radiator etc.

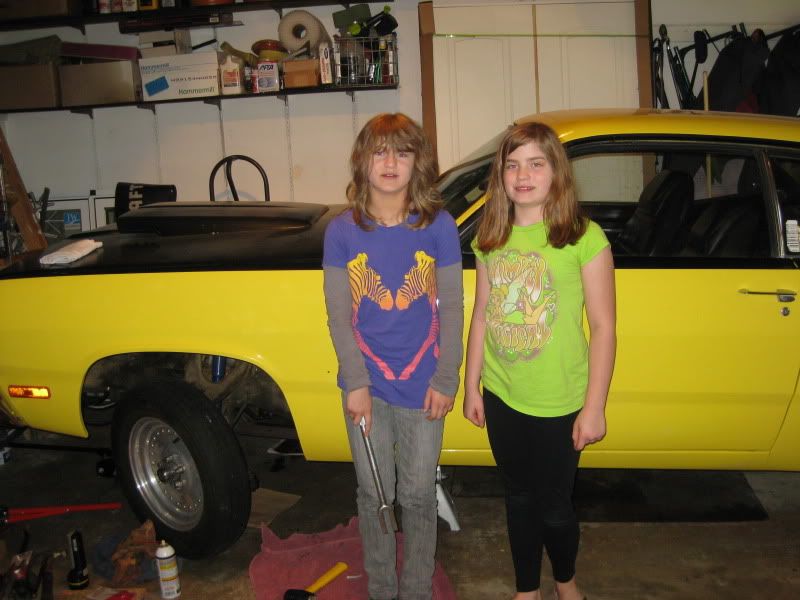
The girls and I love this car and are really excited about the project. We'll post updates as they are available.


Thanks in advance for all of you assistance. "

1st pics taken at the sellers place August 2011


Day we took her home (Skeleton on rear view mirror was my daughter's 1st mod.)


Oct 20, 2011

Hi Folks,

Well, been busy on the Duster. Got the shifter sorted out, installed front seatbelts, checked/tightened everything underneath and sorted out more of the wiring issues. Also, accumulating the stuff needed to get her street legal again, (thanks to FABO members, I am finding just about everything.)

Took her on her for a few test drives around town, and other than a boat load of play in the steering wheel, I could not be happier (my kids LOVED the power, sounds and looks/thumbs up we got). Suspension/Front end seems OK, so gonna look at possible adjustments to steering box.

Nov 5, 2011

Finally got my directionals working! It was a pain tracing all the hacked up wires back to their respective places. Turns out the PO cut out the flasher, so I had to cut another flasher & plug assembly from a spare wiring harness I picked up and am back in business. Also got the crazy amount of play in manual steering worked out. Replaced the gear oil and made a few adjustments. She goes where she's pointed now.

Next task is pulling out the bird nest of wires the PO has all over the engine bay and re-wire it correctly. I think the MSD6LA is wired incorrectly...battery has been draining on me. I just love trouble shooting wiring/electrical issue.
 
December 2011

Header Bolt Removal

--------------------------------------------------------------------------------

Well after 2 weeks of penetrating oil, breaker bars and torching I finally got the last header bolt loosened up. The old Hooker "Competition" design only allowed a straight shot (socket with extension) on 4 of the 12 bolts. The remaining 7 required the use of a variety of boxend combo wrenches with breaker bar persuasion. As is often the case, the first 11 came loose without problems after soaking in penetrating oil for a few days. But that last one, the driver's side rear really sucked.

This one
IMG_4269.jpg


Success
IMG_4542.jpg

Got the old worn out steering box out as well!
IMG_4537.jpg
 
Last edited:
March 18, 2012

Been awhile since I updated my thread so here it is. Nothing real photoworthy but prgess none the less.

1. Got the wiper system installed and working. Had to source every nut and bolt. But FABO members came through in a big way and provided much of the parts I needed linkage, pivot arms, motor. Found bushing, gaskets etc on line. Also, the write-up I found via seaches here at FABO were a huge help. A BIG Thank You!! to those that assisted me.

2. Souced everything I need to replace my shot steering gearbox and will post up pics as I start pulling stuff off. While I am at it, gonna replace my oil pan (dented/pin leak) and hit my headers with POR-15 exhaust manifold paint.

3. Pulled out my gauge cluster (Thanks again to those of you that replied to my request for info with helpful tips.) haven't tracked down the cause of my dash light problem, but will keep digging.

4. Continued my project of traces wires to their source and cleaning them up.

Again, not much, but my every bit helps.

Pat

(THESE WERE SOME GOOD DAYS :D Looking at these old pics brings back great memories....weird seeing my kids growing up as the build progresses.)


April 1, 2012

Just posting a quick update. Finally found the correct Speedo cable..woo hoo! Began pulling stuff off to get to my steering gear box. Gonna dig into the headers this week so I can get to the bolts on the gear box. In preparation, we pulled the steering linkage last weekend. Got the car up on stands front & back, and removed the steering coupler last night. Got a coupler rebuild kit and fresh gearbox ready to go. Need to order some tie rod end duster covers and ARP header bolts. Picked up a new oil pan and FelPro gasket set to replace my damaged pan since I figured might as well do it while everything's apart. Here's a few pictures of my helper cleaning and painting some parts. She insists that we make anything we remove/replace look better than when we pulled it off the car...Guess I can't argue with that logic.


May 5, 2012

The old, leaking oil pan. Gonna replace it with a stock 340 pan for a bit more ground clearance. Need to clean/scrape layers of crud of the block, frame, suspension etc, before bolting the new stuff back on. She's coming along!!!

Pat


June 2012

Well, finally ready to start putting the Duster back together!

I took a little time to degrease and add some color to the engine. Also knocked years of crude off the Frame, K-Frame and under side (probably lighten the car up by 5-6 lbs LOL!). Cleaned up the intake as best I could w/o pulling in. The valve covers are too far gone to clean up, so will pull, smooth out and paint them.

Gonna clean up the hoses and get the wires routed/loomed cleanly next.

Will wash down/touch up the rest of the engine bay as soon as I can pull her out of the garage

This morning I pulled the oil pump and test fit the shorter pick up tube and oil pan. Gonna start putting stuff back together next week.

If all goes well, my next update will include video of the car making a little ruckus

A few pics:

Before
IMG_4072.jpg


IMG_4073.jpg


After (May 2015)

20150711_122914_zpse7hdmipg.jpg


20150711_123604_zpskbeucibw.jpg
 
Sept 12, 2012

Just updating my thread. My daughters and I made some great progress since my last update.

- Swapped out the oil pick-up tube and installed the new oil pan.
- Rebuilt the steering coupler and installed the new steering gearbox.
- Replaced the crispy, frayed and overall crappy starter cable harness with a new Mopar piece.
- Installed the headers.
- Cleaned up some of the wiring and removed wires that lead to nowhere...a lot of them!
- Soldered and shrink tubed all the connections that had been spliced with wire nuts (ya I know crazy right? Guessing the PO was not a big electrical guy lol.)
- Fixed the gas gauge
- Resinstalled the leaking 90 filter plate with a new gasket set.
- Replaced a leaking Bypass Hose.
- Mounted the coil that the PO had dangling in the engine bay.

Here's the car at our first Mopar show! That maiden voyage felt damn good!


We already have a pile of new parts to install. Next things we attack are:

- Install the new tie-rods
- Pull seats, carpeting etc.
- Install rear seat belts (Car did not have them when we bought it!) Got an after market Jeep Wrangler rear seat belt replacement set.
- Treat floor & ceiling w/POR15


Will be ordering new carpeting, sound deadener etc shortly.

Looks like I will not be getting bored anytime soon.
 
August 31, 2013

Been awhile since the kids & I updated this thread. So, here we go. New Tie Rod Ends, Install Blaster2 Coil, Got lighting to Gauges & Tach, Installed Tach Adapter for 6AL, Installed missing Fresh Air Vent Door, Install Visors, Sourced all Emblems for Body & Scoop, cleaned up more wiring, fixed missing mounting stud for hood scoop.

Next up:

Sub-Frame Connectors - Picked up the rectangular tubing (Scored two pieces 3"x1.5" 11ga for $30 )

POR-15 & Paint interior

Sound deadener

New Carpet

New Seatbelts Front & Rear

Pull valve cover, strip and paint.

Install Speedo Gear


Here's a few recent pics for a couple shows.

Rolling onto main street for "Corvette Night" cruise night....


Cruise night in Plainfield


Mopower Madness 2013


July 12, 2015

Hey Folks,

Been awhile since we updated this thread. Things got put on hold for a year or so due to some health issues with my Father. But the girls and I have been busy on the project since about May. Since our last update we've:

Replaced Timing Chain & Gears
Water Pump
Hoses
Belt
Elect Fuel Pump
Gaskets
Cleaned up the motor (Girl's picked the colors and I think they did just fine!)
Gutted the interior to repair/weld some cracks in the floor
as well as other misc things.

Now we're ready to POR15 and paint the floor and ceiling, fab and weld in 3"x1.5" subframe connectors (One of my girls is turning out to be a decent little welder!), add sound deadener and the new carpet.

One step at a time!

Be well all


My daughter removing the seat mounting hardware and interior trim pieces (Starts High School in the fall. We're did the time go? #-o )


July 2015

Think that carpet was ready to be replaced? LOL


How bout that old timing chain?

[ame=http://i46.photobucket.com/albums/f105/emandm/1972%20Duster/MVI_0375_zps0cb7cec9.mp4]
th_MVI_0375_zps0cb7cec9.mp4
[/ame]
 
OK That's it for the old posts. The girls and I (mostly them) will update their build thread religiously moving forward. We're taking Pappa (my dad) fishing this weekend so the Duster will have to wait, but next up will be pics of the floor repairs followed by the subframe connector fab and install. You gotta see my daughter in her welding gear :D good stuff! Though seeing them progress from little kids to young ladies in 4 short years is making me feel kinda old...

Take care all,

Pat and Kids
 
Awesome that your daughters caught the Mopar bug and are actually jumping in to help while they are learning!
 
I think that the photos that show a guy's kids growing up as a project progresses are priceless.
 
This is a real hoot. Getting young people and girls at that interested!!!
 
Nice my daughter looks to be a bit younger (11.5yo) than yours. We still have to run into each other, I'm at about rt 59 & N Aurora rd. Maybe at the downers grove show Friday the 24th it's mopar day.
 
Very cool to see them involved, you must be very proud and the car is looking great :glasses7:
 
Nice my daughter looks to be a bit younger (11.5yo) than yours. We still have to run into each other, I'm at about rt 59 & N Aurora rd. Maybe at the downers grove show Friday the 24th it's mopar day.

My girls are 14 now. Yes, Definitely gotta catch up with each other one of these days. We try to hit Barconis Pizza on Wed nights, Cozzi Corner on Tuesday nights in addition to Downers. Were at 75th & Washington. Can't make the 24th due to family commitment (didn't realize it was mopar night!). And gonna be a few weekends before we get the interior done. But we'll pm you when we hit the cruise nights again. Heck, we're so close we don't need a cruise night to get together can always meet just to hang out.

Tske care,
Pat
 
No problem, once my daughter is old enough I'll be getting one for her. She just turned 1 on the 16th so we got what like 2-3 years wait? Lol!
 
No problem, once my daughter is old enough I'll be getting one for her. She just turned 1 on the 16th so we got what like 2-3 years wait? Lol!

Lol. I like the way you think! Your little angel will be old enough before you know man.

Take Care,
Pat
 
-
Back
Top