The Great Pumpkin - '71 Duster

-

rmchrgr

Skate And Destroy
Joined
Apr 15, 2008
Messages
3,962
Reaction score
1,111
Location
Stamford, CT
I bought my '71 Duster in the spring of 2012. I sold a few cars and parts to have enough funds to get it. I wanted a rust-free car and this was one is. When I started looking, I thought I wanted a good starting point for a project that I would build myself but ended up buying a good running car. It was a good choice. The previous owner said the car went a best of 11.97 but was normally a 12.0-12.1 car. That was good enough for me since that was my intended performance goal.

I bought the car from someone on here. I noticed it when it was first put up for sale but didn't think it was for me at the time. I kept re reading it though and the more I looked at the ad, the more I started to realize it was exactly what I had been looking for. The cars I had sold prior to buying this one were impulse buys ('65 Valiant, '71 Dart) that I regretted. I'd buy them, start messing with them, lose interest and sell at a loss. My wife thought I was crazy (what else is new) and was very wary (what else is new) when I told her I was looking at another one. Really though, I wanted a Duster and not a Dart or Valiant. Took me a while to figure that out. I even bought and sold a '70 Duster in between that I didn't do anything with. The only things I did with that one were pulling it in to the garage and out when I sold it. Finally though I was in the right place at the right time and fortunate enough to be able to buy it. I pulled the trigger and did the deal.

Its mostly built the way I would have done it myself - W2 340 with a solid cam, 750 DP, Victor W2 intake, TTi 1 7/8 headers which runs on a mix of pump 93 and Cam 2 100 unleaded when I can get it. Drivetrain consists of a low gear, forward pattern 904 with a B&M Pro Ratchet and 4.30 gears. Chassis is your basic street/strip setup - skinny front wheels and 275 drag radials on the back, offset shackles, S/S springs, frame connectors, battery in the trunk, CE shocks. The car still retained the OE drum brakes all around. Manual steering.

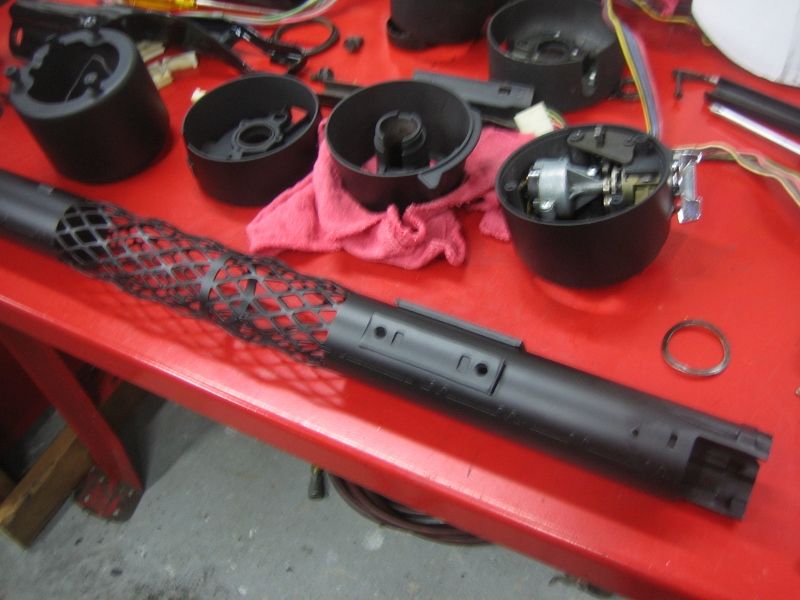
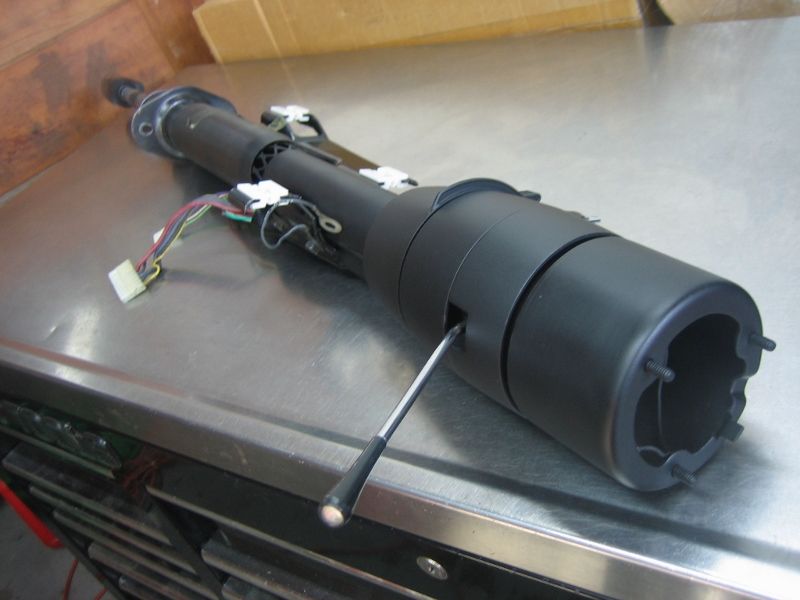
Interior is original but in very nice condition. Black vinyl bench with low end trim. AM radio, heater but no A/C. All the glass is good, door panels are good, trim is a little worn but not trashed. The column still had the column shift parts on it and the basic steering wheel. The carpet was passable but had a hole in it. Cheapo Auto Gauge gauges and tach. Pretty sure it was built in the early 90s and stayed that way.

I drove it for most of last year up until about December. It was really fun to drive on the street. I took it out for many blasts down a back road near my house and it feels really quick. I've never had a car that shifts at 7K - its hard to describe what that feels like if you don't know but the first time I did it, I knew I was home. Took it to a few cruise ins and didn't get a lot of attention. Its kind of a sleeper I think even though it has Centerline Auto Drags and drag radials. My 2nd kid was born last May so I was a little busy and never got to take it down the track.

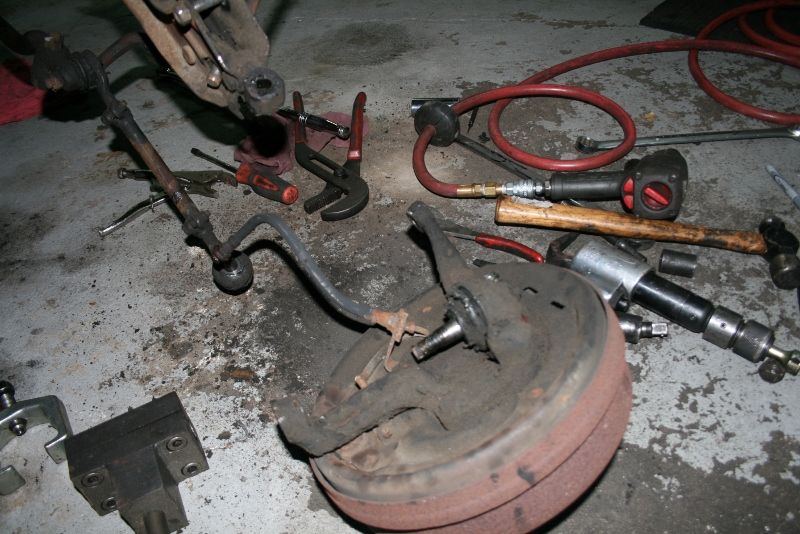
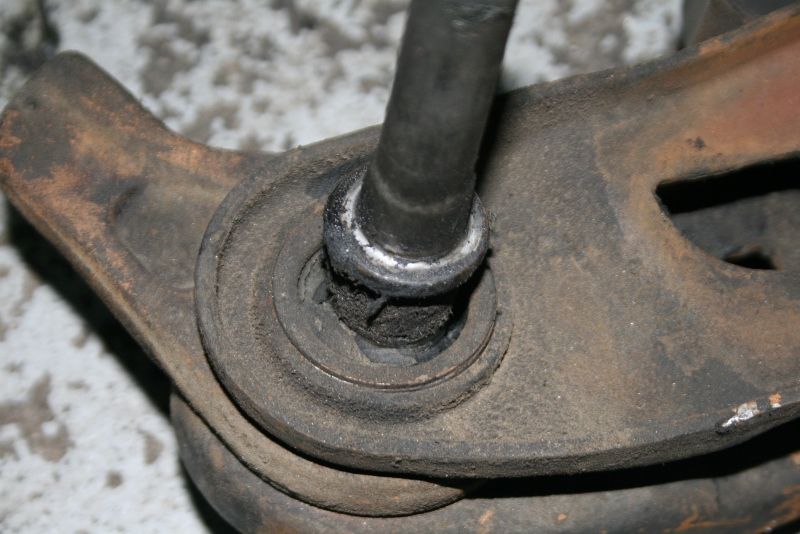
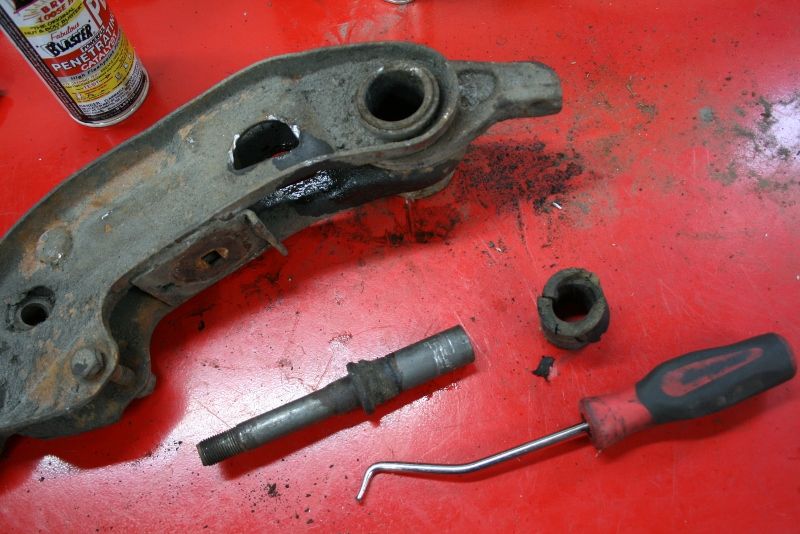
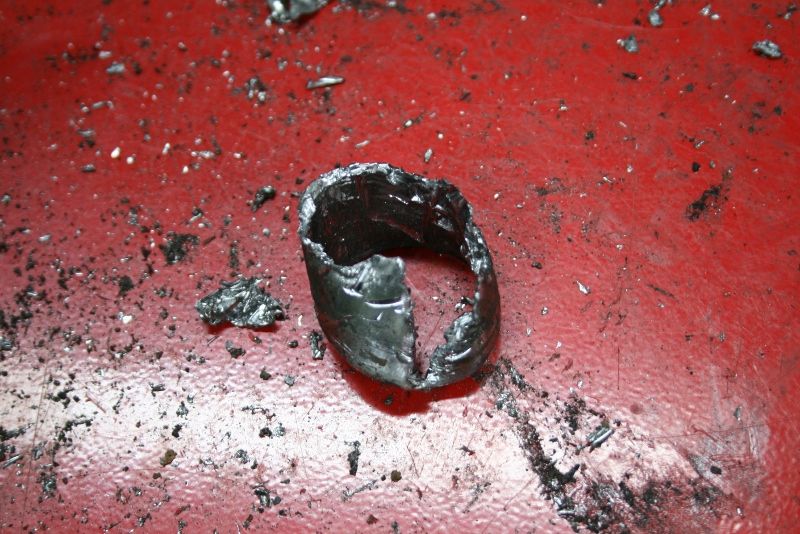
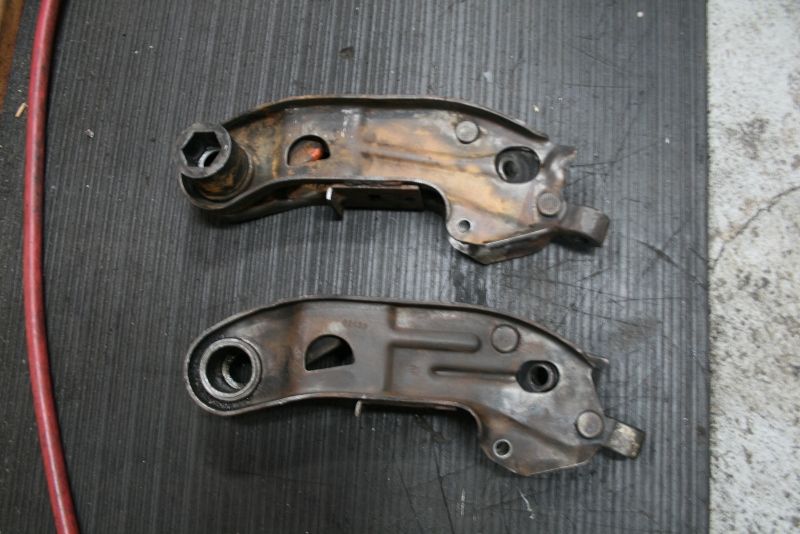
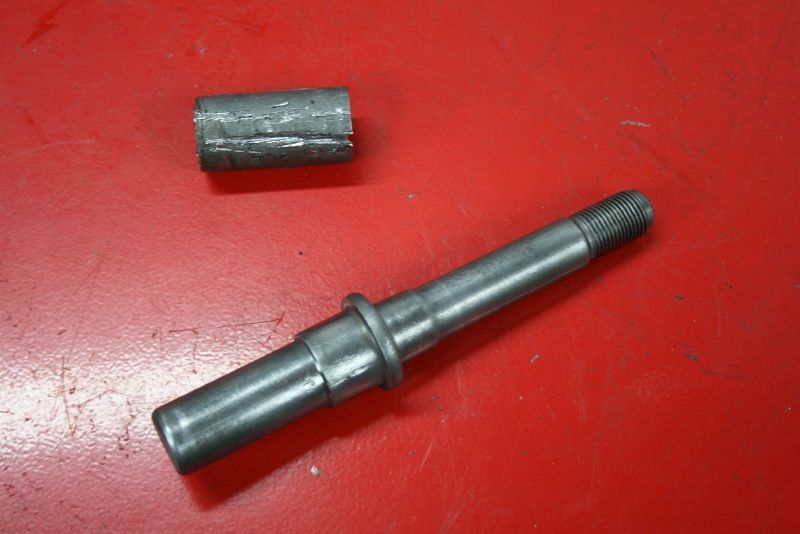
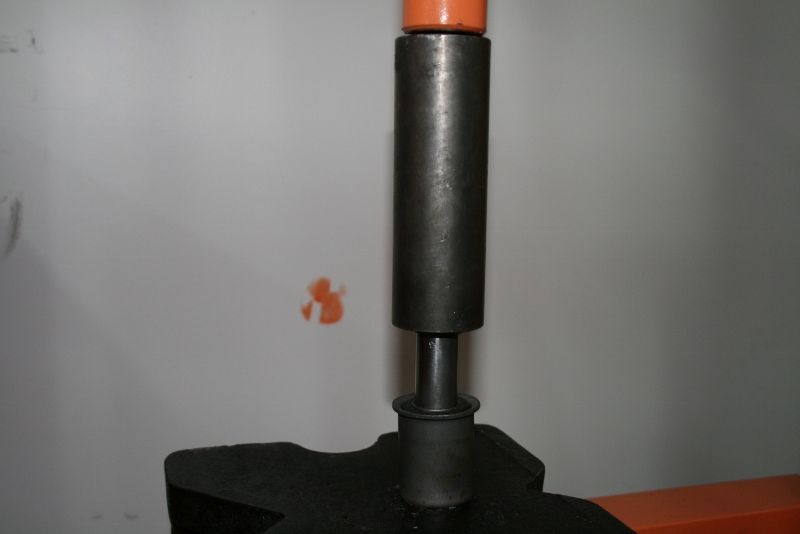
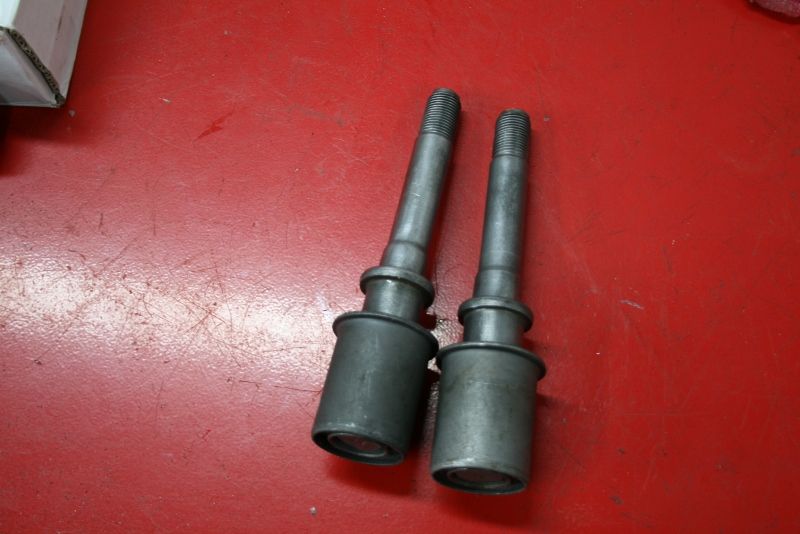
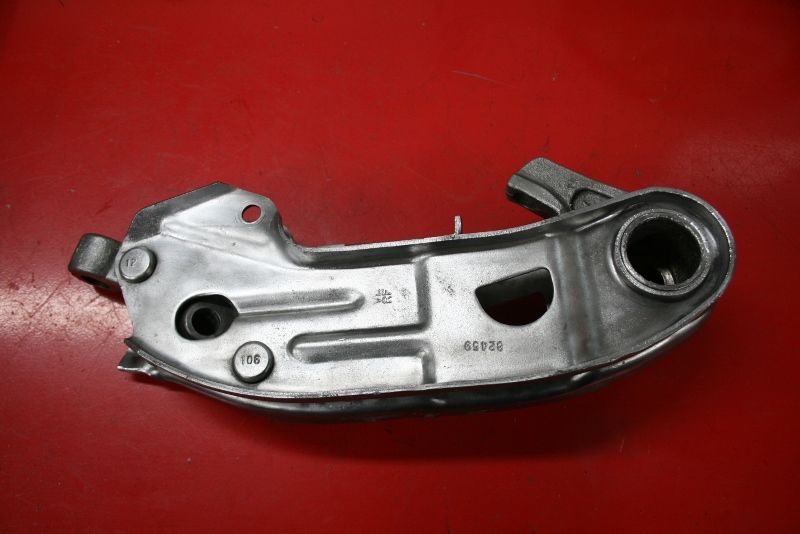
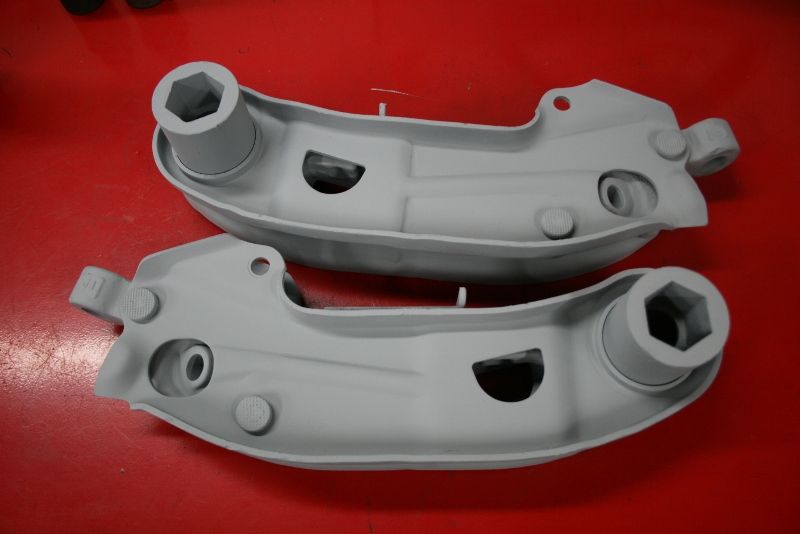
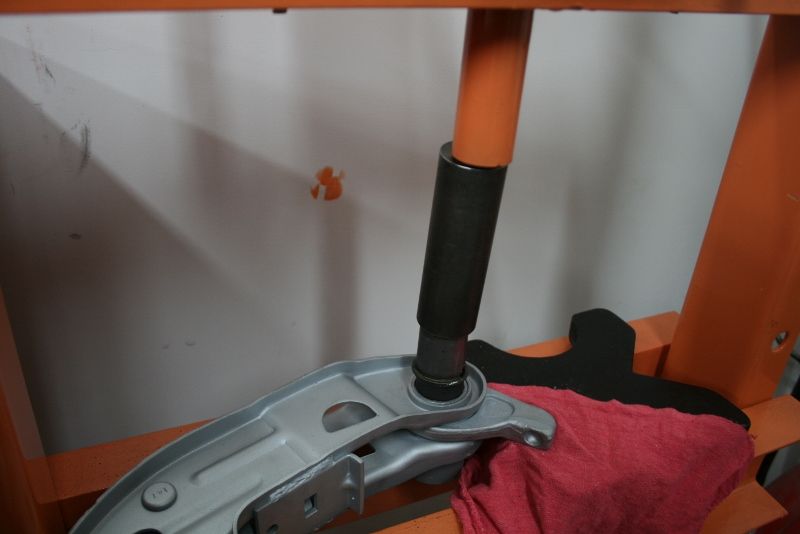
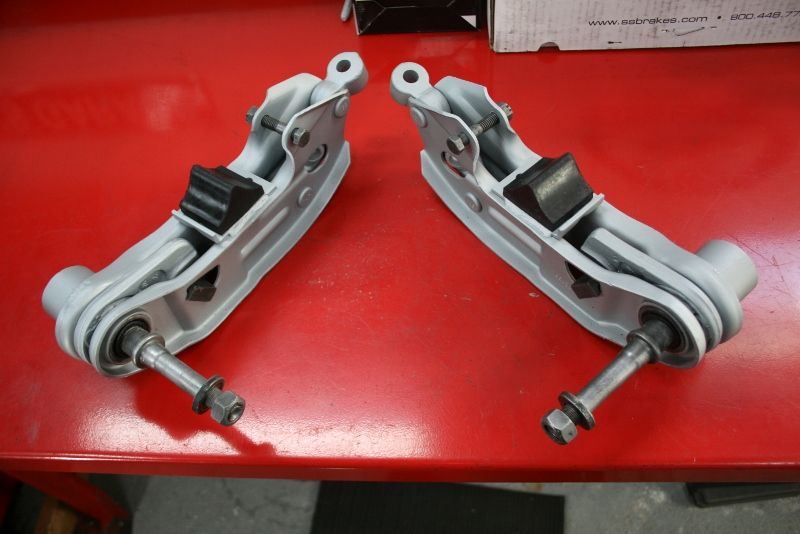
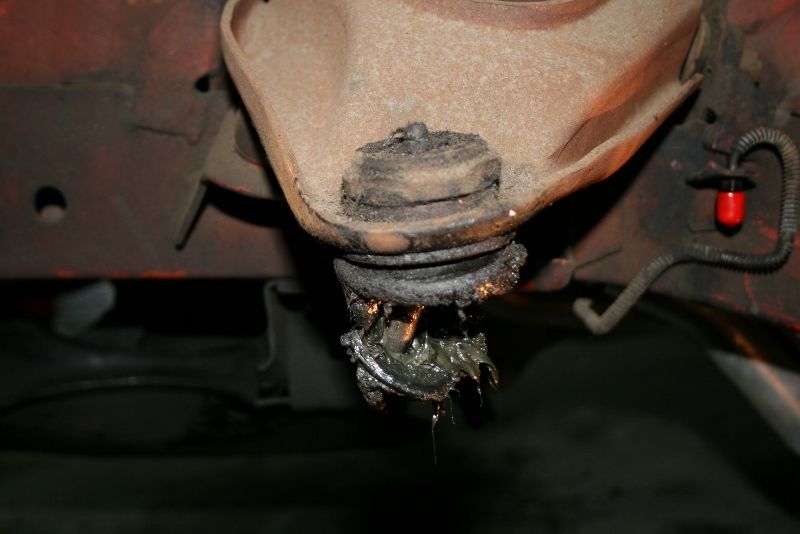
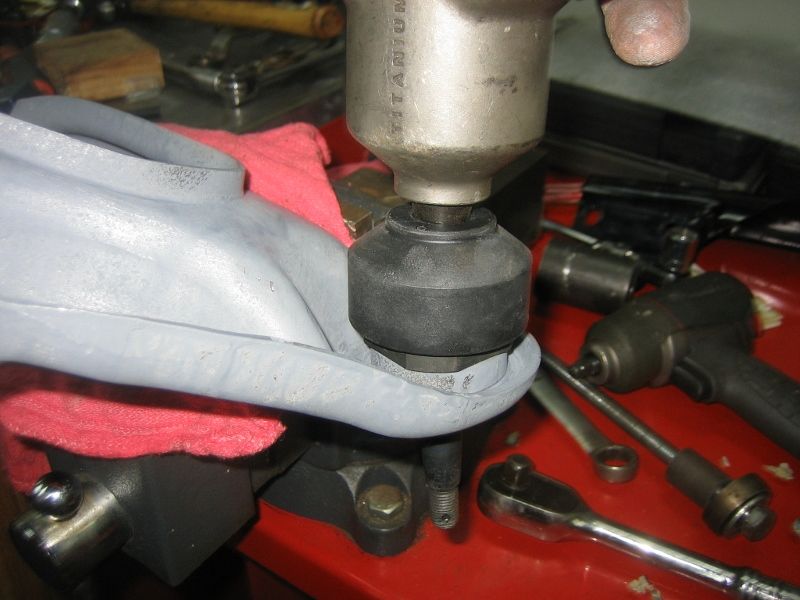
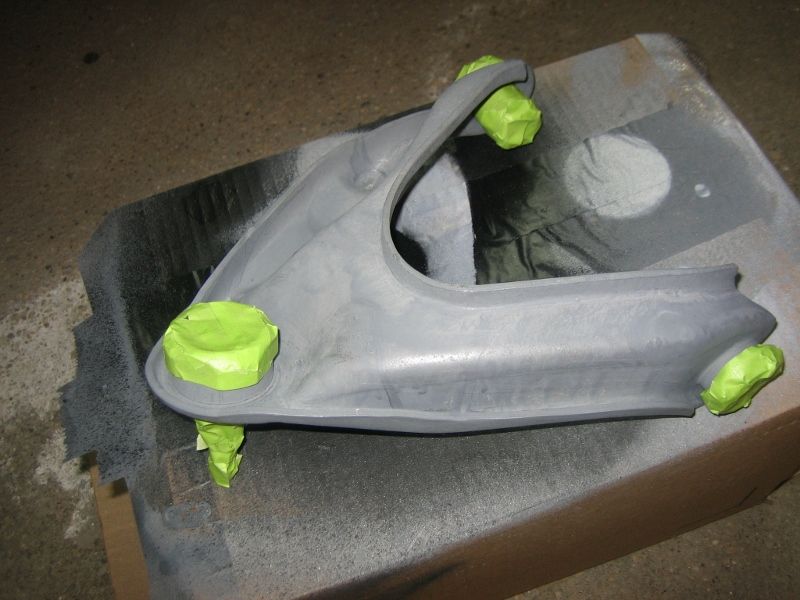
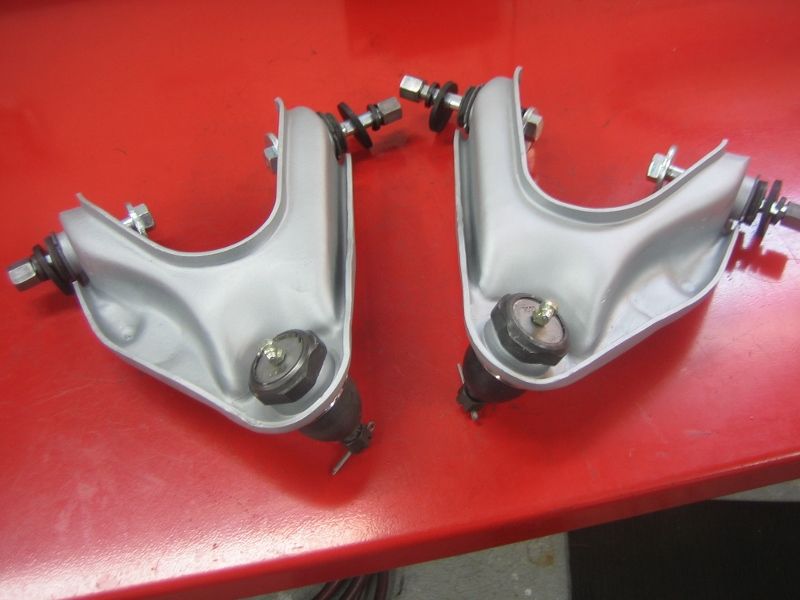
The more I drove it, the more I began to realize that there was a lot of stuff that was worn out. The front end was shot and almost every bushing was disintegrated. The drum brakes were shot. The fuel system was working but was not installed very cleanly and the fuel pressure was high. The 4.30 gears were a little too much. And on and on.

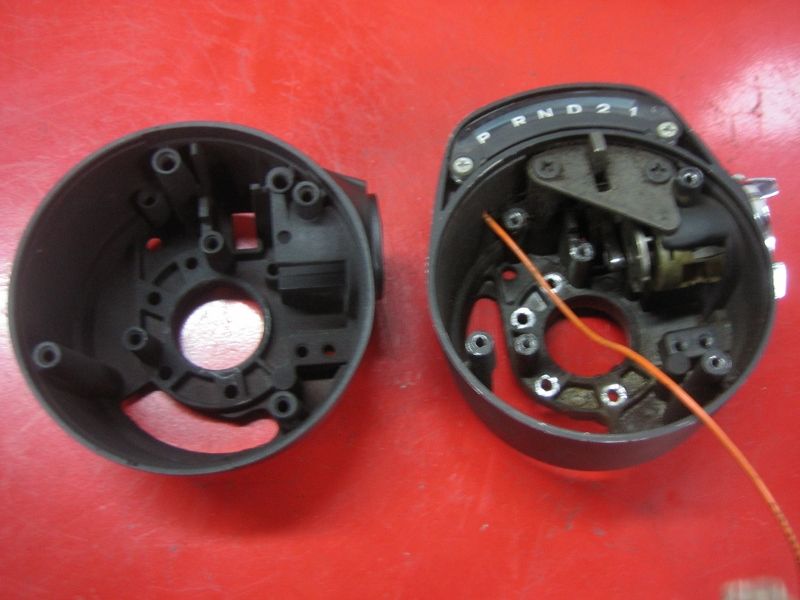
Besides those things, I've had an ongoing vision for whatever cars I've had over the years - stripped down, light and simple. No extra gee gaws, creature comforts or flashy stuff. Made to go but not ratty or gutted and somewhat 'factory correct'. So that means the accessories got the ax - radio, heater stuff, bench seat etc. I managed to find all the correct delete plates and parts to cover up the vacant spots - heater, radio, blower motor. I even found two (yes, two) super-rare driver's side heater delete fresh air vent boxes. No fiberglass body parts. Got rid of the heavy steel bumper brackets in front and replaced those with a very light set of aluminum ones I got from a Moparts member.

So basically what I'm saying here is that I got a good car which I'm trying to put my own stamp on. So far, I've changed a lot of stuff but stopped short of completely disassembling the car. It doesn't really need any body work so all the upgrades are mechanical and/or performance related.

I've been involved in the hobby for a while but not at the level I'm at now. Being a Chrysler dealer tech for several years has given me the skills and the confidence to tackle most of the older car stuff with ease. I have basically all the tools and equipment I need at home. As a side note, my shop has also come together which is something I never had before I bought my house in 2009. No more working in the street in Brooklyn, NY or at my dads house an hour away.

At this point, the car has been down since January. I had hoped to finished with this stuff but due to some unforseen circumstances, I have not had as much time to work on it as I would have liked. The hope though is to be driving it again before the end of the summer. I managed to re-do the fuel system and get it running again before I took it apart but I will try to include some of that here as well.

So on to the pics. I'll try to break it down into sections and update stuff as it gets completed. Thanks for looking.

Here's how it looked when I first got it.
attachment.php?attachmentid=311124&stc=1&d=1332382522.jpg


attachment.php?attachmentid=311125&stc=1&d=1332382522.jpg


attachment.php?attachmentid=311126&stc=1&d=1332382522.jpg


attachment.php?attachmentid=311127&stc=1&d=1332382522.jpg


attachment.php?attachmentid=311128&stc=1&d=1332382522.jpg


attachment.php?attachmentid=311130&stc=1&d=1332382522.jpg


More to come! Thanks for looking.
 
I guess I'll start with the front end. From the looks of things at first dis-assembly, the OE parts were still in service. It certainly looked as if nothing had been touched since 1971. Again, just about every bushing was toast. The ball joints were flopping around like noodles. Everything was covered with old grease from torn boots.

Removing old parts.
1800x534_zps012ba8b5.jpg


Check out these pivot bushings - toast!
2800x534_zps4bd36529.jpg


Pivot out.
3800x534_zps20cf3f24.jpg


Starting on steel bushing sleeve.
4800x534_zps6051779f.jpg


Thing was in there good, ended up chiseling it out.
5800x534_zpsaddefa4f.jpg


Starting to get the gunk off.
6800x534_zps15c0d443.jpg


Cut inner bushing sleeve off pivot.
7800x534_zpsd8e8d3e8.jpg


Pressing pivot into new bushing. I used rubber.
8800x534_zps3edb3322.jpg


New pivot bushing ****.
9800x534_zpsfe1d70fa.jpg


Ever seen a brand new lower control arm?
10800x534_zps8d95e857.jpg


I decided to paint the arms. Here they are primered.
11800x534_zps2a23884f.jpg


Pressing pivot and bushings into arm. Yes, the press ram is crooked.
12800x534_zpsdf938d1d.jpg


Done.
13800x534_zpsb635a248.jpg


These are currently sitting on the shelf, just need to be installed. More to come.
 
Hard to believe the car was going as fast as it was with what these things looked like.

This is what i started with.
1800x534_zps19c99d68.jpg


Cleaned up the inner fender area.
2800x534_zpsef65c93a.jpg


De rusted with Evaporust and then wire wheeled.
3800x600_zps556ddfec.jpg


Installing new bushings.
4800x600_zpscdd4fce9.jpg


Installing new ball joint.
5800x600_zpsf72924ed.jpg


Taped off and primed. I used Eastwood tank tone and a coat of flat clear.
6800x600_zpsc9074233.jpg


Done, awaiting installation. New cam bolts too.
7800x600_zps4c4f0611.jpg


More to come.
 
One of the first things I started on was the steering column as it was also was in need of a rebuild. The coupler cover had come loose long ago. Though I didn't find out until I took it apart, the steering shaft was collapsed. (found a replacement on Ebay) The steering wheel was clocked to the right and the manual box was leaking badly. The column shift collars were still on. I also wanted to use my new Tuff wheel I bought a few years back. So out it came for a rebuild and floor shift conversion.

I've done a few columns now and its not that hard. Finding the correct paint to match the original satin is the hardest part. I tried SEM coatings at first but I couldn't get the sheen or texture right. I sanded it all off and ended up using Rustoleum satin black. It was almost a dead nuts match.

I didn't take pics when I took it apart but here are some of the reassembly.

Just a pic for reference to show the difference between the floor and column collars.
IMG_9553800x600_zps109ba391.jpg


Here are the parts laid out for the rebuild. I decided it was too shiny so it was sanded down and redone with different paint.
IMG_9556800x600_zps57415ffe.jpg


Here's the little wavy washer/bearing that goes under the key release collar. It sits in a slot at the top of the column jacket. Grease is your friend.
IMG_9557800x600_zps0822de0e.jpg


Key release collar with return spring.
IMG_9561800x600_zps2c91f48f.jpg


Shaft lock. More grease.
IMG_9562800x600_zps86efe0c4.jpg


Shaft with lock collar and roll pin installed.
IMG_9570800x600_zpsc879d87d.jpg


Bearing collar with bearing installed. Sometimes those insulators will tear during disassembly. This one started to rip a little but I managed to work it free without any further damage. Bearing was cleaned and re-greased.
IMG_9580800x600_zps9cbcaaea.jpg


Here's a pic of the snap ring that sits in a groove in the shaft. It keeps these parts in place.
IMG_9579800x600_zps71268b9e.jpg


Ignition switch, shaft lock mechanism and key tumbler.
IMG_9568800x600_zps0d140162.jpg


The lower bearing needed to be installed before the snap ring was in place. The bearing is secured with a set screw so I had to determine where it was going to sit before I put the shaft in place. It was a tight fit and needed some massaging with emery paper to slide up far enough. I was able to line it up with the hole at the bottom of the jacket to tighten the set screw. I slid it up the shaft far enough to sit behind the lower seal and retainer. You'd never know it was there unless I told you.
IMG_9572800x600_zpsa1725356.jpg


Column shift lower 'bearing' seal thing with retainer covers new insert bearing.
IMG_9586800x600_zps04118899.jpg


Steer and gear coupler seal.
IMG_9590800x600_zpscc5d1290.jpg


Bracket and wiring cover. Note new biscuits.
IMG_9598800x600_zps9dc0fbac.jpg


Finished product awaiting installation. Note Tuff wheel adapter. I need one of those key release decals to complete it. Note the difference in luster from the earlier pic.
IMG_9596800x600_zpsb1f09177.jpg


More to come.
 
Nice clean car. Sounded like lots of fun with the original setup. But I can see how it could get old. Those front inner fenders look fantastic. Great job of just using your head and cleaning them carefully.

Did someone take the sharktooth grille out of the car at one time. The front grille and badge look like a 1970 Duster.

Did that car originally have disks? Looks like a disk master cyl?
 
Where did you purchase the new biscuts, I am in need of a set.
 
The brakes on this car were a little scary. When I got it, they were real loose. I believe they had been backed off to reduce drag at the track and never got put back for the street. Even after tightening them up, they still needed to be pumped. Nothing was leaking but it was all worn out pretty bad. Again, it looked like this was all the OE stuff. If not, it hadn't been serviced in ages. A couple of the shoes were cracked and everything was generally crusty.

Before making a choice on what to do with the brakes, I did a lot of research on what was out there and there is in fact a lot to choose from. I had two complete disk set ups already on hand but I decided not to use either one and sold them off. My issue with them was that they were either the heavy factory parts and/or were based off of those, both of which put the wheels out farther than my original set up. Not what I was after!

I never knew that until recently. I really liked the look and stance of the car the way it was. I realized that I had the experience of tires rubbing on the front fenders with that setup on my old Dart but I never put two and two together. There are few choices out there to remedy this scenario. I could have gone with a Wilwood set up which uses 10" drum spindles and only moves the wheel out around .20" but I decided on the SSBC/aluminum Kelsey Hayes style 4 piston calipers instead. They're super light and appear to be well made. They are an 'upgrade' for the OE cast iron ones and only fit cars with that option. Whatever. I just liked 'em. I was able to get the rest of the parts to complete the job - spindles, hubs, rotors, new bearings and seals and hardware. Some of you guys might think it was an odd decision to stay with the small bolt pattern but I avoided the cost of new wheels and kept the look I liked. I even found some longer wheel studs for a little peace of mind from a source down in Australia. See thread about those here.

There was an older B+M line lock on the car but it never worked right. I was never sure if it was because the brakes were too loose or if it was just not working. I learned that it wasn't installed right. The solenoid needs to be installed after the distribution block. This old one was just spliced into the front brake lines out of the master. The brake light would come on and would hold for a second but it wouldn't hold the car if you let off the brake pedal. I got a Hurst roll control.

All the old lines came out too and I bent up new ones myself. There was a lot of trial and error and re-dos. Doing the front line that goes across the firewall was a real *****, as were the ones that go under the frame to the flex lines.

I ordered a braided front line kit from Mancini. I got new wheel cylinders for the rears as well as new drums, shoes and hardware. All the fittings are stainless so they don't rust ion place. I also had a new lightweight master cylinder and mounting bracket. I had most of this stuff for a while so it was good to finally put it to use.

I put a prop valve in the line to the rears that was mounted on top of the frame connector with a home made bracket. Worked out OK and is easy to reach.

Not many pics at the moment but here's some to start.

Here's the crusted, heavy drum brakes detached from the car for the first time in decades.
IMG_8935800x534_zps1b946ad5.jpg
IMG_8959800x534_zps96f1dcd5.jpg


Old drum brake master after draining old fluid. Those lines were on there good.


Ancient front lines soaked with penetrant.
IMG_8939800x534_zpscec6c246.jpg


Here's the OE distribution block, also soaking with penetrant.
IMG_9006800x534_zps42f3246b.jpg


'Restored' master cylinder pushrod. Soaked in Evaporust, wire wheeled and coasted with Rust Prevention Magic.
IMG_9007800x534_zpsc267e2c6.jpg


Here's a tool I made to straighten out bulk lines that come in coils. You uncoil it a little and stick it between the wheels while running it back and forth. Comes out straight as an arrow. makes life easier.
IMG_9623800x600_zps51434c60.jpg


That's all I have for now on the brakes. I'll update with more stuff when I get to it. More to come.
 
Nice clean car. Sounded like lots of fun with the original setup. But I can see how it could get old. Those front inner fenders look fantastic. Great job of just using your head and cleaning them carefully.

Did someone take the sharktooth grille out of the car at one time. The front grille and badge look like a 1970 Duster.

Did that car originally have disks? Looks like a disk master cyl?

Thanks for the compliments. I don't think this had a sharktooth grille but I'm not sure. It is a '71. Originally a 318 car, nothing special. It was from Anaheim.

Pretty sure the car was drum brake equipped, nothing else would indicate otherwise. Found the build sheet behind the glove box but I lost track of it. I'll have to look for it to confirm.
 
There was nothing really wrong with the rear end in and of itself and it actually worked fine. The only issue was a leaking pinion seal from the 489 case and it was starting to make a mess. Other than that, all was good.

I've had a set of Moser axles and an MP aluminum 4.10 geared diff. that I built several years ago sitting on a shelf that I've been wanting to put to use. I also got a complete Caltrac set up that I'm really stoked about, so out came the entire rear end.

Cleaning it up was not in my initial plans but I figured since I'm redoing all the brake lines and putting in a new suspension, it should probably come out. I removed all the old brake stuff, pulled the pumpkin out and pulled the axles out. The springs and 489 diff. were put on the shelf. The bare housing was sandblasted clean and painted.

Originally the car had the MP offset shackle kit. The front hangers need to be trimmed to allow full movement of the Calvert triangulated pivot. I started grinding on them and removed a lot of material which I was a little uneasy about. I did the left side first and did a trial fit with the mono springs which come with aluminum bushings. The front eye was binding and I needed to really pull the spring towards the center of the car to get it to line up with the shackle. I knew that couldn't be good but it went in.

I started on the right side but halfway through my first cut, I realized I had the hanger upside down and was cutting material off the wrong part. Doh! I abandoned that project and ordered a new offset shackle kit from Dr. Diff. They arrived really quickly and are WAY nicer and much lighter than the old MP ones. I ended up only having to cut a notch on the inside of the triangulated pivot to allow the full range of motion when the pivot swings forward. Calvert said it was OK to do as long as it was kept to a minimum. Seems like a good idea for someone to make these for this particular application so you're not grinding the nice shiny finish off your new Caltracs. Oh well.

The axles that were on the car were the OE small bolt pattern. The flange holes had been welded up and re drilled for the large bolt pattern. They had green bearings installed and were in good condition. The axle seals were fine. There are super long ARP 12 point screw in studs which I transferred to the Mosers. Nice!

I hit a small snag when doing the rear brakes. I thought I could re-use the backing plates that were on the car but I didn't realize there was a difference in 10" backing plates. Turns out there are specific plates for 1.75" shoes and 2.5" shoes - the pivot on top is a different height due to the mounting points of the shoes. I had all new 10 x 2.5" brake stuff on the shelf but it wouldn't go together with the small shoe backing plate. Live and learn. I found a set on here which were cleaned up and installed. Everything went together perfectly after that.

I still need to finish the install on the rear. I gotta trim the right side Caltrac pivot and then torque everything down. I also have to put in some new fluid but then it should be ready to go.

Here are some pics of the housing. I will post more pics when I get to it, especially of the Caltrac pivot.

Housing blasted clean, ready for paint.
IMG_9628800x600_zps13107949.jpg


Here's the old 489 case with the 4.30 gears. No more snubber with the Calvert stuff.
IMG_9630800x600_zpsa07a909d.jpg


Here is some of the hardware soaking in Evaporust. Rear hangers, parking brake levers etc. Don't laugh at my pink hospital bucket.
IMG_9631800x600_zps494c809b.jpg


Here's a pic of the Moser axles. Note the long studs on the one axle. They come with studs but you take those out and install your preferred ones. I had them install green bearings.
IMG_9632800x600_zps791082f7.jpg


Here's the housing after being primed. I installed an empty case when it was blasted to prevent media getting inside. I cleaned it thoroughly afterwards anyway.
IMG_9634800x600_zps0b087671.jpg


Painted. Just a semi gloss with a flat clear. Naturally it chipped when I put it back under the car but I can touch it up.
IMG_9636800x600_zps576f0607.jpg


Here is the cool guy aluminum diff. I think its one of the very first ones Mopar made. I bought it almost ten years ago at this point. The price on these has gone up several hundred bucks since then and I'm not sure if they're even available anymore. I think the 4.10 should be a good gear for the car. The p.o. raced the 1/8 mile. We talked about gears and he seemed to think the 4.10 would be better for a 1/4 mile track which is what I would mostly be racing on. That's a Victory billet 7290 yoke.
IMG_9633800x600_zps339187f7.jpg


Case torqued down to housing. Easier to do out of the car.
IMG_9638800x600_zpsc7a3c15a.jpg


Here is one of the ill-fated MP offset front spring hangers. I was not feeling good about removing so much material but I did it anyway. Turned out to be all for naught. One of the studs was loose too so I was happy to ditch these boat anchors. Probably should have done that from the git-go.
IMG_9639800x600_zps11a55515.jpg


More to come.
 
Like a few other parts of this build, I didn't plan on going as far as I have but things tend to snowball and the wiring is no different. The electrical system in the car was fine but there definitely were some things I did not like - yellow parts store insulated ring terminals, taped together splices etc. The wires from the cheesy tach and shift light were sort of half tucked under the back of the dash pad. It looked like multicolored spaghetti was oozing out of the back of the dash pad. Whoever wired it previously liked to just coil and zip tie excess wires and there was a lot of it. Overall a passable but sloppy job and nowhere near my sanitary standards.

While doing the wiring, I planned to upgrade the ignition. Again, it was all coming out anyway so if ever there was a time to tackle it, it was now. The car had Ye Olde Mopar Chrome Box which I dumped for an MSD. My initial plan was to run my MP tach drive distributor with a Moroso mechanical tach but the distributor that was in the car worked good, had a quick advance and no vacuum to deal with. The tach drives have a really quick advance curve and since this is a street car, I wanted to retain some part throttle drivability. Would it have worked? Probably but looking at everything else, I decided to hold off on that for now and stick with what I had.

I did get some new parts for the ignition system though. I already had a Firecore male terminal cap I got from Rick at Carlisle last year. I ordered a new rotor and new Firecore male terminal plug wires from him to replace the old gray parts store cap and Taylor wires. I need new plugs but that's no problem. I'm finally getting to use the MSD 6AL I've had sitting on the shelf for years.

After doing some research on coils, I decided to just go down to the parts store and get a Ford TFI type coil. I didn't feel the extra expense of buying an MSD coil was necessary since the Car Quest one will get the job done. I was stoked to replace the rusty chrome canister coil that was haphazardly stuck up on the firewall with a strap. I made a bracket to mount it vertically to the intake.

I wanted the MSD box out of sight. When I removed the radio, I took out the speaker from under the dash. I looked at the bracket on the bench and it occurred to me that's where the MSD should go. The wires willl reach everything, it will have plenty of air and won't be exposed to excess vibrations or heat like if it was in the engine bay. Initially I made an thin aluminum plate that mirrored the shape of the speaker bracket and I screwed the MSD to that. It wasn't necessary to do that though because I ended up bolting the box right to the speaker bracket. I used larger screws for the bracket to hold the extra weight of the box but that really wasn't necessary either. That speaker magnet was kinda heavy actually!

I also finally figured out a use for my little MSD programmable shift light. Since the ammeter was now gone, I took the bulb socket out of the back of the circuit board and installed the shift light. The ammeter wire studs were in perfect position for it so I made a bracket to hold the light to the back of the board. I have yet to see if it works but it should. I don't need a super nova flash to tell me when to shift.

During my wiring research, I kept running into info from Mad Electrical. I thought his ideas were pretty sound so I decided to give them a try. I did the ammeter bypass thing by splicing the gauge wires together. I bought his trunk battery and relay kits. And just to make things more complicated for myself, I also bought an AR Engineering/Denso 60 amp 'one wire' alternator kit from Mancini. I'm still working on the wiring for all that and it's proving to be a little tough. I tend to over think stuff so that's most of my issue. I'll get it done.

As an aside, I bought a '71 A body/small block forward engine wiring harness at Carlisle a few years back. I won't say who I got it from but let's just say it was total crap. Before I even went to install it, a few of the wires had pulled out of the connectors. I ended up taking the whole thing apart, harness wrap and all to basically harvest the wires, terminals and connectors. The OE harness was dirty but passable so I decided to stick with it and change what needed to be changed or fixed. I removed all the unnecessary/unused wires from the harness.

The bulkhead connector and fuse box in this car are in surprisingly good shape, nothing melted or hacked. The Mad ammeter bypass involves drilling larger holes in the B.H. connector to pass the spliced main dash feed wires through. I decided to skip that. My plan is to run them back to my cut off switch in the back to kill power to the ignition switch. Not going to get into it here though but that's the plan.

The battery cable from the trunk was originally under the car. It was in the way in a couple places and I was fighting with it. Again using the Mad Electrical ideas, I added more complexity by adding a remote 'Ford' starter solenoid in the trunk but now the battery cable is able to be run safely inside the car. I laid it in the driver's side wiring trough. Its 'only hot when cranking' as the saying goes so there's little/less chance of a short on a 1/0 gauge wire.

So as I mentioned earlier, I dumped the chintzy Auto Gauge tach and gauges. I got a really cool tach/oil pressure gauge bracket from SS/AFX out in Arizona that they use on their Hemi Dart/Cuda restorations. I wanted a vintage looking deal and I wound up with Stewart Warner Deluxe gauges and an 8,000 rpm tach. I really dig the look with the chrome bezels and simple graphics, totally old school. The oil pressure gauge is mechanical and plumed with Aeroquip PTFE hose - total overkill. The rest of the gauges are SW too, a mechanical water temp gauge and a voltmeter, all 2 1/16 with an Autometer 3 hole panel.

And then there's the Innovate LM1. I was into the idea of an analog fuel gauge and decided on the LMI. It seemed to have the best features and most capability of the basic tuning aids. It was a little more pricey than some of the other choices but I think its gonna be a good thing once its sorted out.

Luckily, there was already an 02 bung welded in the exhaust. There was an old spark plug in it that was almost seized in there but I got it out without any drama. To get the wiring into the passenger compartment, I drilled a fairly large hole in the spot on the trans tunnel where its flat to feed the wiring through. Found a grommet for it too. The 02 bung is right underneath it so it worked out well. The plan is to have the module come up through the carpet and rest under the seat but I need to put the carpet in and see how it lays out.

I think I'm forgetting some things but I'm sure there will be more long-winded and wordy posts to fill in the details.

These electrical pics are gonna be a little vague and/or boring here but it's what I have at the moment. Not the sexiest subject but its all part of it.

Here's the OE ammeter wires. The cluster has been removed already.
IMG_9653800x600_zps1bf77076.jpg


Crimped, soldered and shrink wrapped.
IMG_9663800x600_zps0bee51b9.jpg


Here's the shift lite and bracket where the ammeter bulb used to be.
IMG_9647800x600_zpsb4f5468d.jpg


With cluster installed, looking up from the floor. Plenty of room.
IMG_9652800x600_zpsf82391eb.jpg


Not sure why i took this pic but its the bulkhead connector removed from its home, I think I was getting ready to splice the ignition 1 + 2 (brown and blue wires) circuits to the red MSD signal wire here. The MSD happened to come with a handy dandy pre-made splice for this express purpose. Works good. The red and black wires are from the dash main feed that will run back to the switch. After I made the splice, I checked continuity with a meter and its good.
IMG_9656800x600_zpsc14c9058.jpg


More to come.
 
Just wanted to add some links to threads I started last year documenting some fuel system upgrades and subsequent issues. In addition to what was done at that point, I got a new throttle cable and a set of AR Engineering W2 tall intake throttle cable/return spring brackets to replace the cobbled together ones that the car came with. Whoever installed it originally had left the OE throttle/kickdown bracket and used one of those L brackets that hang off the back of the carb stud. I had the feeling that it was not set up perfectly.

The new set up works great - there is a distinctly more positive feel in the pedal and it snaps back with authority. I'll probably have to make some adjustments to the idle when I fire it up. The throttle cable job was much easier to do with the carpet, column and firewall wiring out of the way. Only trouble I ran into was properly torquing the intake bolts (after installing the new brackets) with the large runners in the way but its done.

Here are the links to the older threads;

http://www.forabodiesonly.com/mopar/showthread.php?t=189176

http://www.forabodiesonly.com/mopar/showthread.php?t=203858

http://www.forabodiesonly.com/mopar/showthread.php?t=202998

http://www.forabodiesonly.com/mopar/showthread.php?t=203255
 
Very cool thread!!
Thanks for sharing.

Thanks for reading, glad you like it. Been wanting to post my own build thread for a while. I'm stoked to be able to document all this stuff and share it. That's what its all about.
 
Nice write up. I thought this car was a great deal when it was listed for sale.
 
Another good thread to learn from, and thank you for taking the time to post it up for us rmchrgr, X2 AdamR, a very good write up indeed :thumblef:
And I must say some good work/Fun going on here rmchrgr :cheers:
 
Thanks guys, it's been fun. My one wish is to have a solid couple of days without any obligations where I could just be in the garage and working. Rugrats really have a way of cutting into me time. :banghead:

Anyway, the hope was to have it up and running for Mopars at E Town at the end of the month but that does not look promising. The wiring took a lot of time and and it's still not done. I actually stopped the wiring project down for a bit, it was getting a little monotonous.

And just to make more work for myself, I added more things to the list - a new trans pan and cooler set up. The old cooler lines leaked badly and I think the trans was overfilled. I am working on mounting the trans cooler right now.

I'm also looking into an aluminum radiator. I never realized how heavy those OE radiators are. The one in the car was a 26" core that they made to fit. (nothing was cut, just drilled some holes and used spacers) I hadda take it out to do the trans cooler and when I lifted it out I almost wrenched my back. An aluminum rad would fall in line with my weight savings plan so I just need to decide if its worth the price.

I will try to post up pics soon, just have to charge the camera and download them to my laptop.
 
I haven't made much progress on the Duster lately. I put on my new Pioneer balancer. I ordered an aluminum radiator which was ridiculously expensive but I did it anyway. I took the trans cooler lines off the trans and got new tubing and fittings to replace the old leaky stuff. Like usual, I over-thought how to mount the trans cooler up front and went through a few different attempts. Still working on it but I did come up with a simpler idea that I should be able to knock out when I get some more time. I also ordered a set of Hemi Dart style seat brackets from a local guy, I'm gonna go pick them up this week.

Spent a lot of coin lately on a car that's in pieces but I'm pretty much done with major purchases.

As I've said already, the hardest thing for me is to string together solid blocks of time to work on it. As a matter of fact, not being able to work on the car is making me a little nuts lately. For those of you that have kids, you'll understand when I say that I'm counting the minutes until school starts...

Tonight though, I managed to make the time to get out to the shop and got some more stuff done. I didn't do anything on the car itself because I had to clean up before I went any further. My shop was a disaster area. Stuff had been left out and was piling up for what seemed like months. I have a tendency to take out lots of things when I'm involved in something. Couple that with the bad habit of leaving said things out after I'm done with them and you have a royal mess in short order.

I was literally tripping over stuff. Plus, when the mess starts getting bigger, I'll push it out of the way rather than picking it up. I really wish I had better work habits.

The crux of the biscuit here is that I was losing sight of where I was. Working on multiple things simultaneously is never a good idea for me but somehow I end up doing it all the time. It's probably why everything takes me so long, there's so many different uncompleted tasks waiting for this or that. But that's how I roll I guess. And truthfully, everything you do can't be conveniently checked off in sequence or compartmentalized into tidy little segments.

It feels good to clean though and to put things back where they belong. It's like doing laundry after you've been wearing dirty clothes for a week. You wonder why you didn't take the time to do it before things got out of hand.

I'm not totally done tidying up yet but I made a pretty good dent. I even started sorting fasteners. I have no life.

Here are a few before and after shots. :shock:

View attachment IMG_9599 (800x534).jpg

View attachment IMG_9595 (800x534).jpg

View attachment IMG_9596 (800x534).jpg

View attachment IMG_9597 (800x534).jpg

View attachment IMG_9598 (800x534).jpg

View attachment IMG_9600 (800x534).jpg

View attachment IMG_9601 (800x534).jpg

View attachment IMG_9602 (800x534).jpg
 
I finally ironed out the mounting situation for the trans cooler. Wasn't sure how I wanted it mounted but it ended up being easiest to have the fittings pointing up rather than to the side. I was able to utilize existing fasteners from the lower radiator support and hood latch so no new holes were drilled. I fabricated a bracket from a steel sheet. I found it was easier to work with steel rather than aluminum, it's more forgiving. I did use two aluminum strips for the top mounts but those were simple cut and drill.

Though I used the existing radiator support and latch fasteners, I think I'm going to need some longer bolts for a little more support. The OE ones worked well for mockup. I'm happy with how it came out. It's solid and in an easy position to plumb.

Cooler mounted and a pic of bracket from underneath.
 

Attachments

  • IMG_9607 (800x534).jpg
    57.2 KB · Views: 2,682
  • IMG_9621 (800x534).jpg
    29.3 KB · Views: 2,665
Also got my Griffin aluminum radiator yesterday. This thing is impressive. The tubes are 1.25" It looks well made and way lighter than the 26" brass/copper one that was in there originally. Unfortunately, there's a few issues with it. I'm OK with that, but it's just more stuff to deal with.

One; the original fan clutch is now too long. I researched and now know that the Hayden 2765 should work in this situation, so I have to order one from somewhere. They're relatively cheap on Rock Auto. My local parts store told me $75. Screw that.

Two; the beat up 26" fan shroud obviously no longer fits so I need a 22" one. There's a flange on the outside of the core to mount the shroud, just need to find the right one. Never realized how expensive shrouds were. I've read the repros out there tend to warp so I'm on the lookout for an OE one. Hope I can find one this weekend at ETown.

Three; the mounting brackets on the rad. don't line up with the original cage nuts on the support. Might have to waller out the holes a little to make it work. This is one of their direct fit radiators so I'm not sure what happened here. Might put in a call to Griffin about this and see what they say. Probably not worth sending it back over but it's a little annoying. I may just have to look at it again.

Four; the overflow spout is pointed towards the driver's side but it was originally on the right. I need to be careful with how the trans cooler lines are routed to avoid interference with the overflow bottle. I looked at an RCI catch can which is shorter and would probably work.

Five; the hose outlets are now closer to the engine so I have to shorten the hoses so they won't kink.

And when I went to stick the new cap on, the bottom of it sliced my finger open and I was bleeding all over the place. Grrrr...

Overall though, I'm happy with it. I guess I just had it in my head that Griffin was one of the better products so I went for it. The weight savings is also a big plus.

Pics of it mocked up and burly cooling fins and cap flange.
 

Attachments

  • IMG_9604 (800x534).jpg
    68.8 KB · Views: 2,735
  • IMG_9605 (800x534).jpg
    40.1 KB · Views: 2,711
-
Back
Top