I'll have to swing by for a lesson.
You are using an out of date browser. It may not display this or other websites correctly.
You should upgrade or use an alternative browser.
You should upgrade or use an alternative browser.
The Great Pumpkin - '71 Duster
- Thread starter rmchrgr
- Start date
-
rmchrgr
Skate And Destroy
I'll have to swing by for a lesson.
Well let's not go that far...
Managed to get a front pump bushing today in between dropping off the kids off early this AM and picking them up late this afternoon.
Went to a trans shop by my house and showed them the pump and asked if they could replace the bushing. I called Dynamic and they wanted me to put a babbit bushing in rather than the standard bronze rebuild bushing. The reason for the babbit is that the converter snout can get chewed up by the bronze. They were pretty clear about that but the guy at the shop said "aaahhh, don't worry about it, the Sonax bronze bushing is a better part". I was ready to walk out and find another place when he made a call to see if he could get what I requested. There's a branch of a big trans parts supplier here on the Island which had one so I lucked out.
Brought the converter with me to check fit and it was perfect, nice and smooth. A 10 minute job, cost $20. Scratch that off the list.
Looked at the drum bushing and it looks a little suspect. Might end up replacing that too but not sure yet. Probably should have brought it down with the pump but I didn't think about it.
rmchrgr
Skate And Destroy
Soooo, back from Carlisle. I posted a bunch of links to pics on here and on Moparts so check 'em out. Had a great time, really enjoyed it. Not much to report though other than that. Saw some drag racing on Friday and Sunday. Hung out with some cats from my area and had a weekend away from family and other obligations. Only crappy part was that it took 6 hours to get home from Beaver Springs Dragway yesterday - 2 hours to get through the Delaware Water Gap on 80, was ready to stick a knife in my head.
I cruised the swap meet for two days and didn't really buy much. I don't need anything for my car since it's all there and in decent shape. The things I looked at would have likely been placed on top of the rest of the junk on my shelves anyway. I was totally happy to look around but nothing really jumped out and said buy me. Swap meets are all about potential anyway, probably more of a gamble than anything. Ratio of cost vs. reward is probably upside-down at these things. Chase is better than the catch as they say.
Had the idea prior to going down that I wanted to look into getting a carb. Picked up a bunch of 850 double pumpers - man, those things are heavy! Never realized how much they weigh compared to a TQ or even my Proform. Like putting a brick on top of your intake. Couldn't get myself to buy one, just kept thinking that they were being sold for a reason and I'd put them down. Looked at a lot of air cleaners too because I am not thrilled about the current setup I have (air bell with a K&N top). Guys wanted silly money for unsilenced ones, just did not seem worth it to me since my car is nowhere near original. ended up getting just a cheapo base. Thought I might use it to cut up for a custom thing but it'll probably just go on the shelf.
Did get a bunch of things for my transmission build up from A&A. They are great to deal with, Rick is really top notch. Got an oil pump from B3RE and chatted with him for a bit about his rocker arm geometry pedestal kit. Seemed like an OK dude, am strongly considering having a kit made. Still not sold completely on it though so I have to do some more research.
Ordered the replacement head studs so I should have those this week. Have pretty much everything I need for the trans now too so I hope to have that done soon.
More to come.
rmchrgr
Skate And Destroy
Been a while since the last update. Right now I am using my old Mac because I killed my laptop with a coffee tsunami one morning a few weeks back. Damn thing was less than two years old too.
I was doing what I normally do when I picked up my mug (repaired handle with crazy glue) and it snapped clean off the handle. Yep, full cup, dead center on the keyboard. I tried resuscitating the patient but no dice. Took the entire thing apart only to find that the keyboard is basically the only part that is not serviceable. Half of the keys are stuck and the rest are not responsive. Didn't feel like spending several hundred to fix it so I gotta save for a new one. I have an adapter to get all my stuff off the old drive when I get a new machine but I'm kind of in limbo until then. This Mac is 11 years old and totally obsolete but still works somewhat.
Didn't really like my laptop much anyway. It had a touch screen which I can't stand and the track pad was awkward. Windows 8 was really annoying too but I hear the newest version sucks worse. I'm an old Mac guy but have no use for such a fancy box anymore so I'm stuck with Brand-X.
Anyhoo... made some progress on the Duster in several areas and I'm heading down the stretch.
Ordered pushrods from Hughes just today, 8/3. Went through the whole long process of checking max lift at the valve, valve tip wipe pattern yada yada. Broke out all sorts of tools that I hardly ever use so that was cool. In any event, the valve geometry is dead nuts with no rocker stand shims needed. Good stuff!
Pushrods are not cheap though, like almost shockingly expensive. My valve spring pressure is right at the max for using 'standard' wall thickness so it was best to go one step up and use thicker tubing. Less valvetrain flex is always a good thing anyway especially with the 59º LA stuff.
Head studs arrived finally and are correct. Previously purchased studs are now added to the pile of mistakenly ordered parts. I could probably build an entire engine with all all the leftovers.
Like said in the last post, I got a new oil pump at Carlisle. When I was on the phone with Hughes, I asked them about that particular bolt and they said they don't use a washer and sometimes grind the head of the bolt. Looks like I will be doing one or the other or potentially even both to get the pump body to sit flat. May look into using a stock bolt in that location just for ease of installation. I don't like grinding stuff like that but I may have to.
Transmission sub assemblies are apart and inspected, most everything looks OK. Couple wear spots here and there but no major damage. Trying to decide whether to get a bushing driver kit to do the rest of the bushings myself or just take the parts down to the trans shop again and have them drive them in. I have a crappy seal driver set that does nothing in this instance so I need the right tool. Cheap tools here will likely yield poor results and ultimately more aggravation. Need to clean everything well before I start to reassemble.
Couple other trans notes; was happy to see both gear sets were steel four pinion style so no need to go hunting for a set. The A999 was a pretty stout trans from the factory, stoked to have a real deal unit.
Ran into one small issue with the clutch packs I ordered from A&A. The clutches in the kit are Alto red but are thinner than my OE frictions. (.06x vs. .08x) The frictions in the kit are sold as an upgrade for 4 clutch drum applications so you can fit 5 in. But I already had 5 and the thin ones wound up being too short. The solution is 6 thins! Yep, 6 clutches in my front drum.
Also ordered a line pressure spring from them. I learned from Paul at Turbo Action (who built my valve body) that the 'reverse boost circuit is controlled' and line pressure with my particular V.B. is around 110 psi. A&A thought I should have more line pressure, especially with the extra clutch so I am looking to be around 135psi. Need to get a pressure gauge to dial it in. Will probably take a little trial and error which will involve dropping the pan to adjust the spring. That sucks but what can you do. Hope to get it close so I don't have to do that.
So pushrods should be here soon and the rest of the trans parts will be too. Hope it's just turning wrenches until it's all back together.
More to come!
rmchrgr
Skate And Destroy
Wow, over a month since the last update. Finally got a new laptop so I have all my computer-related stuff back in one place. This new one is much better than the previous model, really disliked the touch screen. I am not a tablet type person. The screen is also bigger and the keyboard has a number pad. Plus it was under $300 which is a heaping helping of win.
So as far as the Duster, the transmission is done and the engine is almost there, just waiting on a specific main stud that works with the Kevko oil pump pickup. Will detail further down.
In other news, I decided to remove the Hurst Line-Loc and made new front brake lines. Frankly, I felt like the thing was never right. I don't believe it was the Line-Loc itself since it was brand new and installed correctly but rather the combination of parts - small caliper pistons and rotors combined with a lot of extra tubing with sharp bends.
Everything was put in new two years ago but the brakes were never that great. I did everything I could possibly do to get them to stop better but they just felt a little lacking. Normal street driving was mostly OK but slowing down at the track was a little scary. I had to really stand on the pedal and always ended up using the last turn off.
The second issue was creep at the starting line. When you brought the revs up, it wanted to roll. Some of the creep may have been due to the the converter but mostly it was the brakes not holding enough. This affected the launch RPM which obviously effects 60 ft times and ultimately ET. I wanted to be able to launch around 1,800-2,000 but it would start to creep just past idle. I believe it may have cost at least a hundredth at the line, maybe more.
The thing I kept coming back to was the idea that somehow the roll control was preventing the front brakes from getting full pressure because of all the extra plumbing and very tight bends involved in the lines. I never verified the pressure at the calipers but that was my gut feeling.
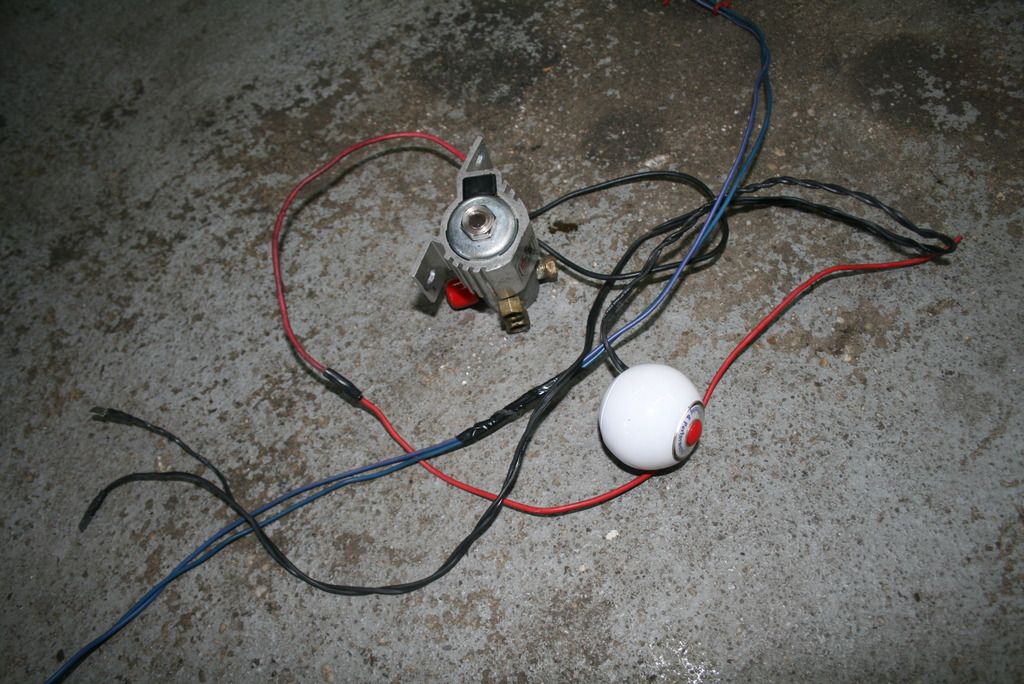
In addition, the release was slightly awkward with the button on the shifter knob. The few times I had it down the track, I never even used it. So the decision was made to take it out and re-do the front lines. As a result, there is less clutter in the corner of the engine bay where the master cylinder is and less wiring to contend with. The new lines have much gentler bends so hopefully the will be a difference. If not, its time for different brakes.
Line Loc parts and wiring removed from the car.
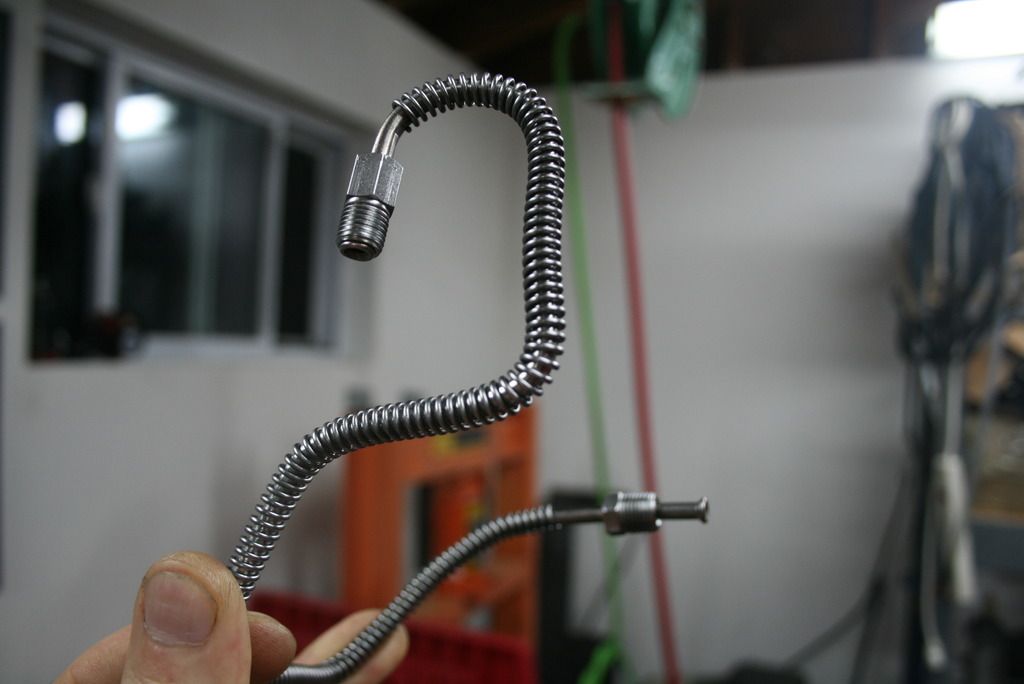
New front brake lines. The fronts are the most difficult to make yourself. because of where they are and how they are routed. What a P.I.T.A, even with the motor and trans out.
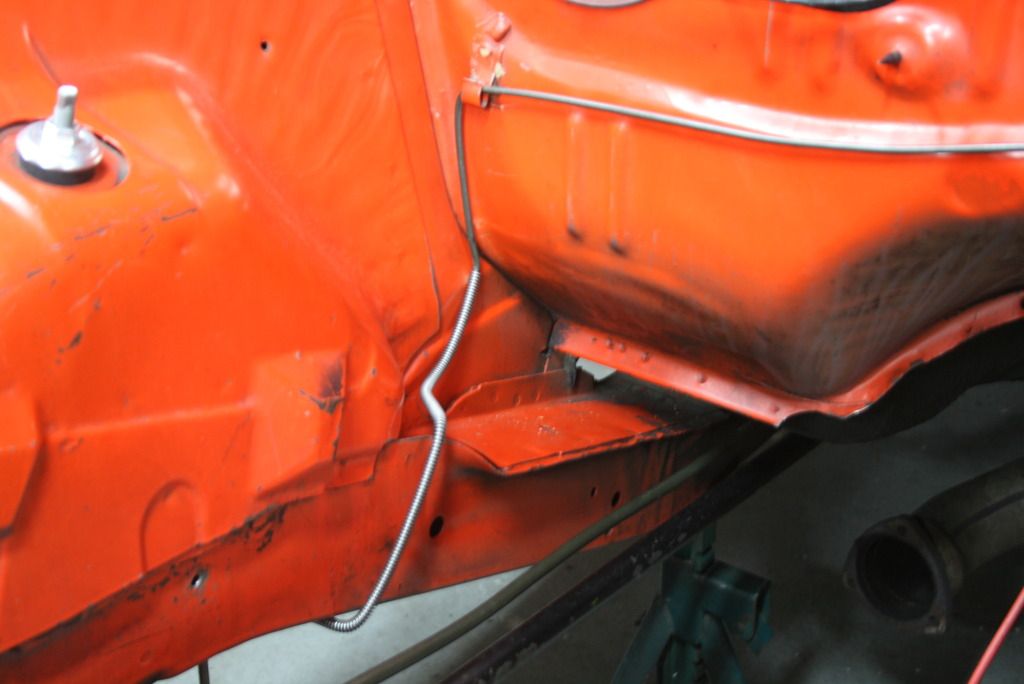
In light of how time-consuming it is to make brake lines, I used the factory original I had for the left front. I soaked it in Evaporust and wire wheeled it, looks brand new. Fits perfect ('natch) and looks good.
Sure seems like I like to make extra work for myself doing other stuff when I should be working on finishing the engine. This was bugging me though so while the engine is out, I took the opportunity to make the change. I didn't lose any extra time as I am waiting on a part and can't move forward without it. I'll explain in the next post.
More to come.
So as far as the Duster, the transmission is done and the engine is almost there, just waiting on a specific main stud that works with the Kevko oil pump pickup. Will detail further down.
In other news, I decided to remove the Hurst Line-Loc and made new front brake lines. Frankly, I felt like the thing was never right. I don't believe it was the Line-Loc itself since it was brand new and installed correctly but rather the combination of parts - small caliper pistons and rotors combined with a lot of extra tubing with sharp bends.
Everything was put in new two years ago but the brakes were never that great. I did everything I could possibly do to get them to stop better but they just felt a little lacking. Normal street driving was mostly OK but slowing down at the track was a little scary. I had to really stand on the pedal and always ended up using the last turn off.
The second issue was creep at the starting line. When you brought the revs up, it wanted to roll. Some of the creep may have been due to the the converter but mostly it was the brakes not holding enough. This affected the launch RPM which obviously effects 60 ft times and ultimately ET. I wanted to be able to launch around 1,800-2,000 but it would start to creep just past idle. I believe it may have cost at least a hundredth at the line, maybe more.
The thing I kept coming back to was the idea that somehow the roll control was preventing the front brakes from getting full pressure because of all the extra plumbing and very tight bends involved in the lines. I never verified the pressure at the calipers but that was my gut feeling.
In addition, the release was slightly awkward with the button on the shifter knob. The few times I had it down the track, I never even used it. So the decision was made to take it out and re-do the front lines. As a result, there is less clutter in the corner of the engine bay where the master cylinder is and less wiring to contend with. The new lines have much gentler bends so hopefully the will be a difference. If not, its time for different brakes.
Line Loc parts and wiring removed from the car.
New front brake lines. The fronts are the most difficult to make yourself. because of where they are and how they are routed. What a P.I.T.A, even with the motor and trans out.
In light of how time-consuming it is to make brake lines, I used the factory original I had for the left front. I soaked it in Evaporust and wire wheeled it, looks brand new. Fits perfect ('natch) and looks good.
Sure seems like I like to make extra work for myself doing other stuff when I should be working on finishing the engine. This was bugging me though so while the engine is out, I took the opportunity to make the change. I didn't lose any extra time as I am waiting on a part and can't move forward without it. I'll explain in the next post.
More to come.
rmchrgr
Skate And Destroy
So OK, abut that engine. This thing has been fighting me since day one. I've had so many backwards steps during the process it's laughable. When I was a tech dealing with engines, we'd have them out, rebuilt and back in in a day and half not counting waiting on parts. This engine is taking 8 months!
Here's a list of do-overs and their fixes;
So yeah, there have been a lot of hiccups with this thing and there's probably more I'm trying to suppress from memory. Some of it was due to my own ignorance, some of it just dumb luck. All of it adds up though and it's annoying having to go back and re-do, re-think or change so many things.
When I took the oil pump and main cap back to the machinist, I told him about all the struggles. He laughed but then gave me a nice vote of confidence when he said when that happens, he knows it's gonna run good. Thanks Glen!
It's true, it hasn't all been bad news - everything else has gone fairly well. I will be stoked to have it finished and broken in though.
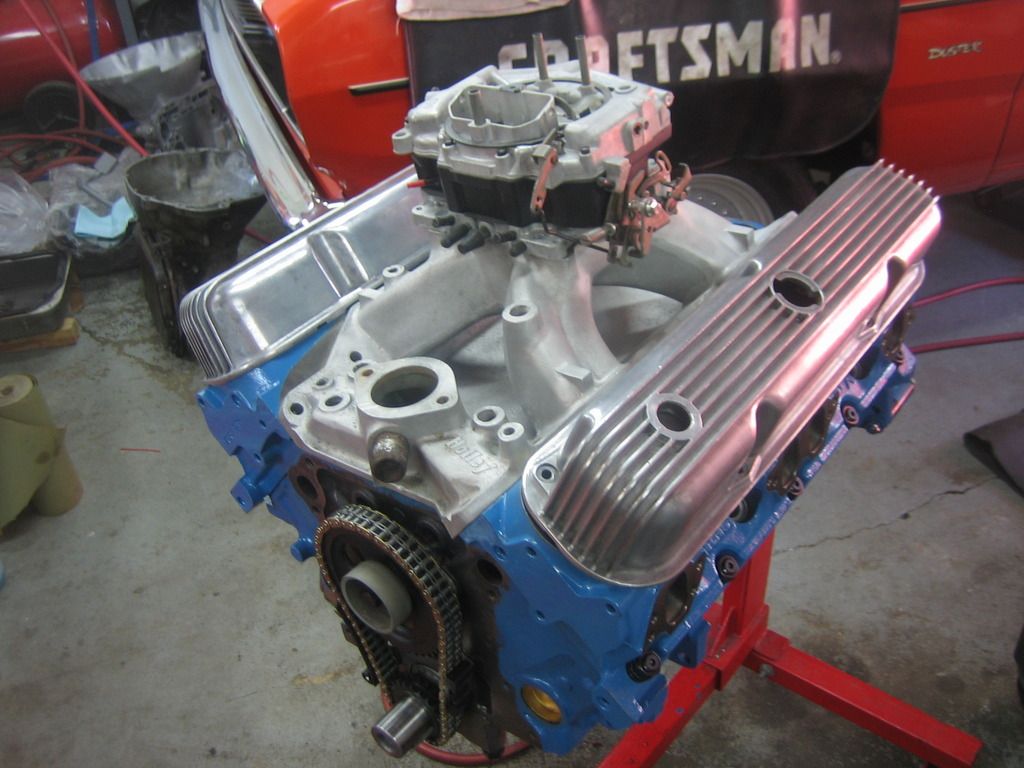
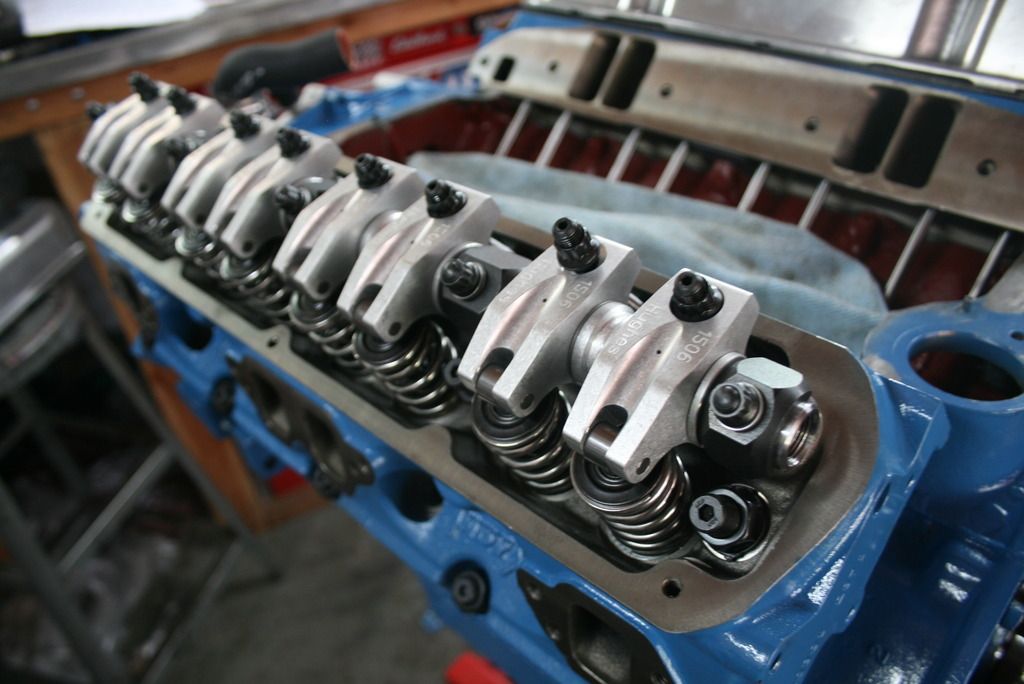
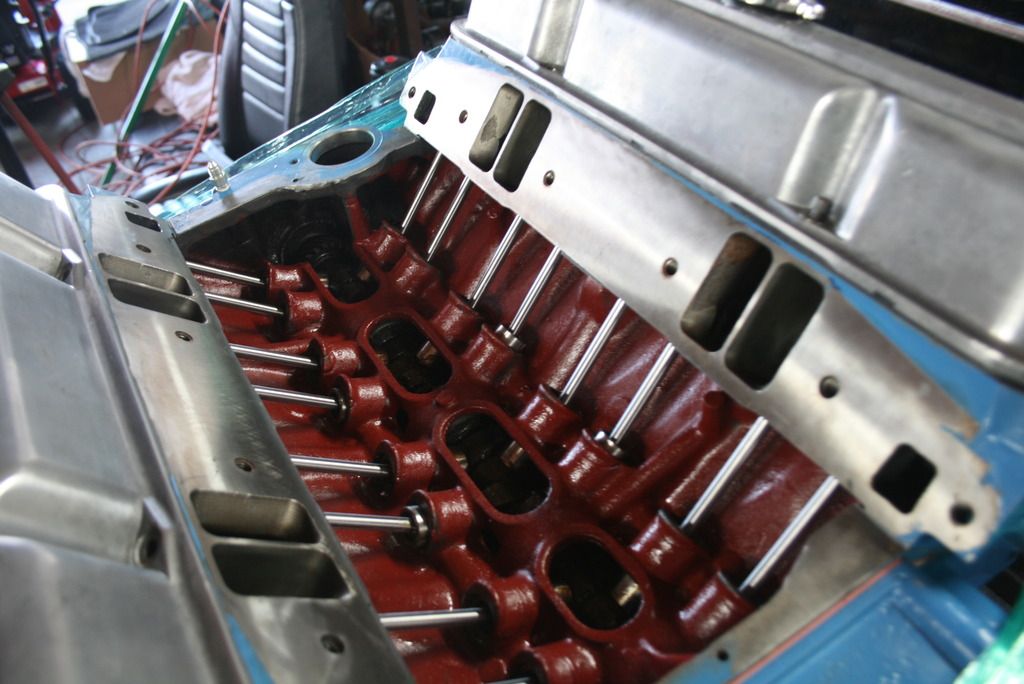
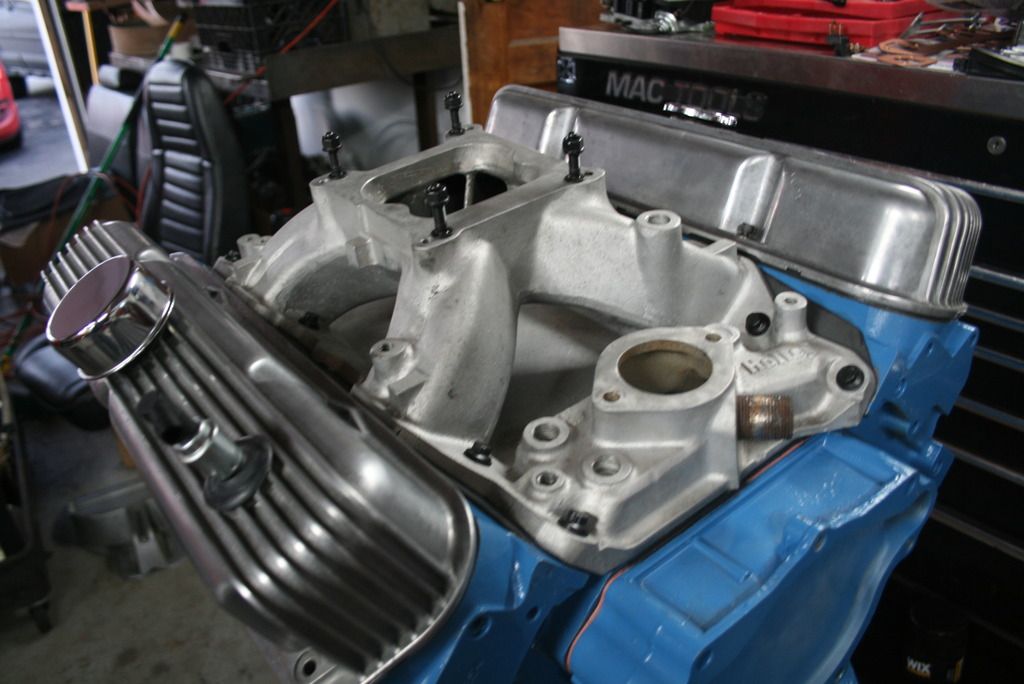
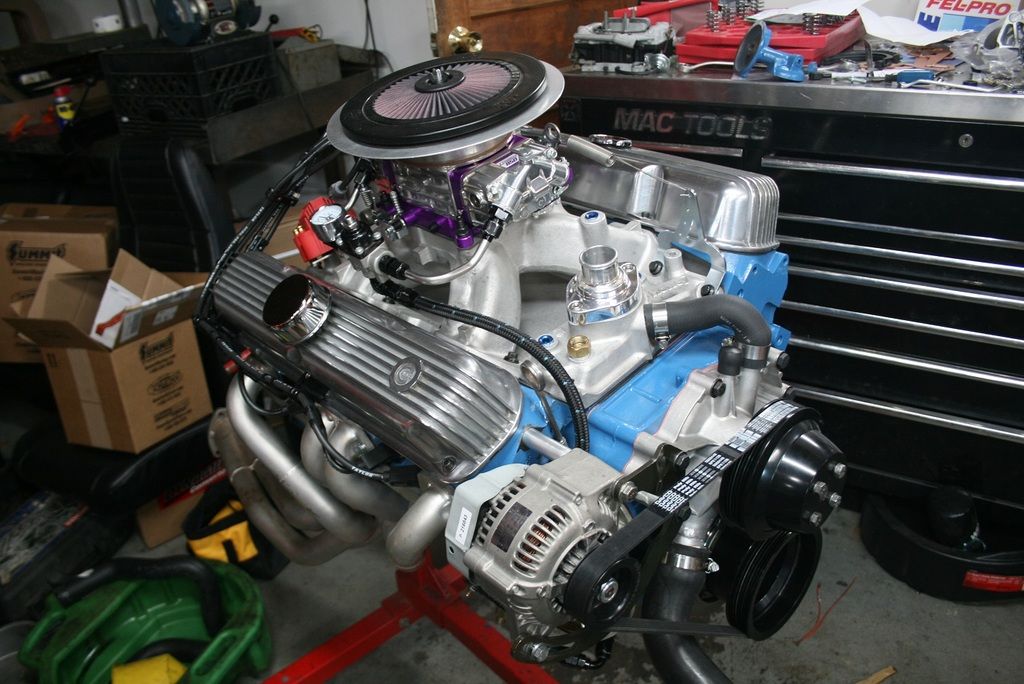
Here's a pic of the top end mocked up. It was actually helpful to do this because it helped me see past all the stupid crap and remember what I was working towards.
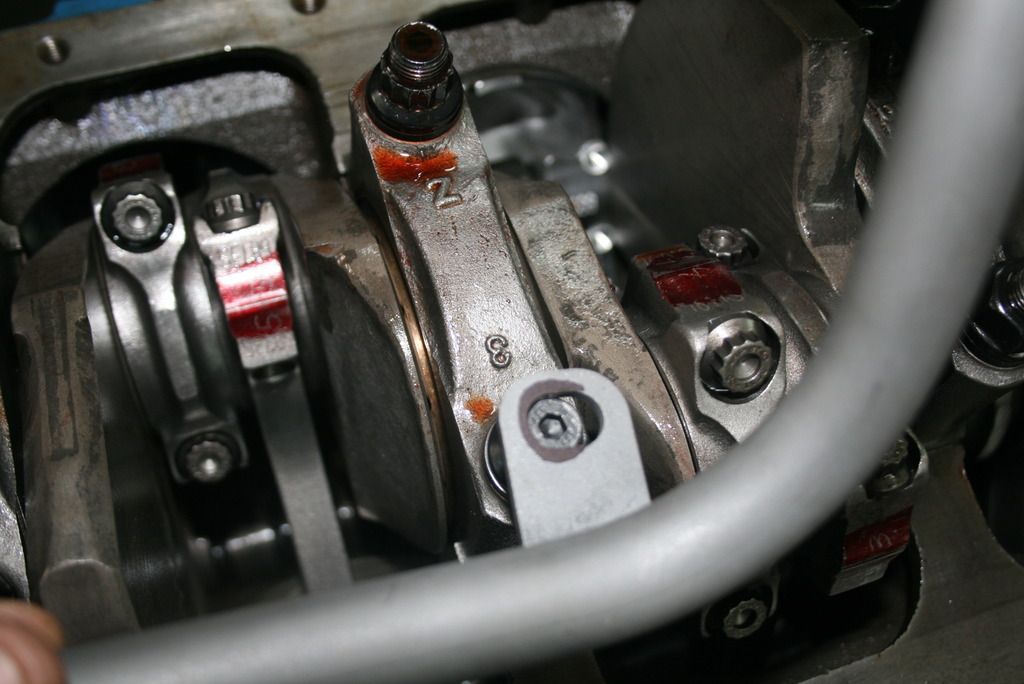
One thing that did go well was the valve geometry which is kind of a big deal. This pic shows the wipe pattern with the checking pushrod and it's dead nuts.
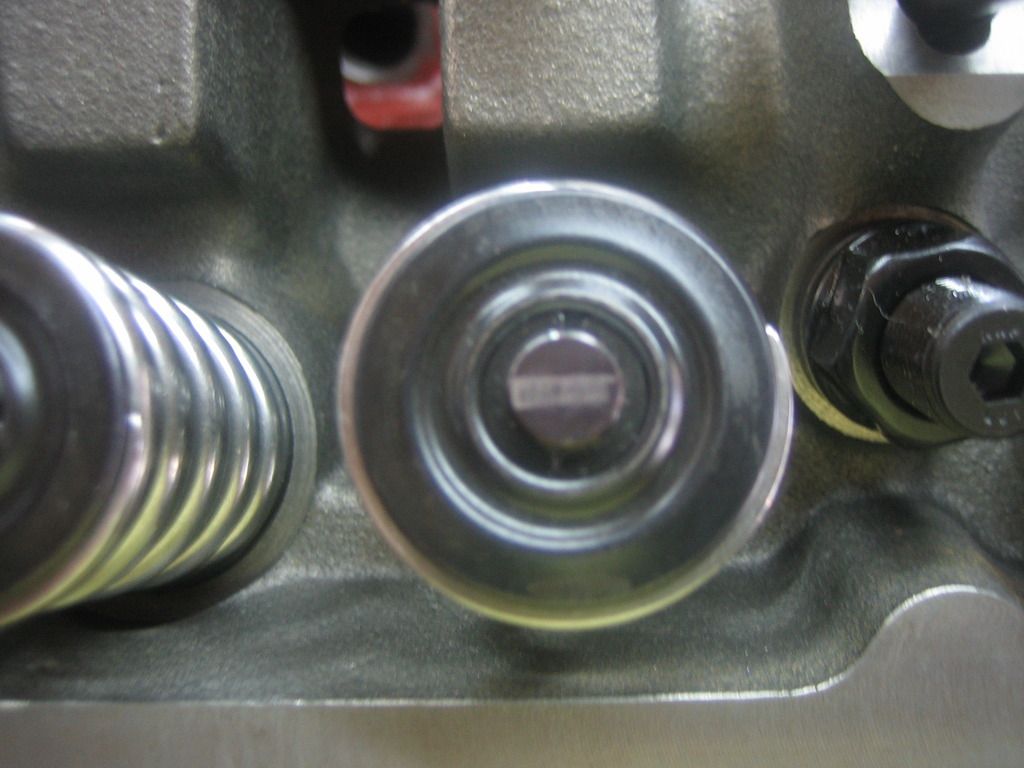
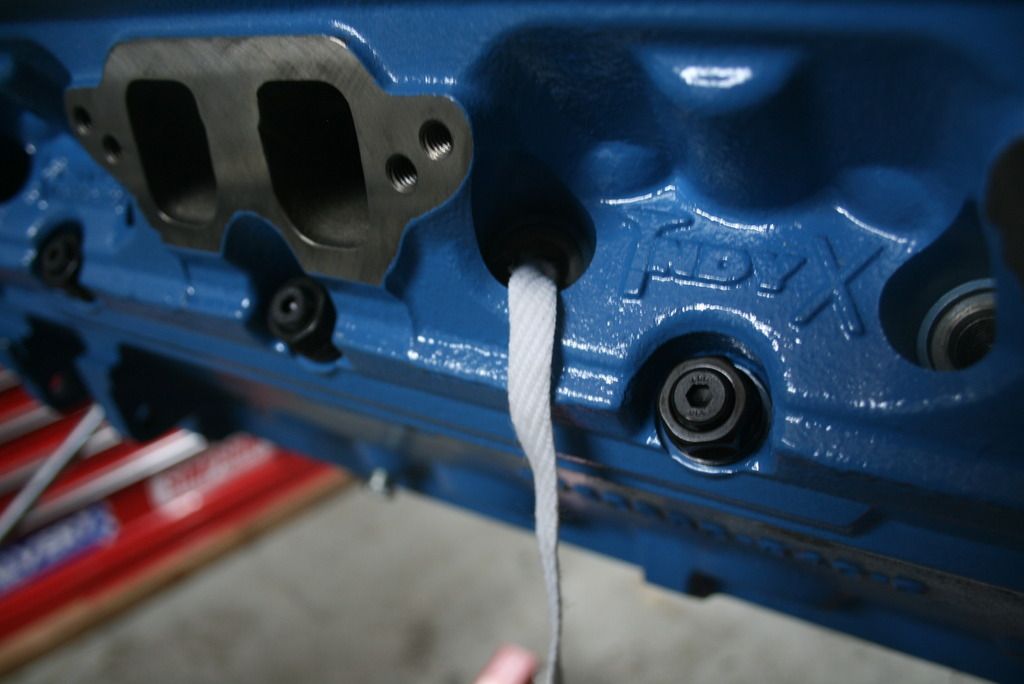
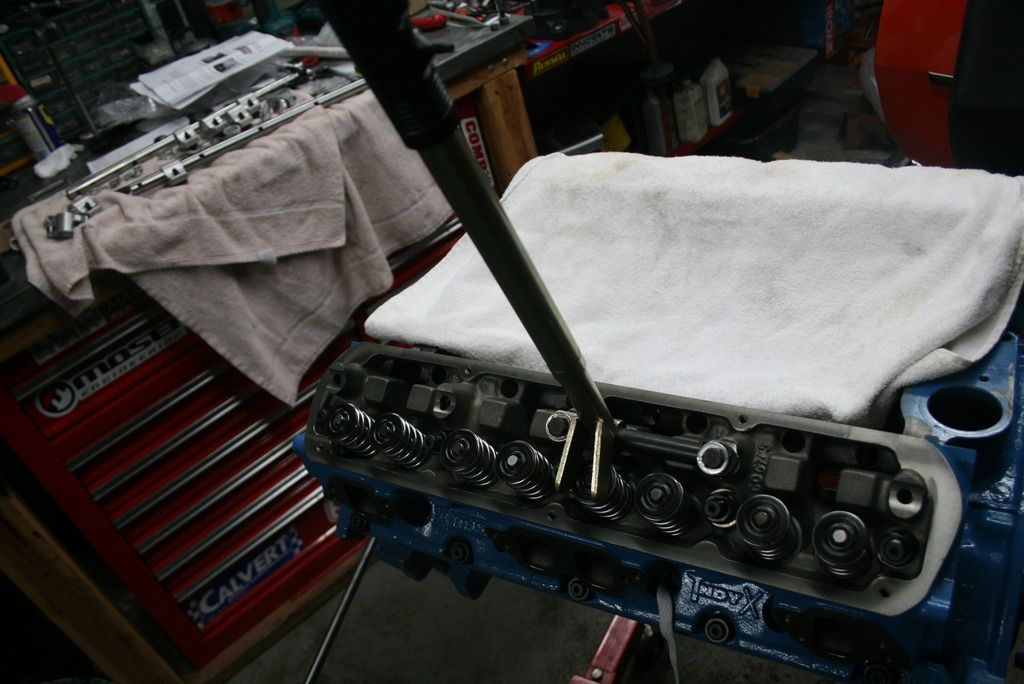
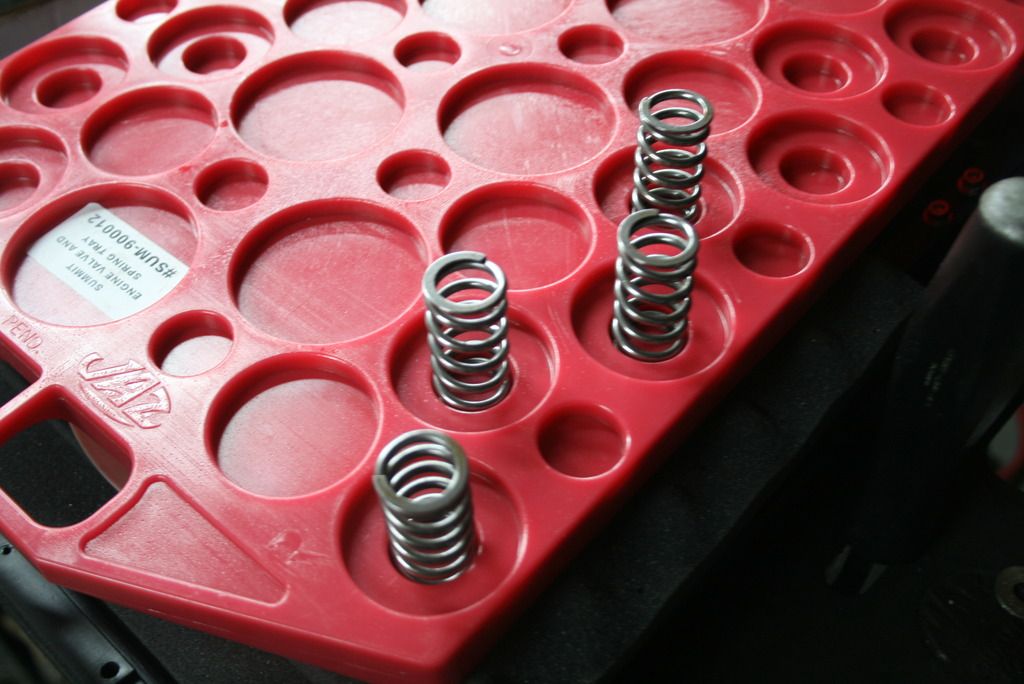
For break in with a flat-tappet cam running any sort of spring pressure, you need to remove the inner springs to prevent wiping the lobes on first fire up. Here are some shots showing how the inner springs were removed. I have an on-head spring compressor which works great but requires holding the valve up so it does not fall into the cylinder with nothing holding it up. I have an air adapter to force air into the cylinder but the heads were not torqued down, nor was the intake or exhaust so the air would have been useless. I used the old rope trick where you feed rope or string into the cylinder to prevent the valve from falling out. You bring the piston up to TDC, feed the string in through the spark plug hole, do your thing with the valve, re-install everything then pull the string out. Worked great. I used an old hockey skate lace which is really long and thick.
On head valve spring compressor at work.
Here's the valve spring, retainer and locks before removing the inner spring.
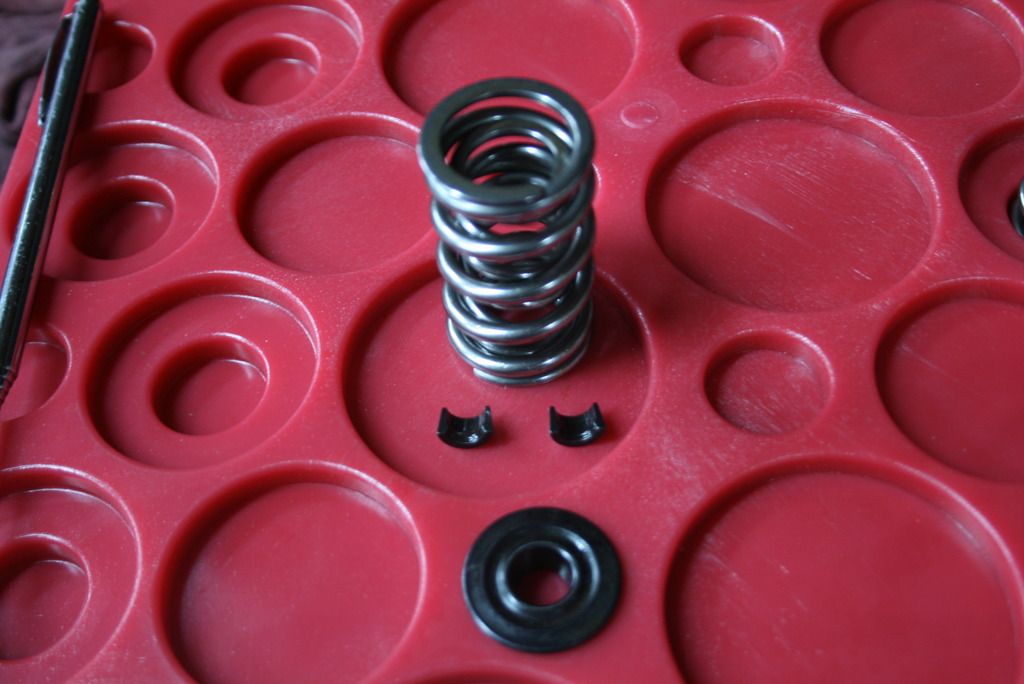
A few of the inner springs that have been removed. I got this plastic tray to keep things organized.
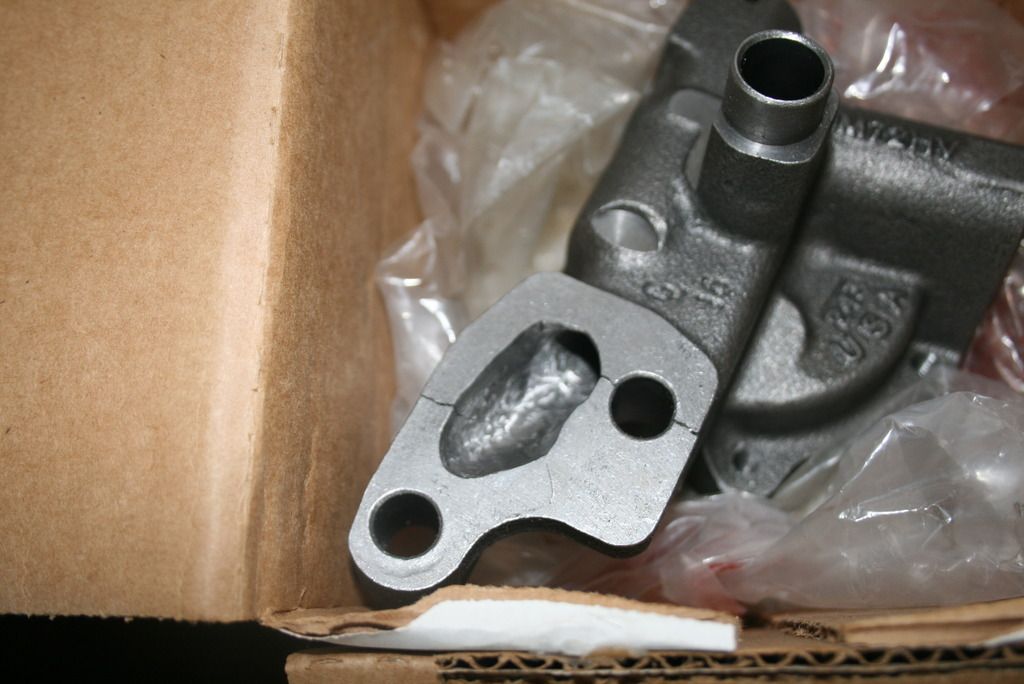
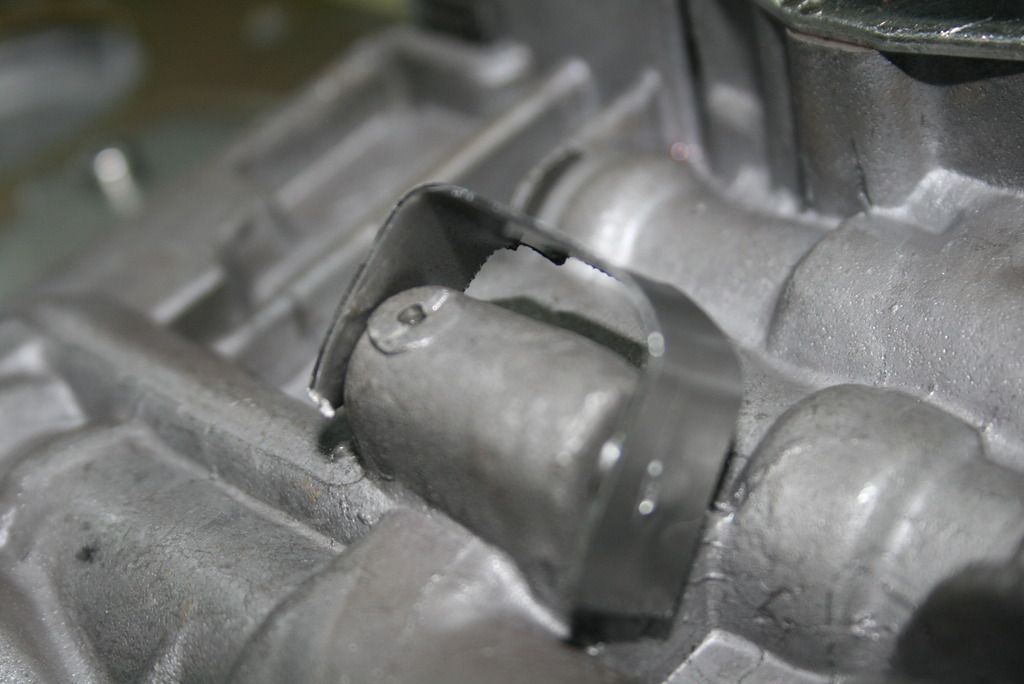
Don't remember showing this pic before but here is the cracked oil pump housing. This was from Precision oil pumps. They smooth the ports and remove the casting flash from the housing, coat the gears and check all clearances. Expensive junk now.
I smoothed out the new pump housing myself and swapped the fancy coated gears from the broken one.
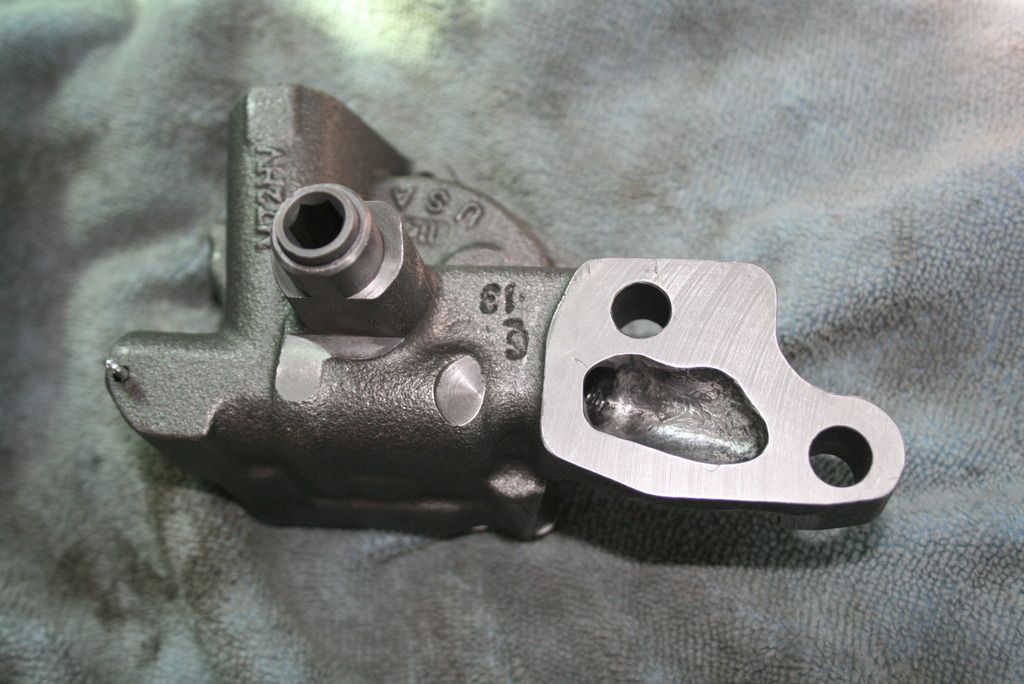
Here's the issue with the Kevko pickup. There is a mounting tab which is supposed to be installed on the #3 main cap bolt. Works with the windage tray bolts but the studs I have do not have the provision for the tray so therefore are too short. The tab on the pickup is now just floating in space. The solution is Kevko M101-1. Wish I had known that when I bought the pan and pickup...
So that's where the engine is right now. I figure once the stud comes then it's basically just assembling the rest of the parts. Won't hold my breath but there really aren't any other stones that have been left unturned. Hope I don't eat my words.
I will detail the transmission stuff in the next post.
More to come.
Here's a list of do-overs and their fixes;
- wrong rockers (needed 1.6, ordered 1.5)
- wrong head studs (needed Magnum style, not LA)
- took several tries to get crank end play correct
- over torqued rod bolts using rod stretch method (ordered new rod bolts, used regular torque method)
- cracked Precision "blueprinted" oil pump housing (got new pump, swapped coated gears into new housing; thought main cap oil pump mounting surface was crooked causing pump housing to bind; took the cap and pump to the machine shop who said it was OK.
- learned you can not use the washer for the shorter rear main bolt specifically provided in the main stud kit from Hughes)
- dowel holes on cylinder heads did not line up with dowel pins in block (ground the dowel pins down and reamed the pin holes in the heads; still need several whacks with a dead blow hammer to get them seated)
- dropped a head gasket and bent a corner
- destroyed front oil galley plugs because of incorrect installation (drove all over town to several parts stores looking for the correct plugs; found some slightly oversize that had to be ground down to fit.
- found the Hughes rocker shaft hold down studs are too long for the rocker stud holes in the heads and do not allow full engagement of the threads when installed with their hold downs and shafts (have not figured that one out yet)
- timing chain tensioner was a *****
- Kevko oil pump pickup does not work with regular studs (special main stud needed with extra length above the cap bolt; did not know it was available until I wnt to assemble it and it was floating in space with no support; found correct on Kevko's web site. Doh! waiting over a week for the part to arrive)
So yeah, there have been a lot of hiccups with this thing and there's probably more I'm trying to suppress from memory. Some of it was due to my own ignorance, some of it just dumb luck. All of it adds up though and it's annoying having to go back and re-do, re-think or change so many things.
When I took the oil pump and main cap back to the machinist, I told him about all the struggles. He laughed but then gave me a nice vote of confidence when he said when that happens, he knows it's gonna run good. Thanks Glen!
It's true, it hasn't all been bad news - everything else has gone fairly well. I will be stoked to have it finished and broken in though.
Here's a pic of the top end mocked up. It was actually helpful to do this because it helped me see past all the stupid crap and remember what I was working towards.
One thing that did go well was the valve geometry which is kind of a big deal. This pic shows the wipe pattern with the checking pushrod and it's dead nuts.
For break in with a flat-tappet cam running any sort of spring pressure, you need to remove the inner springs to prevent wiping the lobes on first fire up. Here are some shots showing how the inner springs were removed. I have an on-head spring compressor which works great but requires holding the valve up so it does not fall into the cylinder with nothing holding it up. I have an air adapter to force air into the cylinder but the heads were not torqued down, nor was the intake or exhaust so the air would have been useless. I used the old rope trick where you feed rope or string into the cylinder to prevent the valve from falling out. You bring the piston up to TDC, feed the string in through the spark plug hole, do your thing with the valve, re-install everything then pull the string out. Worked great. I used an old hockey skate lace which is really long and thick.
On head valve spring compressor at work.
Here's the valve spring, retainer and locks before removing the inner spring.
A few of the inner springs that have been removed. I got this plastic tray to keep things organized.
Don't remember showing this pic before but here is the cracked oil pump housing. This was from Precision oil pumps. They smooth the ports and remove the casting flash from the housing, coat the gears and check all clearances. Expensive junk now.
I smoothed out the new pump housing myself and swapped the fancy coated gears from the broken one.
Here's the issue with the Kevko pickup. There is a mounting tab which is supposed to be installed on the #3 main cap bolt. Works with the windage tray bolts but the studs I have do not have the provision for the tray so therefore are too short. The tab on the pickup is now just floating in space. The solution is Kevko M101-1. Wish I had known that when I bought the pan and pickup...
So that's where the engine is right now. I figure once the stud comes then it's basically just assembling the rest of the parts. Won't hold my breath but there really aren't any other stones that have been left unturned. Hope I don't eat my words.
I will detail the transmission stuff in the next post.
More to come.
rmchrgr
Skate And Destroy
Alright, so while I was fumbling around with the engine, I took a break to get my brain straightened out and built the transmission.
I've worked on various transmissions through work and school so I know my way around somewhat but I've never done a performance build up on my own. Getting them out and in is no problem and taking them apart is of course not that hard. Putting it back together obviously takes a little more effort.
It's not unlike building an engine really. You gotta choose the right parts for the application, check your clearances, have some specific tools and know how to use 'em and you must work cleanly.
So this build up centered around a well-used, grimy A999. It' a '76 non lockup unit. The hard parts were in decent enough shape and the clutches even looked OK so it didn't appear too abused, just really dirty. The case was shot though. the bellhousing had been repaired but the mating surface would have needed to be milled flat to work. So I got a 'race prepped' case from A&A but cleaned and re used the original tail housing. I was able to reuse the hard parts inside but went with new clutches and steels, bands and servos. I swapped the valve body from the unit I took out of the car. I replaced most of the bushings and thrust washers too.
I didn't have too much difficulty with it. Save for the proper bushing driver set, I have most of the tools needed to do the job including several flavors of snap ring pliers and a return spring compressor for the direct drum. A local shop did the bushings for me really cheaply and quick so buying the driver set to use a few times didn't make sense.
To get the servos in, I borrowed a burly valve spring compressor from a guy I used to work with. That thing is pro grade beefy and the servos went in without a whimper.
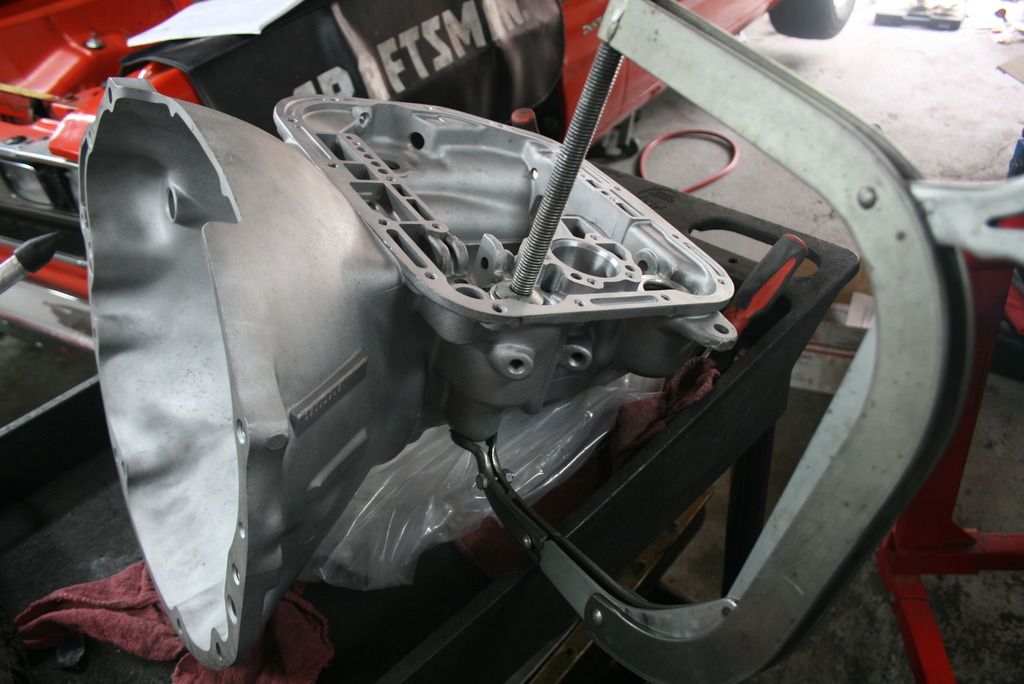
Only thing I could have used was a bench mount holder. Might invest in one for the next trans build up. Wrestling with the case on the bench or on my cart was not the best.
I went slow and steady cleaned everything twice which took forever. I double checked all the clearances where necessary - gear train, front and rear drum clutch packs and end play. I did have to play around with selective snap rings in the drums but the gear train was good. The end play is a little on the looser side but I couldn't really do much about it so I went with what I had. It's within spec just not as tight as I would have liked.
All in all, went together pretty easily. Of course there were a few hiccups but nothing like the engine where I had to go back and re do **** over and over. Most of the missteps were just ordering more parts when I found something I needed but hadn't ordered previously.
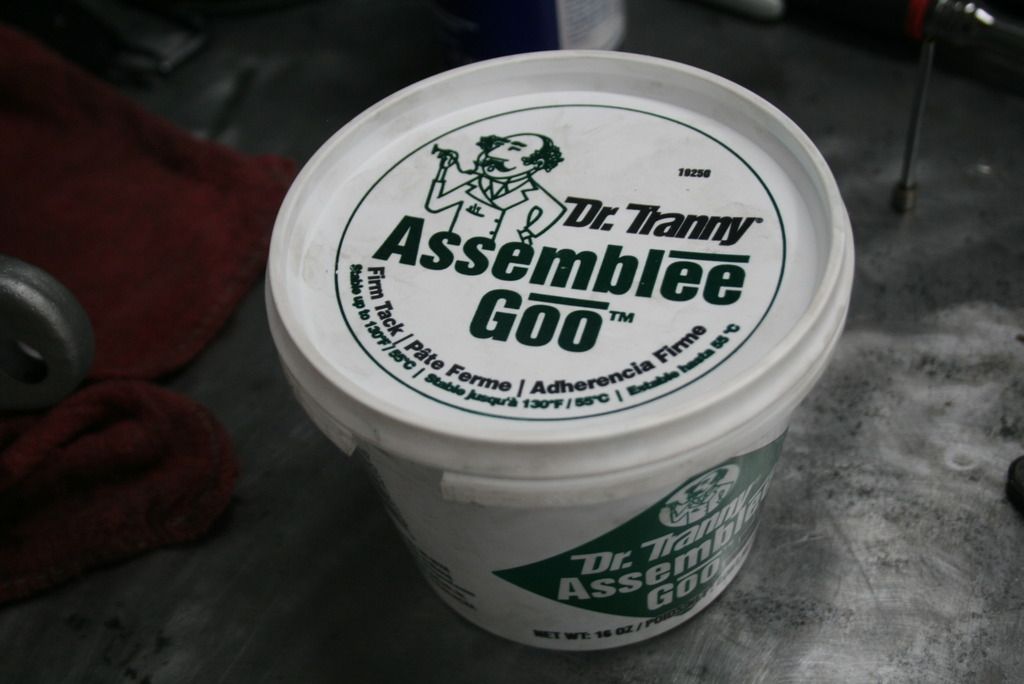
I used transmission specific assembly lube like we used to have at work which is really tacky. It's high quality stuff and not your typical assembly lube. It definitely helps with seals and stuff like that.
The last thing that was sort of uncharted territory for me was line pressure. I bought a line pressure spring from A&A at Carlisle but needed some education on it. I went back and forth on the phone with Turbo Action (who built my valve body) and A&A making sure I had things matched up correctly. There was a question of whether the reverse boost circuit in the valve body had been modified by T/A to reduce the pressure in reverse. (it wasn't) but it was agreed that I could use the spring anyway because the overall line pressure was still faily lo at around 105-110 psi. The spring should put e over 135-140 and potentially up to 150 in gear under load.
Getting the spring in was kind of a *****. You wrangle the spring in behind a plate and force it down while cinching down some little screws. It's tricky to do without a third hand but I managed to get it in and (hopefully) adjusted to the proper point. Since I have the A&A case, there is a bung welded on the pan rail and drilled out to access the line pressure spring to adjust it without dropping the pan. Genius!
Enough babble, here's some pics. I didn't get shots of everything though, sorry picture mongers.
This is the assembly lube stuff. The stuff we used at work was called Smart Blend but this is what I got from the parts place.
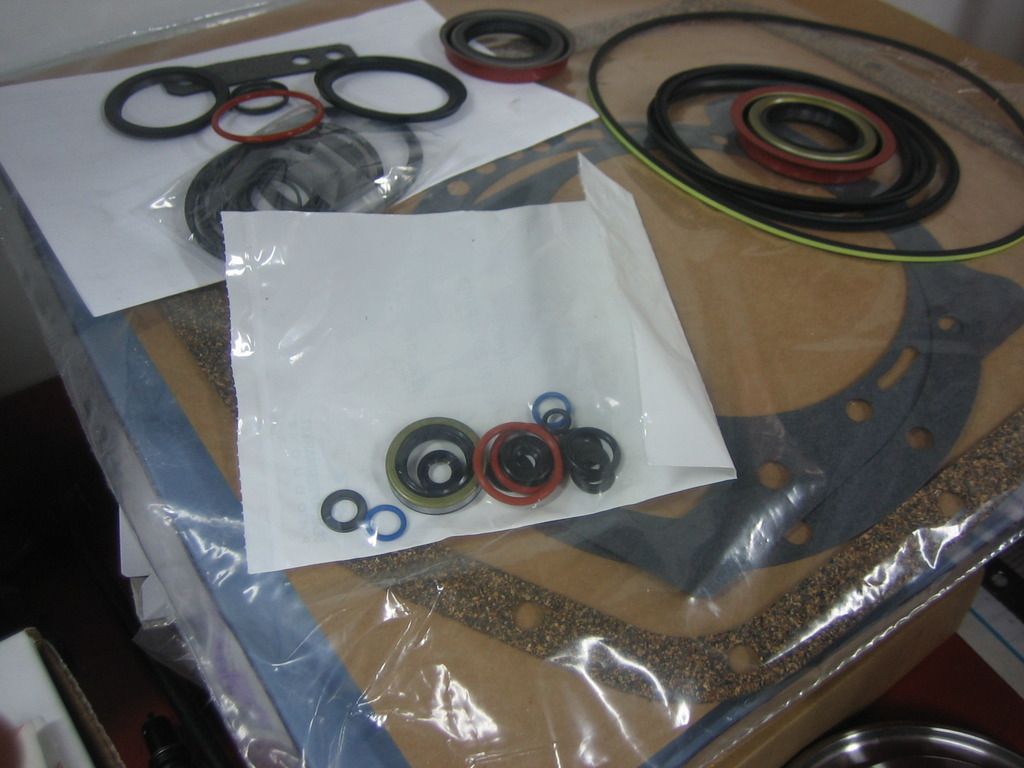
Rebuild kit.
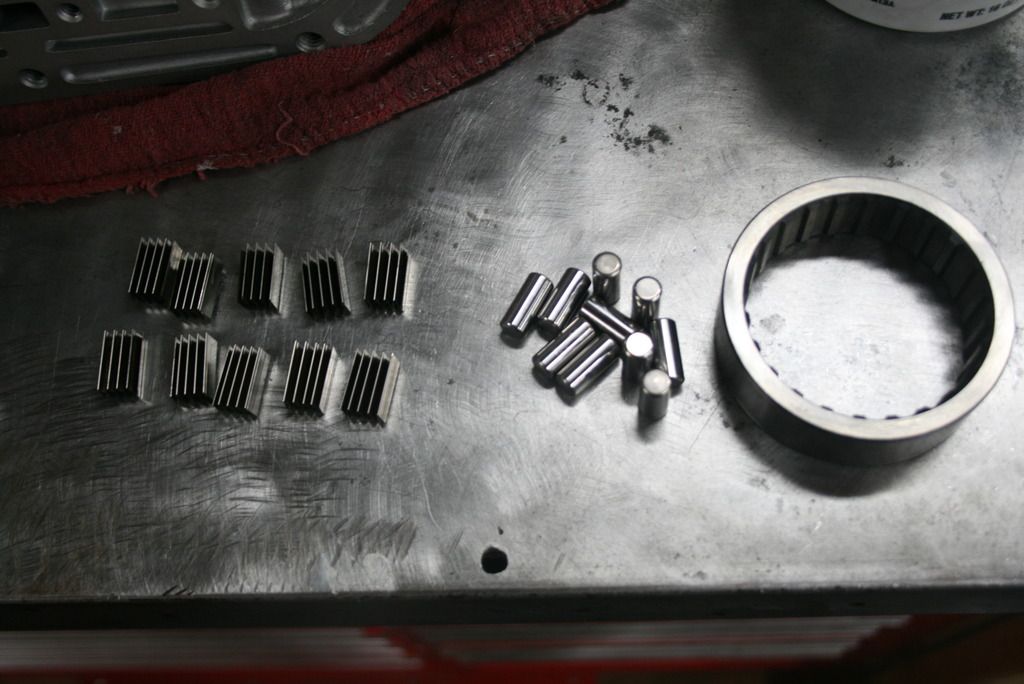
Sprag parts cleaned and ready to install...
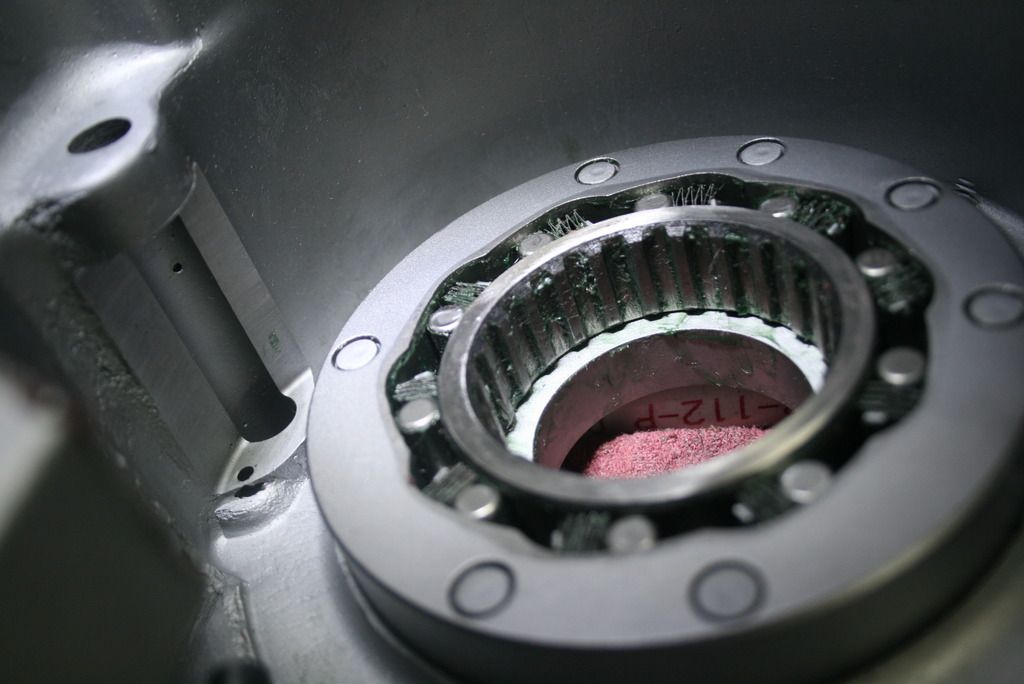
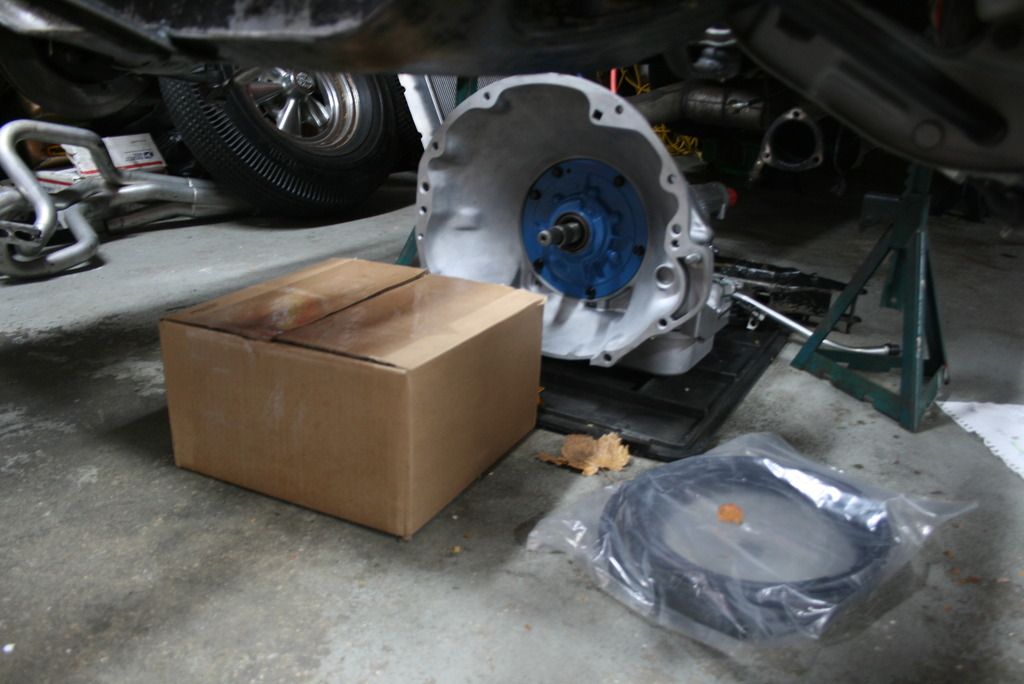
...and installed in the case.
Low reverse drum (which houses the rear planetary gear set) in place.
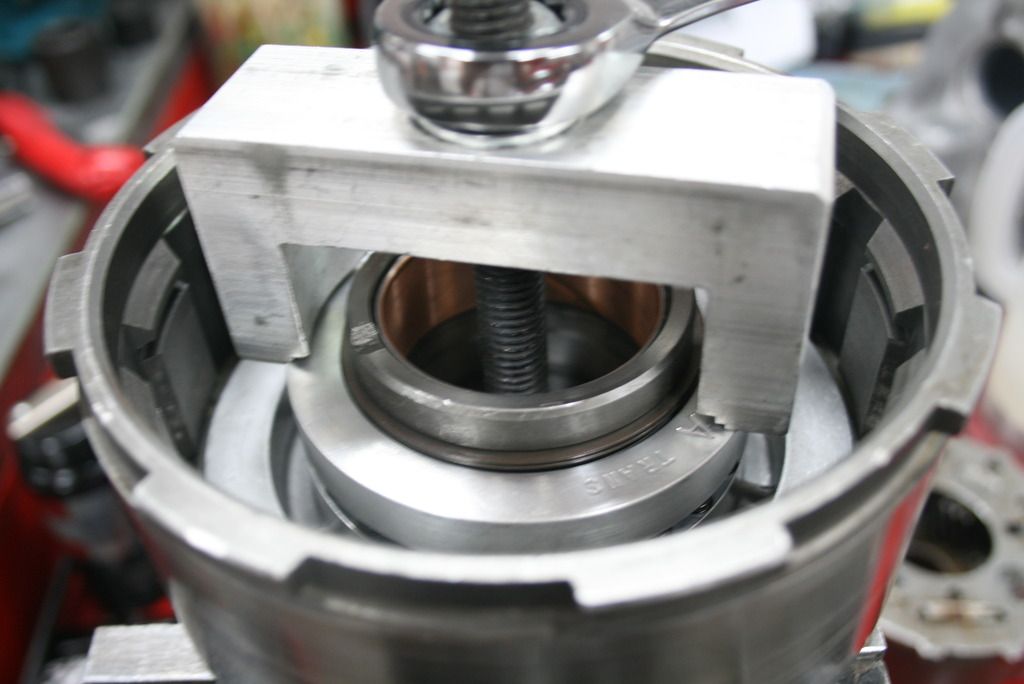
Servo crushing spring compressor in action.
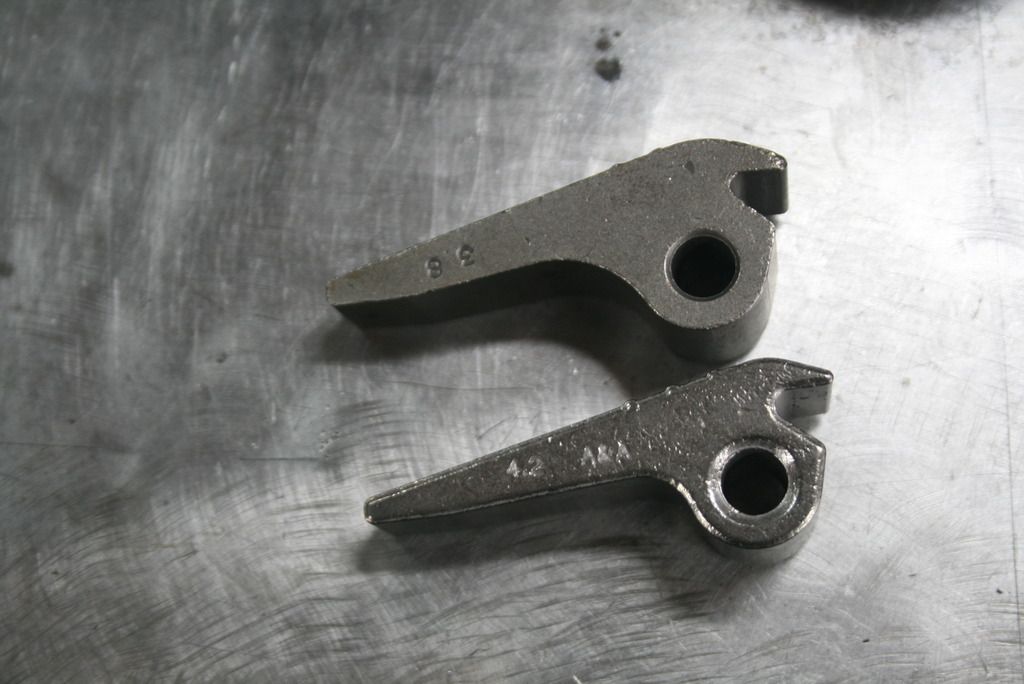
Comparison pic of a factory 3.8 lever and the 4.2. The majority of things I've read about levers say the 5.0 is overkill in most applications.
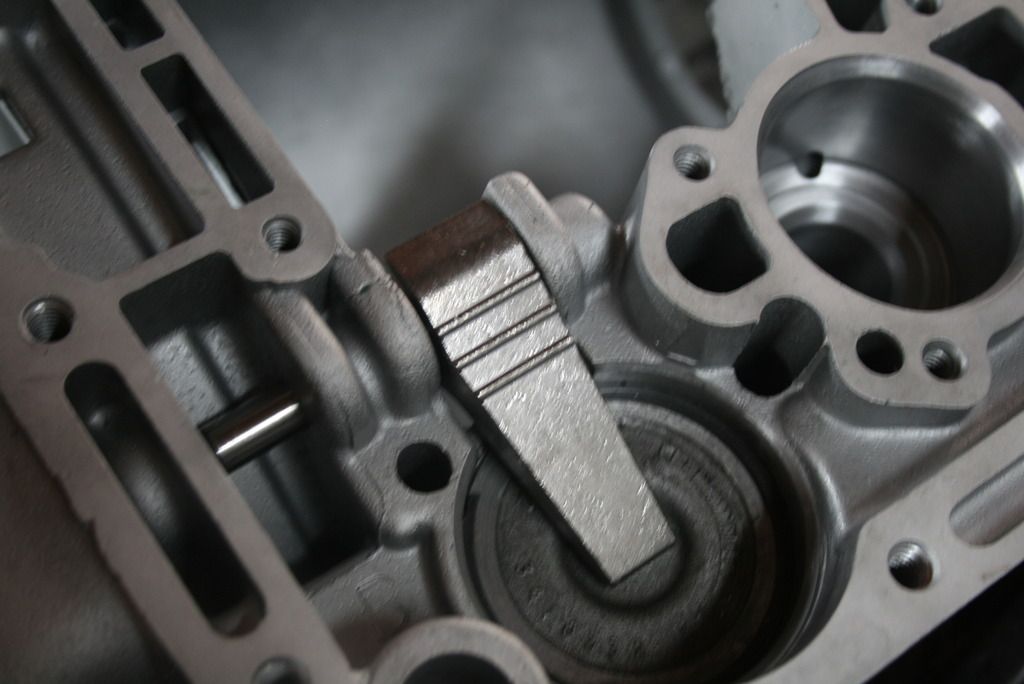
Lever installed. I used a reinforced band strut here but it's not in the pic because the drum is not in yet.
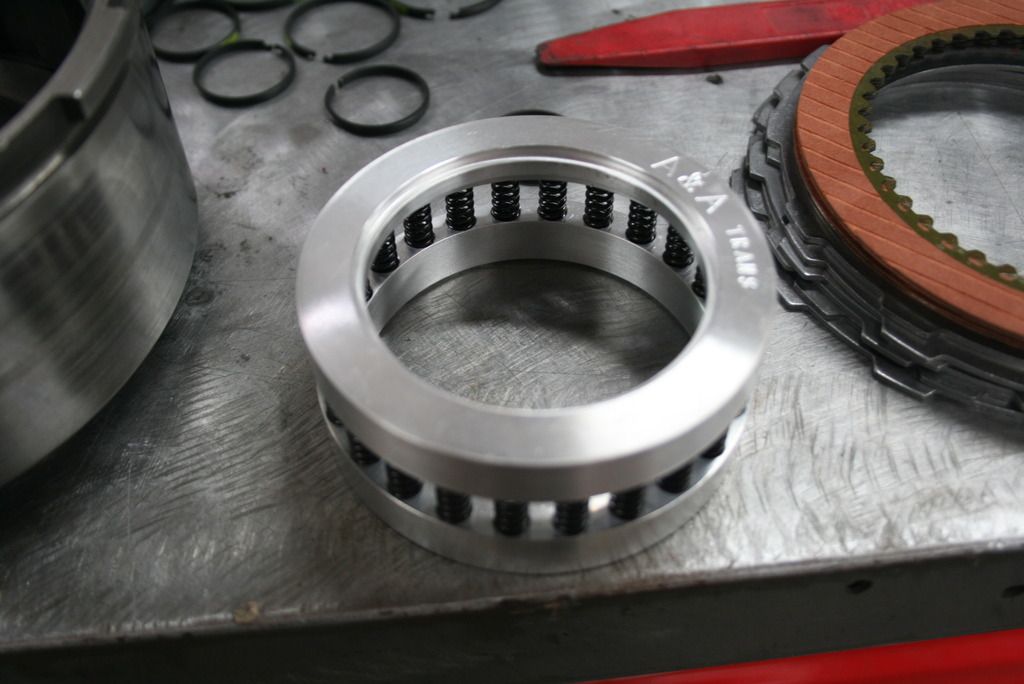
This is a multi-spring retainer for the direct drum to replace the factory part. Its supposed to eliminate shift overlap. The next pic is of the factory spring which according to A&A is wound the wrong way and causes said overlap. Note the spring retainer which got destroyed by the spring compressor.

Gorilla spring compressor in action.
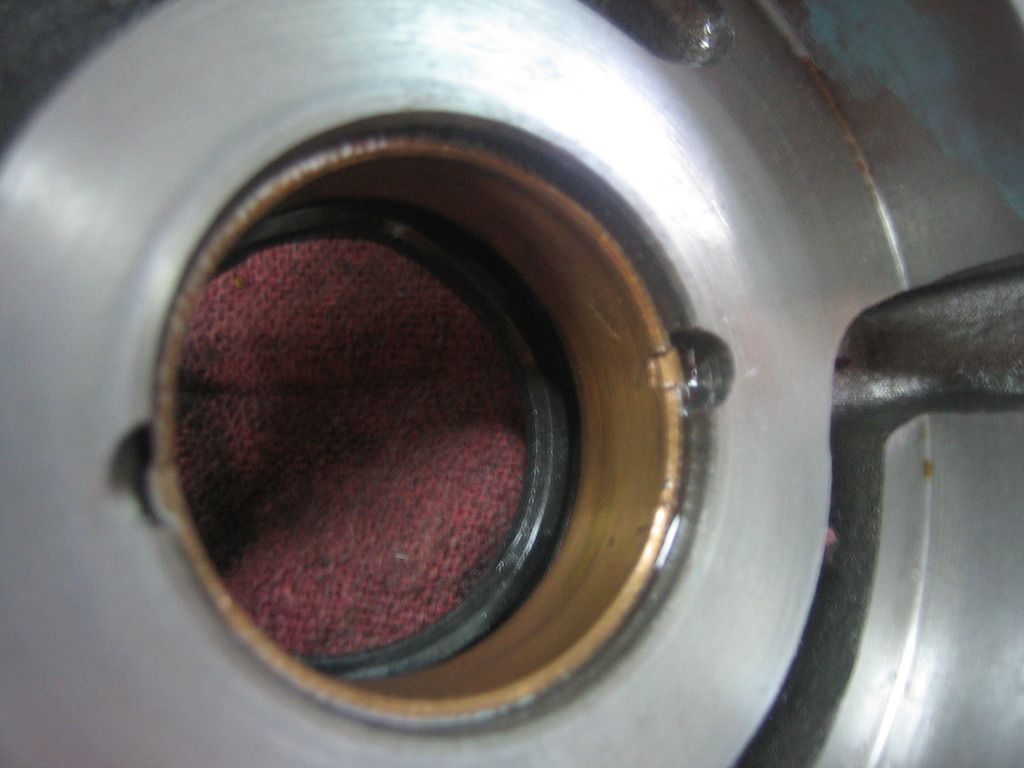
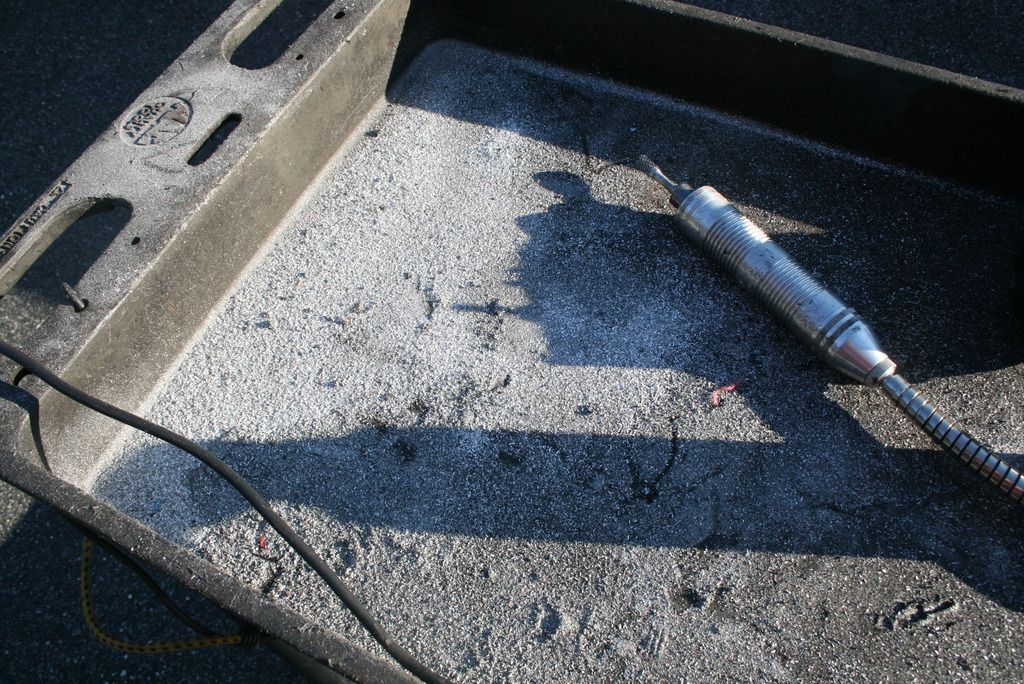
Moving towards the front of the trans. This is the old pump bushing. For performance converters, you want a babbit bushing which you can get from most of the vendors. Performance converters have different snout material and the brass bushing chews it up in hsort order - bad.
I didn't have a bushing set at that one point but knew I needed to replace the pump bushing with said babbit piece. I went to the local trans place and the guy looked at me like I was crazy asking for a babbit bushing. He tried to convince me to use a "Sonnax" (genral replacement parts) brass one because it's 'better' but I insisted he get me a babbit one since Dyanamic and A&A both said I need to use it. He found one and put it in. I eventually got a bushing kit later on and had him install the rest of them. I have an extra babbit pump bushing now or next time.
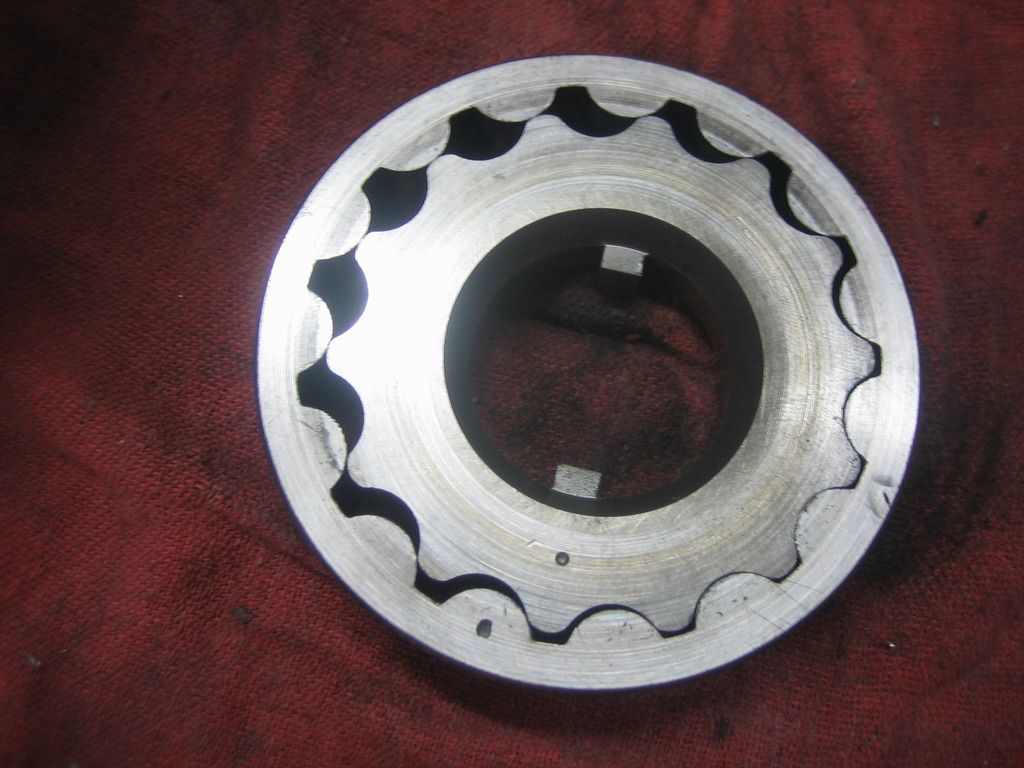
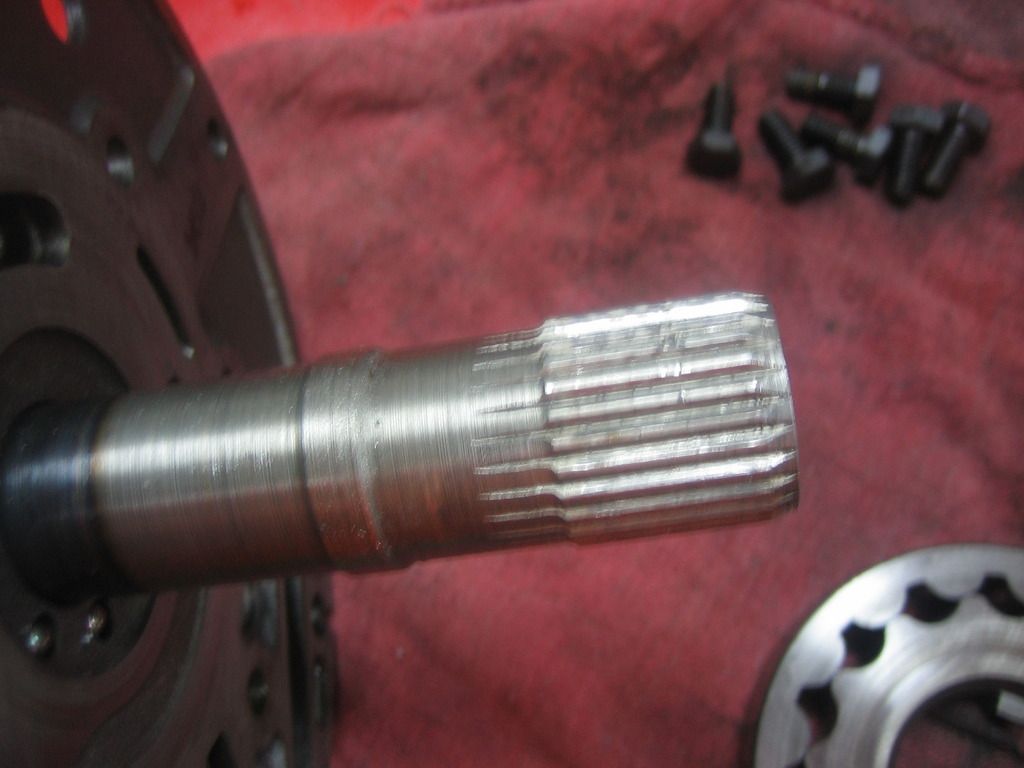
Just a shot of the pump gears cleaned up and ready to go in. There were a few burrs and nicks on the converter hub tangs but no major wear so they got re used.
The input splines were a little chewed up si I filed down the burrs with a stone.
This is a little 'tool' I made to help install the shift tower in the valve body. If you've ever tried to do this without help, it's nearly impossible. There is a spring and a check ball whch you can see in the little housing. The ball rides on the detent rooster comb thing and is held in place with pressure from the spring. There is no way to install the tower while holding the ball and spring in place. I bent a piece of metal and put a dimple in one end to cup the ball. Then I was able to slide the tower in place and release the tool. The ball and spring did go flying once.
So that's all the pics I have for now. Thanks for hangin' with me through these last three posts. It was a lot of work to get this all together after my old computer took a dump.
More to come.
I've worked on various transmissions through work and school so I know my way around somewhat but I've never done a performance build up on my own. Getting them out and in is no problem and taking them apart is of course not that hard. Putting it back together obviously takes a little more effort.
It's not unlike building an engine really. You gotta choose the right parts for the application, check your clearances, have some specific tools and know how to use 'em and you must work cleanly.
So this build up centered around a well-used, grimy A999. It' a '76 non lockup unit. The hard parts were in decent enough shape and the clutches even looked OK so it didn't appear too abused, just really dirty. The case was shot though. the bellhousing had been repaired but the mating surface would have needed to be milled flat to work. So I got a 'race prepped' case from A&A but cleaned and re used the original tail housing. I was able to reuse the hard parts inside but went with new clutches and steels, bands and servos. I swapped the valve body from the unit I took out of the car. I replaced most of the bushings and thrust washers too.
I didn't have too much difficulty with it. Save for the proper bushing driver set, I have most of the tools needed to do the job including several flavors of snap ring pliers and a return spring compressor for the direct drum. A local shop did the bushings for me really cheaply and quick so buying the driver set to use a few times didn't make sense.
To get the servos in, I borrowed a burly valve spring compressor from a guy I used to work with. That thing is pro grade beefy and the servos went in without a whimper.
Only thing I could have used was a bench mount holder. Might invest in one for the next trans build up. Wrestling with the case on the bench or on my cart was not the best.
I went slow and steady cleaned everything twice which took forever. I double checked all the clearances where necessary - gear train, front and rear drum clutch packs and end play. I did have to play around with selective snap rings in the drums but the gear train was good. The end play is a little on the looser side but I couldn't really do much about it so I went with what I had. It's within spec just not as tight as I would have liked.
All in all, went together pretty easily. Of course there were a few hiccups but nothing like the engine where I had to go back and re do **** over and over. Most of the missteps were just ordering more parts when I found something I needed but hadn't ordered previously.
I used transmission specific assembly lube like we used to have at work which is really tacky. It's high quality stuff and not your typical assembly lube. It definitely helps with seals and stuff like that.
The last thing that was sort of uncharted territory for me was line pressure. I bought a line pressure spring from A&A at Carlisle but needed some education on it. I went back and forth on the phone with Turbo Action (who built my valve body) and A&A making sure I had things matched up correctly. There was a question of whether the reverse boost circuit in the valve body had been modified by T/A to reduce the pressure in reverse. (it wasn't) but it was agreed that I could use the spring anyway because the overall line pressure was still faily lo at around 105-110 psi. The spring should put e over 135-140 and potentially up to 150 in gear under load.
Getting the spring in was kind of a *****. You wrangle the spring in behind a plate and force it down while cinching down some little screws. It's tricky to do without a third hand but I managed to get it in and (hopefully) adjusted to the proper point. Since I have the A&A case, there is a bung welded on the pan rail and drilled out to access the line pressure spring to adjust it without dropping the pan. Genius!
Enough babble, here's some pics. I didn't get shots of everything though, sorry picture mongers.
This is the assembly lube stuff. The stuff we used at work was called Smart Blend but this is what I got from the parts place.
Rebuild kit.
Sprag parts cleaned and ready to install...
...and installed in the case.
Low reverse drum (which houses the rear planetary gear set) in place.
Servo crushing spring compressor in action.
Comparison pic of a factory 3.8 lever and the 4.2. The majority of things I've read about levers say the 5.0 is overkill in most applications.
Lever installed. I used a reinforced band strut here but it's not in the pic because the drum is not in yet.
This is a multi-spring retainer for the direct drum to replace the factory part. Its supposed to eliminate shift overlap. The next pic is of the factory spring which according to A&A is wound the wrong way and causes said overlap. Note the spring retainer which got destroyed by the spring compressor.
Gorilla spring compressor in action.
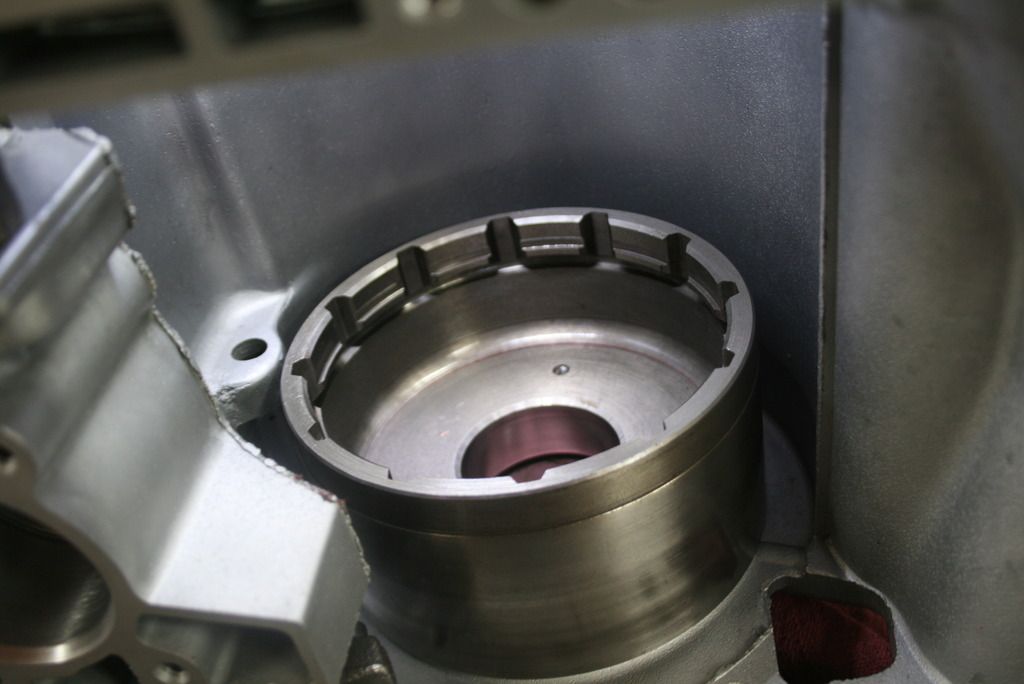
Moving towards the front of the trans. This is the old pump bushing. For performance converters, you want a babbit bushing which you can get from most of the vendors. Performance converters have different snout material and the brass bushing chews it up in hsort order - bad.
I didn't have a bushing set at that one point but knew I needed to replace the pump bushing with said babbit piece. I went to the local trans place and the guy looked at me like I was crazy asking for a babbit bushing. He tried to convince me to use a "Sonnax" (genral replacement parts) brass one because it's 'better' but I insisted he get me a babbit one since Dyanamic and A&A both said I need to use it. He found one and put it in. I eventually got a bushing kit later on and had him install the rest of them. I have an extra babbit pump bushing now or next time.
Just a shot of the pump gears cleaned up and ready to go in. There were a few burrs and nicks on the converter hub tangs but no major wear so they got re used.
The input splines were a little chewed up si I filed down the burrs with a stone.
This is a little 'tool' I made to help install the shift tower in the valve body. If you've ever tried to do this without help, it's nearly impossible. There is a spring and a check ball whch you can see in the little housing. The ball rides on the detent rooster comb thing and is held in place with pressure from the spring. There is no way to install the tower while holding the ball and spring in place. I bent a piece of metal and put a dimple in one end to cup the ball. Then I was able to slide the tower in place and release the tool. The ball and spring did go flying once.
So that's all the pics I have for now. Thanks for hangin' with me through these last three posts. It was a lot of work to get this all together after my old computer took a dump.
More to come.
The small stuff just kills you,man. At least your on it...
rmchrgr
Skate And Destroy
OK, been back at it a little more. Motor is in the final assembly stage so to speak. Oil pump and pan are on, timing cover is on. Heads are torqued down and I'm setting up the valve train for the final time. But of course there's more stupidity to overcome.
Since this combo is going to be pretty robust, I thought it might be a good idea to make sure there's a enough fuel on tap for 'spirited' driving. I went back and forth trying to decide whether to spend the coin on a fancy electric pump but the more I looked into it, I began to realize that it wasn't worth the hassle. I wanted an in-tank Phantom pump which is $440 off the bat. Add to that a new tank, by-pass regulator ($$), material for new lines and making them, all the associated fittings, wiring the thing and on and on.
So I abandoned the electric pump idea and got a new mechanical fuel pump from Clay Smith. This is a gnarly 6 vane type and can support way more horsepower than I will ever have. It's BIG though and takes up a lot of room so there are interference issues. Except for fuel line fittings, I never had a fitment problem with the Carter pump I had previously. I love to make extra work for myself.
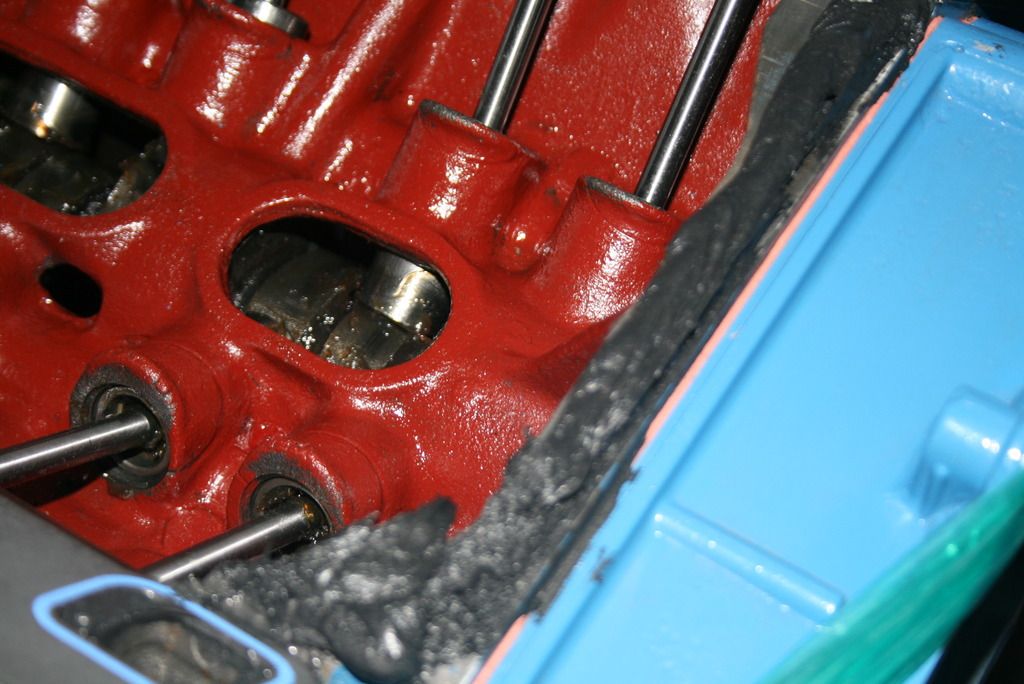
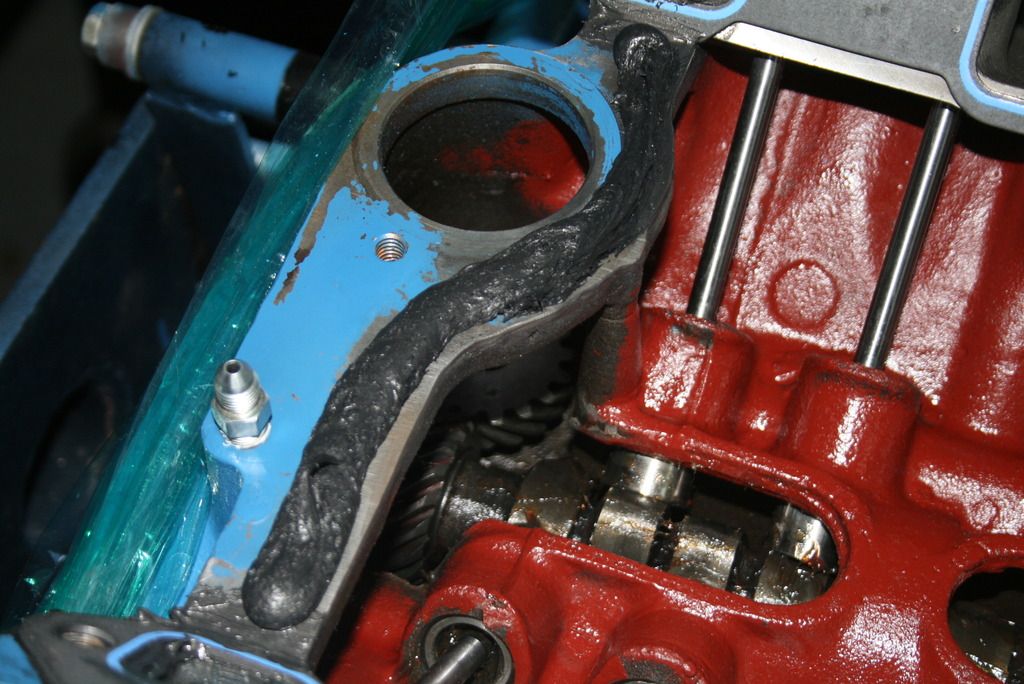
So in any event, there's a couple places where the C.S. pump is making contact with other stuff. one spot is where the casting boss sticks out from the bottom of the passenger side of the block and hits the pump body. No big deal, the boss is easily ground down to provide enough room.
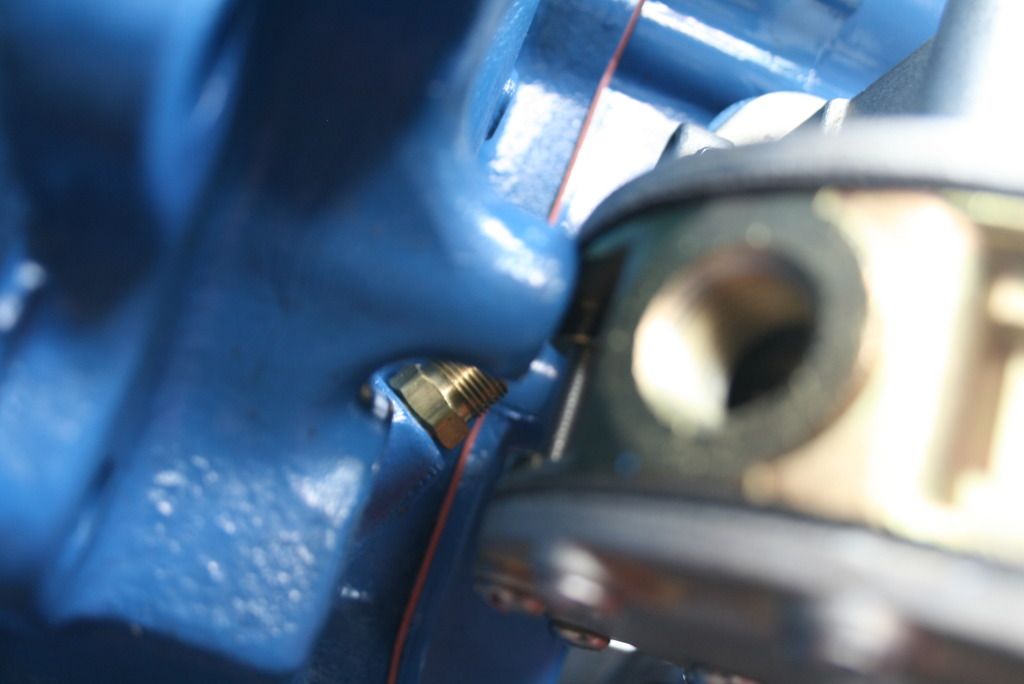
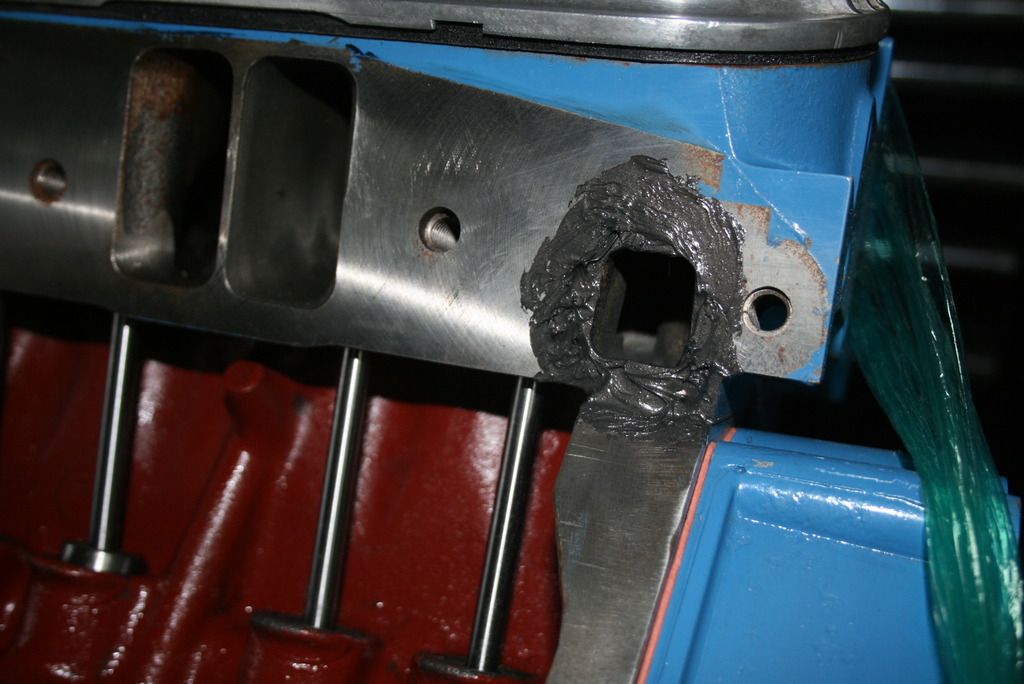
The major issue here is with the water pump inlet. The pump body is large enough that it's right in line with the inlet where it attaches to the lower hose. Unfortunately, the solution is to slice the W.P. inlet, re-clock the lower part and weld it back on to gain clearance. I could get a '70 w.p. housing but my radiator would have the inlet on the wrong side. Guess I'm going to the welder next week to get this done. PITA.
The marks are from me trying to figure out how to cut the lower inlet.
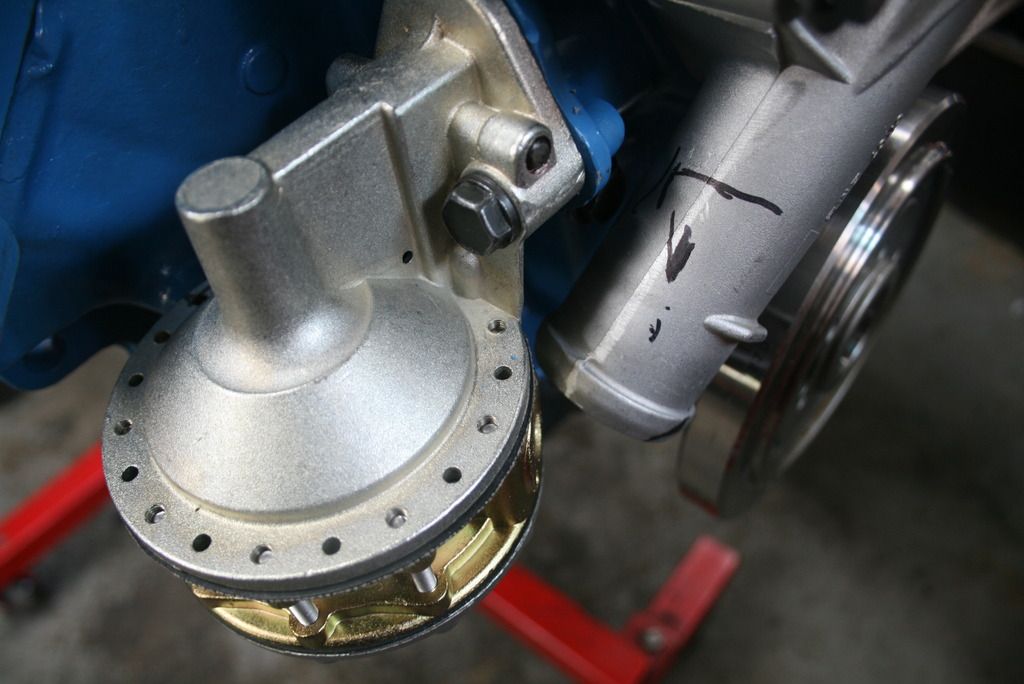
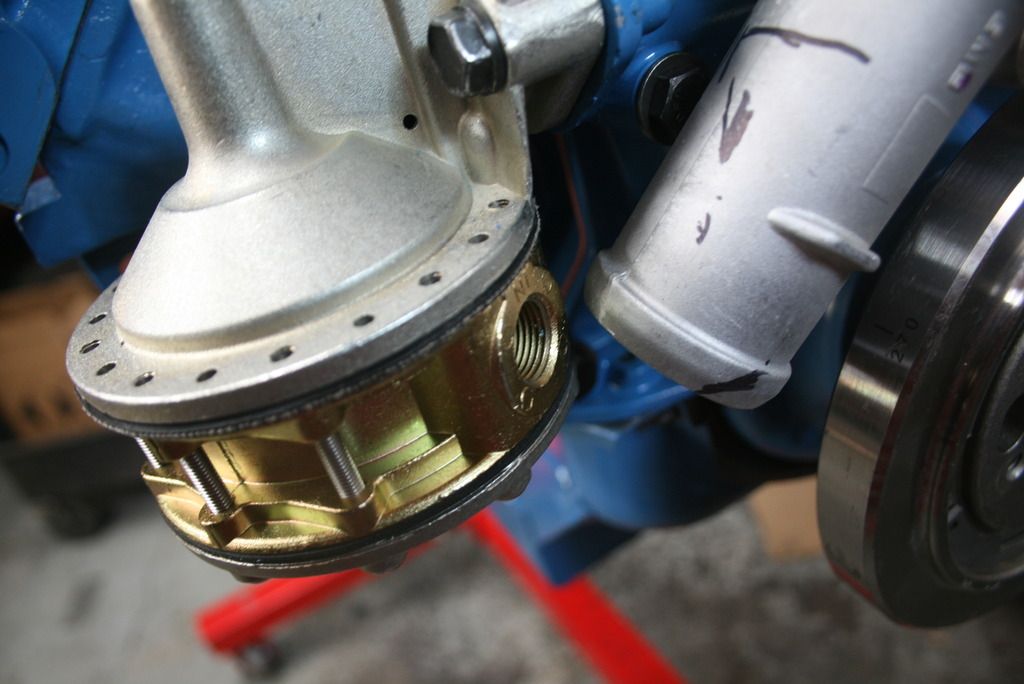
The last issue with this silly pump is the inlet/outlet arrangement. Unlike the Carter which you can clock pretty much any way you want since the inlet/outlet are on two different adjustable levels, this pump has them 180 degrees apart and no matter which way you clock it, they are 180 apart. The solution is the Edelbrock bottom feed plate. This plate will solve the problem of where the lines come out because the plate relocates them under the pump. Might have to get a few more adapter fittings but the plate is a good idea. On the old combo there was slight interference with the fittings coming out of the Carter pump, they were right up against the alternator bracket which I never liked.
As I mentioned earlier, I am doing the final setup on the valve train. Lifters are clean, lubed up and in. The Hughes rockers I have require some time to set up. They give you spacers and shims to get the rocker tip centered over the valve. It takes some trial and error to get the shims right. I wound up doing two at a time in between the rocker hold downs since it was too difficult trying to do more than that at one time. The hold downs are essentially in a fixed position so the side-to-side adjustment is accomplished with the shims. I would eyeball it first without shims. Then I would move the rocker whichever way it needed to go and add shims accordingly until there was little end play. I believe .010" is what you're looking for, have to go back and check it to make sure.
Just a general pic during the install process.
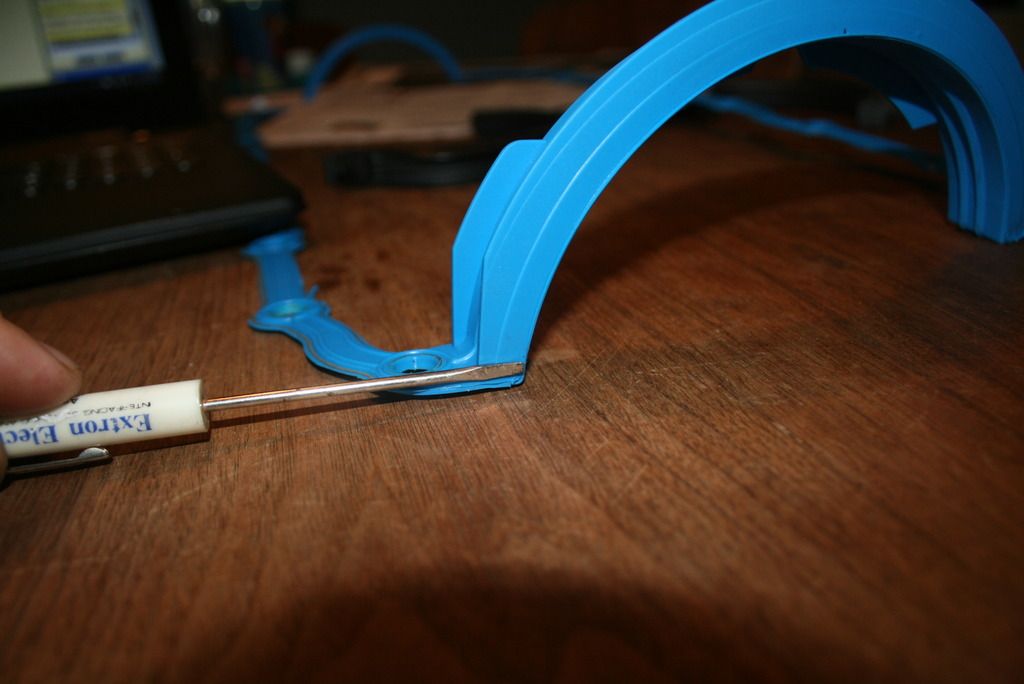
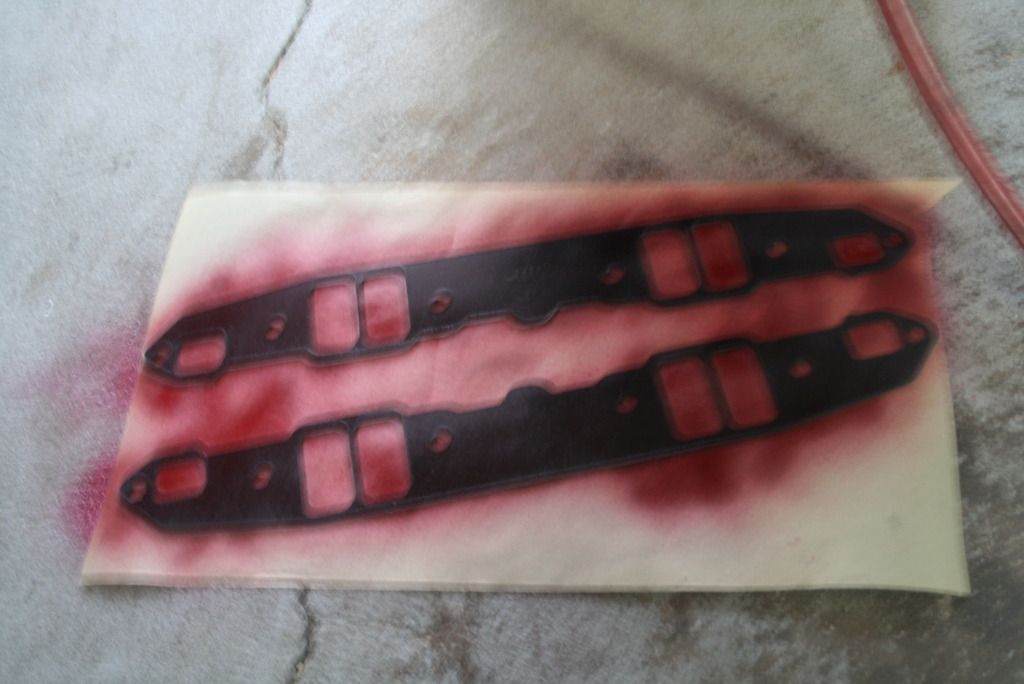
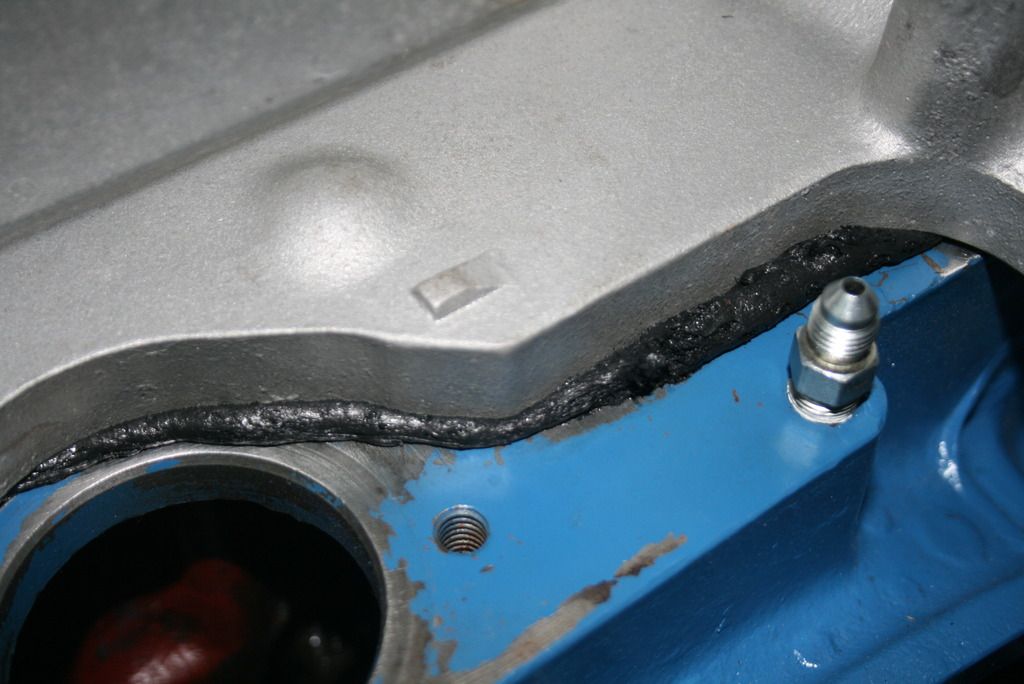
So just a few points on the oil pan. I had thought about using the steel-core pan rails from a 5.2 pan gasket and mating them to the regular 340 end seals to make a one-piece gasket. My theory did not work out so well because the steel-core gaskets are double the thickness of the regular gaskets and won't compress enough leaving a space for leaks. This of course is the opposite of what I was after with this idea so I scrapped it and went with the regular Fel-Pro 4 piece RTV smear mess. I hope this thing does not leak, I am going to FREAK. I hate oil leaks.
The screwdriver tip is pointing to where I wanted to mate the two gaskets together into a one piece but ultimately my idea was not going to work. I might try it on another engine someday.
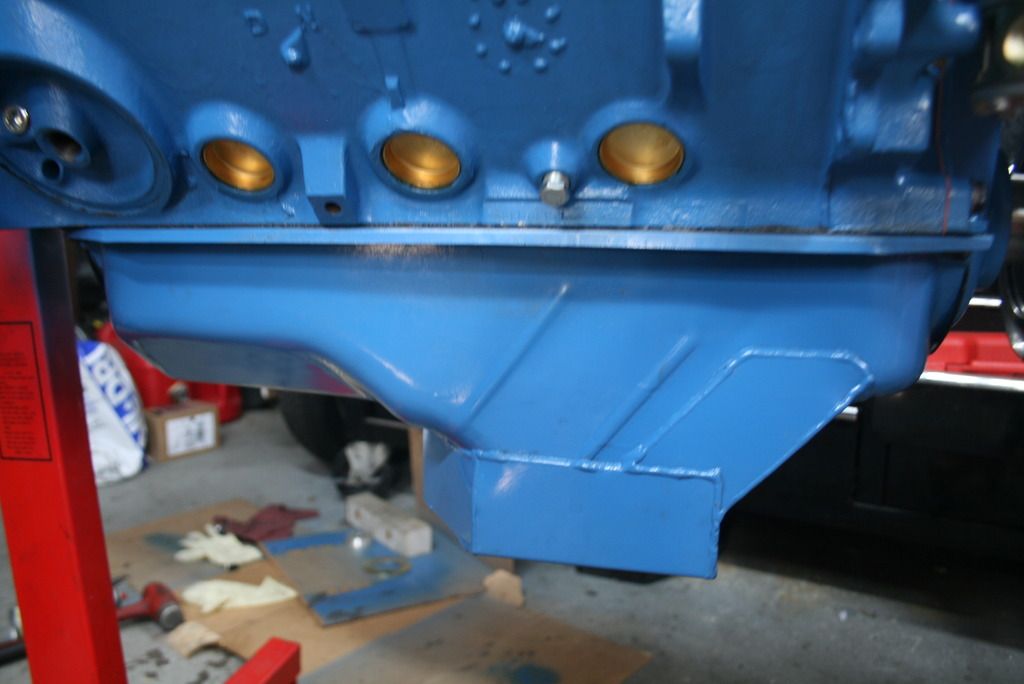
I also had to repaint the oil pan. It came from Kevko with some residue on it which I cleaned up. Unfortunately the cheap paint they use is really thin and it started coming off in some spots so I stripped it down and painted it to match the block and heads. It's a lot of blue, yes.
More to come.
Since this combo is going to be pretty robust, I thought it might be a good idea to make sure there's a enough fuel on tap for 'spirited' driving. I went back and forth trying to decide whether to spend the coin on a fancy electric pump but the more I looked into it, I began to realize that it wasn't worth the hassle. I wanted an in-tank Phantom pump which is $440 off the bat. Add to that a new tank, by-pass regulator ($$), material for new lines and making them, all the associated fittings, wiring the thing and on and on.
So I abandoned the electric pump idea and got a new mechanical fuel pump from Clay Smith. This is a gnarly 6 vane type and can support way more horsepower than I will ever have. It's BIG though and takes up a lot of room so there are interference issues. Except for fuel line fittings, I never had a fitment problem with the Carter pump I had previously. I love to make extra work for myself.
So in any event, there's a couple places where the C.S. pump is making contact with other stuff. one spot is where the casting boss sticks out from the bottom of the passenger side of the block and hits the pump body. No big deal, the boss is easily ground down to provide enough room.
The major issue here is with the water pump inlet. The pump body is large enough that it's right in line with the inlet where it attaches to the lower hose. Unfortunately, the solution is to slice the W.P. inlet, re-clock the lower part and weld it back on to gain clearance. I could get a '70 w.p. housing but my radiator would have the inlet on the wrong side. Guess I'm going to the welder next week to get this done. PITA.
The marks are from me trying to figure out how to cut the lower inlet.
The last issue with this silly pump is the inlet/outlet arrangement. Unlike the Carter which you can clock pretty much any way you want since the inlet/outlet are on two different adjustable levels, this pump has them 180 degrees apart and no matter which way you clock it, they are 180 apart. The solution is the Edelbrock bottom feed plate. This plate will solve the problem of where the lines come out because the plate relocates them under the pump. Might have to get a few more adapter fittings but the plate is a good idea. On the old combo there was slight interference with the fittings coming out of the Carter pump, they were right up against the alternator bracket which I never liked.
As I mentioned earlier, I am doing the final setup on the valve train. Lifters are clean, lubed up and in. The Hughes rockers I have require some time to set up. They give you spacers and shims to get the rocker tip centered over the valve. It takes some trial and error to get the shims right. I wound up doing two at a time in between the rocker hold downs since it was too difficult trying to do more than that at one time. The hold downs are essentially in a fixed position so the side-to-side adjustment is accomplished with the shims. I would eyeball it first without shims. Then I would move the rocker whichever way it needed to go and add shims accordingly until there was little end play. I believe .010" is what you're looking for, have to go back and check it to make sure.
Just a general pic during the install process.
So just a few points on the oil pan. I had thought about using the steel-core pan rails from a 5.2 pan gasket and mating them to the regular 340 end seals to make a one-piece gasket. My theory did not work out so well because the steel-core gaskets are double the thickness of the regular gaskets and won't compress enough leaving a space for leaks. This of course is the opposite of what I was after with this idea so I scrapped it and went with the regular Fel-Pro 4 piece RTV smear mess. I hope this thing does not leak, I am going to FREAK. I hate oil leaks.
The screwdriver tip is pointing to where I wanted to mate the two gaskets together into a one piece but ultimately my idea was not going to work. I might try it on another engine someday.
I also had to repaint the oil pan. It came from Kevko with some residue on it which I cleaned up. Unfortunately the cheap paint they use is really thin and it started coming off in some spots so I stripped it down and painted it to match the block and heads. It's a lot of blue, yes.
More to come.
FWIW, I like the one peice Mr. Gasket pan gasket. It has rings to prevent to much crush. There a little tricky to instal.
rmchrgr
Skate And Destroy
FWIW, I like the one peice Mr. Gasket pan gasket. It has rings to prevent to much crush. There a little tricky to instal.
No one makes a one piece gasket for the 340 pan, 5.2/5.9 only. It would be nice to have a one piece for the LA 318/340 though. If the regular gasket leaks, I will give my idea a try.
You can use the 5.9 gasket on an LA 360 but you have to modify the pan by welding in the little kick outs at the corners.
rmchrgr
Skate And Destroy
Geez, updates have been few and far between here lately. Not going to apologize since I didn't do anything wrong but I feel bad for 'not putting the time in'. That said, the engine is basically done save for a few things that have been really tough to get past.
Buying a truck certainly didn't help. The truck runs and drives OK but it is a project that lately I have been sinking more time into than the Duster. Maybe I needed a break from it for a while though, what with all the missteps and do-overs.
Regardless, I'm going to admit something here that has been eating at me - I am afraid of sealing up the intake on the 416.
There, I said it.
I don't know how to do it, actually. Where do you put the goop? Do I use the cork gaskets or use a mountain of silicone instead? If I use silicone, do I cut the little head gasket tabs off? And on and on. This is just procedural stuff but the questions are legitimate. I want to get it right and not have any leaks. I hate leaks.
But deeper than that, there is a gnawing feeling that once I finally do get this step completed, it's done. And that's when the second guessing starts. Did I degree the cam right? Did I set up the rocker arms right? What if the carb is way off when I fire it? I need to dyno it, I need to do this I need to do that. What could I have done wrong? Paralysis by analysis.
I basically gotta stop wussin' out and git 'er done.
The other major piece of trepidation I'm dealing with is the trans. I had the valve body apart and changed the pressure spring so I want to test it somehow before I put it behind my brand new motor. I called around looking for someone with a transmission dyno. Freddy Brown transmissions said they have one but basically could only check pressure but also said he they could 'make it shift'. Hmmm..
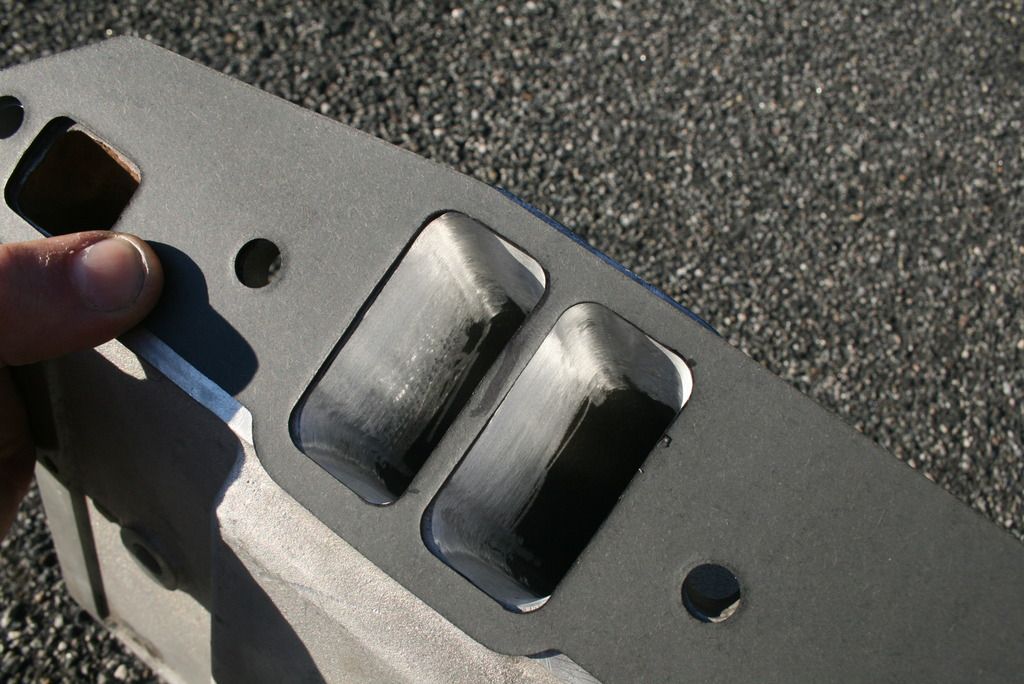
While agonizing over the intake gaskets, I did manage to gasket match the intake. It was really nice day so I broke out the burrs and started whittling. Not sure what I ended up with and may go back and touch it up again but I managed to create a small mountain of aluminum chips.
The port roofs and inside port walls needed the most material removal. Some of the roofs had almost a 1/8" mismatch between the gasket and port opening. The short side turn on the inside ports bulges out before it gets to the end of the runner so I ground that down until it was close to being even with the port outline. The floor did not need too much material removal. I did not go too far into the runners because I have short burrs. Only other work was to smooth out some of the sharper edges on the runner dividers and blend the carb throat into the lower plenum. I was leery of doing too much here so I only touched it up a few times and stopped.
Here's the Strip Dominator gasket match in progress. The dark black areas are marker ink to check where I'm at.
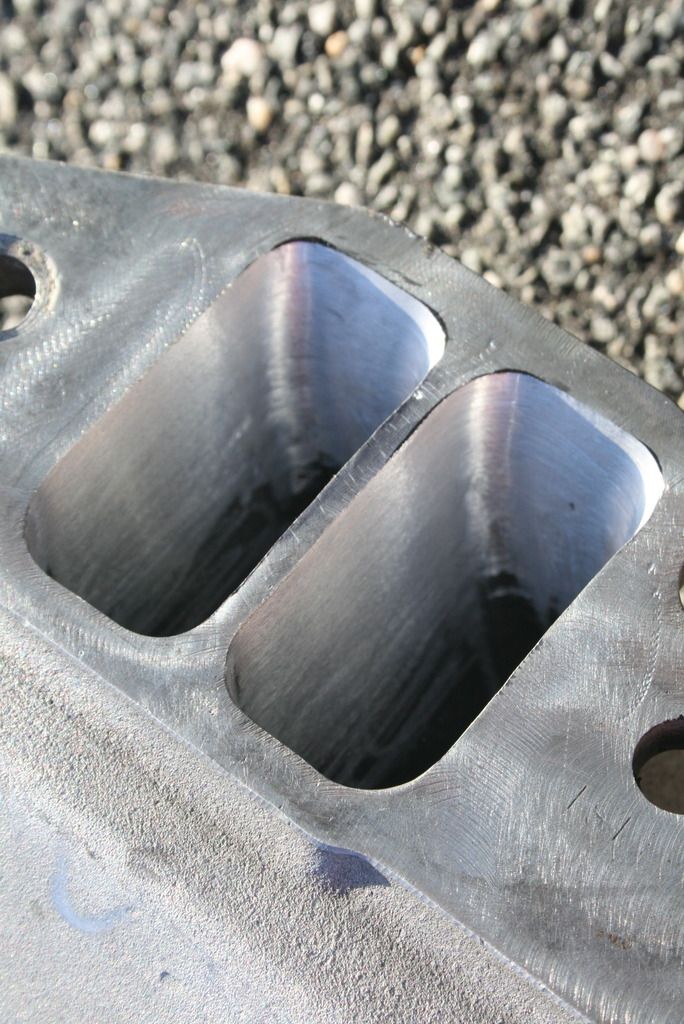
Looking at the port roof from the bottom.
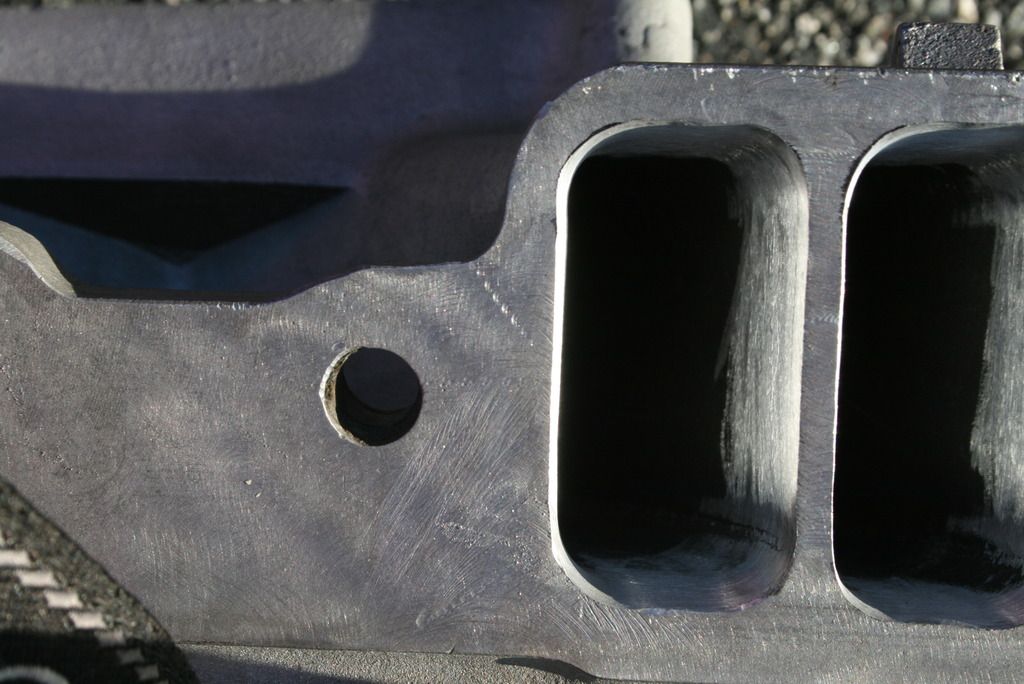
Here is a pic of the inside ports. The left most port wall had a good amount of material removed.
More.
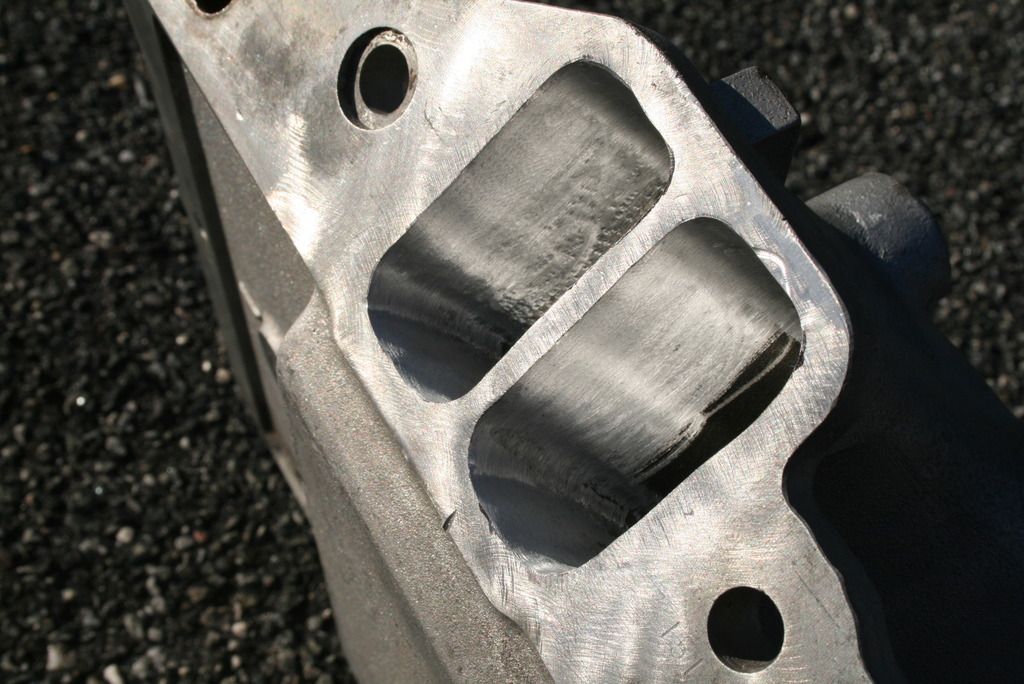
My Dumore grinder makes quick work of soft aluminum.
I know I am not the only one who has ever struggled to complete a project like this. I am so damn close though. Just wish I could have gotten some seat time with it before winter.
More to come.
Buying a truck certainly didn't help. The truck runs and drives OK but it is a project that lately I have been sinking more time into than the Duster. Maybe I needed a break from it for a while though, what with all the missteps and do-overs.
Regardless, I'm going to admit something here that has been eating at me - I am afraid of sealing up the intake on the 416.
There, I said it.
I don't know how to do it, actually. Where do you put the goop? Do I use the cork gaskets or use a mountain of silicone instead? If I use silicone, do I cut the little head gasket tabs off? And on and on. This is just procedural stuff but the questions are legitimate. I want to get it right and not have any leaks. I hate leaks.
But deeper than that, there is a gnawing feeling that once I finally do get this step completed, it's done. And that's when the second guessing starts. Did I degree the cam right? Did I set up the rocker arms right? What if the carb is way off when I fire it? I need to dyno it, I need to do this I need to do that. What could I have done wrong? Paralysis by analysis.
I basically gotta stop wussin' out and git 'er done.
The other major piece of trepidation I'm dealing with is the trans. I had the valve body apart and changed the pressure spring so I want to test it somehow before I put it behind my brand new motor. I called around looking for someone with a transmission dyno. Freddy Brown transmissions said they have one but basically could only check pressure but also said he they could 'make it shift'. Hmmm..
While agonizing over the intake gaskets, I did manage to gasket match the intake. It was really nice day so I broke out the burrs and started whittling. Not sure what I ended up with and may go back and touch it up again but I managed to create a small mountain of aluminum chips.
The port roofs and inside port walls needed the most material removal. Some of the roofs had almost a 1/8" mismatch between the gasket and port opening. The short side turn on the inside ports bulges out before it gets to the end of the runner so I ground that down until it was close to being even with the port outline. The floor did not need too much material removal. I did not go too far into the runners because I have short burrs. Only other work was to smooth out some of the sharper edges on the runner dividers and blend the carb throat into the lower plenum. I was leery of doing too much here so I only touched it up a few times and stopped.
Here's the Strip Dominator gasket match in progress. The dark black areas are marker ink to check where I'm at.
Looking at the port roof from the bottom.
Here is a pic of the inside ports. The left most port wall had a good amount of material removed.
More.
My Dumore grinder makes quick work of soft aluminum.
I know I am not the only one who has ever struggled to complete a project like this. I am so damn close though. Just wish I could have gotten some seat time with it before winter.
More to come.
Patience, my man. You should be seeing light,at the end of the tunnel...
rmchrgr
Skate And Destroy
Have not been on here much lately, figured I'd update just 'cuz. Thing is - I got no updates!
I will be honest, I have not been doing anything with the Duster lately. I still need to seal the intake to the block but the engine is pretty much done. After that, the rest of the external stuff needs to go on then fire it up and break it in. The trans has been done since the end of summer. I did some brake work when I finished the trans but other than that, there is nothing new to report.
I feel kinda bad about it frankly. See, I bought a truck a few months ago and it's been taking up all my time since it needed a bunch of work. I actually got pretty deep into it, like it became a mini restoration. Had to rebuild the entire rear end including axle bearings, re-seal the diff, all new brakes and lines, an almost complete re-wire, interior stuff, some front-end work... like, I can't believe how much crap I've done to this silly truck in the three months I have had it. I figured it would need some attention but not this much.
I believe I needed to take a step back from the Duster for a while though. I had been working on it for almost an entire year only to have have setback after setback at each step. It was getting frustrating to tell the truth. It seemed like everything I did needed to be completely re-thought or physically re-done after some screw up. I was starting to feel it a little bit, like what else is going to go wrong - everything was just kicking my ***. Guess I needed to put it down for a while and work on the truck to feel like I was succeeding at something.
Maybe it is appropriate to be updating today since I finally got the truck running again. I should be wrapping it up now so perhaps I can finally finish the 416 for real and break it in so it's ready for next season. It's been really warm here so luckily I have been able to work out in the garage comfortably when normally it'd be too cold.
I guess sometimes there are low points during car projects where the work stops and you take a break for a while. Maybe it helps to gain a little bit of a different perspective and come back with some new fire.
What I won't do is start piling things up on the car. Or pirate parts to use on the truck. (there have been a few instances where I could have but didn't) I also won't compromise anything just to get it done.
Forever on jack stands.
I am starting to rust.
What lies underneath.
More to come.
Well,'it is a ton of work your doing by yourself. And it takes time, a lot of it.
If your really feeling down in the dumps, I could always come over and open up a can of whoop *** and sing my blues tale of woe! LMAO!!!!!
I just had my 727 re done due to the tail shaft being windowed. Take 3!
Still waiting on final bore size of the 360 for the wife's car. Zzz Zzzz Zzz.....
Still waiting on the 904 news. More sleep time....
rmchrgr
Skate And Destroy
Thanks Rob.
LOL, your welcome Greg.
This is the time of year where everything slows down a bit so I say, no worries. I'm trying to jam in as much as I can since old man winter is late to his party. Seriously, I wake to 57*'s this morning.... Are you kidding me? This time of year? Record high of upper 60's and 70 something yesterday? Ha!
I think your doing fine. It's not like you have a ton of free time like I do. Heck, I work nights and my kids are big enough where the most time consuming issue is getting on my youngest kid butt for not doing homework.
Your blowing my doors off.
rmchrgr
Skate And Destroy
Well, things have picked back up recently for the Great Pumpkin. Got my truck running well enough to where it does not need much attention so I re-focused on getting the 416 done in time for the season.
So I cleared some hurdles by finally getting the motor sealed up. There was a lot of hemming and hawing on my part on how to do these jobs 'the right way'. Like usual, I overthought it and ended up wasting a lot of time. I even started two threads here on how to seal intakes and oil pans. I wound up getting so many different answers that it made it worse. I took what I thought was right from each thread, put it in a little instruction list and went for it. Sometimes you just have to turn of your brain and jump in. It wasn't like I hadn't done this kind of thing before. In hindsight I don't understand why it became such a big deal. Just one of those self-inflicted problems I guess.
The intake went on OK. I ditched the cork end rails and used the Right Stuff for the block. I spent some time and made sure the intake ports lined up with the ports on the heads as best as I could - I wouldn't want to mitigate my gasket matching efforts. Bottom line is that it's on and it ain't going anywhere. I even got all the pipe plugs in and temp gauge fitting in and mounted the throttle cable and return brackets.
Clean!
Sticky stuff on the gaskets.
Goop around the cooling passages.
Right Stuff
Done.
The oil pan went on pretty easily as well but I ran into a problem and had to remove it which was my worst nightmare. I was installing the coil bracket onto my intake without anything covering the hole for the distributor. There are three little screws that attach the coil to the bracket and one of them flipped out of my fingers and down the hole. I remember looking at the open hole while I was removing the screws thinking that I should cover it - 5 seconds later, the screw was in the oil pan. Doh!
I was ******* pissed - I mean I had just gotten over the hurdle of putting the thing on and now I have to take it off. I tried using a magnet through the drain plug hole to see if I could snatch it but it was not working. No choice, the pan had to came off.
Luckily, it came right off without too much fuss and the gaskets didn't rip. I used RTV sparingly so there was not a lot of mess to clean up. My big mistake was turning the motor over on the stand to get it off - when I turned it, the screw fell and ended up getting lodged between the top of a rod and piston top. I tried turning the crank over gently to dislodge it but it wouldn't budge. I ended up rotating the motor on the stand so the piston was upside-down and it finally rolled loose. All in all it took a good 15 minutes to get it out of there without doing any damage. Frustrating to say the least.
So then the pan went back on. I used a little more RTV this time. Once back over, first thing I did was to stab a distributor in there! I'm no dummy!
So I'm back on the horse after the screw-down-the-hole debacle. Currently, I am working on getting the fuel pump on and oriented. It's a Clay Smith 6 vane pump which is much bigger than your average Carter pump. The body is much wider and interferes with things on either side. Since there is no room for the the fittings and fuel lines, you need to use an Edelbrock bottom plate which obviously has the fittings come out the bottom. The bottom plate is much thicker than the one that comes on the pump so I had to go to the hardware store and got some longer screws. The original inlet and outlets get plugged with pipe plugs. Then, you need to source source some fittings for the bottom. I have a bunch of that stuff on hand so it is just a matter of figuring out which combination of adapter fittings, hose ends and hoses will work best.
Once the fuel pump is on, there's only a few more things left. The front accessories are easy enough. The one last decision I 'need' to make is which distributor I want to use. I have both the standard MP mechanical advance distributor and an older 'tach drive' from the late '80s. It's actually NOS. The 'problem' is that the tach drive is based on an older Prestolite points-style distributor so I need to get new plug wires to fit the old black cap. The current distributor has a Firecore 'HEI' style cap and wires. I was never happy with the plug ends on those wires though so I yanked 'em off to install some molded ones I got from Taylor but have yet to finish that job. I love to make more work for myself.
In other news, I got new brakes. To me, it's sort of unbelievable considering all the jive I went through to make the current ones work. Honestly though I was never happy with them. Hauling the car to a stop at the end of the track was downright scary. A low 12 second car should be able to use the first or second turn off, I always had to use the last turn off, standing on the pedal. In addition, they would not hold the car against the converter at the line, it would creep in the beams so I couldn't launch at anything much above idle which really hurt my 60 ft. times.
Guess I just had to give up on the KH/SSBC deal. I think they were fine for regular driving but did not seem adequate for my application. I think the piston area was not large enough and the rotors are small. Again, they were OK on the street though so it seemed strange that they would not do what I wanted in certain situations. Guess I found their limits.
The other thing for re-doing the brakes was wheels and ditching the small bolt pattern. Not much choice for SBP around unless you get lucky and find a cool vintage wheel but I wasn't really looking. It's a moot point though - I can rock my Fenton Gyros now and have 1/2" front studs.
Centerlines B Gone!

So I went with the Wilwood minimum offset kit for 10" drums. Had to pull my crusty-*** spindles off the shelf and start cleaning them up. I will need to get new tires as well for the wheels. The Kelly Metrics on the car were pretty old so it has been in the back of my mind to replace them anyway. They're not even made anymore. The tires themselves are actually in good shape, no dry rot or unusual wear and they handled fine but I just want the car to be the best it can be so I'd rather not skimp on brakes and tires.
So that's all I can manage to write about for now. I will get some pics up of the fuel pump and brakes when I get to them.
Thanks for your continued support.
More to come.
So I cleared some hurdles by finally getting the motor sealed up. There was a lot of hemming and hawing on my part on how to do these jobs 'the right way'. Like usual, I overthought it and ended up wasting a lot of time. I even started two threads here on how to seal intakes and oil pans. I wound up getting so many different answers that it made it worse. I took what I thought was right from each thread, put it in a little instruction list and went for it. Sometimes you just have to turn of your brain and jump in. It wasn't like I hadn't done this kind of thing before. In hindsight I don't understand why it became such a big deal. Just one of those self-inflicted problems I guess.
The intake went on OK. I ditched the cork end rails and used the Right Stuff for the block. I spent some time and made sure the intake ports lined up with the ports on the heads as best as I could - I wouldn't want to mitigate my gasket matching efforts. Bottom line is that it's on and it ain't going anywhere. I even got all the pipe plugs in and temp gauge fitting in and mounted the throttle cable and return brackets.
Clean!
Sticky stuff on the gaskets.
Goop around the cooling passages.
Right Stuff
Done.
The oil pan went on pretty easily as well but I ran into a problem and had to remove it which was my worst nightmare. I was installing the coil bracket onto my intake without anything covering the hole for the distributor. There are three little screws that attach the coil to the bracket and one of them flipped out of my fingers and down the hole. I remember looking at the open hole while I was removing the screws thinking that I should cover it - 5 seconds later, the screw was in the oil pan. Doh!
I was ******* pissed - I mean I had just gotten over the hurdle of putting the thing on and now I have to take it off. I tried using a magnet through the drain plug hole to see if I could snatch it but it was not working. No choice, the pan had to came off.
Luckily, it came right off without too much fuss and the gaskets didn't rip. I used RTV sparingly so there was not a lot of mess to clean up. My big mistake was turning the motor over on the stand to get it off - when I turned it, the screw fell and ended up getting lodged between the top of a rod and piston top. I tried turning the crank over gently to dislodge it but it wouldn't budge. I ended up rotating the motor on the stand so the piston was upside-down and it finally rolled loose. All in all it took a good 15 minutes to get it out of there without doing any damage. Frustrating to say the least.
So then the pan went back on. I used a little more RTV this time. Once back over, first thing I did was to stab a distributor in there! I'm no dummy!
So I'm back on the horse after the screw-down-the-hole debacle. Currently, I am working on getting the fuel pump on and oriented. It's a Clay Smith 6 vane pump which is much bigger than your average Carter pump. The body is much wider and interferes with things on either side. Since there is no room for the the fittings and fuel lines, you need to use an Edelbrock bottom plate which obviously has the fittings come out the bottom. The bottom plate is much thicker than the one that comes on the pump so I had to go to the hardware store and got some longer screws. The original inlet and outlets get plugged with pipe plugs. Then, you need to source source some fittings for the bottom. I have a bunch of that stuff on hand so it is just a matter of figuring out which combination of adapter fittings, hose ends and hoses will work best.
Once the fuel pump is on, there's only a few more things left. The front accessories are easy enough. The one last decision I 'need' to make is which distributor I want to use. I have both the standard MP mechanical advance distributor and an older 'tach drive' from the late '80s. It's actually NOS. The 'problem' is that the tach drive is based on an older Prestolite points-style distributor so I need to get new plug wires to fit the old black cap. The current distributor has a Firecore 'HEI' style cap and wires. I was never happy with the plug ends on those wires though so I yanked 'em off to install some molded ones I got from Taylor but have yet to finish that job. I love to make more work for myself.
In other news, I got new brakes. To me, it's sort of unbelievable considering all the jive I went through to make the current ones work. Honestly though I was never happy with them. Hauling the car to a stop at the end of the track was downright scary. A low 12 second car should be able to use the first or second turn off, I always had to use the last turn off, standing on the pedal. In addition, they would not hold the car against the converter at the line, it would creep in the beams so I couldn't launch at anything much above idle which really hurt my 60 ft. times.
Guess I just had to give up on the KH/SSBC deal. I think they were fine for regular driving but did not seem adequate for my application. I think the piston area was not large enough and the rotors are small. Again, they were OK on the street though so it seemed strange that they would not do what I wanted in certain situations. Guess I found their limits.
The other thing for re-doing the brakes was wheels and ditching the small bolt pattern. Not much choice for SBP around unless you get lucky and find a cool vintage wheel but I wasn't really looking. It's a moot point though - I can rock my Fenton Gyros now and have 1/2" front studs.
Centerlines B Gone!
So I went with the Wilwood minimum offset kit for 10" drums. Had to pull my crusty-*** spindles off the shelf and start cleaning them up. I will need to get new tires as well for the wheels. The Kelly Metrics on the car were pretty old so it has been in the back of my mind to replace them anyway. They're not even made anymore. The tires themselves are actually in good shape, no dry rot or unusual wear and they handled fine but I just want the car to be the best it can be so I'd rather not skimp on brakes and tires.
So that's all I can manage to write about for now. I will get some pics up of the fuel pump and brakes when I get to them.
Thanks for your continued support.
More to come.
rmchrgr
Skate And Destroy
Got the engine all done!! Been working on this thing for over a year and it's finally finished!
I made a pretty good push to get this point over the last few weeks - plug wires, fuel line, accessories, valve covers, exhaust and a few other things, all of which involved some sort of problem/hurdle/b.s. I kept my head down and kept at it though and got it all done. Per my usual style, I'll describe all this stuff in great detail. Grab a beverage and get comfy, this is gonna be a long one. Guess I'll start with the plug wires.
Making plug wires is something I don't mind doing because it lets me decide where to put the wires. I was not a big fan of my last set of wires for various reasons. This time I went with Taylor 8mm with the molded 135* boots. The molded boots clip onto the plug really well with an affirmative 'click' and the 135* boots allow for clever routing options. My goal was to make them as tight as possible without having to stretch them. I can't stand when stuff is flopping around out in the breeze.
I used Made-For-You Products Smoothie wire looms which bolt to the valve covers. I also got a set of MSD wire separators which helped to make things sanitary. I'm happy with the way they came out, it's pretty much what I envisioned when I started. Plugs are NGK FR5 BTW.
Here's the driver's side. The 135* boots are great on the #5 and 7 cylinders since those wires cross and are close in the firing order. You can clock the boots forward and kind of double them back.
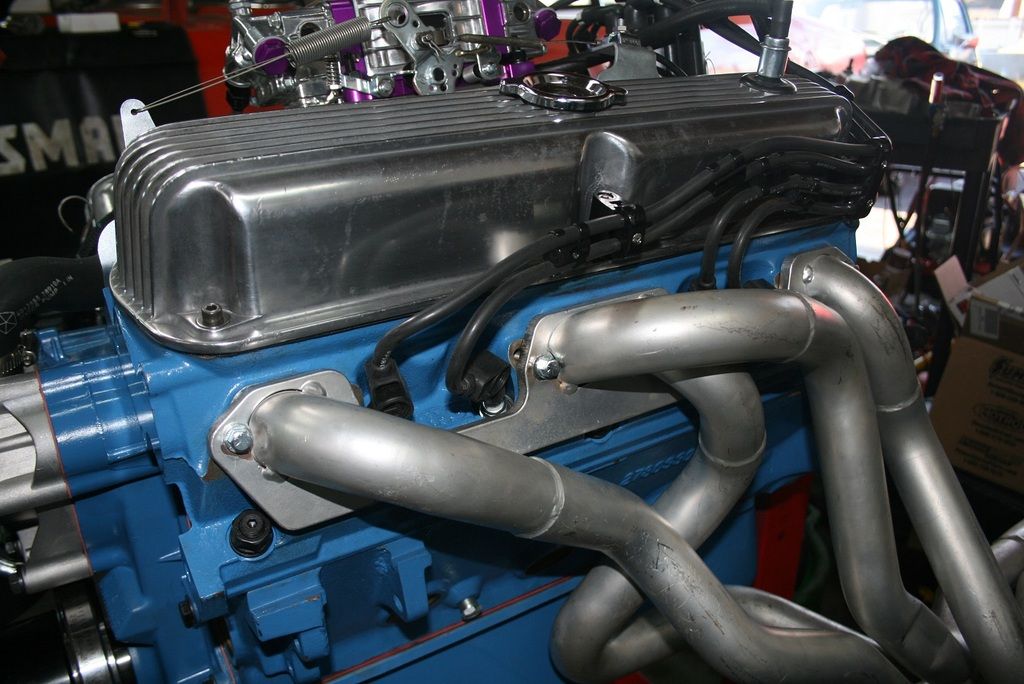
Passenger side.
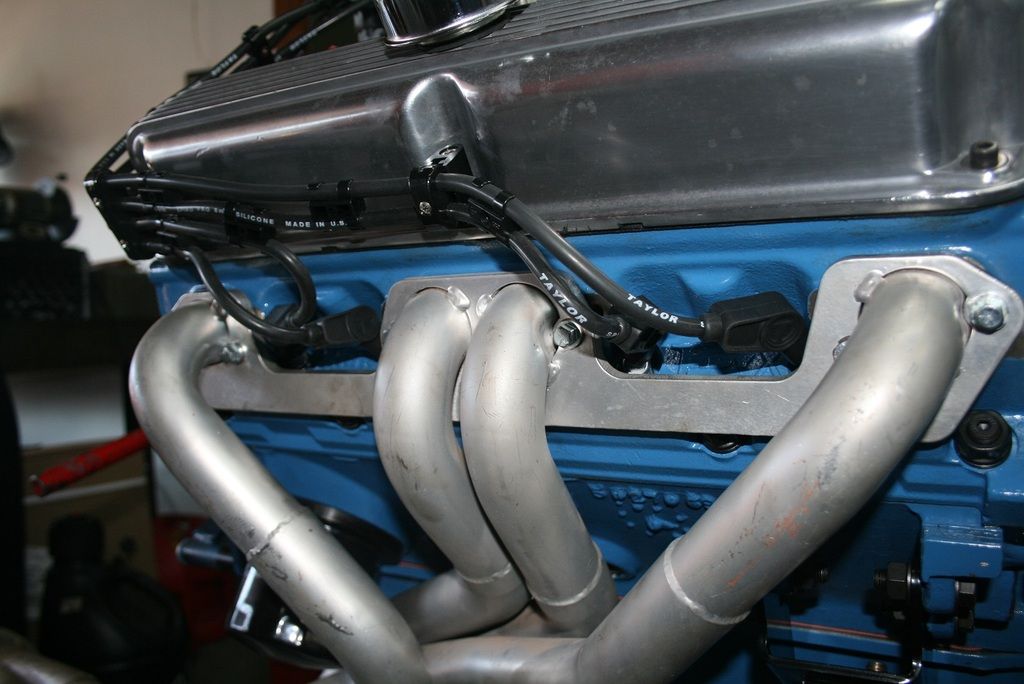
From the back. I tired to keep the wires tight against the valve covers. The looms come with 4 wire separator blocks that hold the long parts of wires in place nicely.
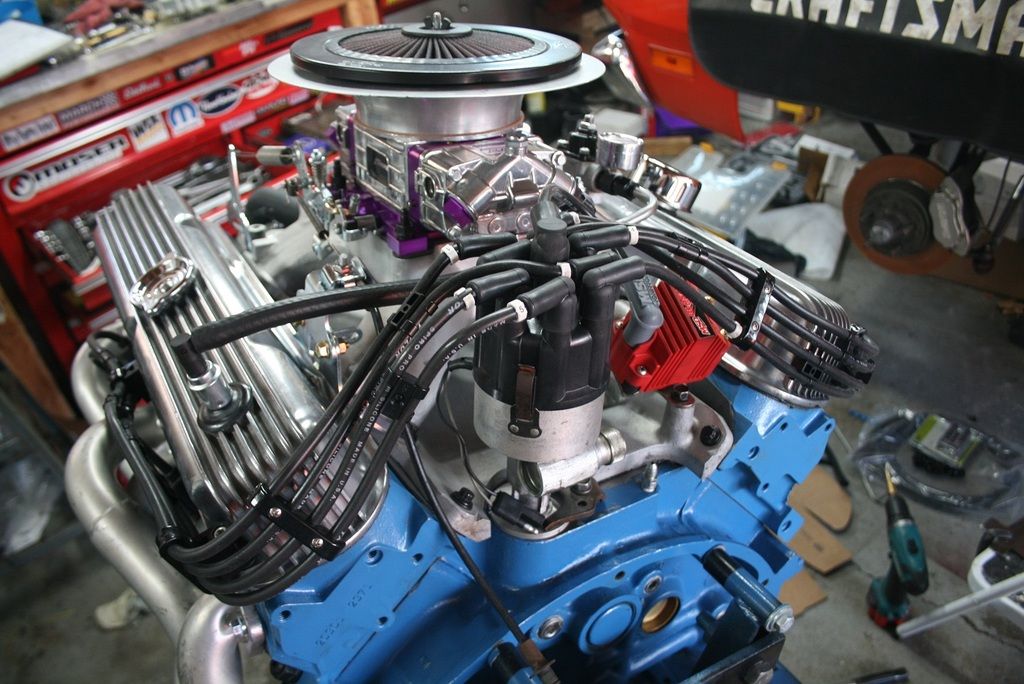
So the front accessories kind of kicked my ***. Yeah, it sounds stupid but it was a ***** trying to get the pulleys to line up. I have the AR/Toyota/Denso alternator setup but with a serp belt pulley from a circle track supply place. I started off with the AR bracket that comes with the conversion kit but the pulley ended up too far back. When I modifed my water pump inlet it ended up putting the hose right up against the fan belt. This required pulley spacers to move the belts forward to clear the hose. This is why the alt. bracket ended up too far back.
I went through a bunch of different configurations trying to make do with what I had but nothing worked without some major flaw. I must have taken the alternator and associated bracketry on and off 100 times. Plus all the back and forth to the hardware store to get all sorts of crap for making spacers etc.
I did a lot of looking around for brackets and found AR offers a kit to mount a 'race' Powermaster alternator to a small block. That kit uses a different bracket with an offset in it. I actually PM'd Andy about it to ask if there would be any issues using it with a different alternator. His reply was "Why, the bracket that comes with the Denso kits works." Not in my situation! I ordered the other bracket kit and it worked like it was meant to be. Couple extra washers and spacers and it was dead nuts. Aftermarket stuff can drive you batty sometimes trying to fit it all together in ways that were never intended.
Here's the alt. mounted up with the Powermaster bracket. Notice the offset in the bracket. The one that comes with the Denso kit is straight across which did not work.
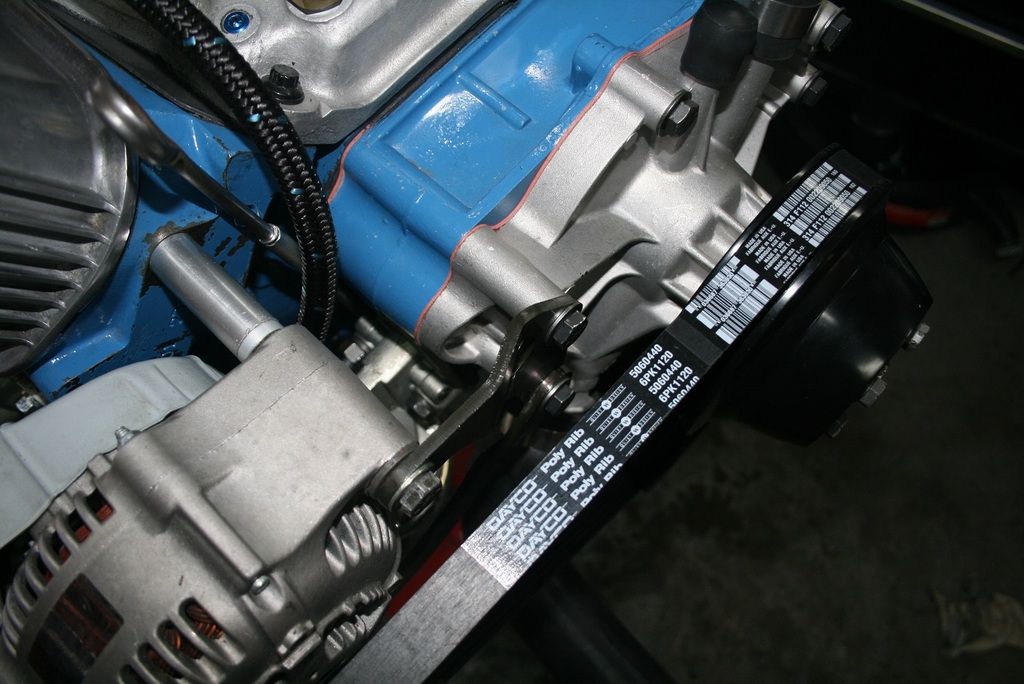
Here's the front accessories all set up. The powder coating on the March pulleys flaked off pretty bad after minimal use and the long hole in the crank pulley was actually kinda trashed. I filed it down, it's all good now but it's a little disconcerting.
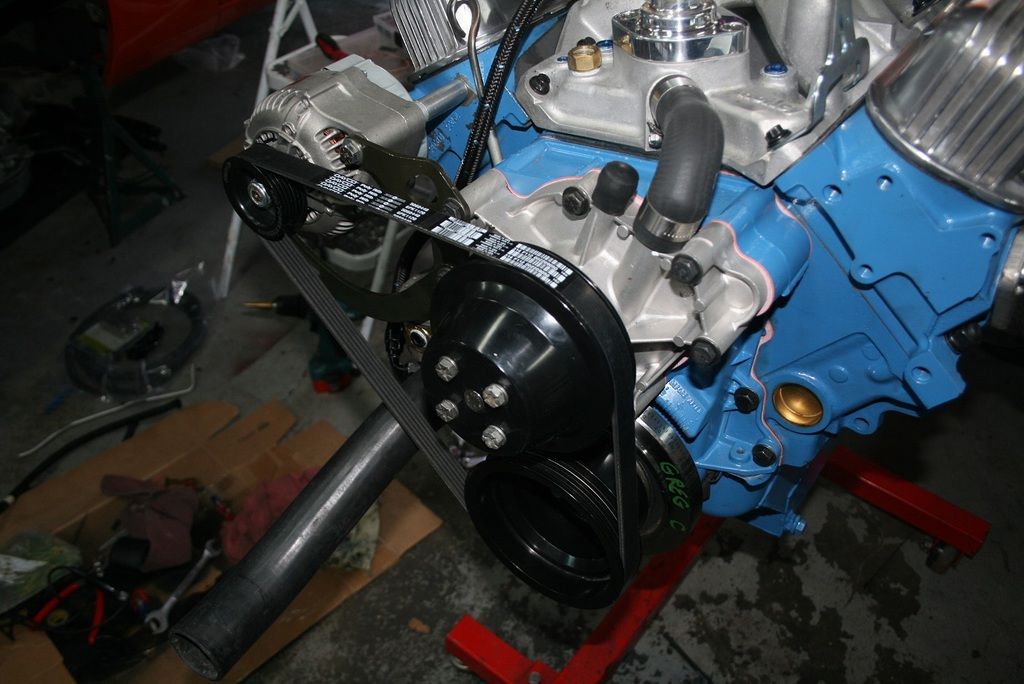
The fuel pump was probably the biggest hassle. I am using a giant Clay Smith 6 vane mechanical pump so I won't go into the aggravation this thing caused me again except to say it's the one thing that led to having to deal with all this other crap. Next time I will just cave in and go to an electric pump like everyone else.
The pump is in though and the accessories seem to fit. The belt is pretty close to the lower rad hose but it's not touching. I can always go to a flex hose and twist it a little to get more clearance but I won't know until the motor goes in the car.
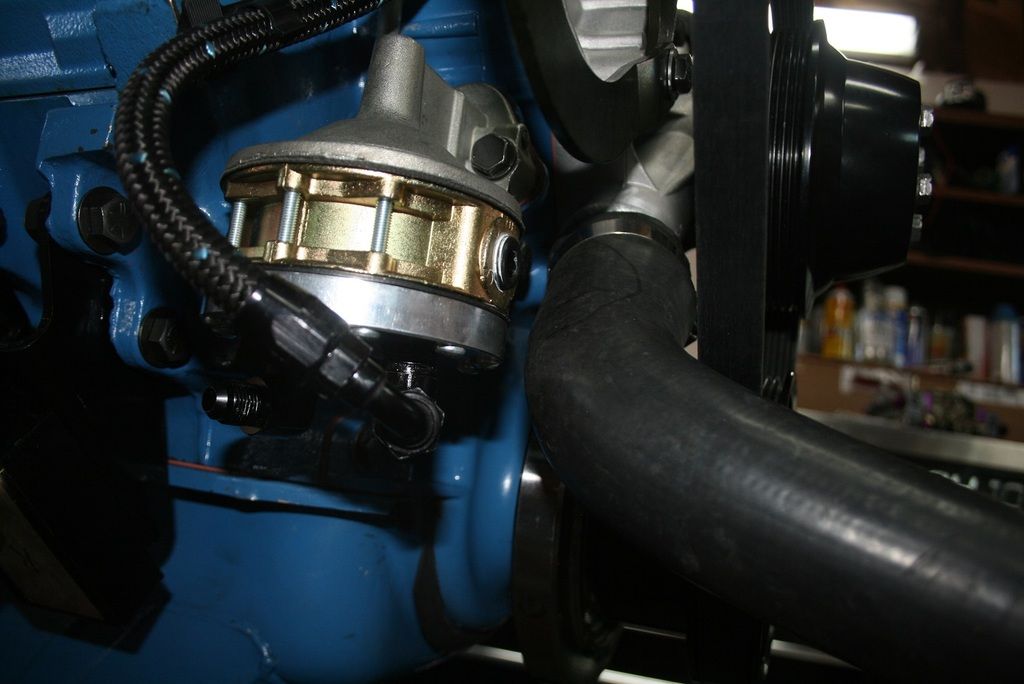
Next fuel pump related item is the pump to carb line. I had basically the same setup on my last combo. This time I made the line with less sharp bends and used a 90* free low hose end coming out of the adapter. I found a clip in my junk bolt box from my dealership days to hold the line in place.
I made the bowl feed lines two years ago so I just re-used 'em. (The CS pump needs a regulator.) The new line just re-connected to the old setup and that was done. Check out my new Proform 850 bling.
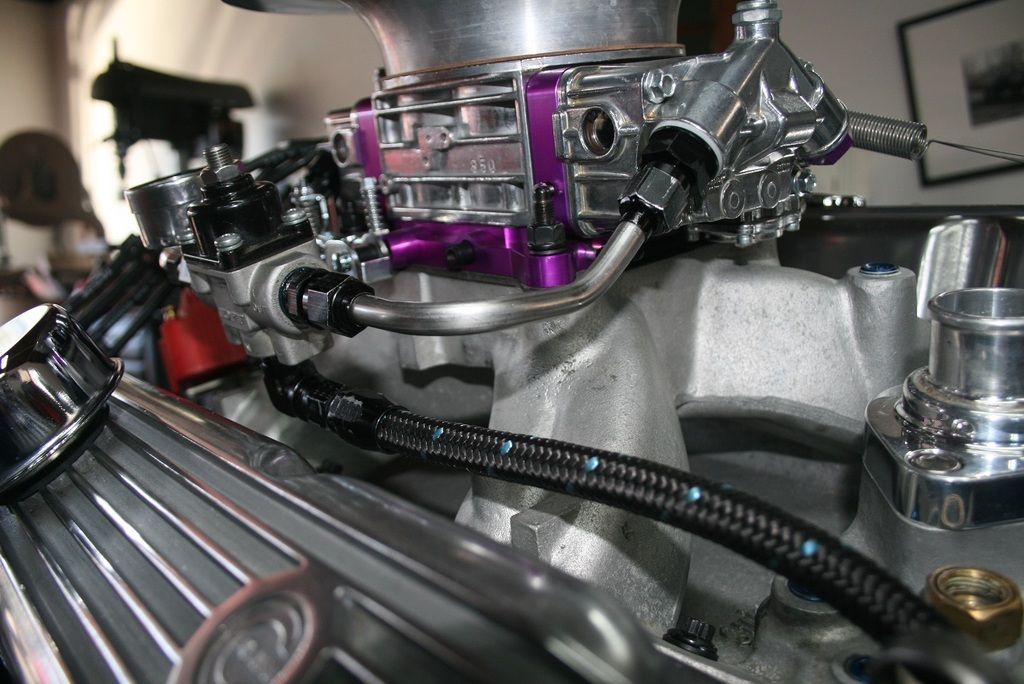
Got the dipstick tube into place as well which doesn't sound like much but believe me, it took some effort. Dipstick always sounds dumb but you gotta have one in some form on an engine that has oil in it. Hughes sells a kit that locks the tube in place with a compression fitting. I liked the idea because I've had dipsticks break off in the block and pop out. When I had the block at the machine shop they tapped it for the fitting. (1/8" NPT)
Getting the thing in there with that ridiculous fuel pump was a P.I.T.A. I left the pump installed purposely because I needed to gauge how much room I had and where to bend the tube to clear the pump. Let's just say I got it to work and it ain't coming out.
You can see the brass fitting behind the pump in the center of the picture. There's a compression fitting at the base of the tube which locks it in place. I could unscrew it and cap it if I wanted but I'll the leave it for now.
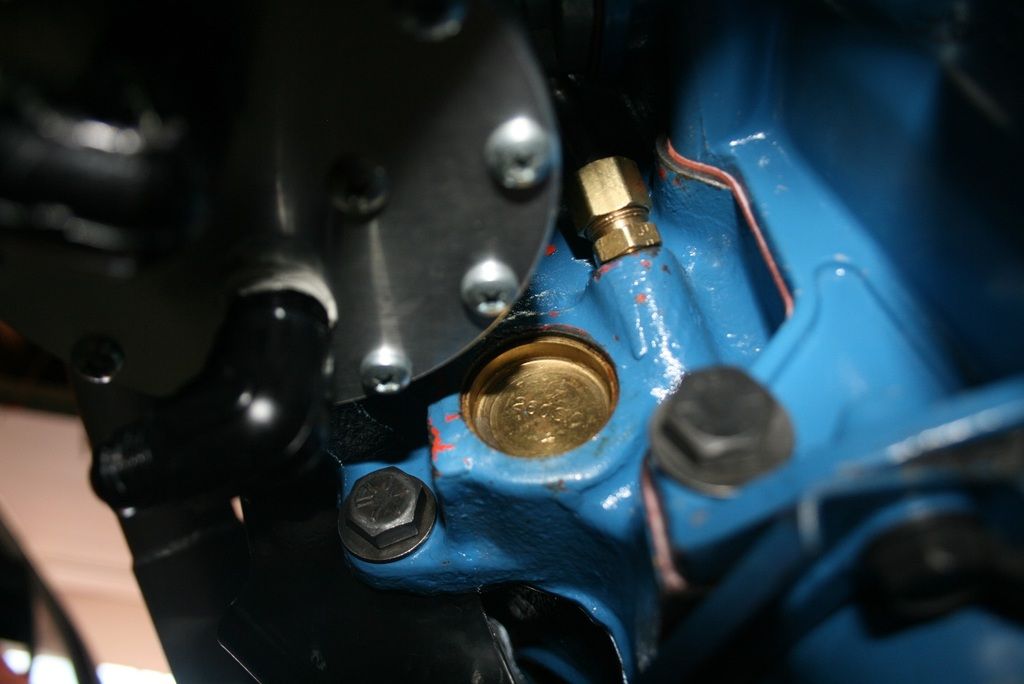
Next ***-kicking involved the headers. Everyone knows headers suck to deal with no matter how you slice it. Since this is my project, naturally I had to deal with another hurdle.
I'm re-using my headers from the old W2 combo. They're TTi 1 5/8" to 1 3/4" step headers with the W2 exhaust bolt pattern. Luckily, the RHS heads are drilled for both the W2 and regular LA exhaust so no problem re-using what I had.. Saved me a bunch of money.
They actually went on OK except for the #5 cylinder. Previously, there was a stud in that location and the nut was seized to the stud. When I pulled the old motor, the stud was stuck in the flange but it somehow came out OK without damaging anything. I was able to get the stud off easily but now I had to figure out how to get the headers back on. There is an indentation right off the flange to make room for the bolt but it's very small. A 1" bolt does not go in AT ALL. I hogged out the bolt hole in the flange to gain a little more clearance but the bolt head was still getting hung up on the tube.
So, out came the hammer. I used body hammers - I put the flat face of one up against the point where it was sticking out too far and gave it a couple whacks - we got clearance Clarencce! Just hope we don't have an exhaust leak from weakened metal. I shortened the bolt up a few threads too which helped with threading the bolt in.
I might be getting new headers anyway, the ones I have are kind of beat. They work OK though nd TTi does not want you to break in a new motor with new headers so I'm stuck with these for now. Hopefully they'll be OK.
Here's the culprit, the #5 bolt.No gaskets yet.
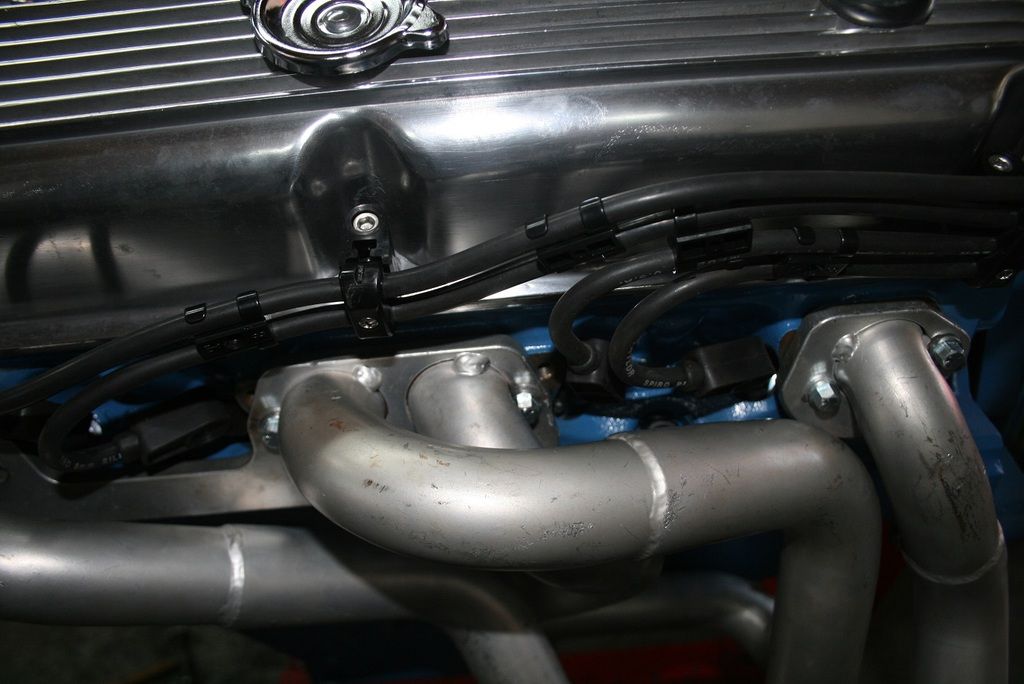
Couple more things, stay with me!
I decided to finally use my old Mopar Performance tach drive distributor. This is an NOS Prestolite unit from the '80s. It's actually a really nice distributor. The reluctor is different than the regular electronic units and seems to be phased correctly since it lines up where I need it to when I checked the timing. I'm using one super light spring and a more medium one along with an FBO limiter plate thing. I set the initial to 20. I can't remember what I set the total to, maybe 34? I have to look.
So using one of these tach drive distributors means I get to finally use one of my cool-guy mechanical tachometers. I have a few that I am considering using though sourcing a cable has proven to be a little tough (naturally). I found a company out in Nebraska that seems to know what I need so I will be ordering one up from them this week. I need to get a right angle adapter for it though since the cables don't like to be bent sharply. The adapter is 3 times more expensive than the cable itself! I'm not too swift sometimes.
So here's the business end of the tach drive on the distributor. It's a 5/8" thread with a .152" tang. Try finding a cable with that end and an end for a Stewart Warner 535AH or 424 EX tach!
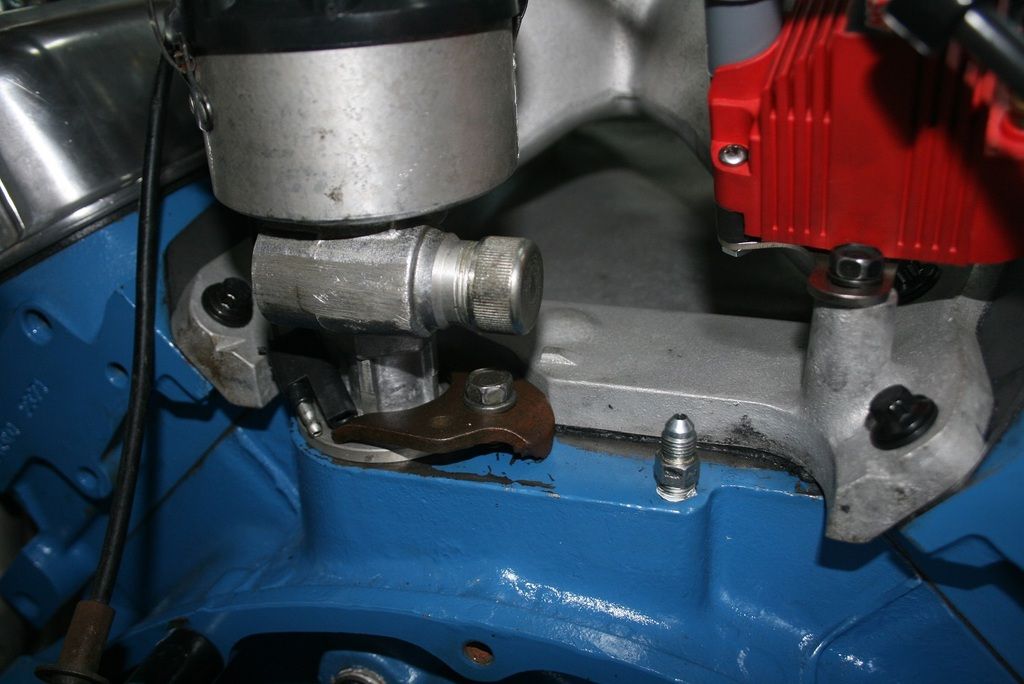
So here are the tachs I am considering using; a Jones Motrola/Moroso from the early '70s, a Stewart Warner 535AH from the early '70s (Sox & Martin used that one) and a Stewart Warner 424EX a la Don Carlton in the wire car. Leaning towards the SW 535 right now, just seems to look the best and I can get a cable for it easily.
Moroso
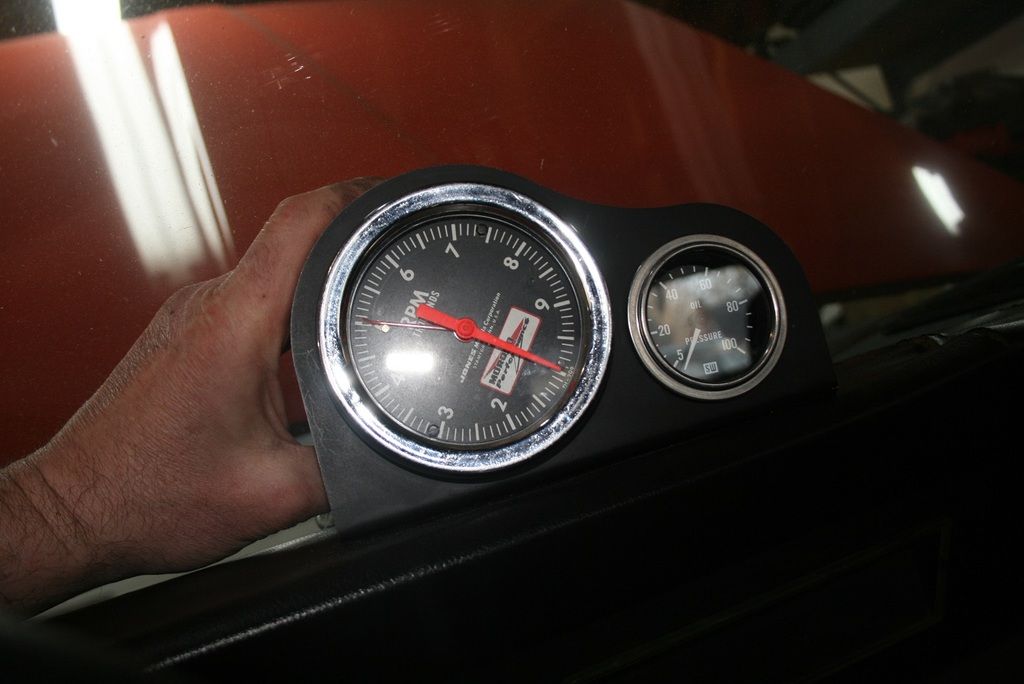
SW 535AH
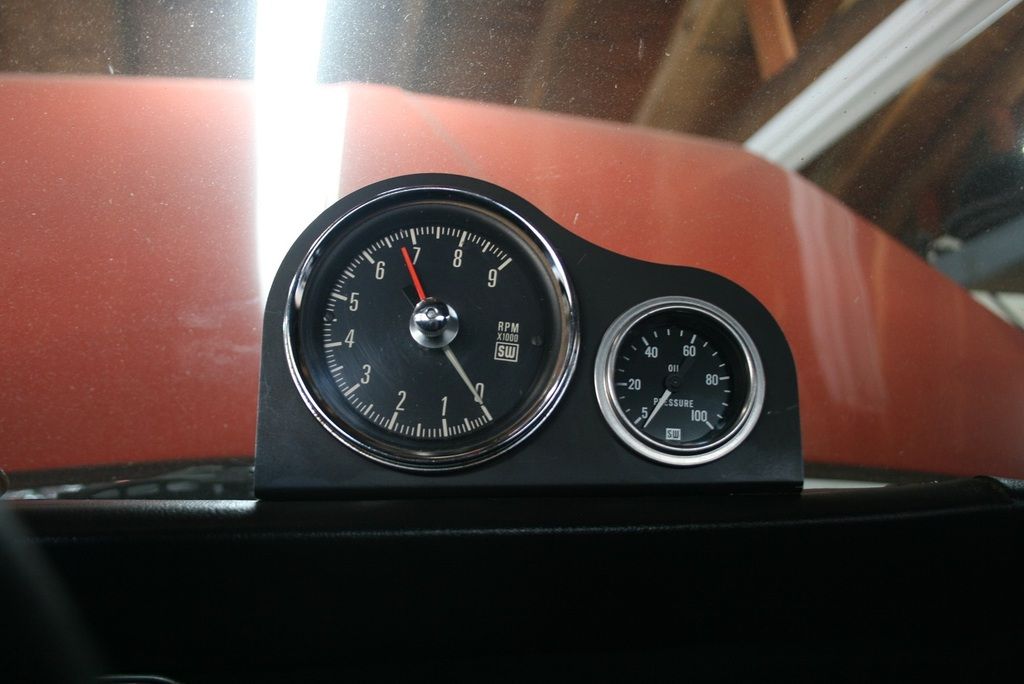
SW 424EX

Here's the same tach in the Wire Car. In this pic, they were doing aero testing and wanted pics of what things looked like from inside the car. At the same time, they ran past a car in the other lane that was filming to see what it looked like at speed. Cool! Never really seen one of these tachs before. Saw one on Ebay recently and I grabbed it, got it fairly cheap too! They are kind of oddball though, tach cable is unique and basically obsolete.
I did a lot of work to install a tach adapter and such for my electronic tachometer, all for naught!
OK, last thing was the oil filter adapter. I went with a Canton Racing billet oil filter adapter plate and ditched the unnecessary 90* adapter. The C.R. plate has an o-ring to seal it to the block which does away with the 'leak prone' regular gasket. It's a thick billet piece with extra holes drilled in the plate to allow more oil flow into the filter. I am able to re-use the OE threaded filter adapter with it. I lubed the o-ring (which you are supposed to do with all o-rings) and screwed the threaded adapter on, easy peasy. I can use up my filters I snagged from work but I will have to start buying them again when I run out. Maybe I can go back and snag some more at some point.
Canton Racing filter plate installed.
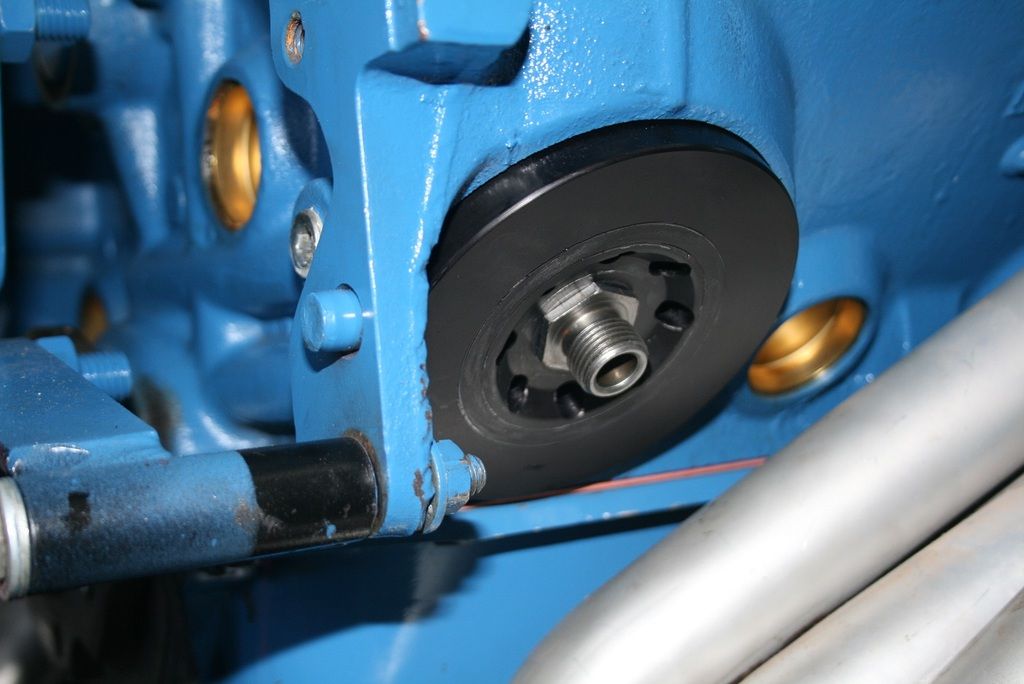
With late model factory 1090 filter.
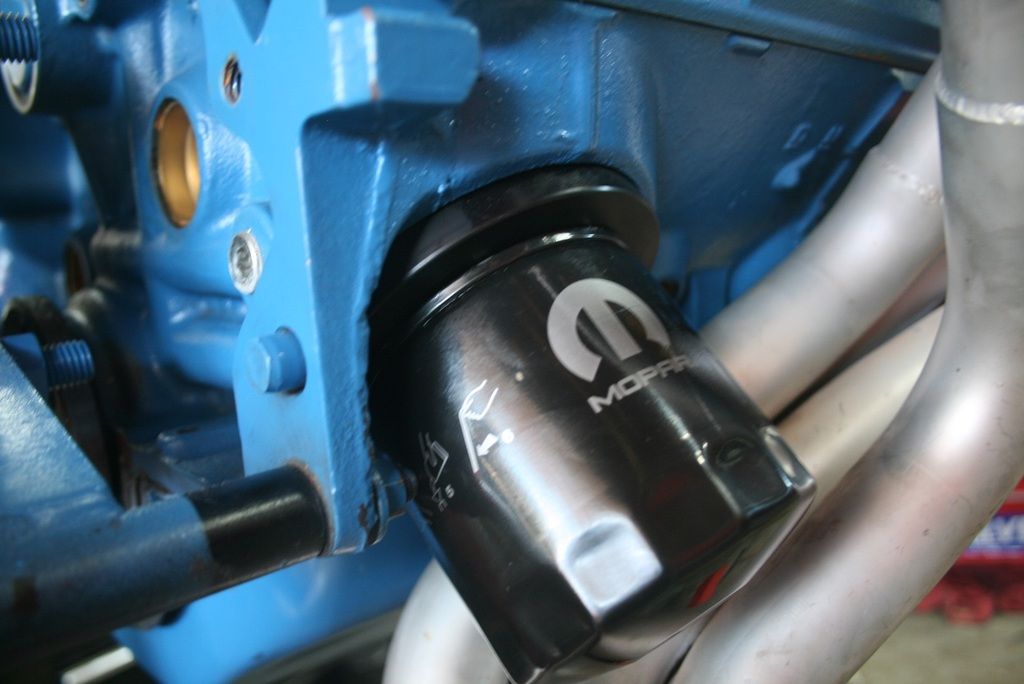
Couple last things, I promise.
Here's the Wilwood brake kit I mentioned in the last post. Not sure if I want to install them before I get the motor in the car. It's a lot to be aware of during a first drive - new motor and trans and new brakes. I might wait until after things are in and running just to make sure I'm not making too much work for myself at one time.
Box O' brakes.
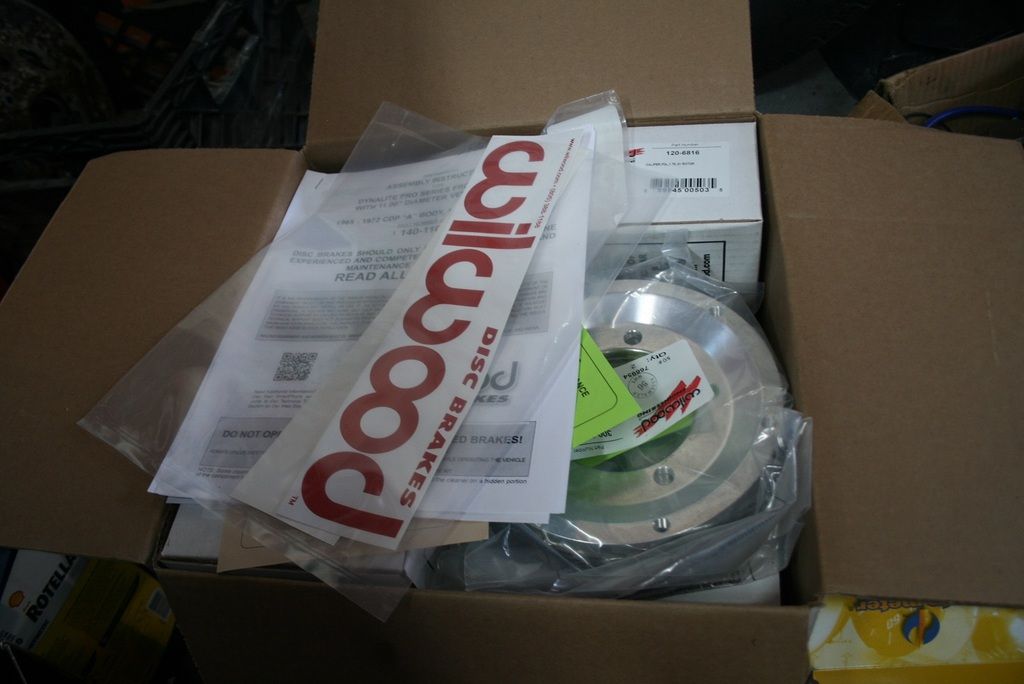
Lastly, I just wanted to show off my NOS Fenton Gyro center cap. Bummer I only have one though. Hope I can find another one!
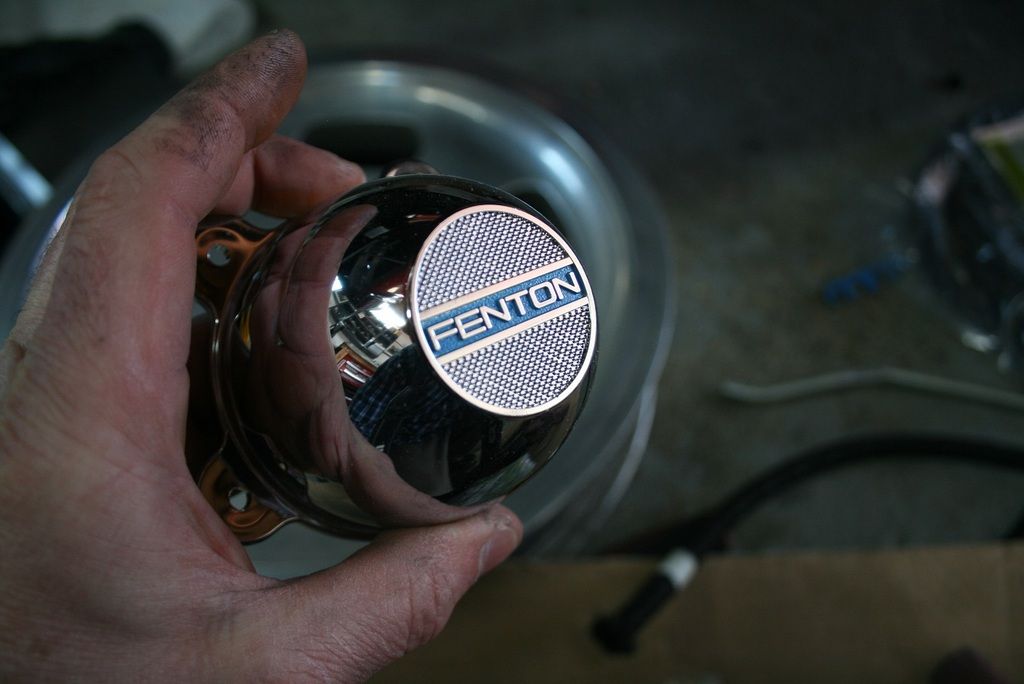
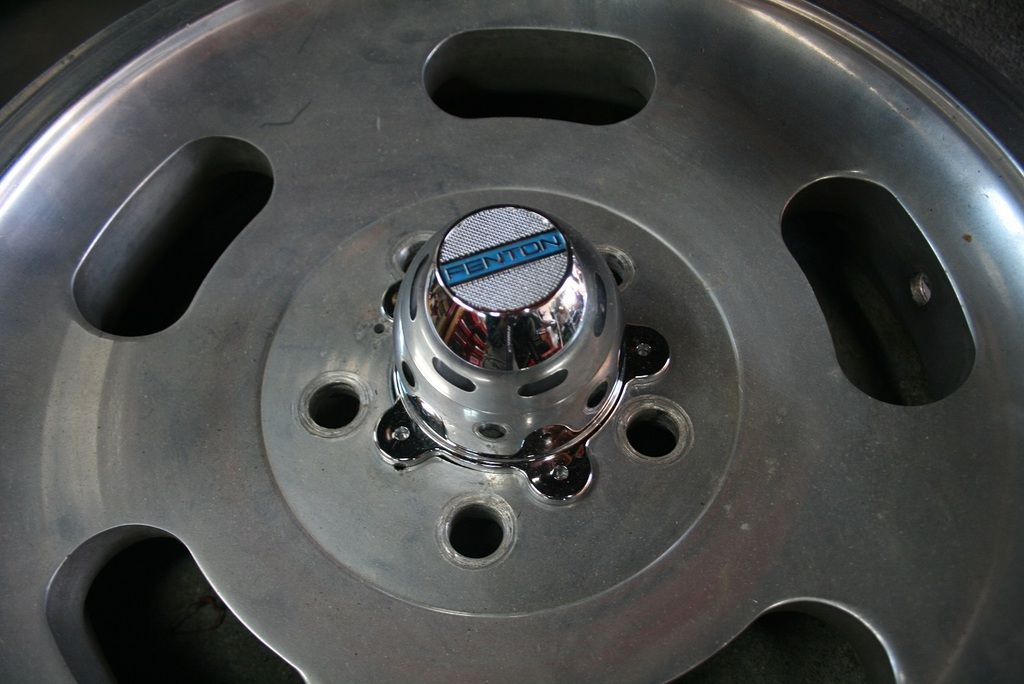
I will be calling the dyno shop to set up an appointment, hopefully they can get me in soon.
At this point in our program, I would like to give a shout out to Rob/Rumblefish. He PM'ed me the other day asking what was up with the Duster. We exchanged a few messages but it got me thinking - I need to finish the damn thing! I have to say it lit a fire under my ***. I blew off all kinds of crap this weekend to get the motor done and I'm really psyched about it. No, not the finishing the motor, but blowing **** off! Thanks Rob!
Whew, that was a lot! If you read all that, I thank you for sticking it out.
More to come.
I made a pretty good push to get this point over the last few weeks - plug wires, fuel line, accessories, valve covers, exhaust and a few other things, all of which involved some sort of problem/hurdle/b.s. I kept my head down and kept at it though and got it all done. Per my usual style, I'll describe all this stuff in great detail. Grab a beverage and get comfy, this is gonna be a long one. Guess I'll start with the plug wires.
Making plug wires is something I don't mind doing because it lets me decide where to put the wires. I was not a big fan of my last set of wires for various reasons. This time I went with Taylor 8mm with the molded 135* boots. The molded boots clip onto the plug really well with an affirmative 'click' and the 135* boots allow for clever routing options. My goal was to make them as tight as possible without having to stretch them. I can't stand when stuff is flopping around out in the breeze.
I used Made-For-You Products Smoothie wire looms which bolt to the valve covers. I also got a set of MSD wire separators which helped to make things sanitary. I'm happy with the way they came out, it's pretty much what I envisioned when I started. Plugs are NGK FR5 BTW.
Here's the driver's side. The 135* boots are great on the #5 and 7 cylinders since those wires cross and are close in the firing order. You can clock the boots forward and kind of double them back.
Passenger side.
From the back. I tired to keep the wires tight against the valve covers. The looms come with 4 wire separator blocks that hold the long parts of wires in place nicely.
So the front accessories kind of kicked my ***. Yeah, it sounds stupid but it was a ***** trying to get the pulleys to line up. I have the AR/Toyota/Denso alternator setup but with a serp belt pulley from a circle track supply place. I started off with the AR bracket that comes with the conversion kit but the pulley ended up too far back. When I modifed my water pump inlet it ended up putting the hose right up against the fan belt. This required pulley spacers to move the belts forward to clear the hose. This is why the alt. bracket ended up too far back.
I went through a bunch of different configurations trying to make do with what I had but nothing worked without some major flaw. I must have taken the alternator and associated bracketry on and off 100 times. Plus all the back and forth to the hardware store to get all sorts of crap for making spacers etc.
I did a lot of looking around for brackets and found AR offers a kit to mount a 'race' Powermaster alternator to a small block. That kit uses a different bracket with an offset in it. I actually PM'd Andy about it to ask if there would be any issues using it with a different alternator. His reply was "Why, the bracket that comes with the Denso kits works." Not in my situation! I ordered the other bracket kit and it worked like it was meant to be. Couple extra washers and spacers and it was dead nuts. Aftermarket stuff can drive you batty sometimes trying to fit it all together in ways that were never intended.
Here's the alt. mounted up with the Powermaster bracket. Notice the offset in the bracket. The one that comes with the Denso kit is straight across which did not work.
Here's the front accessories all set up. The powder coating on the March pulleys flaked off pretty bad after minimal use and the long hole in the crank pulley was actually kinda trashed. I filed it down, it's all good now but it's a little disconcerting.
The fuel pump was probably the biggest hassle. I am using a giant Clay Smith 6 vane mechanical pump so I won't go into the aggravation this thing caused me again except to say it's the one thing that led to having to deal with all this other crap. Next time I will just cave in and go to an electric pump like everyone else.
The pump is in though and the accessories seem to fit. The belt is pretty close to the lower rad hose but it's not touching. I can always go to a flex hose and twist it a little to get more clearance but I won't know until the motor goes in the car.
Next fuel pump related item is the pump to carb line. I had basically the same setup on my last combo. This time I made the line with less sharp bends and used a 90* free low hose end coming out of the adapter. I found a clip in my junk bolt box from my dealership days to hold the line in place.
I made the bowl feed lines two years ago so I just re-used 'em. (The CS pump needs a regulator.) The new line just re-connected to the old setup and that was done. Check out my new Proform 850 bling.
Got the dipstick tube into place as well which doesn't sound like much but believe me, it took some effort. Dipstick always sounds dumb but you gotta have one in some form on an engine that has oil in it. Hughes sells a kit that locks the tube in place with a compression fitting. I liked the idea because I've had dipsticks break off in the block and pop out. When I had the block at the machine shop they tapped it for the fitting. (1/8" NPT)
Getting the thing in there with that ridiculous fuel pump was a P.I.T.A. I left the pump installed purposely because I needed to gauge how much room I had and where to bend the tube to clear the pump. Let's just say I got it to work and it ain't coming out.
You can see the brass fitting behind the pump in the center of the picture. There's a compression fitting at the base of the tube which locks it in place. I could unscrew it and cap it if I wanted but I'll the leave it for now.
Next ***-kicking involved the headers. Everyone knows headers suck to deal with no matter how you slice it. Since this is my project, naturally I had to deal with another hurdle.
I'm re-using my headers from the old W2 combo. They're TTi 1 5/8" to 1 3/4" step headers with the W2 exhaust bolt pattern. Luckily, the RHS heads are drilled for both the W2 and regular LA exhaust so no problem re-using what I had.. Saved me a bunch of money.
They actually went on OK except for the #5 cylinder. Previously, there was a stud in that location and the nut was seized to the stud. When I pulled the old motor, the stud was stuck in the flange but it somehow came out OK without damaging anything. I was able to get the stud off easily but now I had to figure out how to get the headers back on. There is an indentation right off the flange to make room for the bolt but it's very small. A 1" bolt does not go in AT ALL. I hogged out the bolt hole in the flange to gain a little more clearance but the bolt head was still getting hung up on the tube.
So, out came the hammer. I used body hammers - I put the flat face of one up against the point where it was sticking out too far and gave it a couple whacks - we got clearance Clarencce! Just hope we don't have an exhaust leak from weakened metal. I shortened the bolt up a few threads too which helped with threading the bolt in.
I might be getting new headers anyway, the ones I have are kind of beat. They work OK though nd TTi does not want you to break in a new motor with new headers so I'm stuck with these for now. Hopefully they'll be OK.
Here's the culprit, the #5 bolt.No gaskets yet.
Couple more things, stay with me!
I decided to finally use my old Mopar Performance tach drive distributor. This is an NOS Prestolite unit from the '80s. It's actually a really nice distributor. The reluctor is different than the regular electronic units and seems to be phased correctly since it lines up where I need it to when I checked the timing. I'm using one super light spring and a more medium one along with an FBO limiter plate thing. I set the initial to 20. I can't remember what I set the total to, maybe 34? I have to look.
So using one of these tach drive distributors means I get to finally use one of my cool-guy mechanical tachometers. I have a few that I am considering using though sourcing a cable has proven to be a little tough (naturally). I found a company out in Nebraska that seems to know what I need so I will be ordering one up from them this week. I need to get a right angle adapter for it though since the cables don't like to be bent sharply. The adapter is 3 times more expensive than the cable itself! I'm not too swift sometimes.
So here's the business end of the tach drive on the distributor. It's a 5/8" thread with a .152" tang. Try finding a cable with that end and an end for a Stewart Warner 535AH or 424 EX tach!
So here are the tachs I am considering using; a Jones Motrola/Moroso from the early '70s, a Stewart Warner 535AH from the early '70s (Sox & Martin used that one) and a Stewart Warner 424EX a la Don Carlton in the wire car. Leaning towards the SW 535 right now, just seems to look the best and I can get a cable for it easily.
Moroso
SW 535AH
SW 424EX
Here's the same tach in the Wire Car. In this pic, they were doing aero testing and wanted pics of what things looked like from inside the car. At the same time, they ran past a car in the other lane that was filming to see what it looked like at speed. Cool! Never really seen one of these tachs before. Saw one on Ebay recently and I grabbed it, got it fairly cheap too! They are kind of oddball though, tach cable is unique and basically obsolete.
I did a lot of work to install a tach adapter and such for my electronic tachometer, all for naught!
OK, last thing was the oil filter adapter. I went with a Canton Racing billet oil filter adapter plate and ditched the unnecessary 90* adapter. The C.R. plate has an o-ring to seal it to the block which does away with the 'leak prone' regular gasket. It's a thick billet piece with extra holes drilled in the plate to allow more oil flow into the filter. I am able to re-use the OE threaded filter adapter with it. I lubed the o-ring (which you are supposed to do with all o-rings) and screwed the threaded adapter on, easy peasy. I can use up my filters I snagged from work but I will have to start buying them again when I run out. Maybe I can go back and snag some more at some point.
Canton Racing filter plate installed.
With late model factory 1090 filter.
Couple last things, I promise.
Here's the Wilwood brake kit I mentioned in the last post. Not sure if I want to install them before I get the motor in the car. It's a lot to be aware of during a first drive - new motor and trans and new brakes. I might wait until after things are in and running just to make sure I'm not making too much work for myself at one time.
Box O' brakes.
Lastly, I just wanted to show off my NOS Fenton Gyro center cap. Bummer I only have one though. Hope I can find another one!
I will be calling the dyno shop to set up an appointment, hopefully they can get me in soon.
At this point in our program, I would like to give a shout out to Rob/Rumblefish. He PM'ed me the other day asking what was up with the Duster. We exchanged a few messages but it got me thinking - I need to finish the damn thing! I have to say it lit a fire under my ***. I blew off all kinds of crap this weekend to get the motor done and I'm really psyched about it. No, not the finishing the motor, but blowing **** off! Thanks Rob!
Whew, that was a lot! If you read all that, I thank you for sticking it out.
More to come.
Ha ha ha, your welcome. I'm looking forward to seeing this at Bellmore. Perhaps, I'll have the wife '67 Cuda done as well. I'm just waiting on everyone else right now.
rmchrgr
Skate And Destroy
Yep, thanks again Rob.
Next task is to clean up...
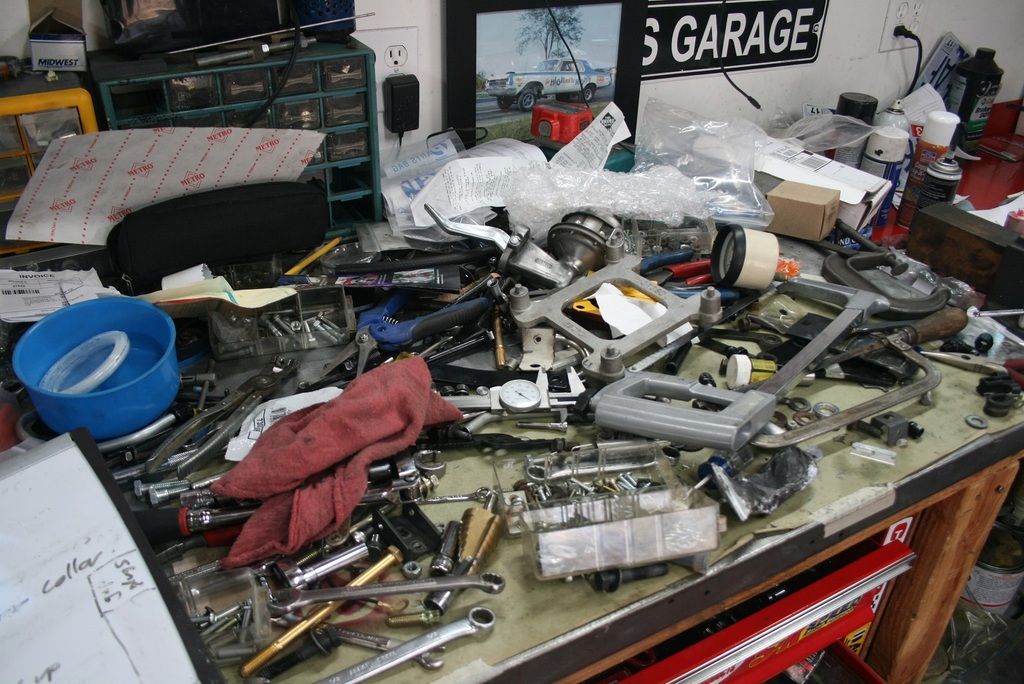
Next task is to clean up...
rmchrgr
Skate And Destroy
Engine is going on the dyno late next week. I forced myself to call and book the time since it would probably be another month before I could get it done. Will be loading it up and bringing it over on Thursday morning so they can set it up to run on Friday.
The inner valve springs are out right now so they will get re-installed after break in and before any full pulls are made. Most everything else is all set.
This is a huge thing for me! Can't wait! Things are moving along.
More to come.
The inner valve springs are out right now so they will get re-installed after break in and before any full pulls are made. Most everything else is all set.
This is a huge thing for me! Can't wait! Things are moving along.
More to come.
rmchrgr
Skate And Destroy
Just a quick update.
As stated previously, the 416 is going to the dyno this week. Can't wait, I'm chomping at the bit.
In addition, my transmission is also going to the dyno to be checked out before I put it back in the car. I am having the trans run on a dyno because it's one less thing to worry about when I fire up the car for the first time after everything is re-installed. If there is a problem and the trans. needs to be opened up again, it would be far easier to deal with rather than having to wrestle the unit out again on my back on my garage floor.
I also want to know what the pressures look like and if it shifts OK. There really is only one way to put it back together so I'm mostly confident but I'd rather be safe than sorry.
If this was just a regular old rebuild, I probably wouldn't bother but I have too much time and money invested in all this stuff just to wing it in the garage. Paying for these services will provide peace of mind and detailed knowledge of how all this stuff ticks.
More to come.
rmchrgr
Skate And Destroy
Picked up my transmission from the trans. shop. Everything checked out good! I'm stoked!
For those of you familiar with them, I went to Freddy Brown out here in Long Island. They are known nationwide as top builders.
The first thing Freddy asked me when I dropped the trans. off was whether I plugged the front vent since it is relocated to the rear of the case. I said "uhhhhh, no, uhh, I don't think so..." So they had to pull the pump out, tap the vent hole and plug it. No big deal. You don't need two vents. I don't think it would have been an issue to have the one in the pump and the one in the rear but it's standard practice to plug the vent if you have it at the rear of the case so they took care of that.
Second thing he asked was whether or not I had Teflon pump rings. Again, I was like, "uhhhhh, maybe?" So after he pulled the pump he called and said that I had "the worst rings possible" in the pump so he changed them out. I kept thinking there was a reason to not have Teflon pump rings but I can't remember what it was. Doesn't matter now, it has Teflon rings in it.
The two main things I was concerned with were whether it shifted OK and what the line pressure was. I put a stiffer spring in the valve body to increase the pressure since I have 6 front clutch discs and 5 rear.
They said the lowest they could get the pressure was 145. I was a little concerned since the reverse boost circuit in my valve body was not modified for higher pressure so the reverse pressure could be very high, like well over 400 psi. Too high pressure can break the piston or bands but he said it was fine.
So all in all, my first full transmission build went pretty well. I may have to make some band adjustments when I start driving it if there is too much overlap between the shifts. I air tested it and it seemed OK so hopefully it will be good to go without much fuss.
Stopped at the engine shop on the way back to confirm my dyno time for Friday. I will be loading up the 416 and bringing it by tomorrow morning to get it set up for Friday.
More to come!
Attachments
I just 2 904's done by him. 1 for the wife's Cuda, simple upgrade & shift kit, mine with a MVB. Told him it was running hard and fast, looking for 9's. He chuckled and said "OK!"
-


