Finally getting around to doing this write up. Been doing a complete overhaul and cleaning on my 40 by 80 shop, moving around farm equipment and junk piled 4 feet high was getting old. So now that is finally done, I got back on the dart.
I purchased the GTS kit back in August at the Nationals.
If you wish to read my initial thoughts, they can be found here.
http://www.forabodiesonly.com/mopar/showthread.php?t=323486
First, the Disclaimer: Below is the procedure I installed my kit in, these steps may or may not be out of step with any supplied instructions from the manufacturer. It is highly recommended that any installer follow the manufacturer's guidelines and procedures to remove/install any and all products. Also, some steps I did forget to take pictures of such as the brake install/removal etc.
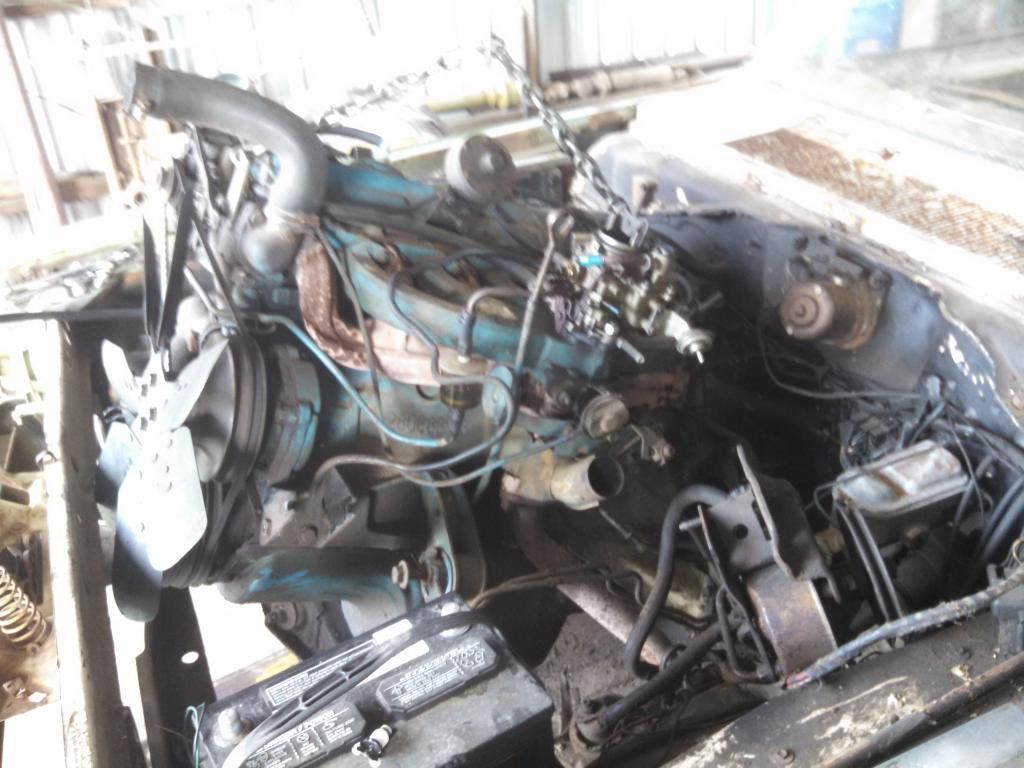
The first thing I did was to yank the old, tired slant 6 and 904 from the car, I have an atlas 2 post, so this made it somewhat easier to pull this out. However, you can do it the old fashion way, which is what I did here since I was pulling it solo. With the right tools and extra hands, you can pull the old factory k frame and drive train out from under the car very easily:
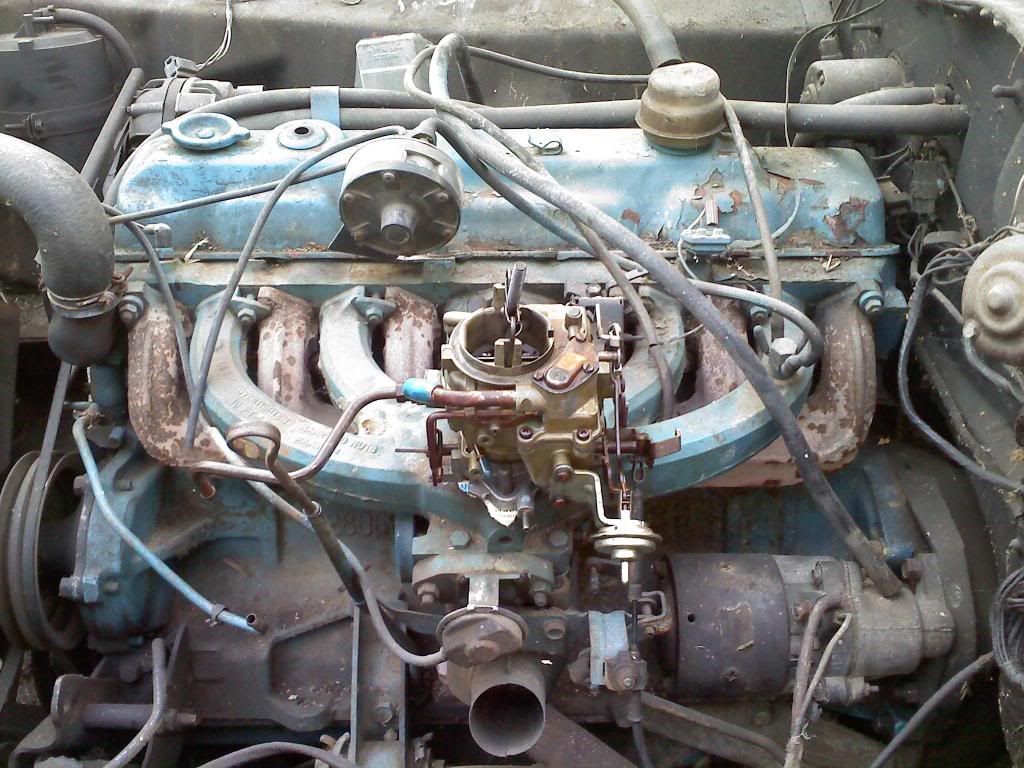
only took an hour and 10 minutes, not bad while doing this solo.
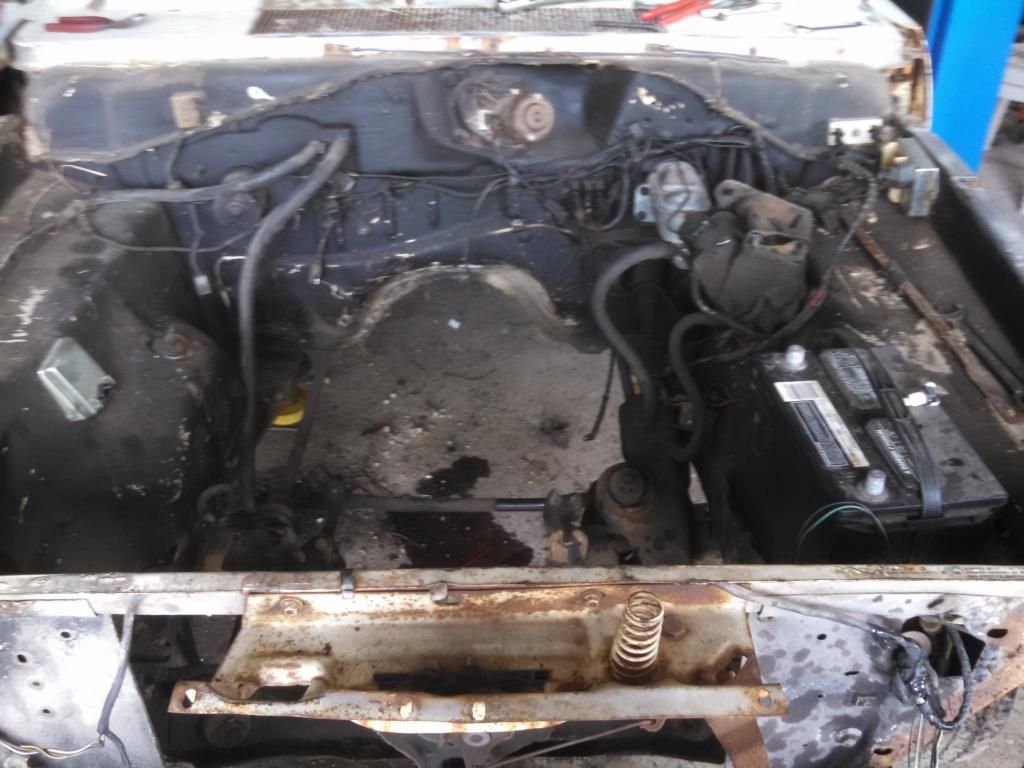
empty bay now:
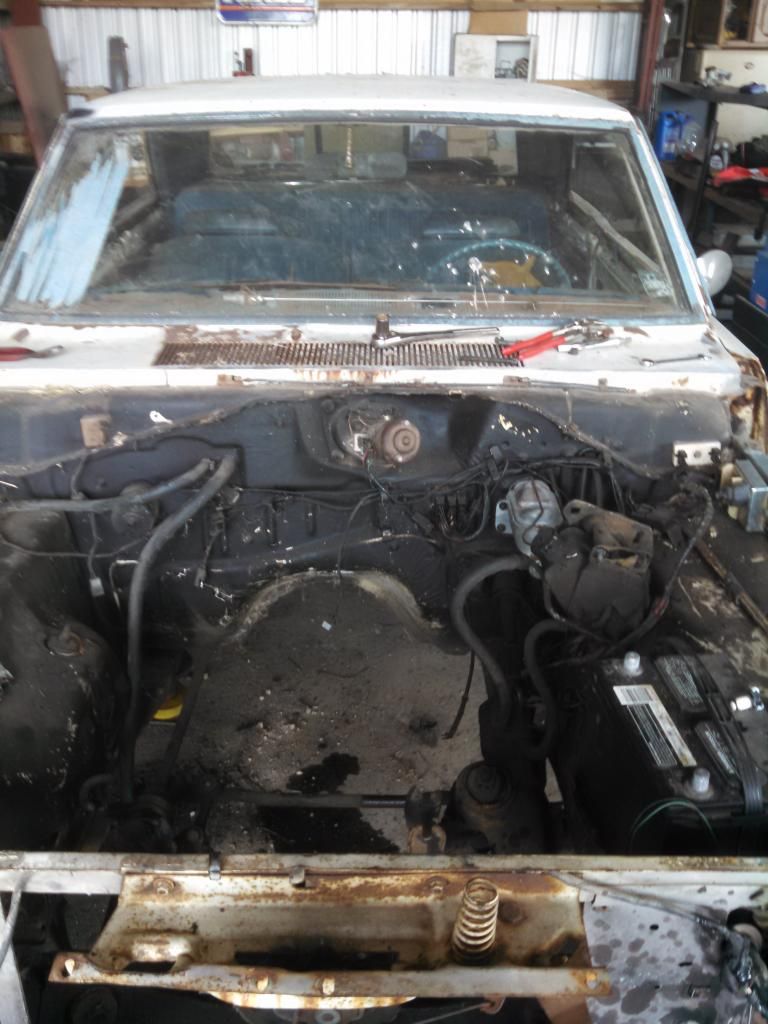
Now for the factory suspension and brakes.
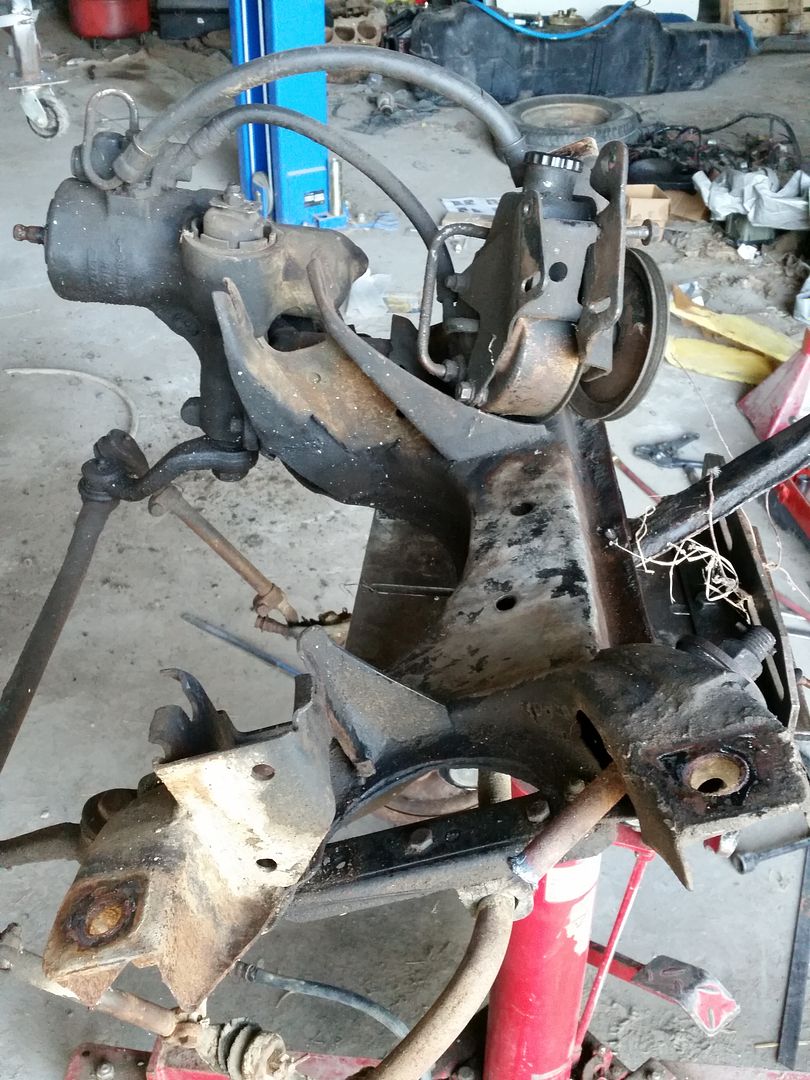
I started by removing the brakes, rubber brake lines, spindles, steering box, pitman arm, k frame to core support brace and steering linkage from the vehicle. Also the factory sway bar came out as well at this time. Next, was the removal of the torsion bars, mine actually were missing the clips and the previous owner at some point had installed .890 bars, sadly, I ruint the bars trying to knocked them out but they did finally come out. Man, it took forever to get those out.
After finally getting the T-bars out, I supported the K frame with a trans jack and removed the 4 bolts holding it in. Note, save these 4 bolts and try your hardest not to strip or damage them in any way as they will be re-used in the GTS kit to mount the tubed k frame. Also, you'll need to reuse or buy new upper control arm cam bolts, my were junk and had to be replaced.
The old junk:
Now, we are to the cutting phase of the install. Some A bodies may have to have the bump stops cut off in order to clear the shock tower of the GTS kit. Mine were barely blocking the way, a fraction of an inch forward and I wouldn't have had to cut them off, but I removed them. While the GTS currently does not come with a bump stop, I will be fabricating my own down the road, should I need it.
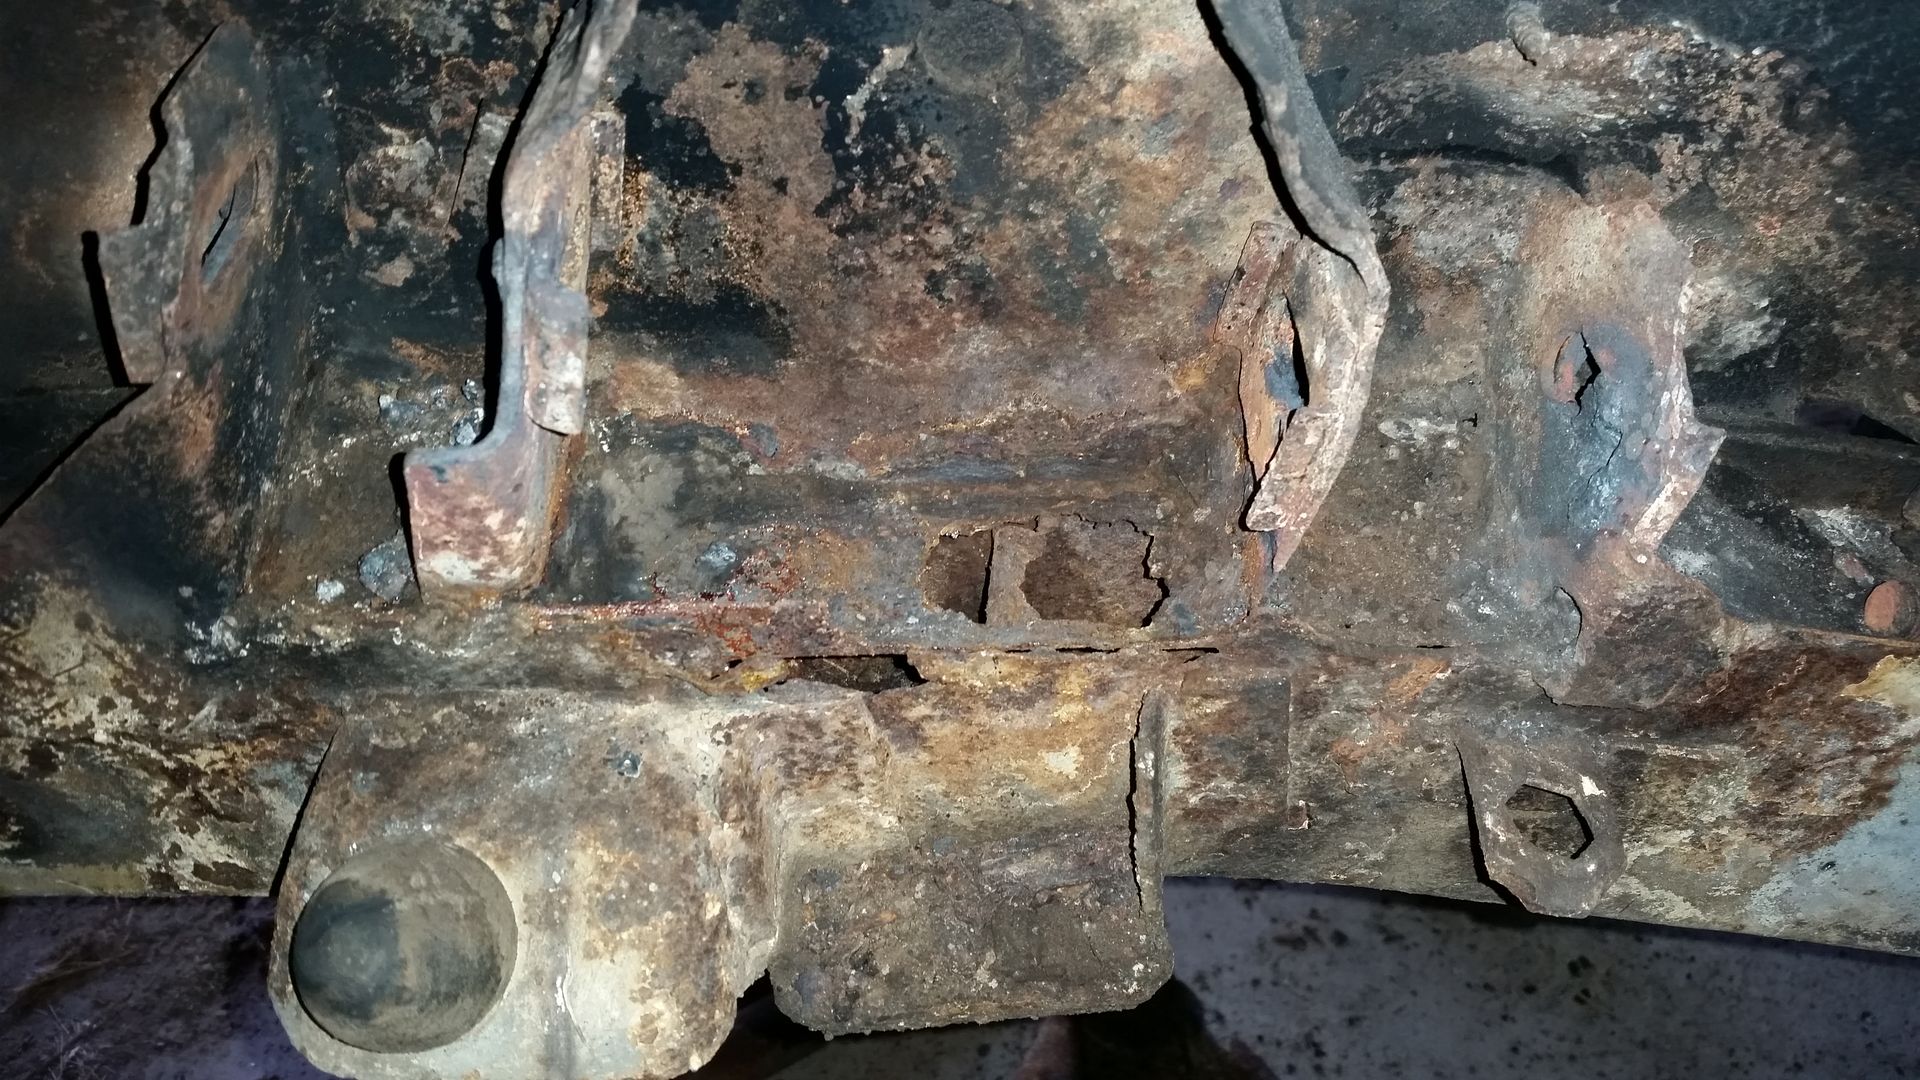
Found some rusty frame rails....now repaired and painted
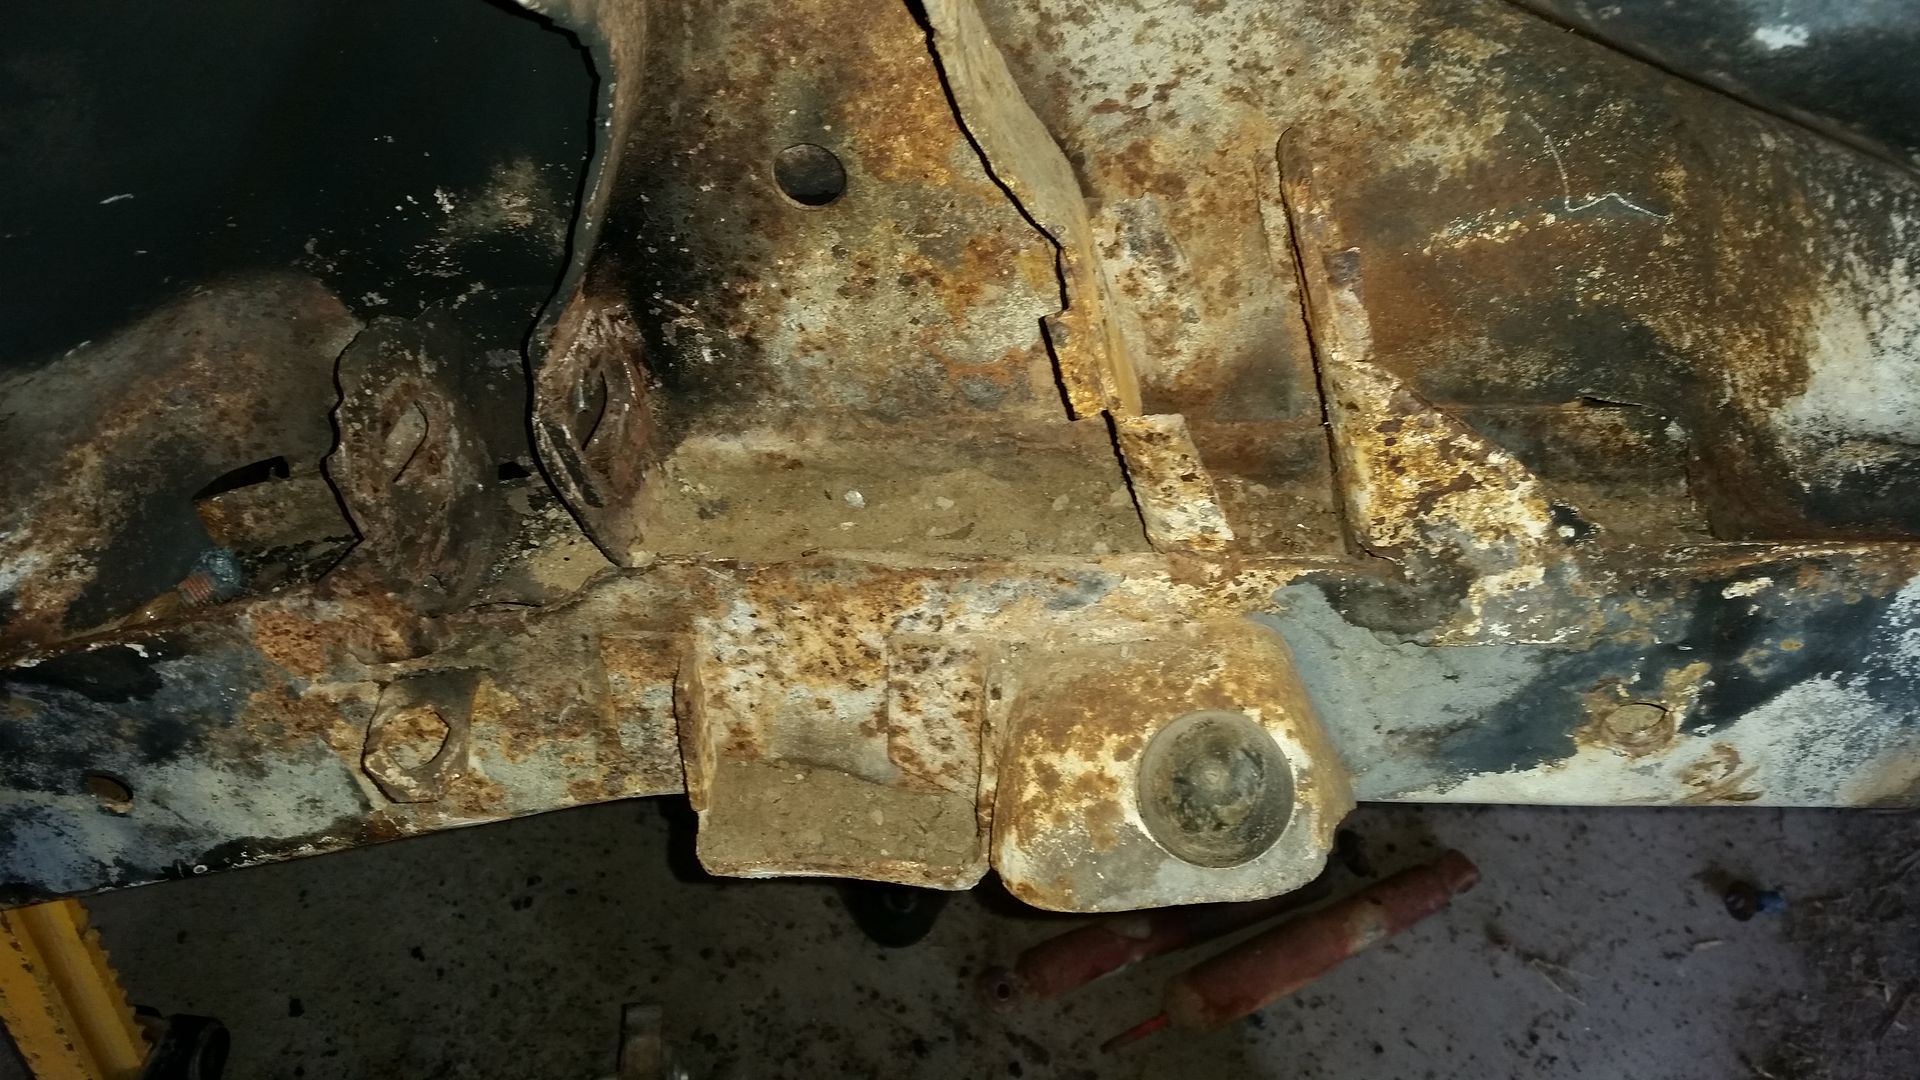
The really bad one
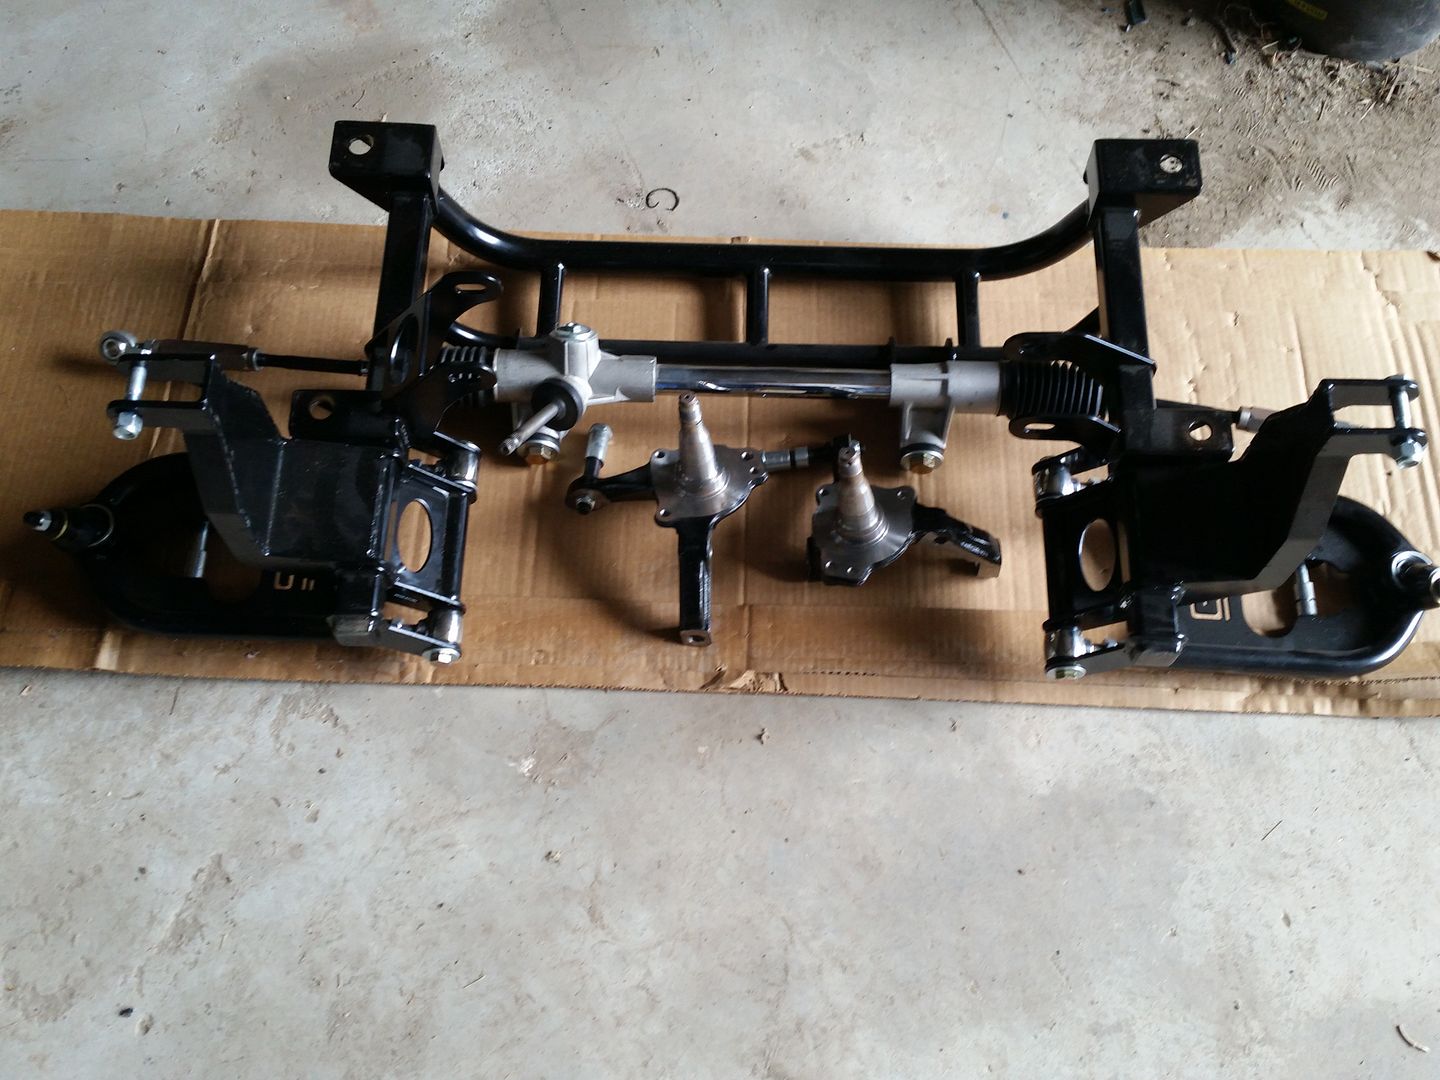
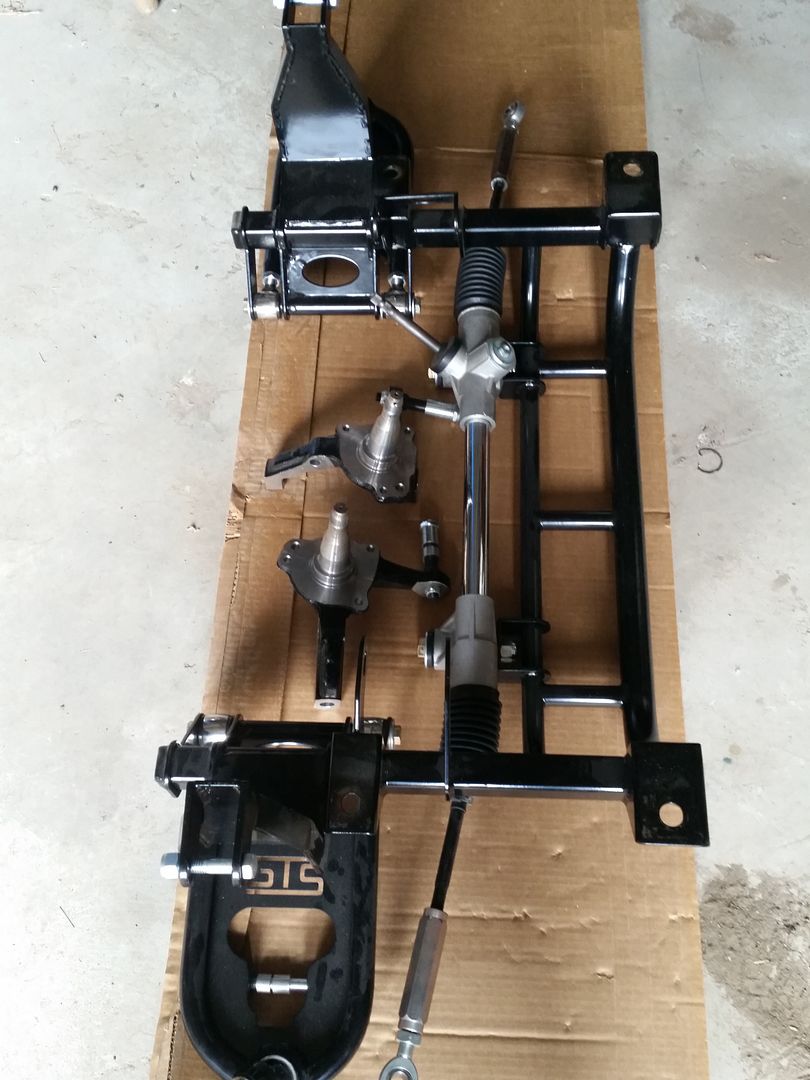
Trial fitting: Installed flawlessly, hardest part was removing the 40yr old camber bolts from the factory uppers, destroyed them in the process
Also, you will have to clearance the upper control arm mount slightly in order to clear the control arms. On the upper control approximately 3/8ths of an inch on both sides of the vehicle.
You have now completed the removal of all items needing to be removed from the car in preparation for the new GTS kit.
Installation and Set Up
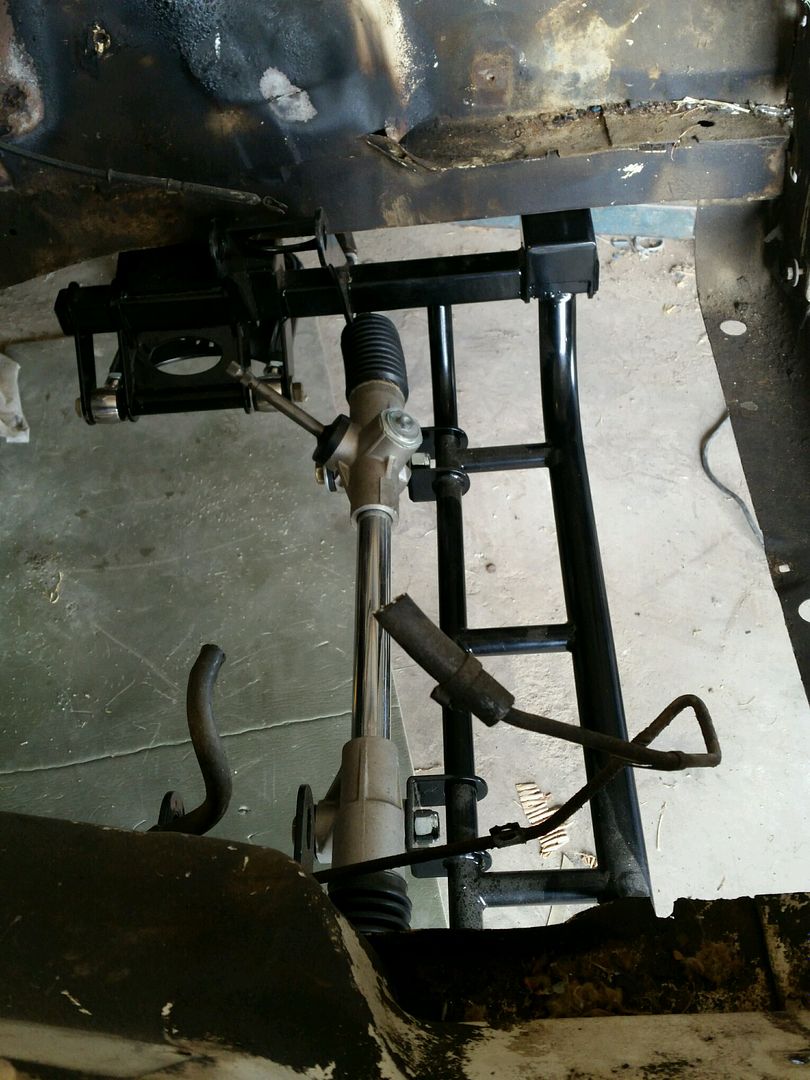
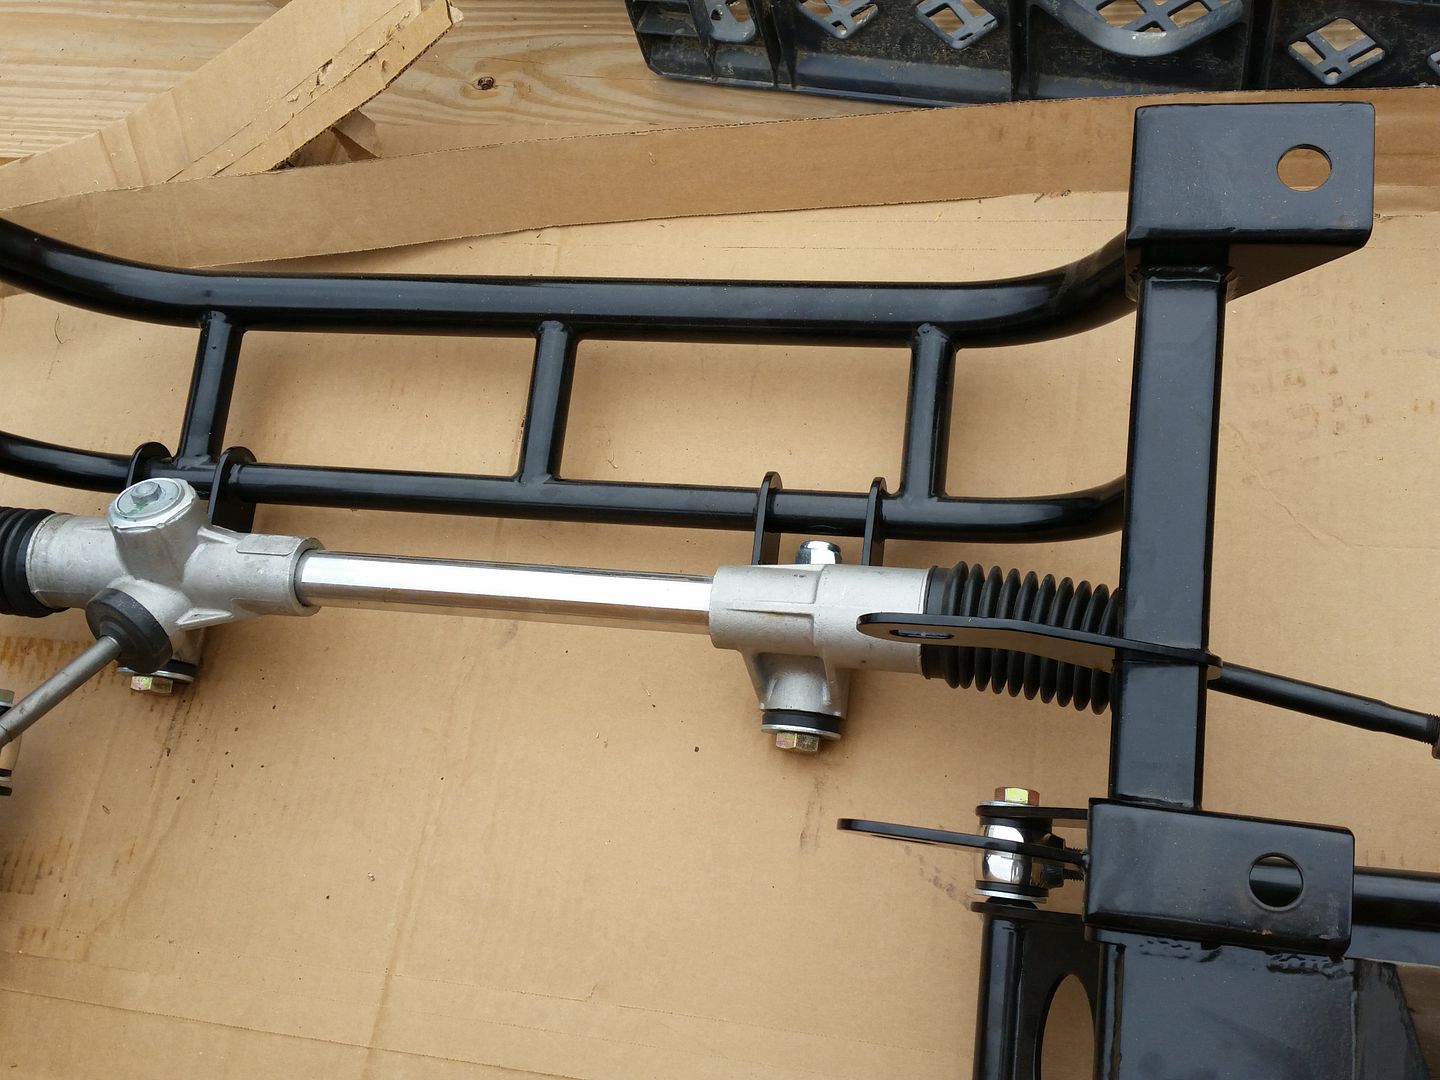
Attach your steering rack, if not already attached, to the K frame with supplied hardware. I also chose to go ahead and mount the lower control arms(after installing the heims and ball joints. Take some grease and lightly grease the bushings on the control arms to prevent noise and squealing. Install the lower control arms onto the k frame. The GTS has an adjustable track width, for this install in order to answer some question some people had, I chose to see if I could install it close to 58 inches. See my comments later on to find out if I was successful in that goal.
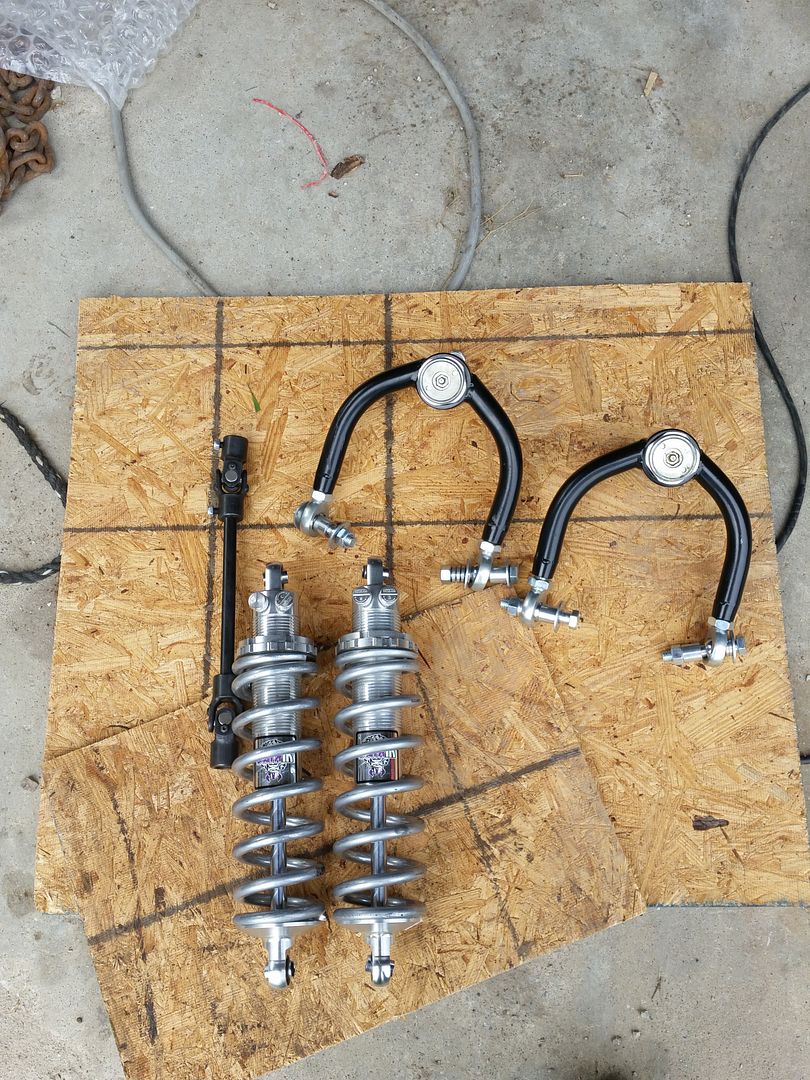
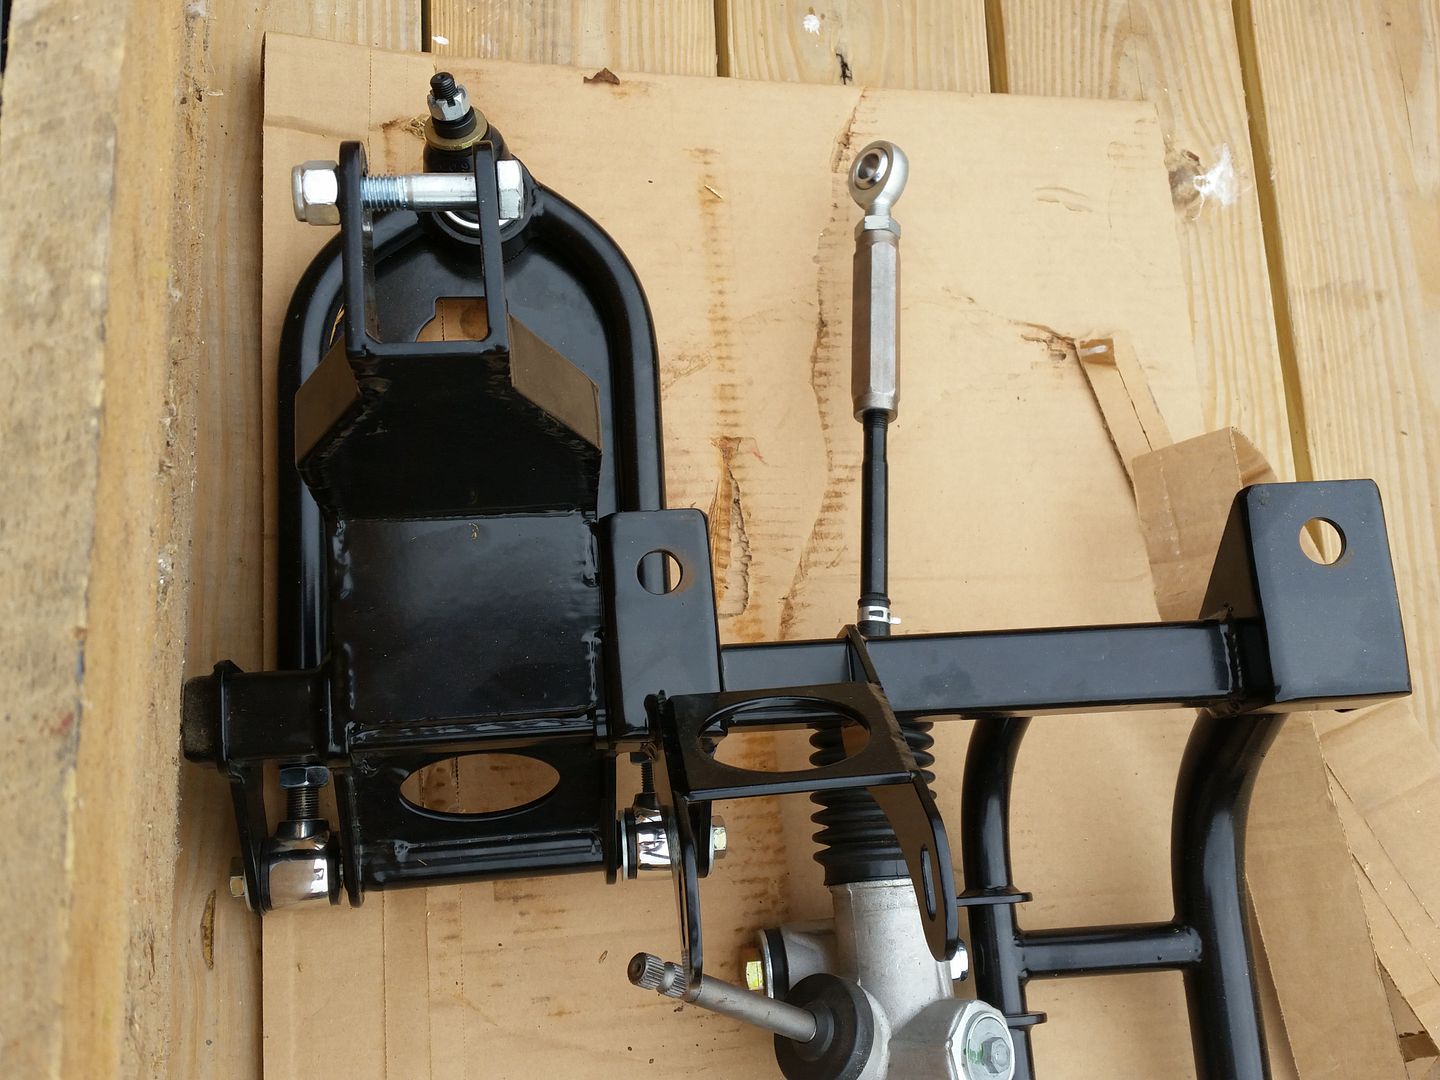
Install the upper control arms. Note: Ensure the same number of threads are showing on each control end. And make sure both sides (driver and passenger) are the same. Fine adjustments can be made later. Using the spacers, make sure there is at least 3/8th clearance between the rods ends and the mounts on the frame. Also, make sure you do this prior to installing the K frame, I didn't and had to drop the frame back out because my king kong hands wouldnt fit behind the shock tower to properly install the upper control arms.
With the help of a friend or a jack,(I used an ATV jack which worked perfectly to support and balance the frame as well as allow me to change the pitch of the K frame effortlessly.) carefully raise the new GTS K frame into position under the car. Re-install the factory K frame bolts through the provisions in the new K frame. Torque to factory specs.
On the lower control arms, swing both control arms inward and under the car until both control arms are underneath the engine bay. per the GTS instructions, "take a straight edge, and ensure the center of the ball joints from the driver’s side lower are in line with the center of the ball joint on the passenger arm. If not, adjust the control arms accordingly. Snug the control arms down. Once they are in line, use the included set screws, 2 for each control arm, and tighten them into the provisions on the lower control arms."
Install the coil overs on to the lower control arms and then the upper mount. NOTE: The supplied GTS instructions as well as the supplied instructions from Viking say that before adjusting the spring height, to lightly coat the coil over body threads in use some silver anti-seize in order to prevent galling the threads.
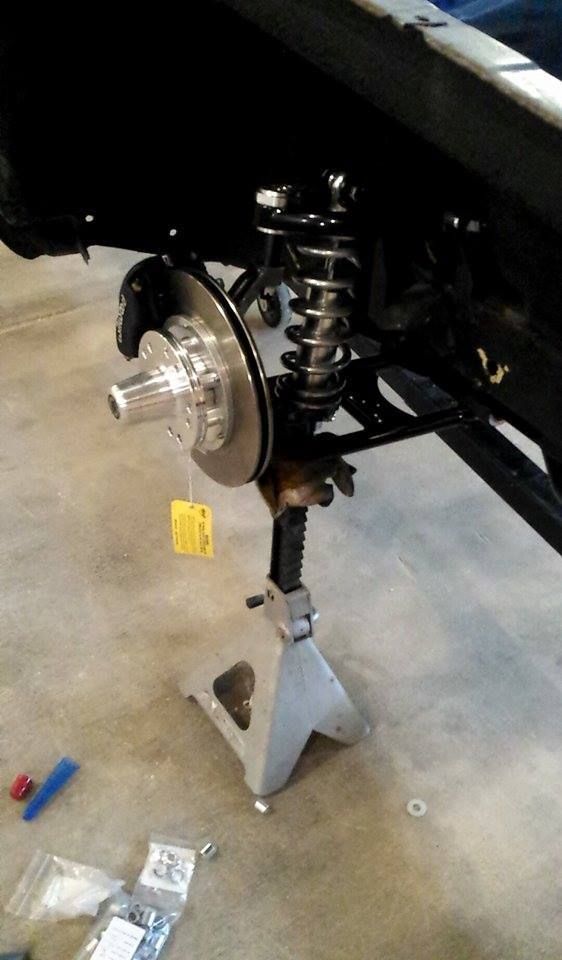
Install spindles and connect the steering arms from the rack to the spindles. One note to mention on these spindles, Carl later changed the bump steer design and I simply shipped my original spindles back to him and he changed them over to his new design to eliminate the giant stack of spacers. So the first couple pics you'll see here are with the old spindles and the later photos with brakes are when I got the new spindles back and after I installed the new upper control arm mounts.
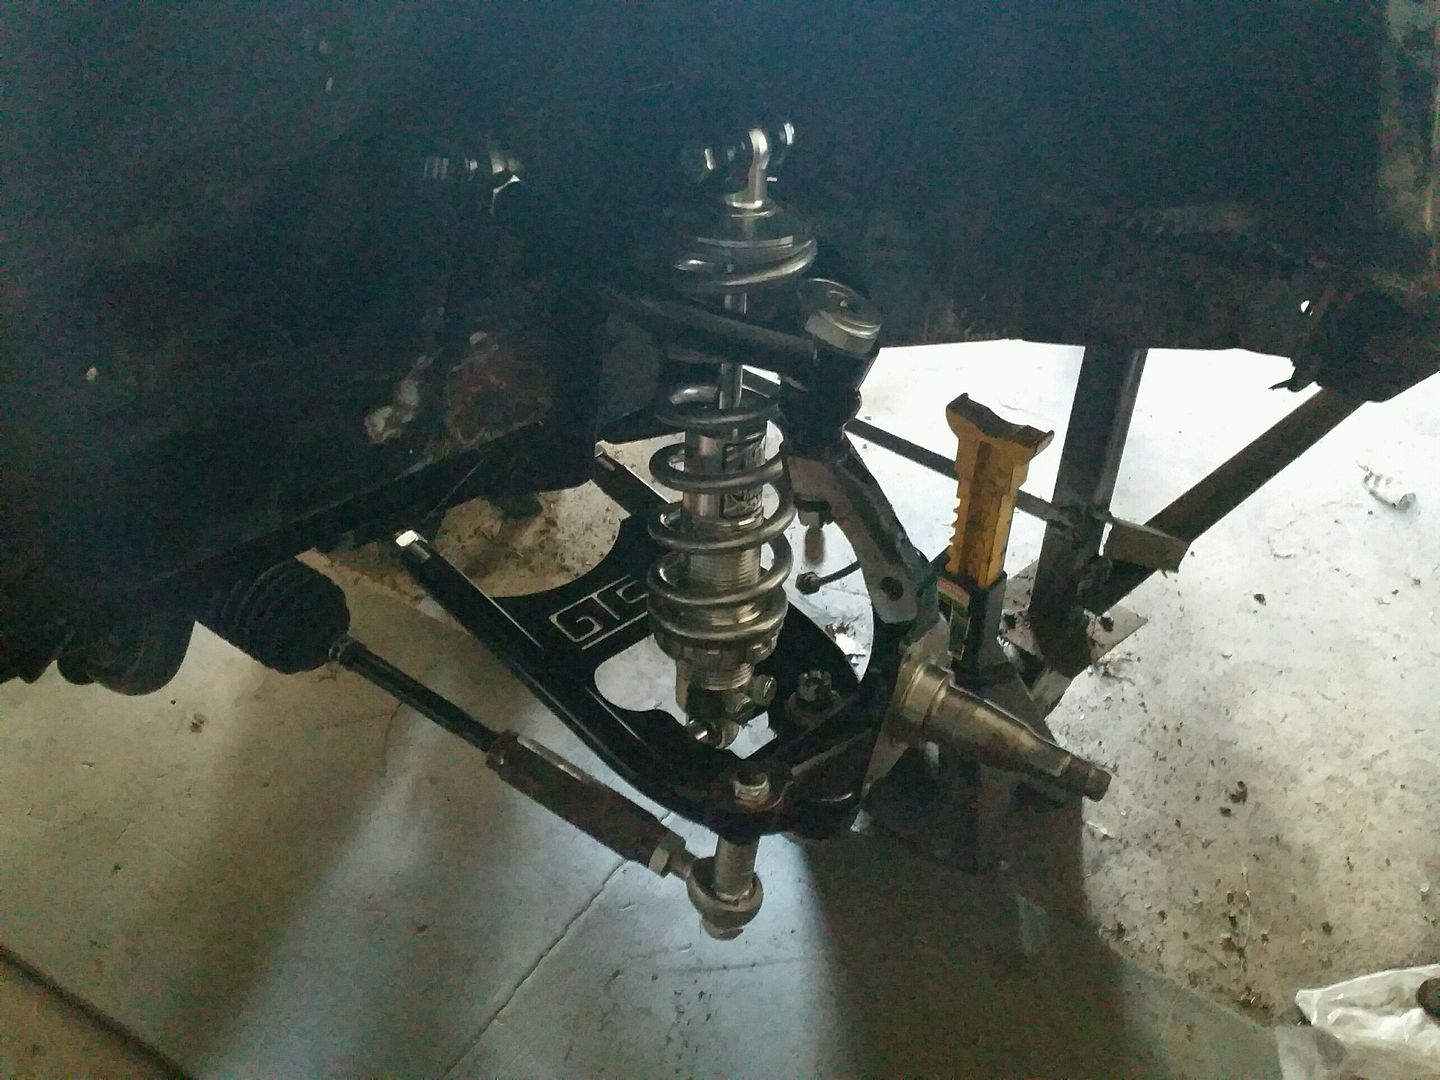
Engine bay shot:
I still have to finish installed the column hook up and the column bearing, will post more of those pictures as I get them done. Also, yes, my 440 is still in the machine shop and I've not yet installed it, however, I will be using a spare RB block to see how everything fits once I get time.
=======================================================================
Some misc pics.
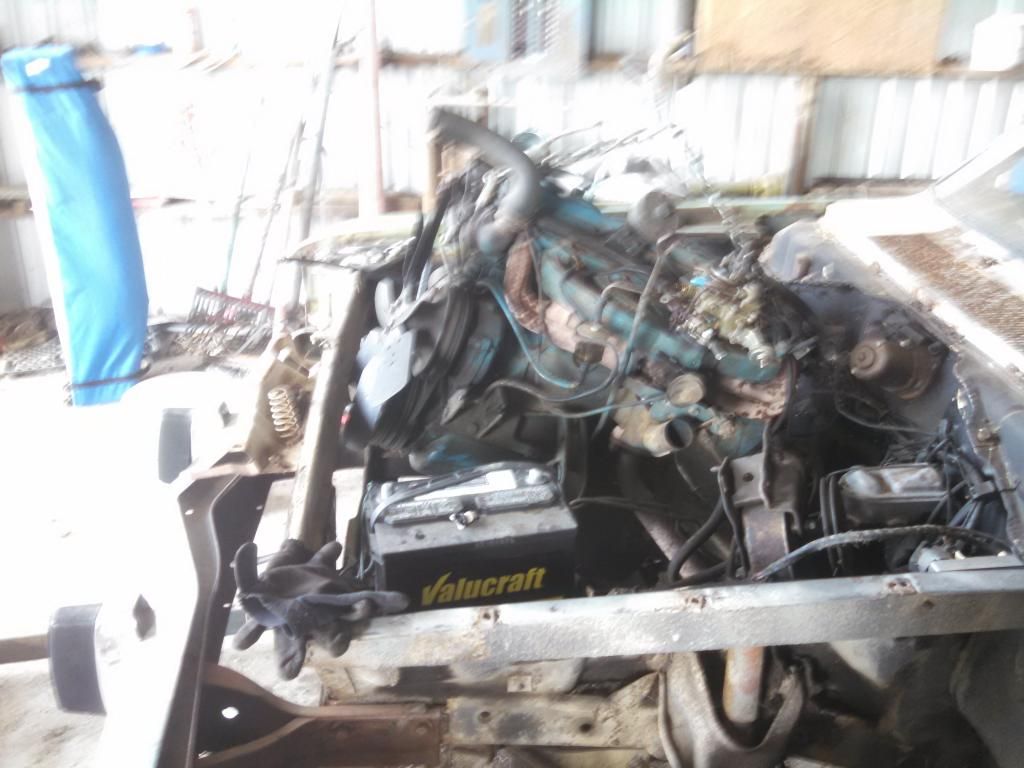
From the day I got it home:


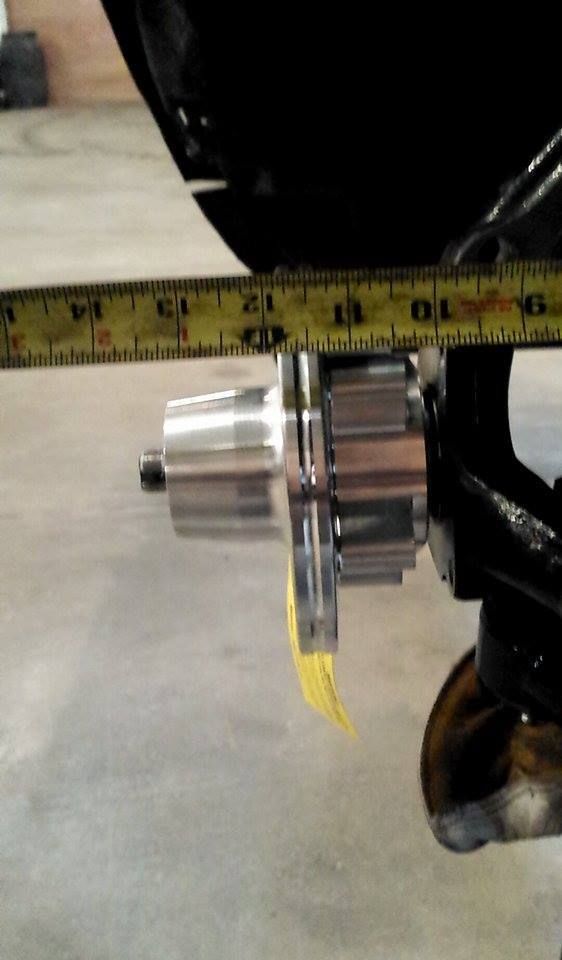
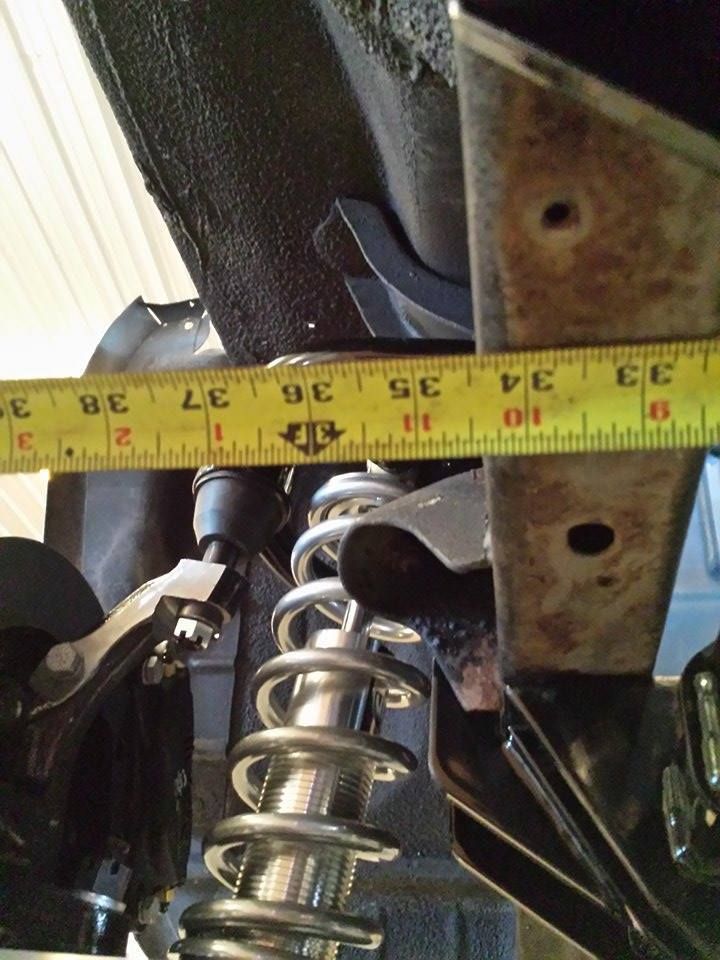
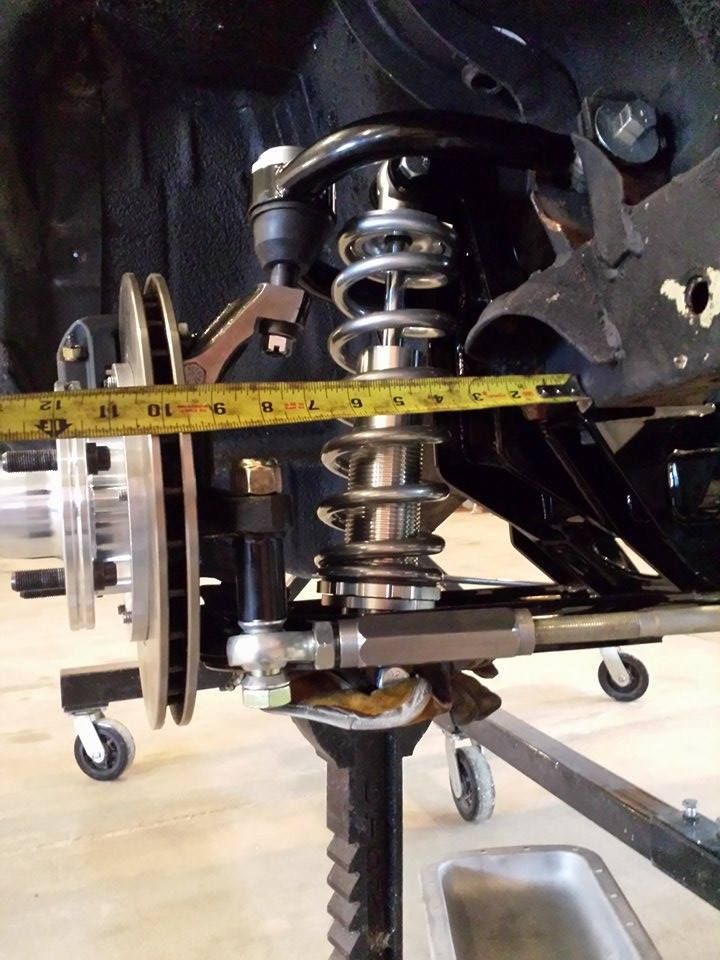
Suspension travel measured out to be an impressive 6.5 inches at the spindel at 58.5 inches hub to hub face and 6.25 at 58.0 hub to hub. With .25 inches to spare before bottoming the shock.
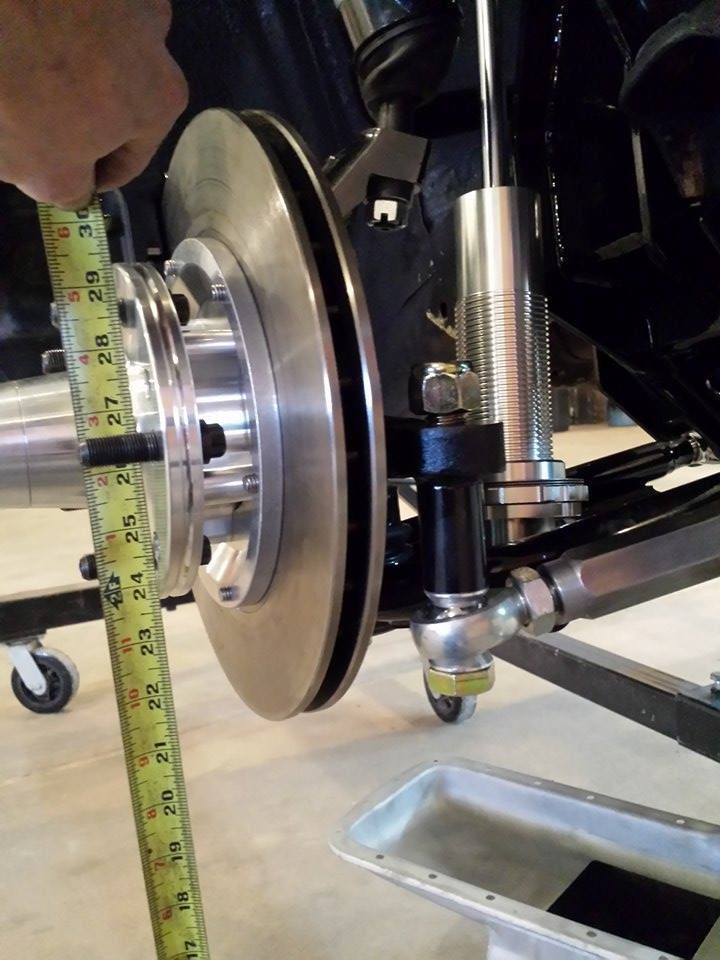
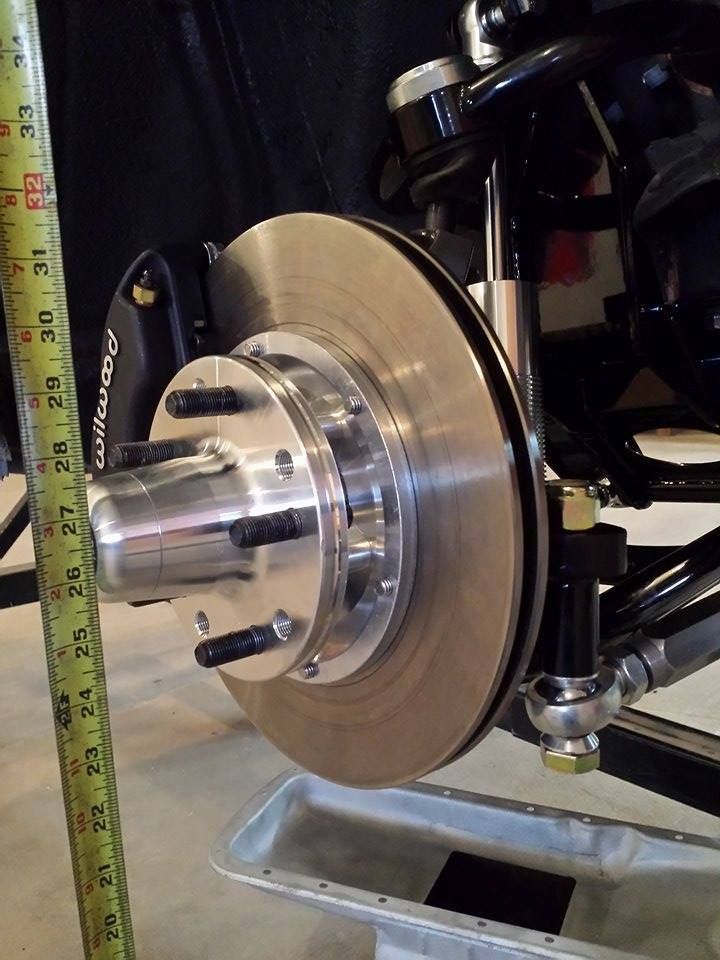
spun bearing, mine measured out to 58 inches with about an 1/8 inch where I could go even narrower, probably as narrow as 57.75 or so, however right now, I set it to 58.5 to measure for tires/rims. Plus that is where the max suspension travel measured at. When completed, I'll be going back to 58 inches but I wanted to measure for the 58.5 setting because I plan to run wheel spacers as a tuning tool on this since it is a PT car. Just another tool in the toolbox for tuning.
More pics uploading, will be posting soon
I purchased the GTS kit back in August at the Nationals.
If you wish to read my initial thoughts, they can be found here.
http://www.forabodiesonly.com/mopar/showthread.php?t=323486
First, the Disclaimer: Below is the procedure I installed my kit in, these steps may or may not be out of step with any supplied instructions from the manufacturer. It is highly recommended that any installer follow the manufacturer's guidelines and procedures to remove/install any and all products. Also, some steps I did forget to take pictures of such as the brake install/removal etc.
The first thing I did was to yank the old, tired slant 6 and 904 from the car, I have an atlas 2 post, so this made it somewhat easier to pull this out. However, you can do it the old fashion way, which is what I did here since I was pulling it solo. With the right tools and extra hands, you can pull the old factory k frame and drive train out from under the car very easily:

only took an hour and 10 minutes, not bad while doing this solo.


empty bay now:


Now for the factory suspension and brakes.
I started by removing the brakes, rubber brake lines, spindles, steering box, pitman arm, k frame to core support brace and steering linkage from the vehicle. Also the factory sway bar came out as well at this time. Next, was the removal of the torsion bars, mine actually were missing the clips and the previous owner at some point had installed .890 bars, sadly, I ruint the bars trying to knocked them out but they did finally come out. Man, it took forever to get those out.
After finally getting the T-bars out, I supported the K frame with a trans jack and removed the 4 bolts holding it in. Note, save these 4 bolts and try your hardest not to strip or damage them in any way as they will be re-used in the GTS kit to mount the tubed k frame. Also, you'll need to reuse or buy new upper control arm cam bolts, my were junk and had to be replaced.
The old junk:

Now, we are to the cutting phase of the install. Some A bodies may have to have the bump stops cut off in order to clear the shock tower of the GTS kit. Mine were barely blocking the way, a fraction of an inch forward and I wouldn't have had to cut them off, but I removed them. While the GTS currently does not come with a bump stop, I will be fabricating my own down the road, should I need it.

Found some rusty frame rails....now repaired and painted

The really bad one
Trial fitting: Installed flawlessly, hardest part was removing the 40yr old camber bolts from the factory uppers, destroyed them in the process

Also, you will have to clearance the upper control arm mount slightly in order to clear the control arms. On the upper control approximately 3/8ths of an inch on both sides of the vehicle.
You have now completed the removal of all items needing to be removed from the car in preparation for the new GTS kit.
Installation and Set Up
Attach your steering rack, if not already attached, to the K frame with supplied hardware. I also chose to go ahead and mount the lower control arms(after installing the heims and ball joints. Take some grease and lightly grease the bushings on the control arms to prevent noise and squealing. Install the lower control arms onto the k frame. The GTS has an adjustable track width, for this install in order to answer some question some people had, I chose to see if I could install it close to 58 inches. See my comments later on to find out if I was successful in that goal.
Install the upper control arms. Note: Ensure the same number of threads are showing on each control end. And make sure both sides (driver and passenger) are the same. Fine adjustments can be made later. Using the spacers, make sure there is at least 3/8th clearance between the rods ends and the mounts on the frame. Also, make sure you do this prior to installing the K frame, I didn't and had to drop the frame back out because my king kong hands wouldnt fit behind the shock tower to properly install the upper control arms.
With the help of a friend or a jack,(I used an ATV jack which worked perfectly to support and balance the frame as well as allow me to change the pitch of the K frame effortlessly.) carefully raise the new GTS K frame into position under the car. Re-install the factory K frame bolts through the provisions in the new K frame. Torque to factory specs.
On the lower control arms, swing both control arms inward and under the car until both control arms are underneath the engine bay. per the GTS instructions, "take a straight edge, and ensure the center of the ball joints from the driver’s side lower are in line with the center of the ball joint on the passenger arm. If not, adjust the control arms accordingly. Snug the control arms down. Once they are in line, use the included set screws, 2 for each control arm, and tighten them into the provisions on the lower control arms."
Install the coil overs on to the lower control arms and then the upper mount. NOTE: The supplied GTS instructions as well as the supplied instructions from Viking say that before adjusting the spring height, to lightly coat the coil over body threads in use some silver anti-seize in order to prevent galling the threads.
Install spindles and connect the steering arms from the rack to the spindles. One note to mention on these spindles, Carl later changed the bump steer design and I simply shipped my original spindles back to him and he changed them over to his new design to eliminate the giant stack of spacers. So the first couple pics you'll see here are with the old spindles and the later photos with brakes are when I got the new spindles back and after I installed the new upper control arm mounts.

Engine bay shot:
I still have to finish installed the column hook up and the column bearing, will post more of those pictures as I get them done. Also, yes, my 440 is still in the machine shop and I've not yet installed it, however, I will be using a spare RB block to see how everything fits once I get time.
=======================================================================
Some misc pics.
From the day I got it home:


Suspension travel measured out to be an impressive 6.5 inches at the spindel at 58.5 inches hub to hub face and 6.25 at 58.0 hub to hub. With .25 inches to spare before bottoming the shock.


I'm still waiting to hear on that installed hub face-to-hub face measurement.
If you can get it down to the mentioned 58.5" it's still 1/4" a side wider than
an HDK and anything wider is a non-starter for me. I want my front wheels to
be tucked in like a stocker; not way out to the fender lips and running VW tires
for clearance. This (and the price) is what made me shy away from the RMS.
.
spun bearing, mine measured out to 58 inches with about an 1/8 inch where I could go even narrower, probably as narrow as 57.75 or so, however right now, I set it to 58.5 to measure for tires/rims. Plus that is where the max suspension travel measured at. When completed, I'll be going back to 58 inches but I wanted to measure for the 58.5 setting because I plan to run wheel spacers as a tuning tool on this since it is a PT car. Just another tool in the toolbox for tuning.


More pics uploading, will be posting soon


