72 duster Build progress
Busted *** again today!!!
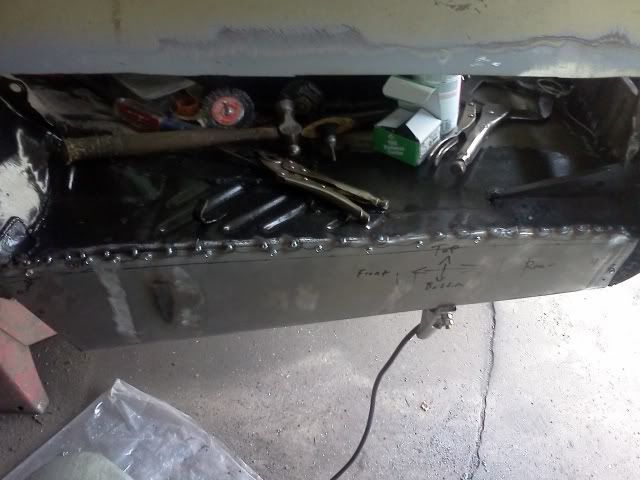
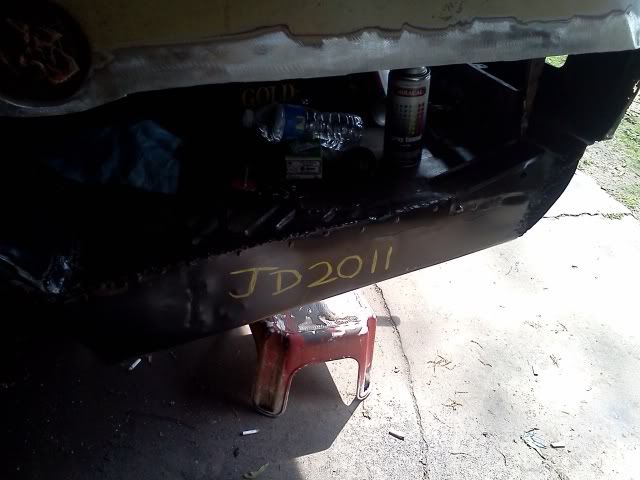
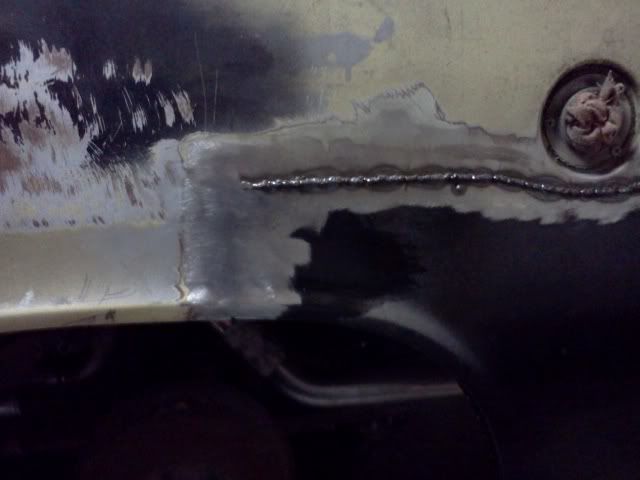
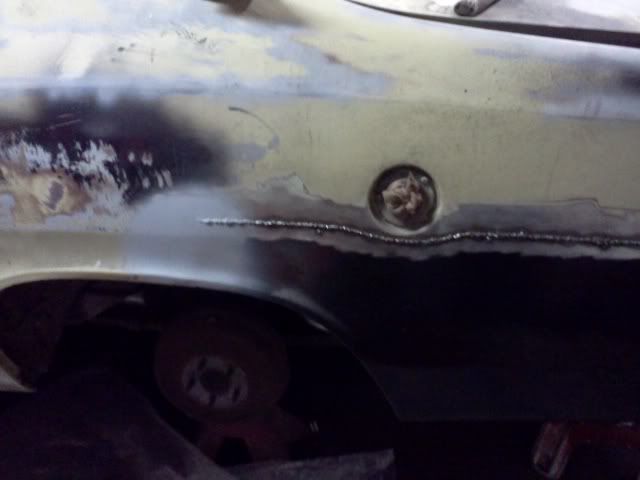
got my trunk extension panel I made all up into place where I wanted it, welded it into the car.....painted it......then in yellow paint marked my initials and date just incase years down the road someone ever works on the car Ill get a little recognition LOL.
tack welded in place
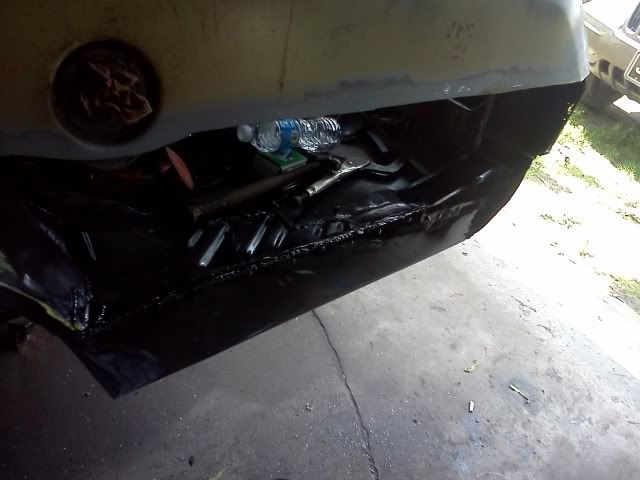
all welded in
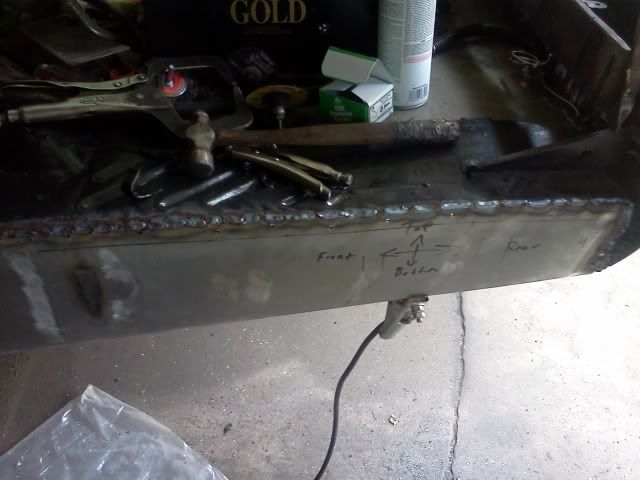
fresh coat of paint to keep it protected
my markings I left....not exactly top notch writing lol but I was using a little touch up paint pen brush that was almost out of paint lol.
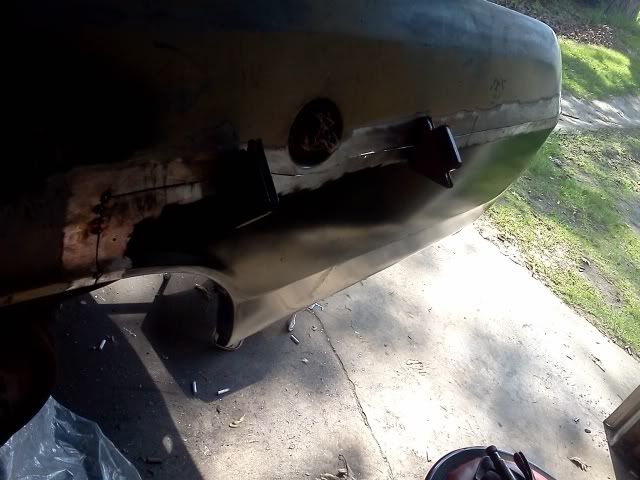
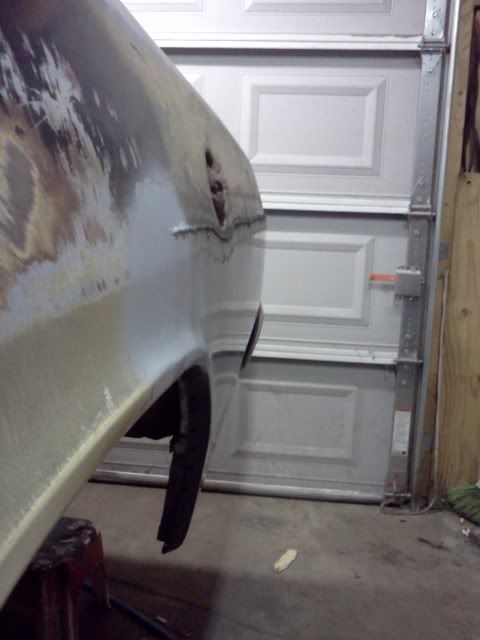
THEN.....once I finished up all that....I popped spot weld holes in around the new patch panel.
then took out a sanding disc and got all of the coating off of the weld surface of the panel and on the car.
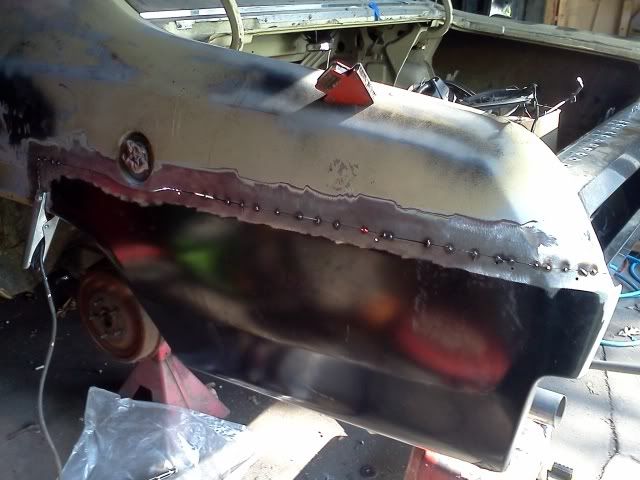
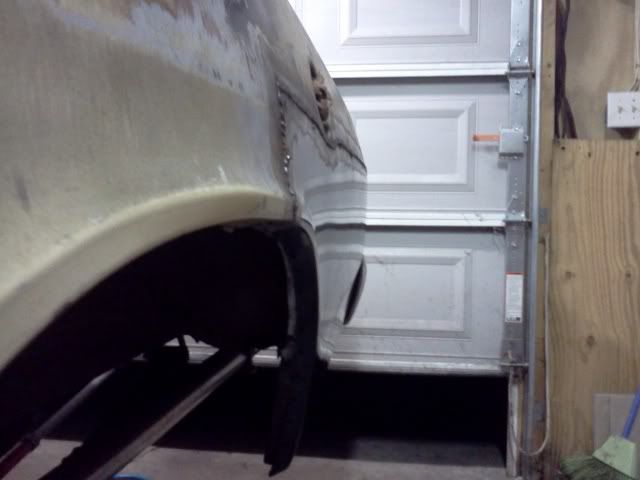
THEN...I started to hang the quarter panel patch in place.....at this point I was cussing and doing alot of staring at the car because with only one set of hands it is hard to hold the panel up at both ends,keep the replacement panel flush with the existing panel,maintain a even cap all the way around the panel,and try to weld it HAHAHA....soooooo I finally ask my wife to come give me a hand.... I had her hold one end,then I took the cut off discs I used to originally cut the panels and I slid it into the gap in a few spots between the 2 panels (that way it would go back to the exact same gap it had when I cut it). Then I stuck some magnets in a few spots to get the panel flush....did a little tweaking here and there....then laid down a couple tack welds to hold it in place once I was comfortable with where it was positioned.
THEN I started working my way down the panel with tack welds...all the while pushing in or out on either of the panels to get them to meet flush.
I also took a paint stick and used it to push one panel in to make the two panels meet flush (when both panels touch the paint stick I knew that they were level with one another).
a few tacks in
a few more
and more
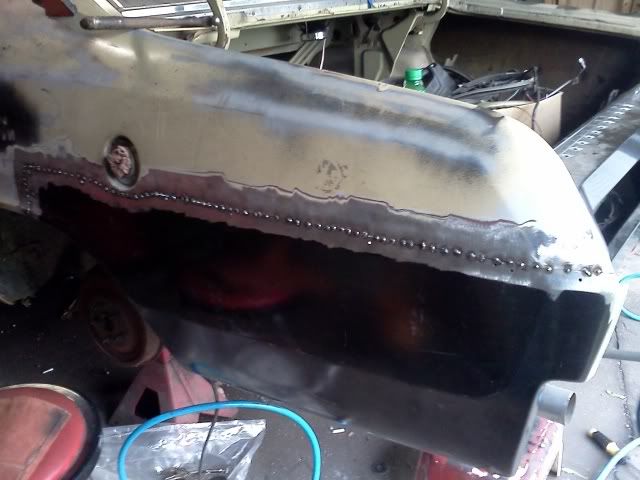
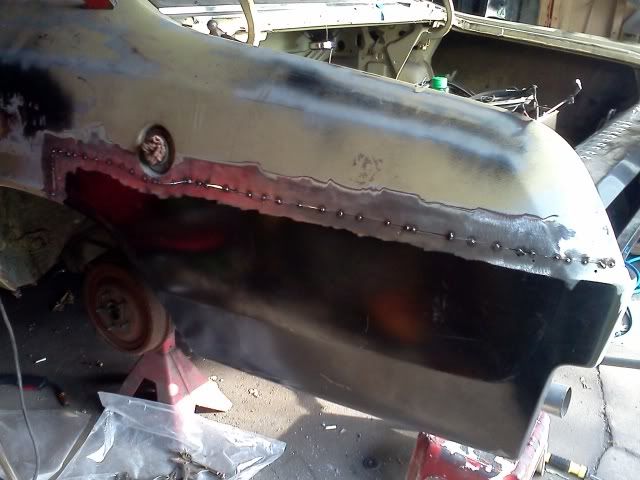
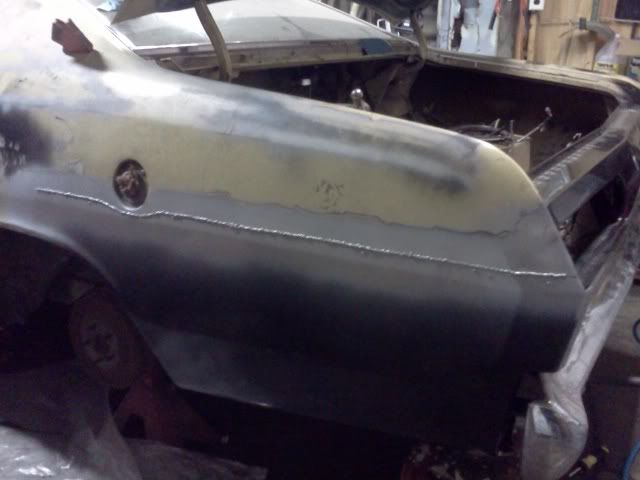
all welded in
no warps in the panel (always a PLUS LOL)
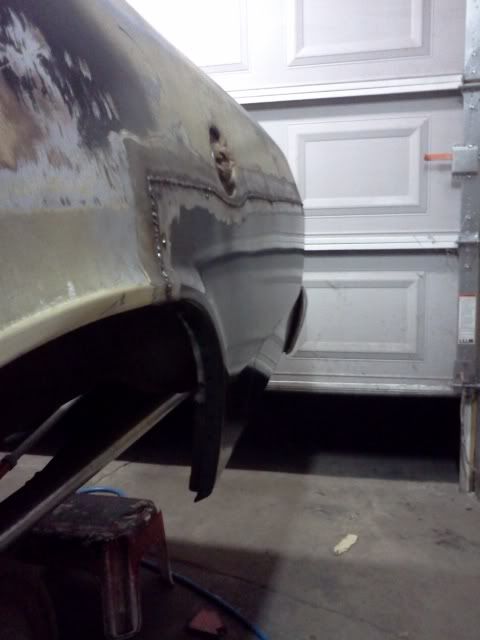
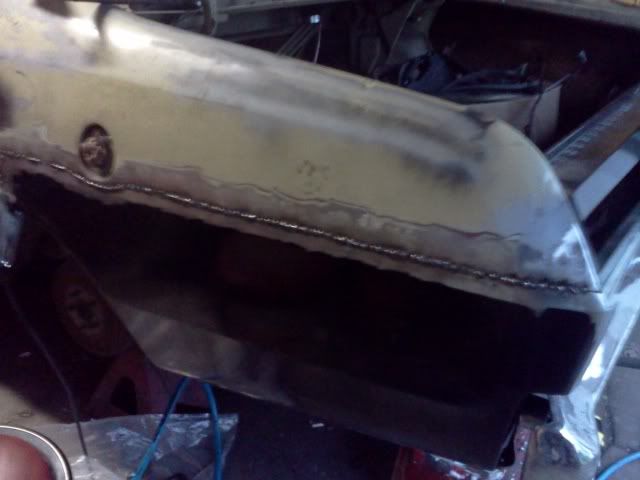
was just getting ready to call it a night and figured I would try grinding down the weld some to see what I had to work with( not done....just did a quick grinding)......and luckily it looks like I will need to use little to no filler!
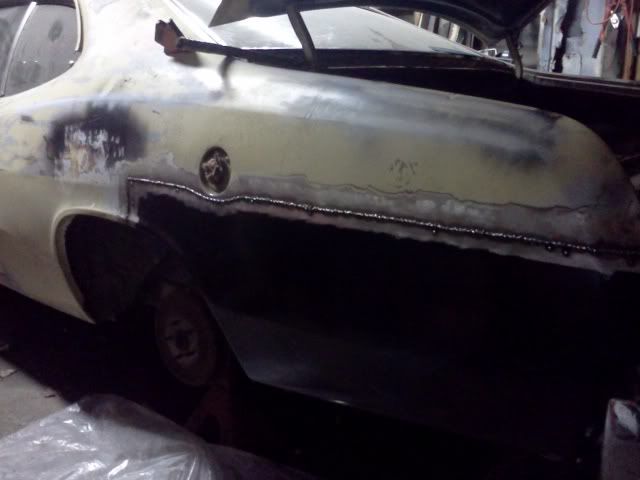
sprayed primer down the body line to help bring my attention to any warping there may have been and all looks good!.
well, thats what I did today.....still more left to do like grinding the weld down and putting my spot welds in around the wheel well and trunk extension but its getting closer.
should have the drivers side done soon! ( and it was the worse side....I did it first so the passenger side would feel like a walk in the park when I get to it LOL).
finish body work soon!....hoping to have all the metal work wrapped up in the next week or two, but heck...at the pace I may get it done a little ahead of schedule lol.
Busted *** again today!!!
got my trunk extension panel I made all up into place where I wanted it, welded it into the car.....painted it......then in yellow paint marked my initials and date just incase years down the road someone ever works on the car Ill get a little recognition LOL.
tack welded in place
all welded in
fresh coat of paint to keep it protected
my markings I left....not exactly top notch writing lol but I was using a little touch up paint pen brush that was almost out of paint lol.
THEN.....once I finished up all that....I popped spot weld holes in around the new patch panel.
then took out a sanding disc and got all of the coating off of the weld surface of the panel and on the car.
THEN...I started to hang the quarter panel patch in place.....at this point I was cussing and doing alot of staring at the car because with only one set of hands it is hard to hold the panel up at both ends,keep the replacement panel flush with the existing panel,maintain a even cap all the way around the panel,and try to weld it HAHAHA....soooooo I finally ask my wife to come give me a hand.... I had her hold one end,then I took the cut off discs I used to originally cut the panels and I slid it into the gap in a few spots between the 2 panels (that way it would go back to the exact same gap it had when I cut it). Then I stuck some magnets in a few spots to get the panel flush....did a little tweaking here and there....then laid down a couple tack welds to hold it in place once I was comfortable with where it was positioned.
THEN I started working my way down the panel with tack welds...all the while pushing in or out on either of the panels to get them to meet flush.
I also took a paint stick and used it to push one panel in to make the two panels meet flush (when both panels touch the paint stick I knew that they were level with one another).
a few tacks in
a few more
and more
all welded in
no warps in the panel (always a PLUS LOL)
was just getting ready to call it a night and figured I would try grinding down the weld some to see what I had to work with( not done....just did a quick grinding)......and luckily it looks like I will need to use little to no filler!
sprayed primer down the body line to help bring my attention to any warping there may have been and all looks good!.
well, thats what I did today.....still more left to do like grinding the weld down and putting my spot welds in around the wheel well and trunk extension but its getting closer.
should have the drivers side done soon! ( and it was the worse side....I did it first so the passenger side would feel like a walk in the park when I get to it LOL).
finish body work soon!....hoping to have all the metal work wrapped up in the next week or two, but heck...at the pace I may get it done a little ahead of schedule lol.