Serj22
Well-Known Member
I'm sure lots of people have made a custom console for their A-body if they don't have one. I have personally made one for pretty much every car I've ever owned. Not sure why, but it's kind of an attention getter right in the middle of your car. I'd love to see other people's ideas here, and creations.
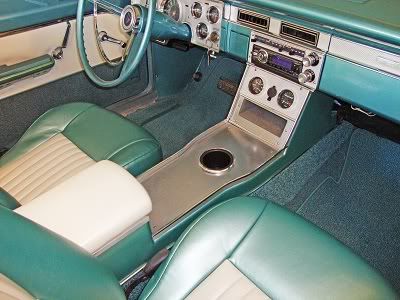
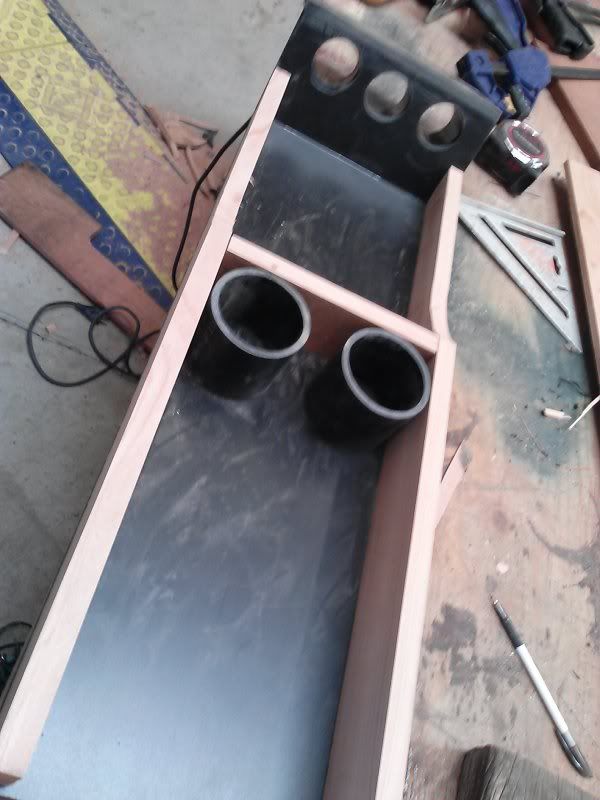
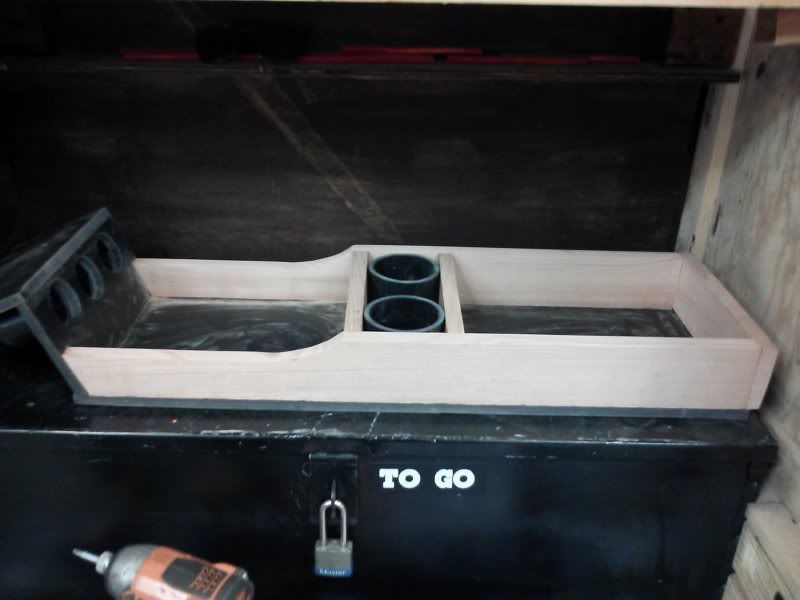
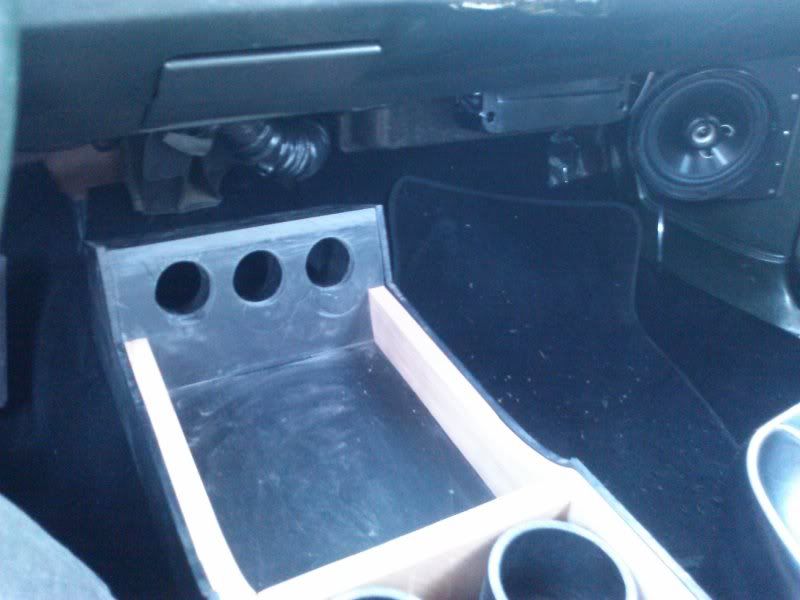
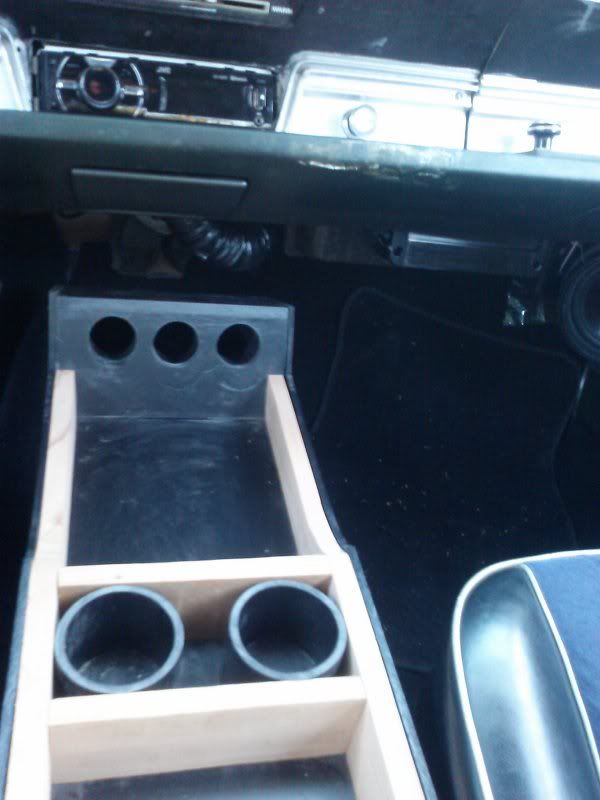
Basically, when I started this - I knew I wanted cup holders. That's all I cared about. After that, I noticed that I like to set things on the hump. Now I needed a space to set things down. On top of that, I have a few USB ports unused that would be nice for charging phones, gps unit, etc... so that can be added in there. Then later on I'll probably add a Oil PSI gauge, a vacuum gauge, and something else... so I might as well have a space to do it without screwing sunpro generic meter holders under the dash. So I came up with a concept, and as it evolves and I built it I may add or subtract things.
This was the basic idea:
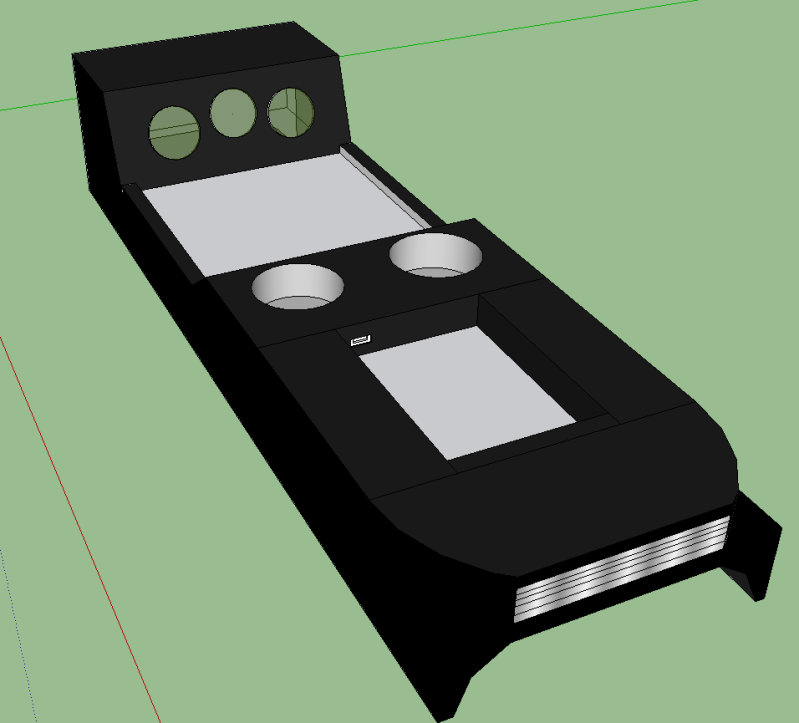
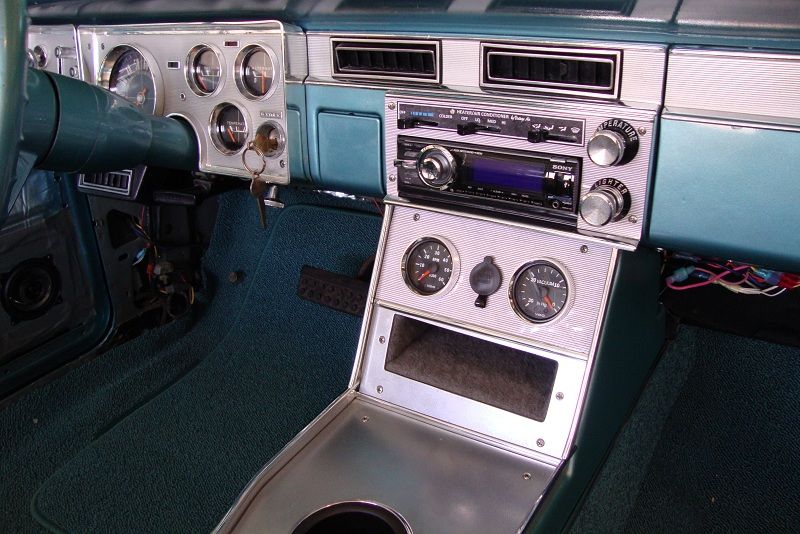
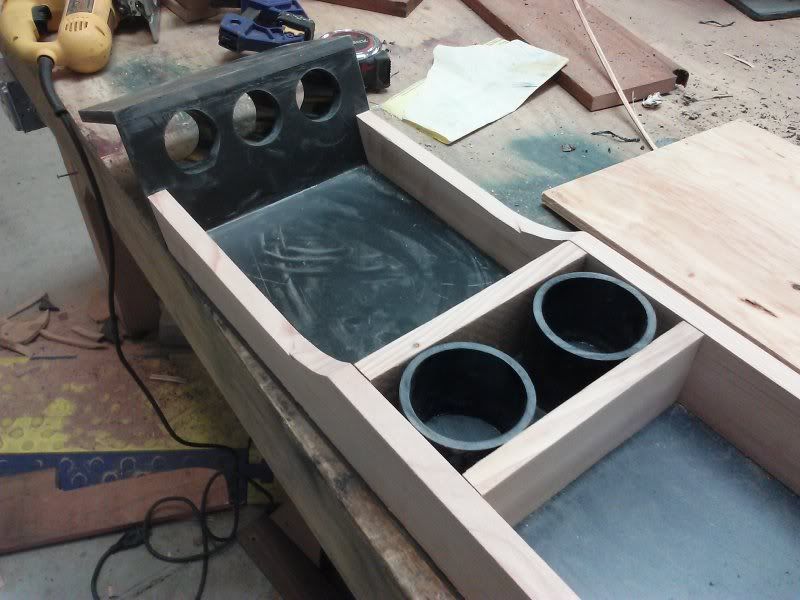
Except the hump arc would be molded to fit exactly on the hump, not just free-float over it. The entire console is 10" wide and about 32" long. It will sit about halfway between the buckets and then go forward from there. The tip of the front should be just under the radio (but on the floor) when done, and not block the air passage behind it - hence the angled back side.
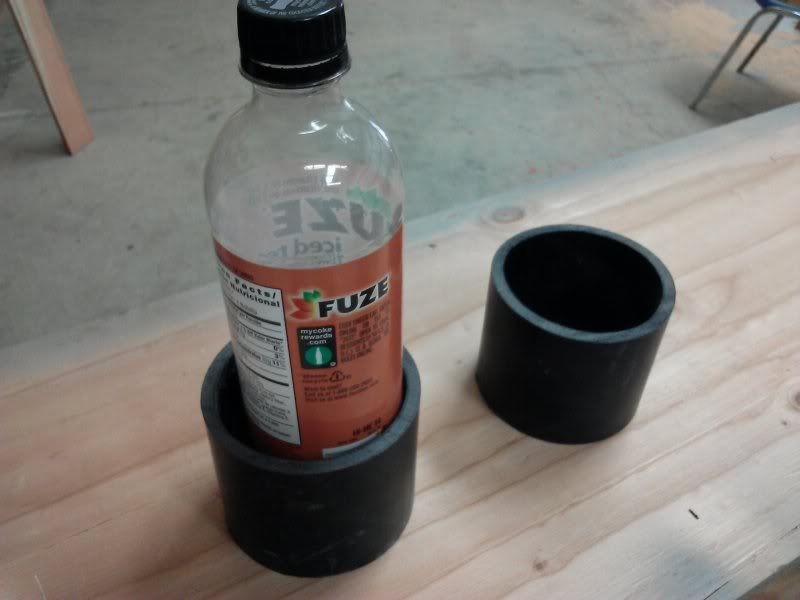
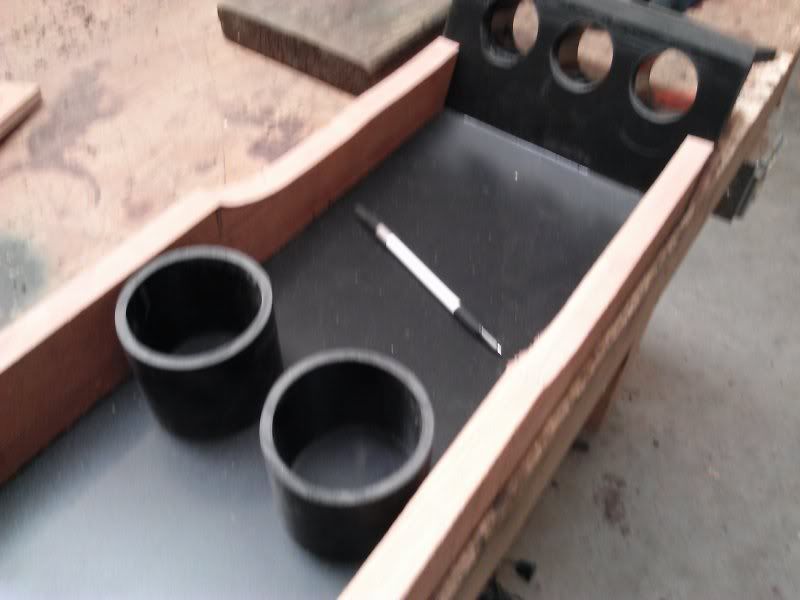
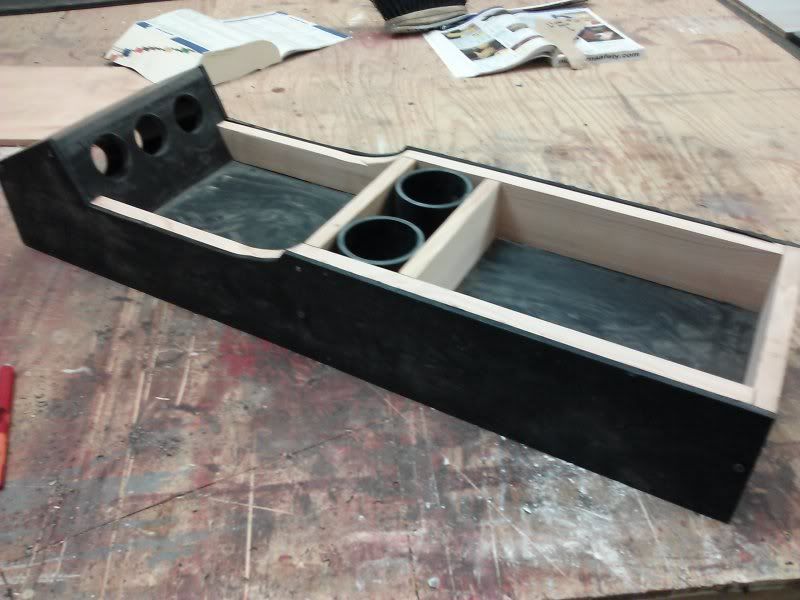
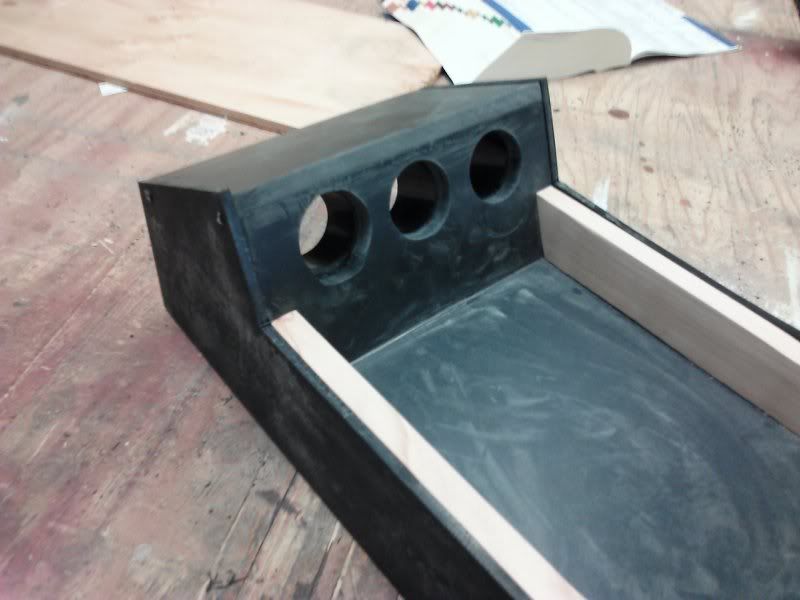
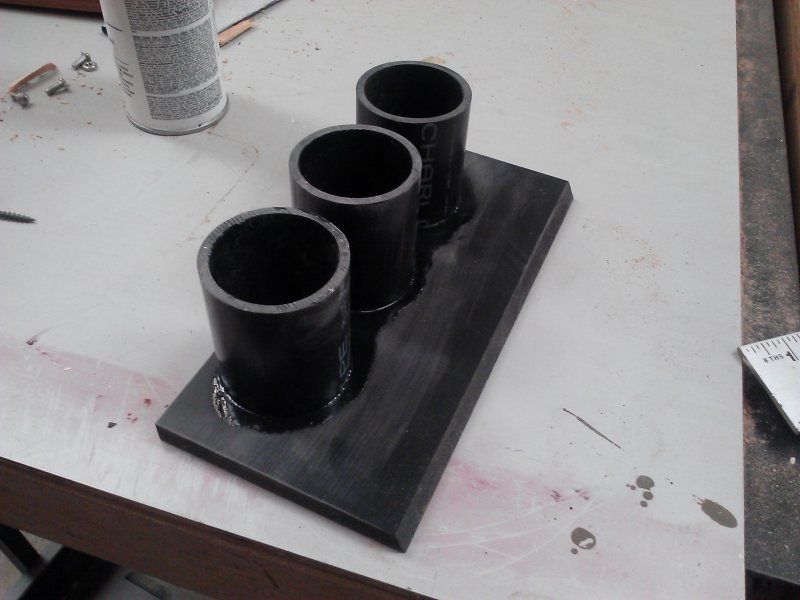
I started it today and made the basic platform out of ABS. I cut 3 small 2 1/4" ABS pipe sections to house gauges -which in the past work perfectly for 2 1/16" gauges. after the console is complete, the pipe will come off so the brackets on the back of the gauges will attach properly. It'll all make sense in the end...
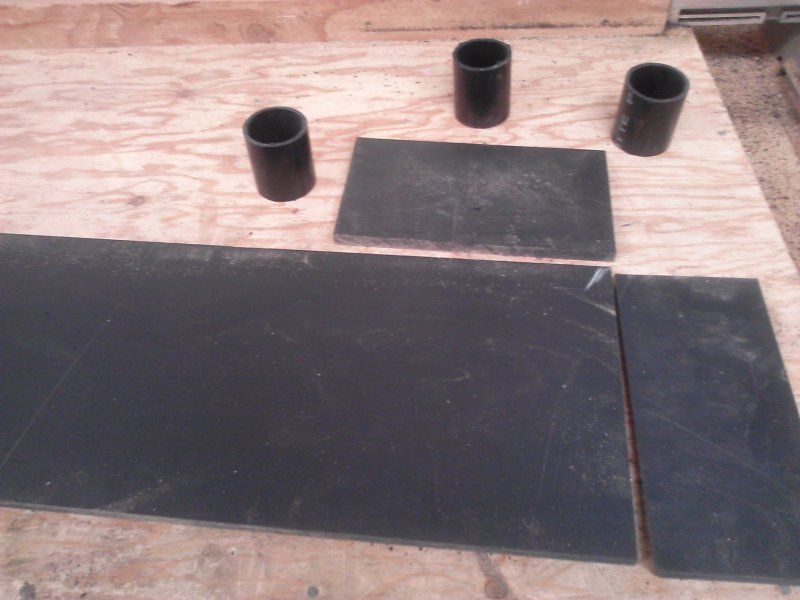
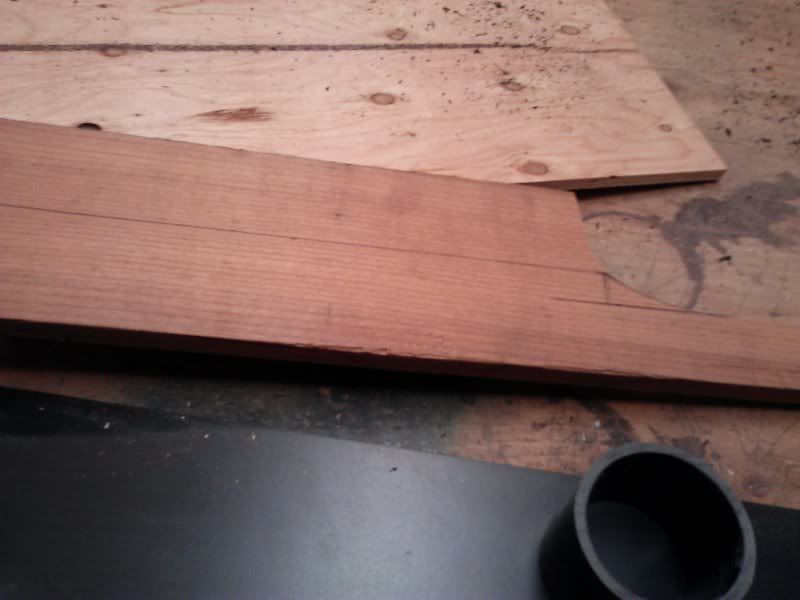
I cut a slight angle in the porton the gauges fit in to arc the head portion of them back towards the floor. Then temporarily glued the pipe to the back spaced evenly - using ABS cement.
I then drilled a 1/2" hole in the center of each gauge space and dropped a router in and cut out the circle using the ABS pipe as a guide for the bit.
Now the pipe makes sense yeah?
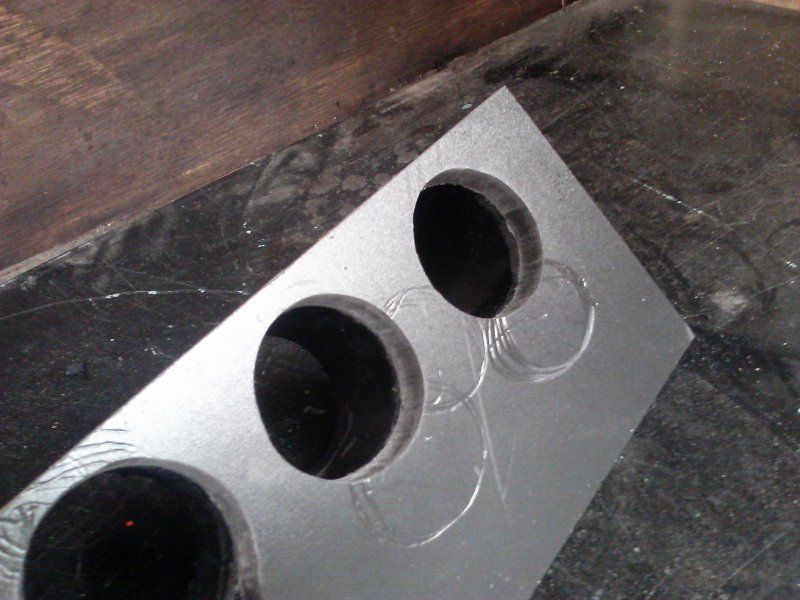
Not worried about scratches from router table; this piece gets filler and paint when it's all done.
Glued the top portion of the gauge housing on to the top.
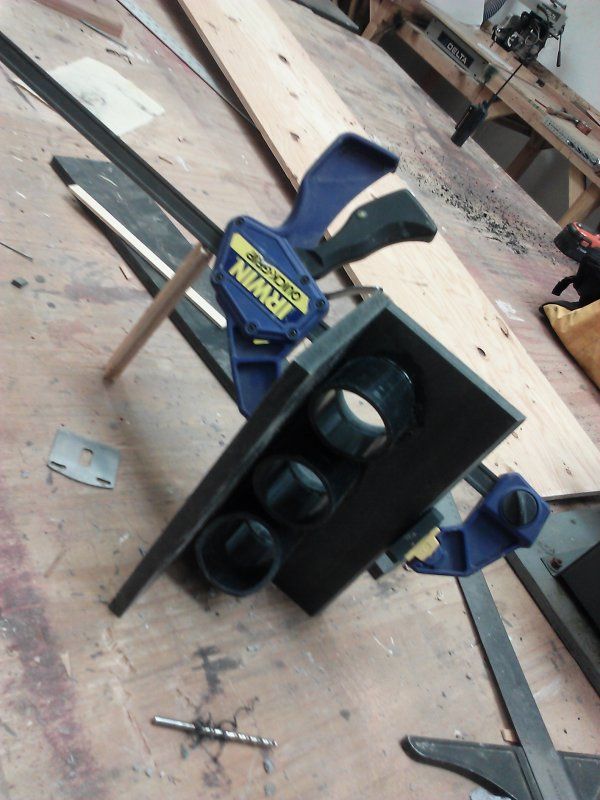
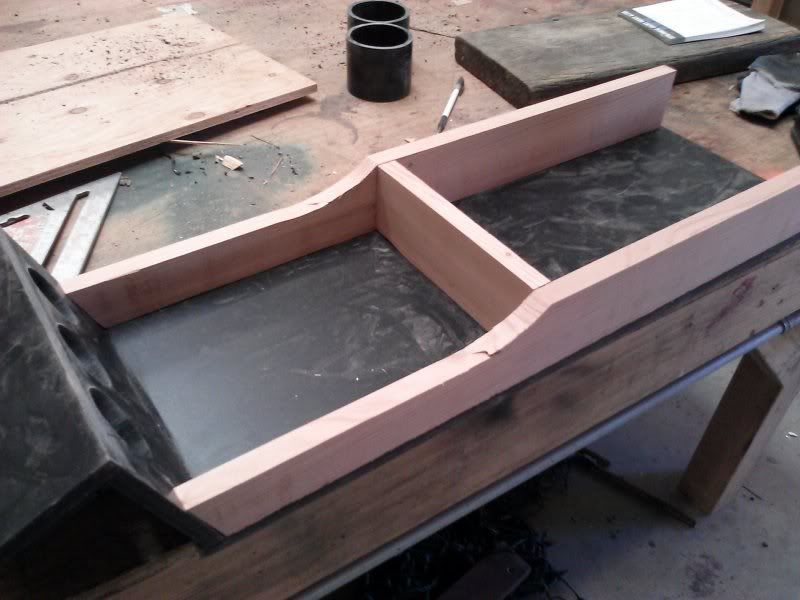
Put the piece at the end of the blank for fitment, roughed up the blank platform on the end, and glued - perfect fitment and ready to move on to the cup holder portion - the sides get built at the very end when I figure out the contour with my super nice -new contour gauge.
That's all I had time for today. Hopefully more tomorrow.
Basically, when I started this - I knew I wanted cup holders. That's all I cared about. After that, I noticed that I like to set things on the hump. Now I needed a space to set things down. On top of that, I have a few USB ports unused that would be nice for charging phones, gps unit, etc... so that can be added in there. Then later on I'll probably add a Oil PSI gauge, a vacuum gauge, and something else... so I might as well have a space to do it without screwing sunpro generic meter holders under the dash. So I came up with a concept, and as it evolves and I built it I may add or subtract things.
This was the basic idea:
Except the hump arc would be molded to fit exactly on the hump, not just free-float over it. The entire console is 10" wide and about 32" long. It will sit about halfway between the buckets and then go forward from there. The tip of the front should be just under the radio (but on the floor) when done, and not block the air passage behind it - hence the angled back side.
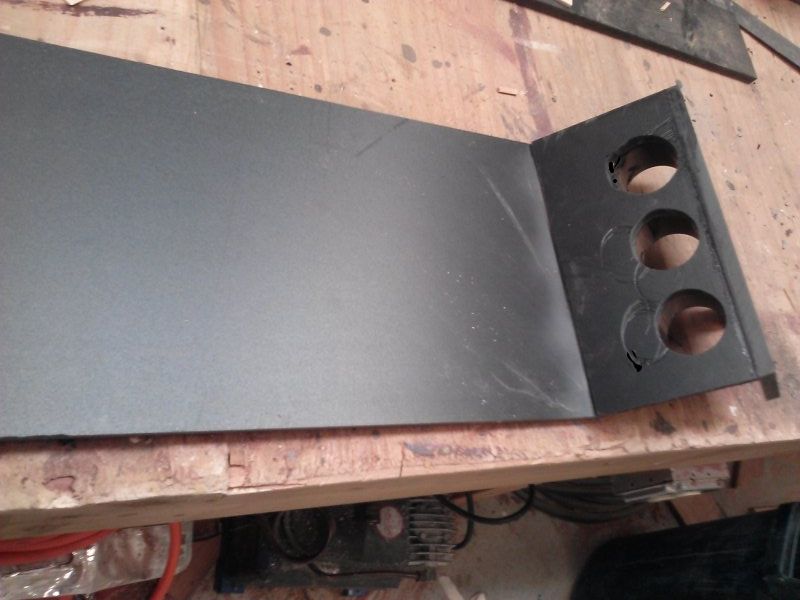
I started it today and made the basic platform out of ABS. I cut 3 small 2 1/4" ABS pipe sections to house gauges -which in the past work perfectly for 2 1/16" gauges. after the console is complete, the pipe will come off so the brackets on the back of the gauges will attach properly. It'll all make sense in the end...
I cut a slight angle in the porton the gauges fit in to arc the head portion of them back towards the floor. Then temporarily glued the pipe to the back spaced evenly - using ABS cement.
I then drilled a 1/2" hole in the center of each gauge space and dropped a router in and cut out the circle using the ABS pipe as a guide for the bit.
Now the pipe makes sense yeah?
Not worried about scratches from router table; this piece gets filler and paint when it's all done.
Glued the top portion of the gauge housing on to the top.
Put the piece at the end of the blank for fitment, roughed up the blank platform on the end, and glued - perfect fitment and ready to move on to the cup holder portion - the sides get built at the very end when I figure out the contour with my super nice -new contour gauge.
That's all I had time for today. Hopefully more tomorrow.
") hahha wish someone in the 70's would have thought about cup holders....
hahha wish someone in the 70's would have thought about cup holders....