Turning a 74 into a 72

-
Bought all the gauges for the new gauge cluster a couple days ago.
I had to do some trimming on it because the bottom right corner was miss shaped and hit the Radio bezel.
If you look back a few post at the picture you'll see what I mean.

Used my metal shears to do the trimming and got it to fit right. I didn't try to stiffen it up like I was planning.
Seem when you get all the gauges in it that stiffens it up some.
Pulled the old gauge cluster out and stuck the new one in to take a picture.

This week end I'll wire the cluster up, I'll have to get a aftermarket speedo cable to attach to the new speedometer though.
 

Attachments

  • dash 005.jpg
    62.9 KB · Views: 653
  • dash 003.jpg
    92.4 KB · Views: 675
I'm trying to recall what speedo cable I used with my AutoMeter Phantoms...wanna say it was actually one for a late 60s-early 70s Nova.

I want to say it's a 7/8" end on the trans, and 5/8" on the speedo

EDIT: It's a generic 84" cable...Pioneer part number CA-3004...should be about $12 at a local parts retailer...
 
I just thought of something else...I have my speedo on the left of center and had to crop out a small scallop of the steering column support to allow the speedo cable to actually go on the speedo...are you going to have to do that?
 
I just thought of something else...I have my speedo on the left of center and had to crop out a small scallop of the steering column support to allow the speedo cable to actually go on the speedo...are you going to have to do that?

I'm not sure if I'll have to or not, but thanks for the heads up. Just put the blinker and high beam indicators in.
What did you do for a light and wiper switch? I was looking at a three speed wiper and head light switch on Summit Racing's web site. It's looks like the stock one aren't going to work.

Boo! You can't use the stock ones? That's all I did, but I did have to put a spacer on the light switch for it to sit correctly in my new dash....I think it was actually a spacer for my camber/caster plates; probably 3/4" OD, open center, about 1/2" tall...

If you do wind up having to buy aftermarket, I would suspect the summit/jegs/painless ones would do the trick. The only downside is those switches won't allow function of the windshield washer pump motor...that's the only big reason I kept my factory one.
 
No washer pump would be fine, I'm not putting the washer bottle back in anyway. If it's raining the dart is staying in the shop.:D
 
Well bought the painless headlight and wiper switch. The head light switch won't work because the pull knob hits the voltage gauge.:protest: And the wiper switch, that I thought was a three speed switch is really a two speed.:-({|= They call it a three position switch with off being one of the positions.

So guess my Son-in-law will be getting new switches for his dart.

I had to modify the stock ones some, but did get them to work (should have done this in the first place). :banghead:

The stock ones look okay and after some work are going to be fine. :cheers:
 

Attachments

  • dash 001.jpg
    65.2 KB · Views: 612
My rechromed bumpers are coming in friday, hope to be posting some pictures of the dart with them on on Saturday.:blob:
 
nice Man cant wait to see them just took of the nose today of my duster I got different fenders, hood, grill, new bumpers, doors, and lots more goodies to start working on it so I figure now is the time just got my new driveway poured last weekend :)
 
Well I finally got my rear bumper from the Bumper Depot, of coarse they sent the wrong front one so I'm still waiting for that.
And they also sent the wrong bumper bolts so now I'm waiting on the correct one to show up so I can install my bumper.

One step forward and two steps back!
 

Attachments

  • 002.jpg
    32.6 KB · Views: 583
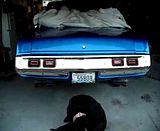
Made a little progress tonight. My front bumper showed up today, but they didn't send the new bumper bolts disgust so I polished up the old ones and installed the bumper with help from my 9 year old granddaughter.:cheers:
 

Attachments

  • bumper 001.jpg
    70.7 KB · Views: 542
Back bumper is on now too! Today I'm hoping to get the transmission in and see if the old girl will run.
I still have some wiring to do, need to get the windshield and rear window installed, front end realigned, and new tires and wheels. Still a ways to go but my list is getting a lot shorter.
 

Attachments

  • 001.jpg
    48.3 KB · Views: 545
My Son-In-Law came over yesterday and help me some with the dart. We installed the starter, shifter, and kick down cable. When we tried to hook the battery up we discovered a dead shot. traced it to the main power feed to the fuse box. Pulled fuses one at a time to try and figure out where the short was.

Wound up pulling all the fuses out and still had the short problem.:banghead: Finally figured where it was. the main feed to the alternator was grounded out at the alternator. The plastic grommet had fallen out.
I had the old alternator out of my dart sitting on the parts shelf so I robbed the plastic grommet from it and fixed the problem.:eek:ccasion:

Only took half the day to figure out what the problem was, I finally remembered that I had hooked the alternator up the other day and tried unhooking it and what do you know the grounding out problem went away.

Here's a picture of where the problem was.
 

Attachments

  • 004.jpg
    72.4 KB · Views: 482
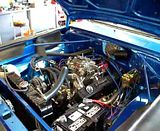
Had these made up today for transmission cooling lines running to the radiator. Rubber re enforced with braided steel and a blue heat shield over them. I'm hoping to fire the old girl up this week end (strong end for MeMike).

View attachment 001.jpg
 
Got the digi lights working too!

[ame=http://i158.photobucket.com/albums/t110/stans7853/002.mp4]
th_002.jpg
[/ame]
 
-
Back
Top