Rocker's 1973 Duster "Clara"

-
Your attention to detail is amazing.........believe me it's the little
things that make the difference between a good car and a so so car.


Wilson
 
Great thread! You are doing some awesome and extremely gratifying work, especially having the kids and wife involved! Looking fwd to more!!
 
Chris, On the UCA mount, weld it up and grind it back smooth. Shouldn't be too tough.
 
I can't wait to see your ride this Summer Chris! Man, you are inspiring me to get out in the garage and get to work!
 
What a truly inspirational build! And I love the attention to details. They really set off the finish product and ensure that everything is done right.

Oh, and get used to the knuckles.. it won't be the last time I'm sure :)

Grant
 
Thank you again for the compliments guys! It was the countless nights of reading over your own threads that encouraged me to start this project in the first place!

I don’t have a bunch to update on… I am more or less on the cusp of making some serious progress. I have been busy dealing with (positive) changes at work, as well as my kiddo’s birthdays, so I haven’t had the funds to go crazy recently.

-I am still waiting to purchase the paints I will need to do the underside of the car, so that is on hold.
-A majority of the front suspension is in the hands of our Mistress of Metal being turned into art! It is just about completed!
-Pinholes in the floorboard did get welded up!
-The engine is almost finished. I am scheduled to see it run on the Dyno the first week of March!!!

In the meantime I have been occupying myself with the AC/heater box. Between an article I found on Mopar Magazine’s website and using common sense, it is surprisingly easy. I have everything pulled completely apart, and only need to resto a few more parts. I also need to order the seal kit from DTM. I posted a few pictures I have taken along the way.

A picture from the breakdown process.
IMG_1256.jpg


A shot of the evaporator housing/box restored. I have been gently blasting all of the fiberglass, then hitting it with a semi-gloss clear coat. You can see the reflection of the plastic bag on the surface. All internal areas get a single coat of clear, while the exterior receives two.
IMG_1389.jpg


All of the actuators, and most of the hardware have also been finished up!
IMG_1390.jpg


This is the last piece I need to blast/finish up. This last piece scares me, as it has several serious stress cracks, and the metal panel on the back is riveted in. I am going to have to really be careful blasting this part, as I have to get the blaster nozzle up inside there.
IMG_1393.jpg


I'll play it safe and pick up a new heater core, but since I do not plan to re-install the A/C at this time, I cleaned up the evaporator really good and will just drop it back into the box. This will at least fill in the firewall holes, and make it easier if I ever do decide to resto the under-hood A/C components.

Here's a link to the Mopar Magazine article I used.
http://www.moparmusclemagazine.com/...o_restore_your_mopars_plenum_box/viewall.html
 
A little motivation to get my rear in gear!

A big thank you goes out to Brian at IMM Engines for this one! As I had mentioned earlier in this thread, this is my first project and I opted to fore go building my own engine for the Duster. I really couldn’t have asked for a better experience during the buildup either! I don’t think it really hit me until we were halfway home that the engine in the back of my buddy’s truck was MINE!

I won’t bore everyone with a bunch of engine pictures, but will post a few I really dig.
march_14_2012_157mod.jpg


MARCH_15_2012_012mod.jpg


Right after we got it into the garage.
enginehome.jpg


Click the video below to see her running. I was soo excited to go that morning, that I forgot my camera..so a cell phone vid will have to do. While I was filming the video below, it made 425hp at 5700rpms and 424ft lbs torque at 4200 rpms.


I need to refocus my efforts on getting the car back together! I can’t tell yet if having the motor in the garage will motivate me in a good or bad way. I also fear I’m getting close to smacking the “financial wall for my project”. Spending on the car may have to slow down a bit, but I will ensure it does not come to a stop. Still need to finish the last little bit of the AC/heaterbox, and finally got the paint to do the underside of the car. now just have to find a good weekend to do it.

Probably should start with cleaning up the garage a bit first lol.:D
 
Well if that doesn't motivate you, I don't know what will. Cruisin' Grand is right around the corner. I'll only be able to make it the first couple months.
 
Those are great numbers! I guess you are not scared of $5.00 gas!

Seriously, hopefully I will get to see Clara at Grand sometime in August/early Sept. It is good work that you are doing. Hope the $$ comes your way to keep up the pace.
 
Great build,
the hand prints are still my favorite but they will be covered up. Do it again on the underside of the trunk lid for all to see!!!.
Andrew
 
Awesome build! really like what you have done with the Duster..and btw you cant bore us with engine pics...its impossible :happy1:
 
Well it has been too long since I posted, so let's catch up shall we.
To make a long story short...I fell into the "complete resto" trap. The car was already this far along, I figured I would go ahead and get it painted/got talked into it. I stripped the car the rest of the way down, and had a pretty sweet deal setup for paint. Yeah that fell through...as did the next two. This was about August of last year, and after the third time I walked away from it for about three months. Here are a few pictures from the teardown.

My daughter helping with the teardown.
IMG_0066_zps8feeb405.jpg


Goofball.
IMG_0064_zps664c9834.jpg


The cardboard headliner…still in great shape.
IMG_0062_zps470a849e.jpg


So apparently they forgot they sprayed the adhesive on the roof, but forgot to install the padding. This is what the roof of my car looked like when I pulled the headliner. There was NO surface rust whatsoever! The steel was as clean as the day it was fabricated. I couldn’t believe it.
IMG_0055mod_zps4ebc35d3.jpg


Look what I found tucked in the bottom of the rear seat back! This was VERY important to me, as I even have the bill of sale from the day the car was purchased.
DSC_0992_zpsbe50a988.jpg


Dash removed.
IMG_0193_zps7978582f.jpg


I also pulled all internal wiring, gas tank, tail lights, everything in the trunk, etc. Last I tackled the door internals and glass, a bit intimidating, but once I really looked at it, it was not hard at all. I went through some of the door hardware, and started restoring a few (of many) pieces.
IMG_0860_zpsdd4b6af4.jpg


IMG_0859_zps6aa57ff9.jpg


Around October I found a great local place that was more than happy to take the project on. They took a look at the car, and confirmed it is as straight as the pictures show. They said they could get things started in January, so I patiently sat on the car again.
Well Mid December my SUV (my dd) decides to spring a radiator leak, that ultimately did $3000 worth of damage, and that’s with me doing some of the repair work myself. The SAME week my wife’s PT Loser decides to crap out also. Not only did this eat up my bodywork money, but I ended up selling the Rally rims/tires from the Duster to help pay for everything.


This is how poor Clara has been sitting for sometime now... Just with a dust covered tarp sitting over her. I am pretty disapointed to be honest.
IMG_0189_zps3985fdd2.jpg


Body shop appointment cancelled, garage was locked up, and again I walked away…for four and half more months.:disgust:
 
The lady I am renting the garage from is also an artist, and knowing I was pretty bummed, asked if she could paint my car for one of her Gallery auctions. The picture does not do any justice in comparison to the original. It came pout amazing, and you bet your a$$ I bid and won!

She titled it "Just and Engine Swap"...fitting.
IMG_1686_zpse7af423b.jpg
 
So recently I started catching upon this season for both Fast N Loud and Graveyard Carz (Yeah I like ‘em)…Well For some reason I got all motivated and stuff, and about mid March I returned to the garage.

I decided I was going to restore my steering column first. I took my original column, and one I had purchased (with the automatic nub removed), and combined parts to create one perfect steering column.

Teardown begins.
DSC_1157_zps15866261.jpg


Trying to find an affordable solution for the factory suede paint. Rustoleum satin textured black is close enough for me and looks really sick!
DSC_1168_zps7bfb02b9.jpg


All parts and hardware restored and ready for assembly.
DSC_1180_zps59199608.jpg


As I mentioned in the beginning, the car was pretty much spray bombed black inside and under the hood, so I love the contrast of part colors. I chose the orange repop coupler seal over the oem black because of this.

DSC_1182_zpsdb47d640.jpg


All done!
DSC_1189mod_zps0f938719.jpg


Oh I also knocked the e-brake handle out too!
IMG_0140_zps183218e9.jpg


I am currently working on finishing the A/C heaterbox (which should have been done months ago. FWIW...Detroit Muscle Technologies (DMT) makes an amazing product, backed by great customer service!
 
Ahhh, nice to see some progress again Chris. I was just thinking about you over the weekend when I moved some stuff around the shop ... like your k-member. :-D We'll need to talk about those lower control arms too when you get a chance.
 
Man Chris your attention to detail on the stuff nobody will ever see is WACKOOOO. I can't imagine how the stuff that will be seen will be! Nice work.
 
Chris: I know all too well about getting caught up in the total restoration thing.
Sometimes we see all these super nice cars and wish we had one like it. But
reality is that sometimes the car get driven and used less because we as
owners are now afraid to drive them and put them in harms way once
they get to be too nice. They become just trophies.....

Nice job on the Duster! When it gets done, enjoy it to the fullest.
That's my advice.


Wilson
 
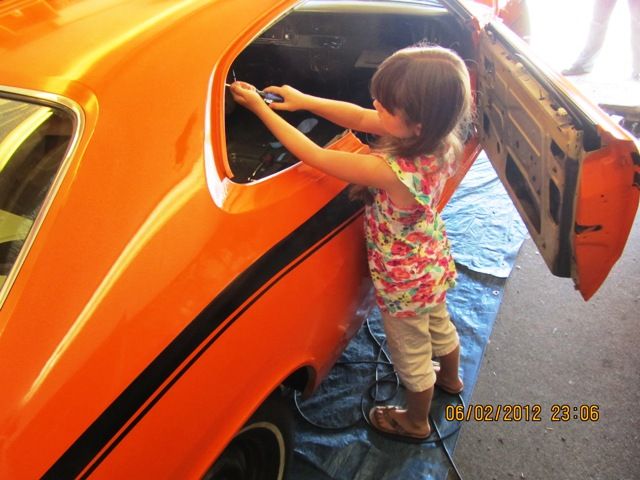
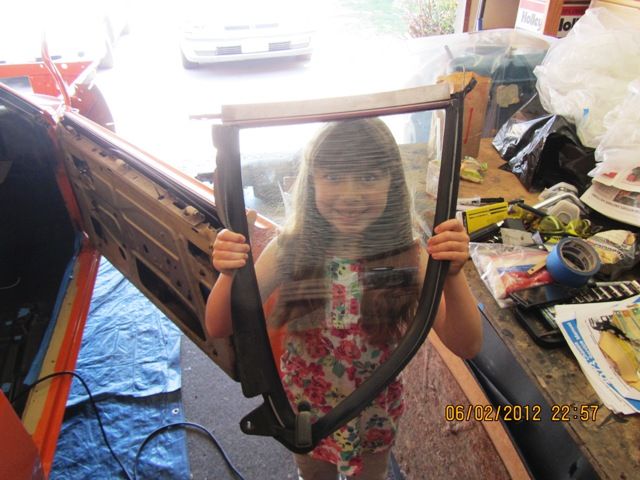
Time for a quick update. So as I had mentioned earlier, I only recently found motivation to start back on my car after a long down period. I like to go to the local cruise each Friday night, then had over to work on little odds and ends for Clara. Well a few months back my wife decides to drop this early Father's Day bomb on me.

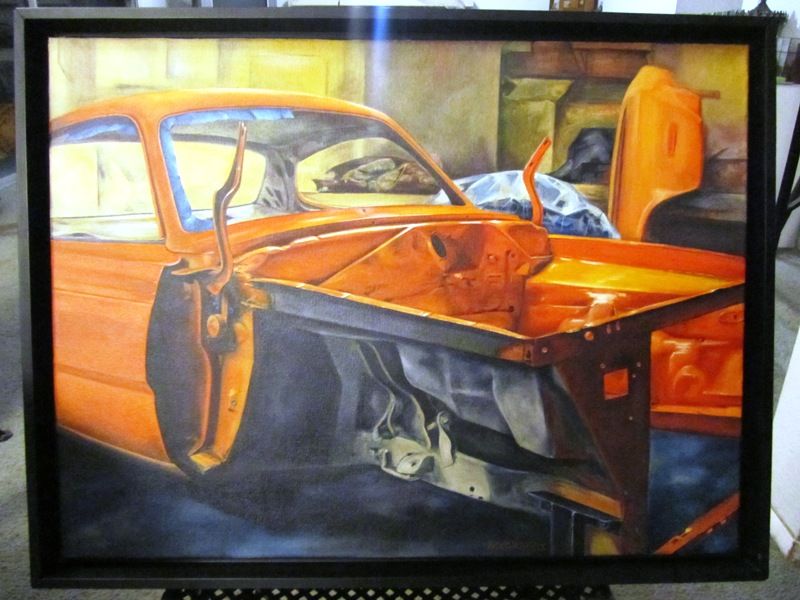
Yeah this happened...
IMG_4451_zpsc3763b04.jpg


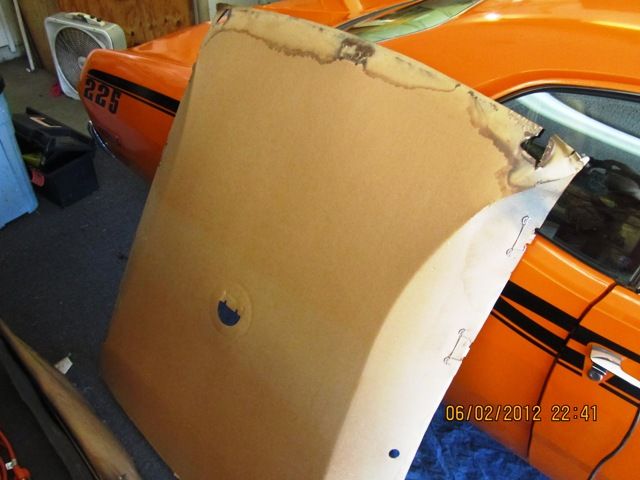
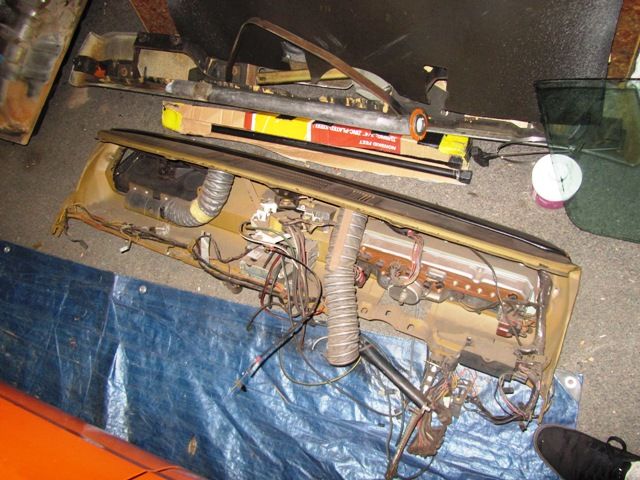
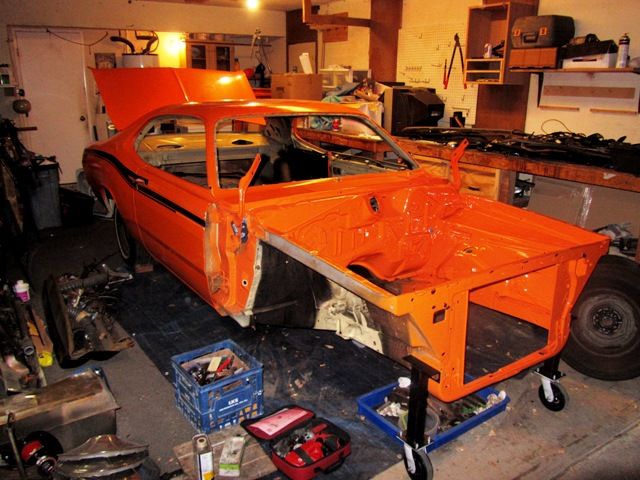
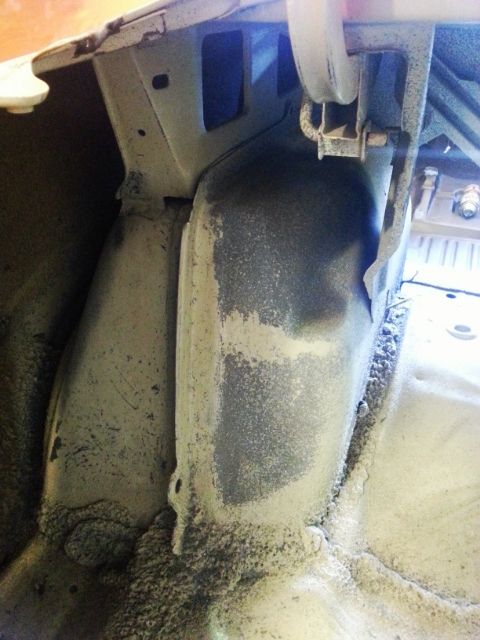
So now I really have a purpose! The car was pretty much ready to go except for the trunk, which had been coated with sound deadener by a P.O. It wasn't the prettiest of jobs either. I want this car to be relatively stock looking, so I knew it had to come out. To free up some of the money for other areas, I decided to take this task on myself. With a paint scraper, small wire brush, and a gentle touch...I scraped the whole trunk. I was able to save almost all of the original paint, and seam sealer.

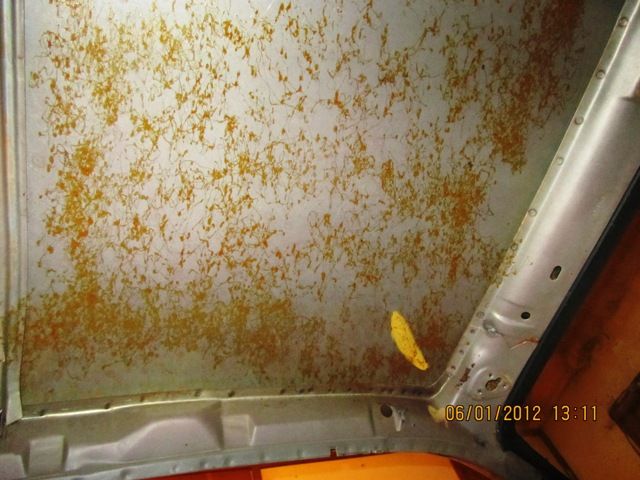
This picture shows the sound deadener I was scraping out. It was everywhere!
20130706_135038_zpse239f02b.jpg


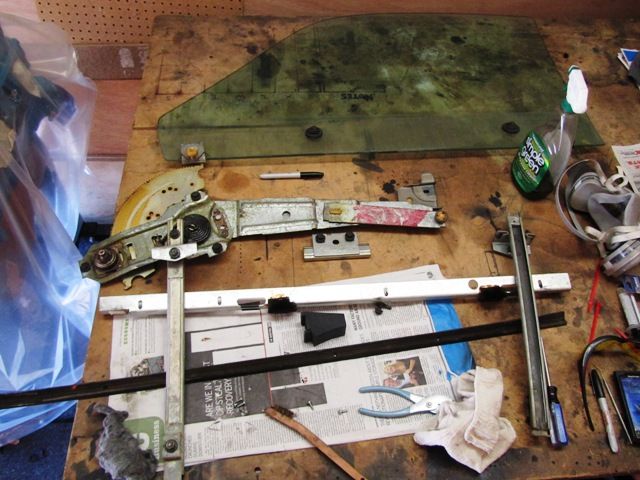
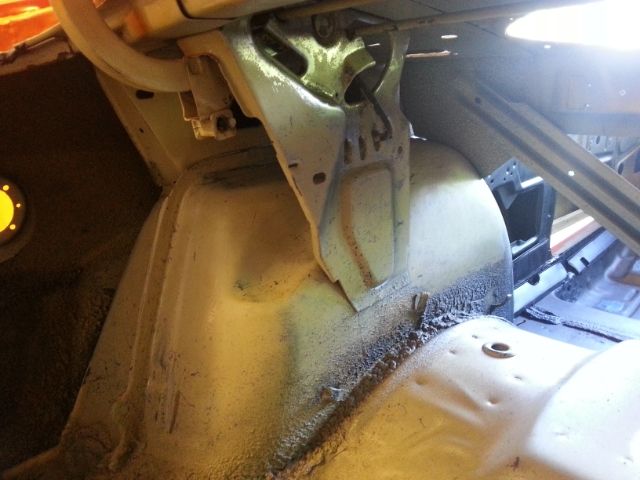
Here's the same area "after".
20130706_160301_zps20c1ef01.jpg


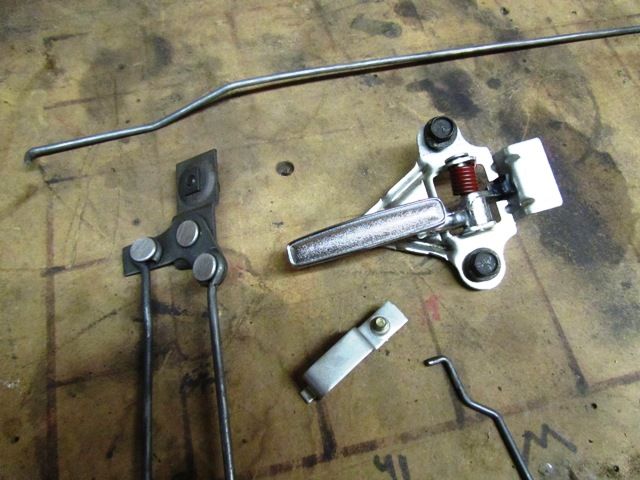
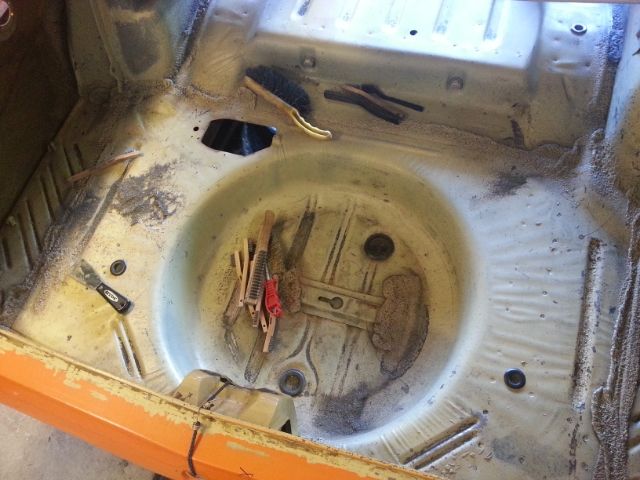
One more shot of the spare tire area all scraped clean.
20130706_135055_zpsfcb908e1.jpg


DTC is finishing up the last details on a Lincoln that beat me into the shop. Once they are done, Clara will be good to go!:cheers:
 
So again my wife is absolute Amazeballs! Recently we moved into a condo (rental), and I got myself a garage with it!!! It's a "one car" garage, but damn dude, I'll take it! Anyway my wife gave me an early Birthday present...

My 1st Metal garage sign!
20130728_204632_LLS_zps36ceaa19.jpg


This shows how big "Miss Mopar" is. :D
20130728_204644_LLS_zps71b2a78c.jpg


So now I have a second project in setting up my garage. I may post a thread in he general section looking for suggestions on laying out my garage soon...Just have to get the car off to the shop first.
 
-
Back
Top