The Great Pumpkin - '71 Duster
Progress has been slow lately but I have managed to clear a few hurdles. I got the rear section of the carpet in, the back seat and package tray. I also made some pretty good headway on the gauges which turned out to be a fairly significant project in itself.
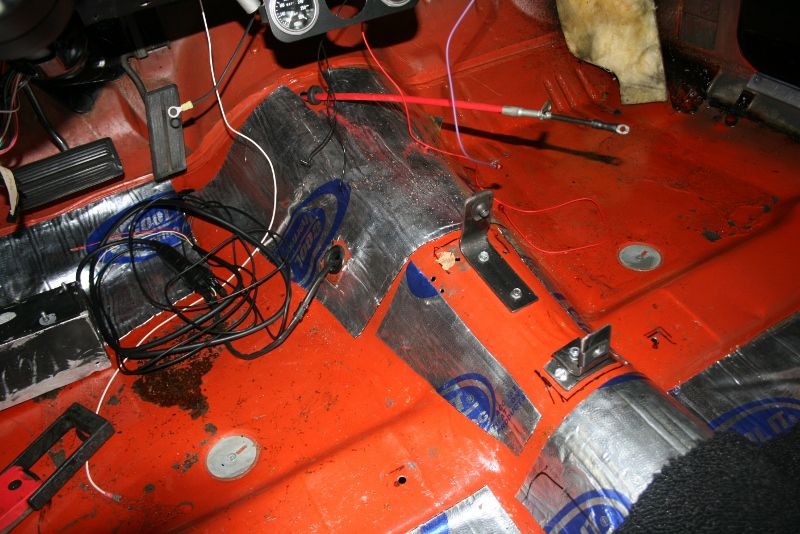
Before the carpet went in, I laid down some Thermo tec heat shield/acoustical matting. For those of you following along at home, installing this stuff may seem to go against my bare bones/weight reduction theme but it's there for a reason.
Back in May of 2000, I went to a two day drag racing school down at Atco in NJ. The school car was a super comp door slammer with a de-tuned pro stock motor in it. Except for a single racing seat, there was nothing in the aluminum interior to dampen any of the noise. It was loud to say the least which made it really difficult to concentrate on procedure. The next day I wore ear plugs and it was like night and day for the better. That has stuck with me since then and was the reason for using the matting.
Honestly, the car wasn't unusually noisy or hot but I figured it wouldn't hurt to put this stuff down. I didn't go crazy with it and tried to place it strategically where I thought it would do the most good. I stuck it on top of and along the sides of the trans tunnel, in the driver's footwell under the pedals, under the front seats, under the rear seats and on the panel behind the rear seat back where it kicks up into the trunk. The last two spots were where I thought it would be most effective since the mufflers are directly underneath.
The carpet has padding under it so I didn't use the matting under those spots. Frankly I don't have any real expectations for it but maybe it will help to dampen some of the drone from the Flowmasters. We'll see.
The carpet went in OK but I did make the mistake of trimming it a little before I put it in. It ended up barely covering the wiring trough along the inner sills. I should have left it alone and trimmed it after it was in but it looked way too big to me. I didn't account for the contours for the floor pans which took up a lot of area. I'll also mention that I did not use any adhesive because there didn't seem to be any originally.
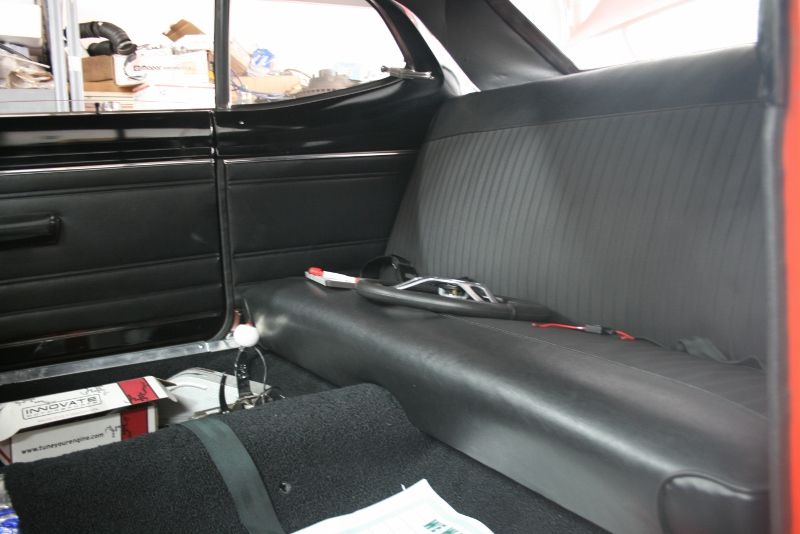
To locate all the seat belt anchor bolts, I used a method I read about on here that utilizes a soldering iron to make the holes. I installed the bolts and laid the carpet over them. Once the soldering iron was hot, I stuck it directly over where the bolts were and burned a hole with the hot tip. Once the hole was large enough to get the bolt shank through, I stopped. Worked like a charm! It also reduces fraying since the edges of the holes are basically cauterized from the heat. So the rear carpet is down and has settled.
Two years ago I got a new plain (no defroster mesh) package tray at Carlisle from Legendary which I finally got to install. The original one really needed to be replaced as it was crumbling and caved in. Plus, the old jute padding under it was also totally disintegrated so that was pitched too. Instead of new jute padding, I used some thin packing foam cut to size and taped underneath it. The tray took a little adjustment to get a good fit but it looks decent enough.
Here's a shot of the carpet and back seat.
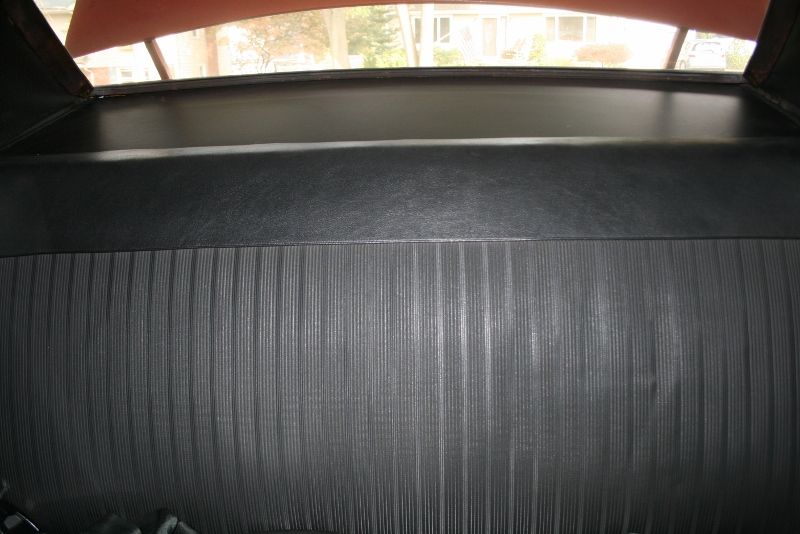
Package tray.
Here's a pic of some of the heat shielding stuck to the floor.
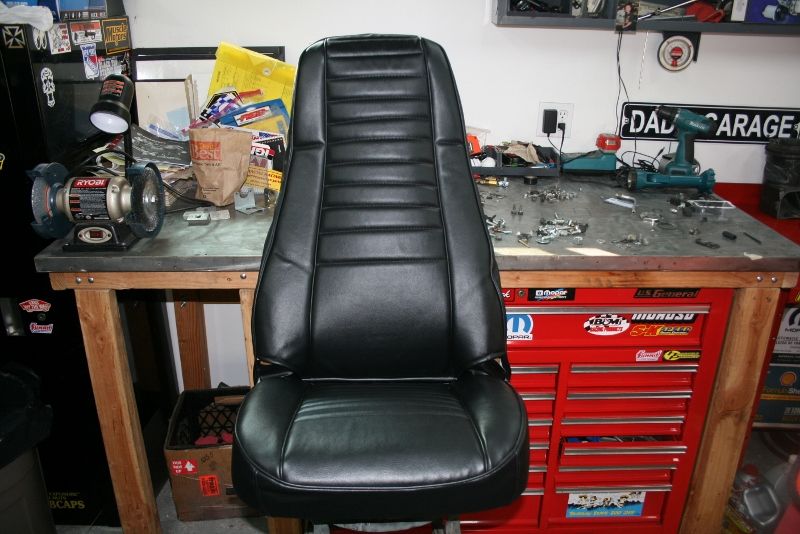
Last thing I have going on is new seat covers. Only thing I need to finish is the hog rings under the frame. I really dig 'em.
So the front section of carpet needs to go in but I am still trying to finish up the wiring for the line lock, A/F gauge module, the shifter and the gauges under the dash before it gets laid down. All the little stuff that no one will ever see seems to take the longest.
Once the front section is in, I'll use the soldering iron trick again but from below to locate the bolts for the seat brackets.
More to come.
Progress has been slow lately but I have managed to clear a few hurdles. I got the rear section of the carpet in, the back seat and package tray. I also made some pretty good headway on the gauges which turned out to be a fairly significant project in itself.
Before the carpet went in, I laid down some Thermo tec heat shield/acoustical matting. For those of you following along at home, installing this stuff may seem to go against my bare bones/weight reduction theme but it's there for a reason.
Back in May of 2000, I went to a two day drag racing school down at Atco in NJ. The school car was a super comp door slammer with a de-tuned pro stock motor in it. Except for a single racing seat, there was nothing in the aluminum interior to dampen any of the noise. It was loud to say the least which made it really difficult to concentrate on procedure. The next day I wore ear plugs and it was like night and day for the better. That has stuck with me since then and was the reason for using the matting.
Honestly, the car wasn't unusually noisy or hot but I figured it wouldn't hurt to put this stuff down. I didn't go crazy with it and tried to place it strategically where I thought it would do the most good. I stuck it on top of and along the sides of the trans tunnel, in the driver's footwell under the pedals, under the front seats, under the rear seats and on the panel behind the rear seat back where it kicks up into the trunk. The last two spots were where I thought it would be most effective since the mufflers are directly underneath.
The carpet has padding under it so I didn't use the matting under those spots. Frankly I don't have any real expectations for it but maybe it will help to dampen some of the drone from the Flowmasters. We'll see.
The carpet went in OK but I did make the mistake of trimming it a little before I put it in. It ended up barely covering the wiring trough along the inner sills. I should have left it alone and trimmed it after it was in but it looked way too big to me. I didn't account for the contours for the floor pans which took up a lot of area. I'll also mention that I did not use any adhesive because there didn't seem to be any originally.
To locate all the seat belt anchor bolts, I used a method I read about on here that utilizes a soldering iron to make the holes. I installed the bolts and laid the carpet over them. Once the soldering iron was hot, I stuck it directly over where the bolts were and burned a hole with the hot tip. Once the hole was large enough to get the bolt shank through, I stopped. Worked like a charm! It also reduces fraying since the edges of the holes are basically cauterized from the heat. So the rear carpet is down and has settled.
Two years ago I got a new plain (no defroster mesh) package tray at Carlisle from Legendary which I finally got to install. The original one really needed to be replaced as it was crumbling and caved in. Plus, the old jute padding under it was also totally disintegrated so that was pitched too. Instead of new jute padding, I used some thin packing foam cut to size and taped underneath it. The tray took a little adjustment to get a good fit but it looks decent enough.
Here's a shot of the carpet and back seat.
Package tray.
Here's a pic of some of the heat shielding stuck to the floor.
Last thing I have going on is new seat covers. Only thing I need to finish is the hog rings under the frame. I really dig 'em.
So the front section of carpet needs to go in but I am still trying to finish up the wiring for the line lock, A/F gauge module, the shifter and the gauges under the dash before it gets laid down. All the little stuff that no one will ever see seems to take the longest.
Once the front section is in, I'll use the soldering iron trick again but from below to locate the bolts for the seat brackets.
More to come.