AlV 69 Dodge GTS project
There it is. first steps.
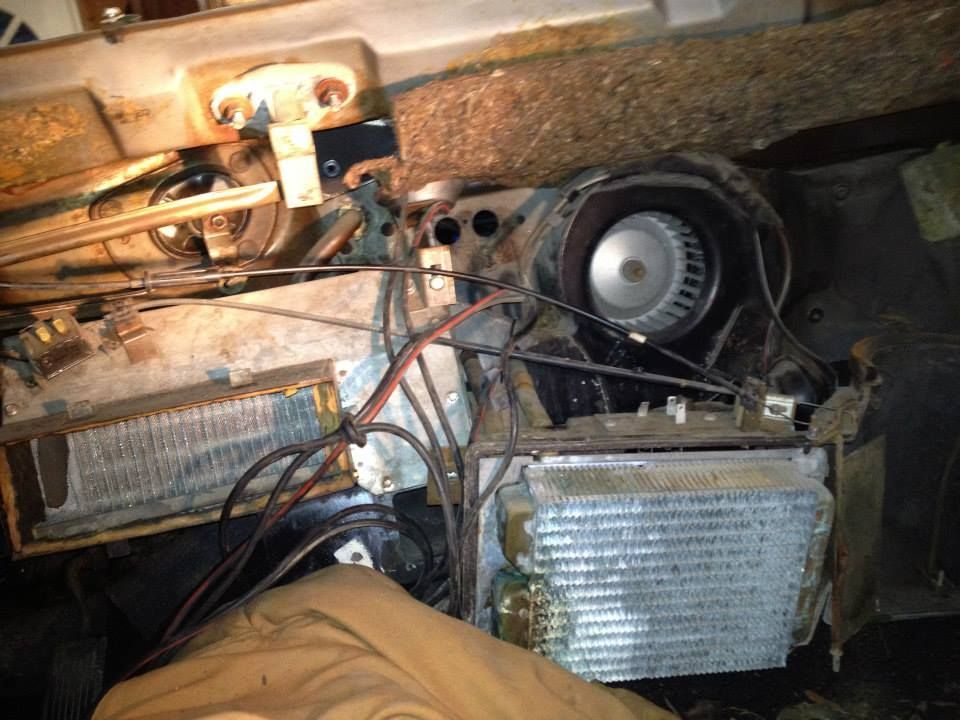
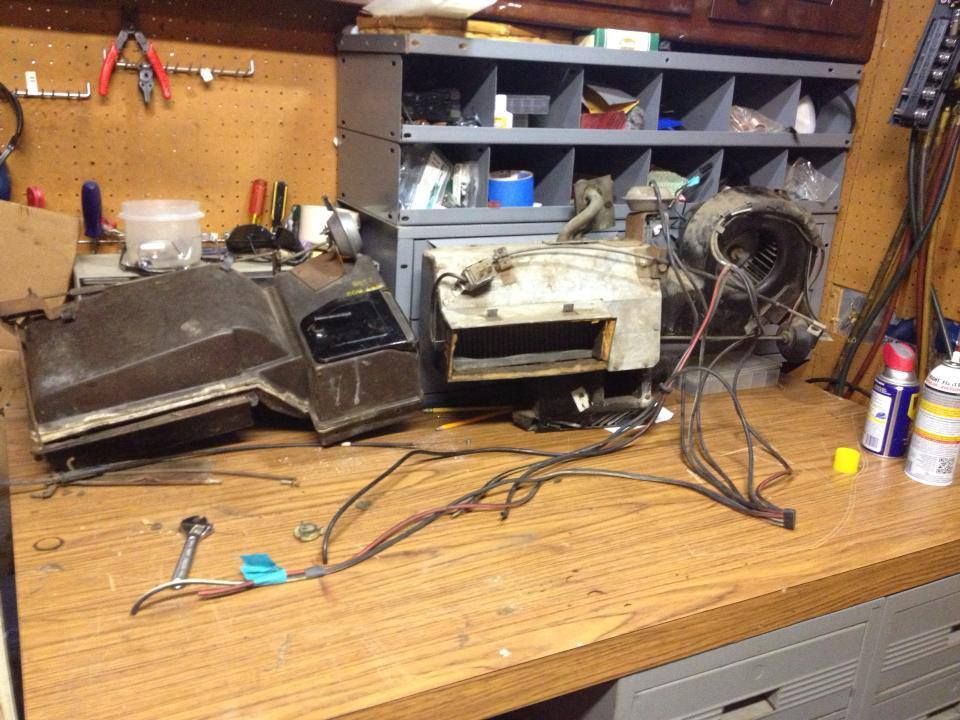
Started removing the heater and AC components. First the Heater side. I have the Rebuild kit and new Heater core on order. We'll see how this goes...
I went over it for a while to get oriented before I dug in. I must have inspected it for an hour. at least it felt like it was that long trying to get an idea of how this thing is built. Kind of like taking the time to smell the roses or something like that lol It really is an impressive bit of work, along lines of: "a fine mess" or "an accurate estimate" I've concluded the unit is "Complex simplicity"!
After realizing that this is not one but two separate sections (held together by one bolt which can be seen just left of the fan) acting as one I decided to start with the heater side first. The heater side is built like a clam shell with the two halves held together by clips. There is also a rod that runs up through the fresh air intake on the right that clamps to the cowl which need to be removed.
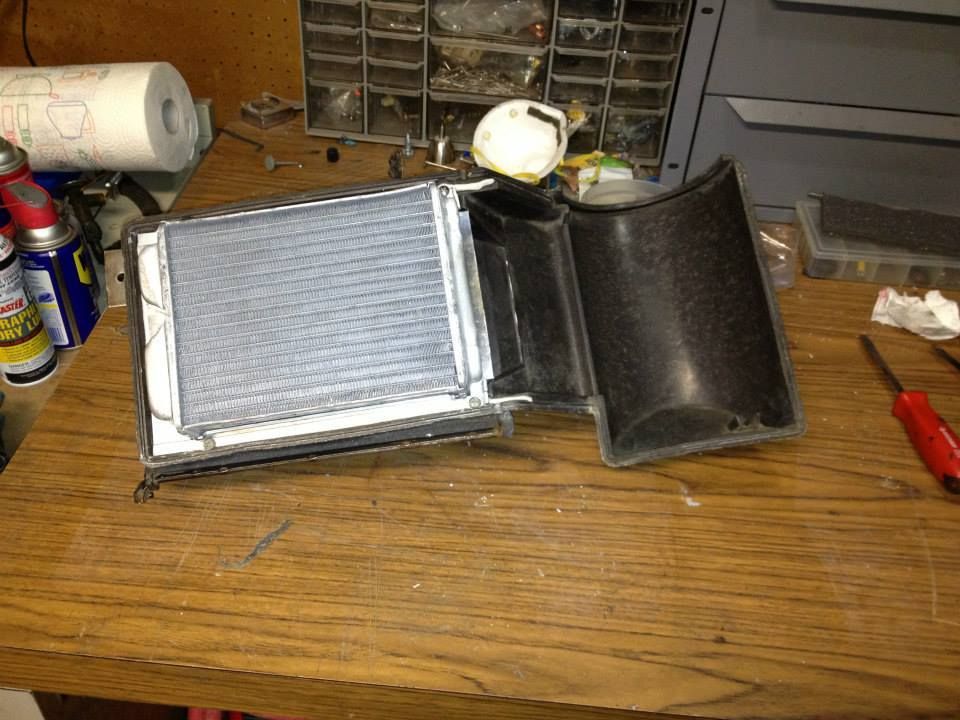
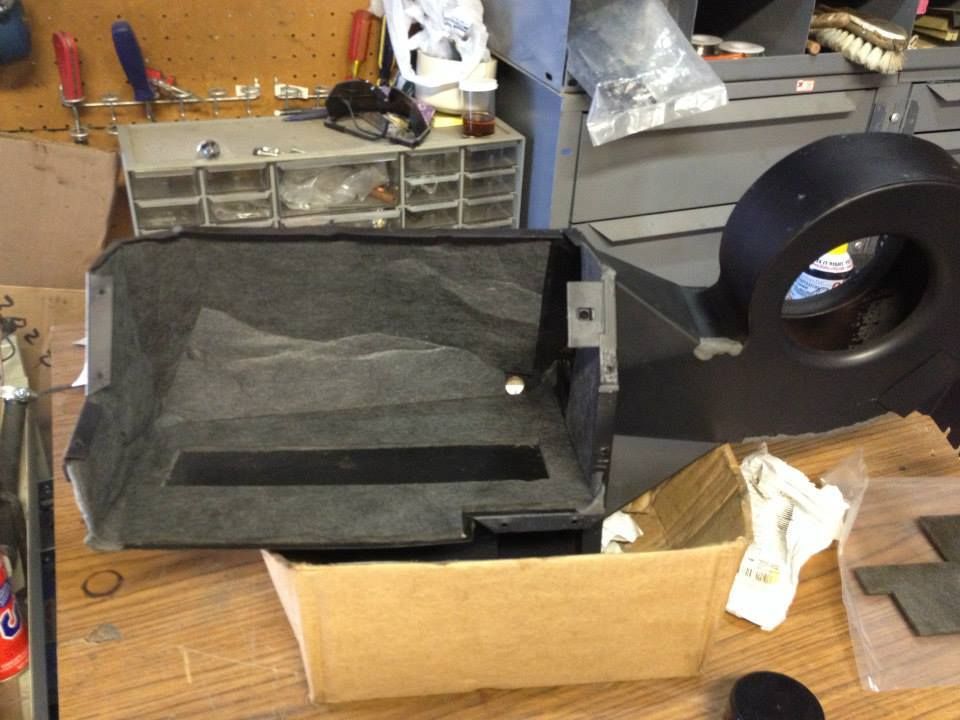
With the clips out I removed the front half of the shell to expose the heater core.
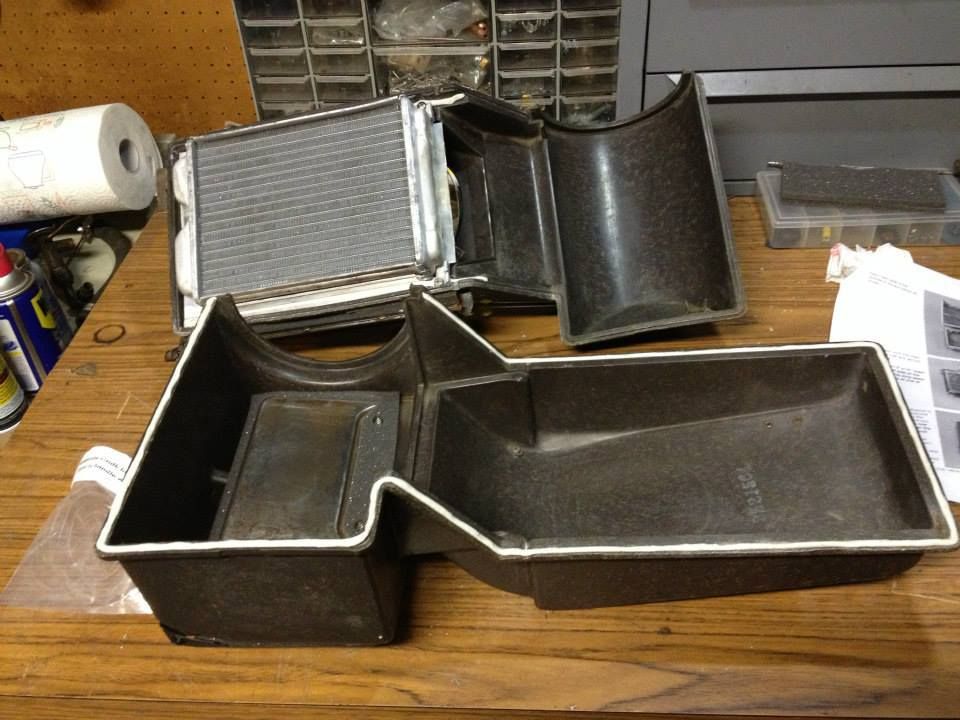
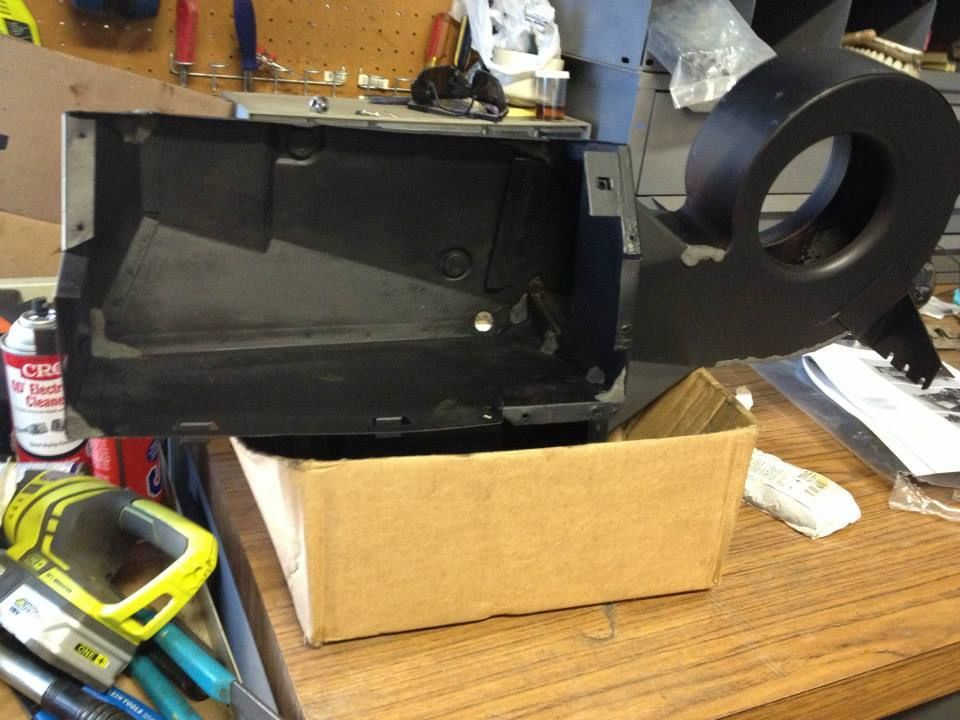
Then I pulled the back half of the box out next leaving the ac section which mounts to the firewall.
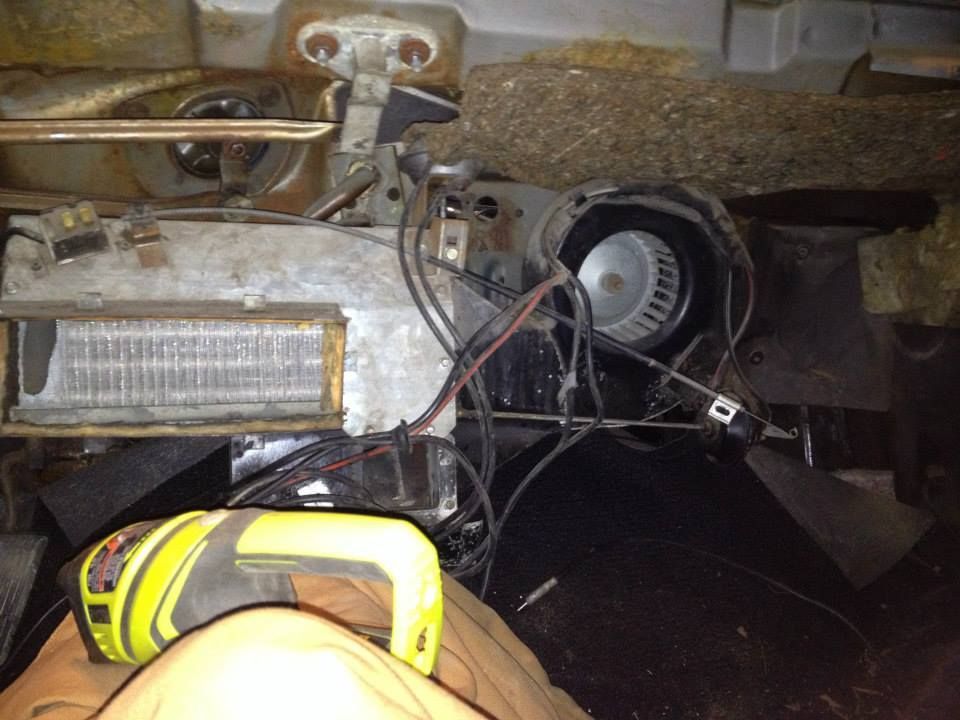
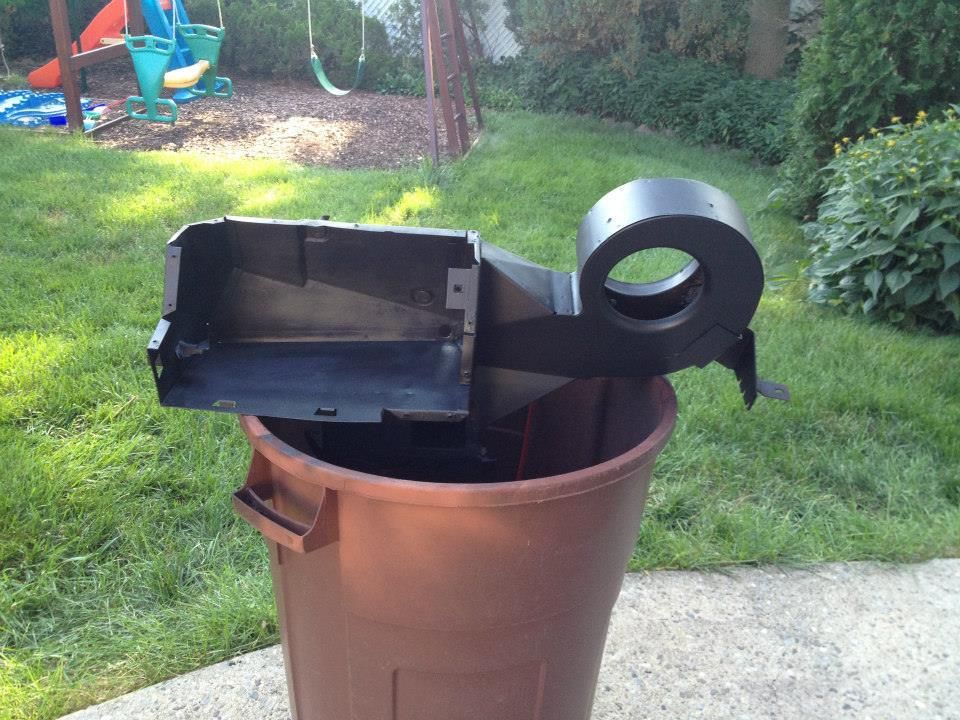
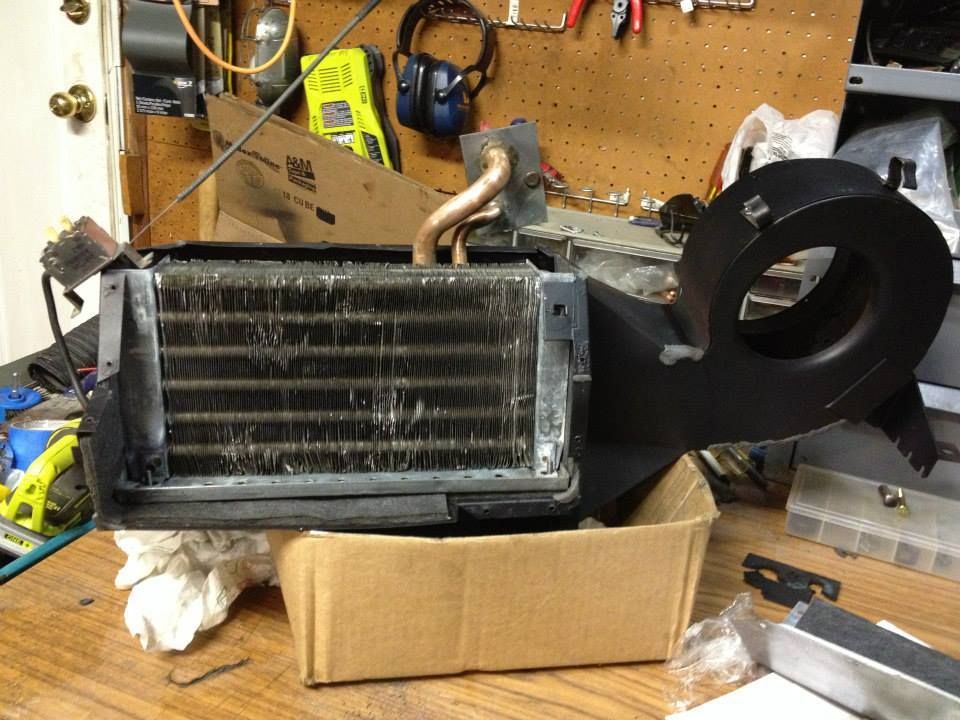
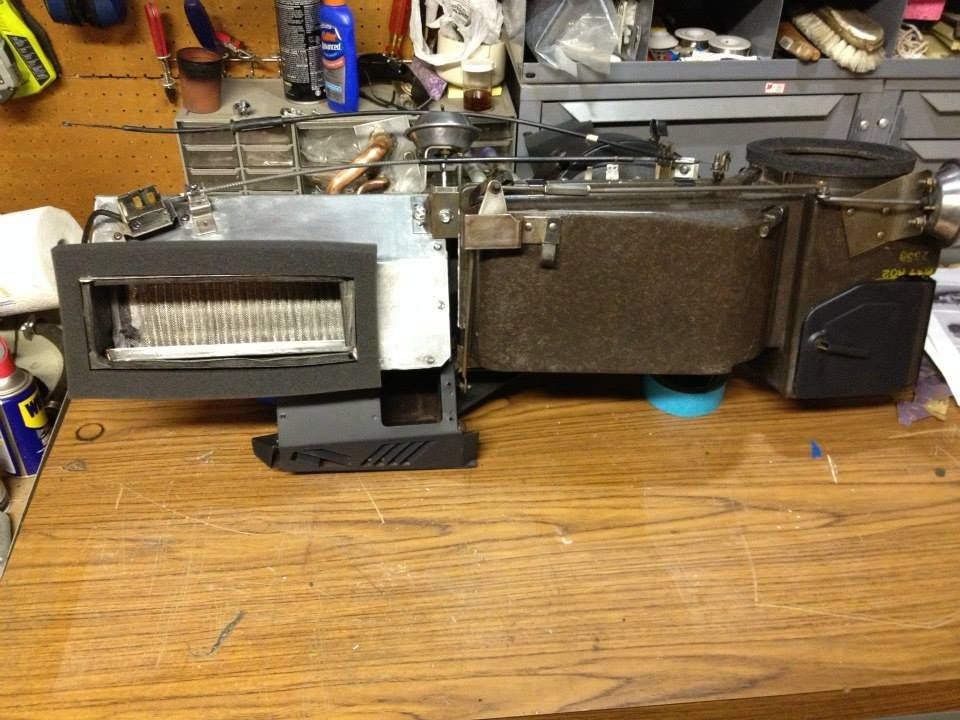
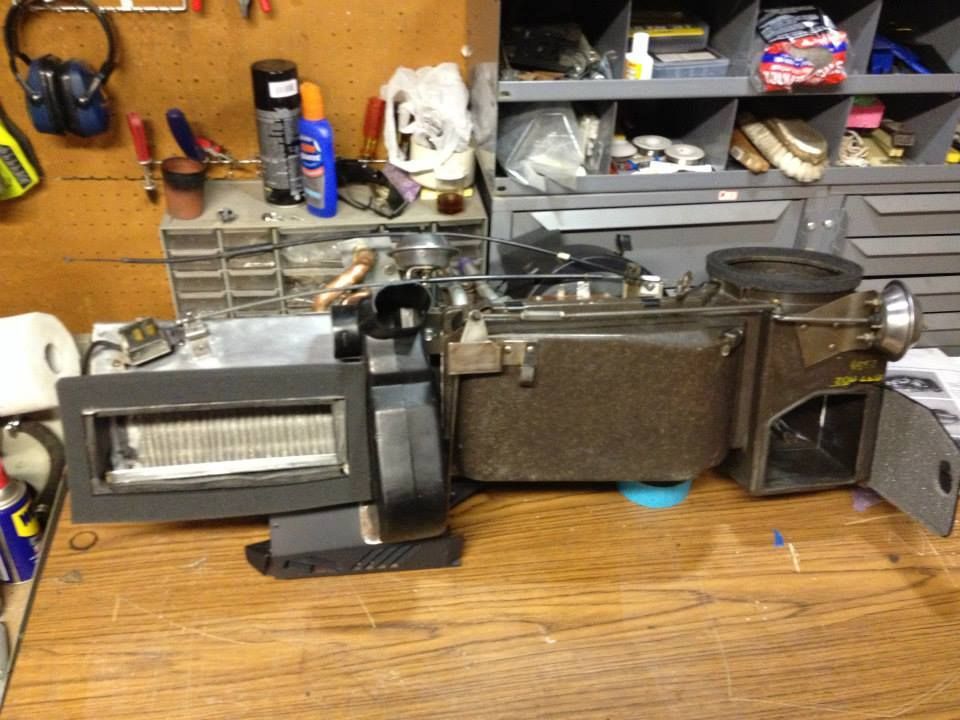
Here it is in all of its glory, I can see the two halves, the damper contained in each and the heater core.
Next I pulled the AC section...4 mounting bolts and 4 Screws then the whole thing comes out. Since I was working alone I chose remove them in halves.
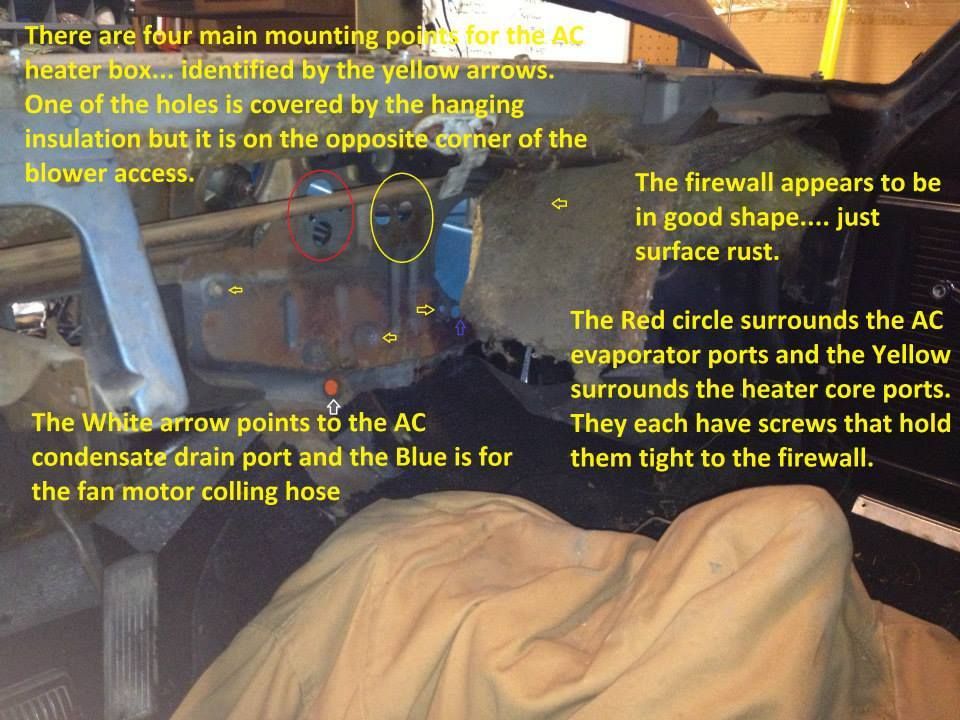
Perspective from the cabin.
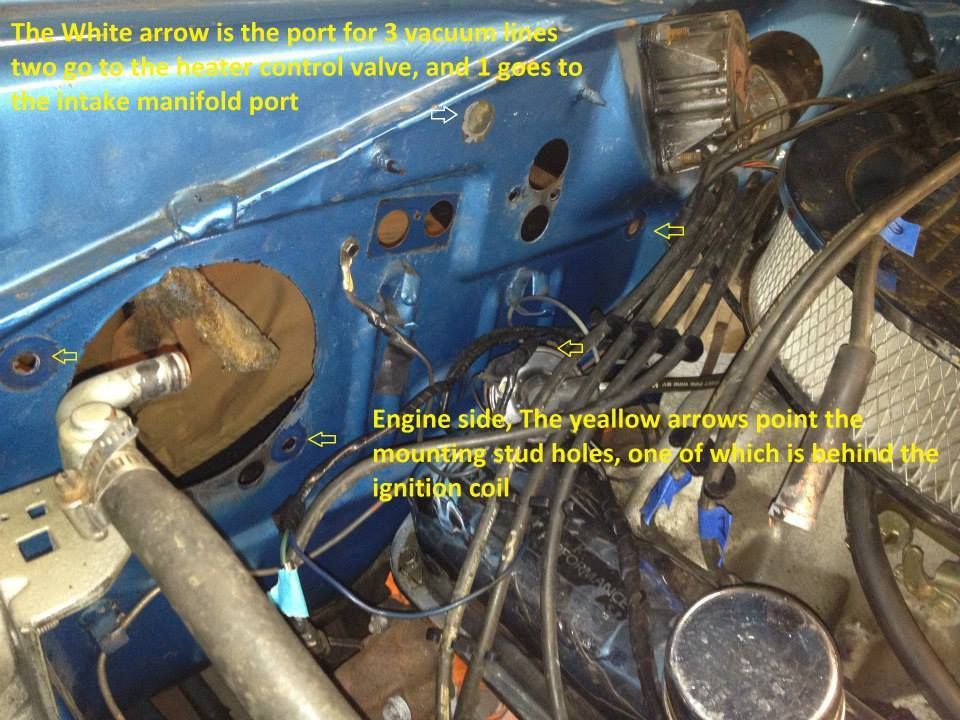
And the engine bay.
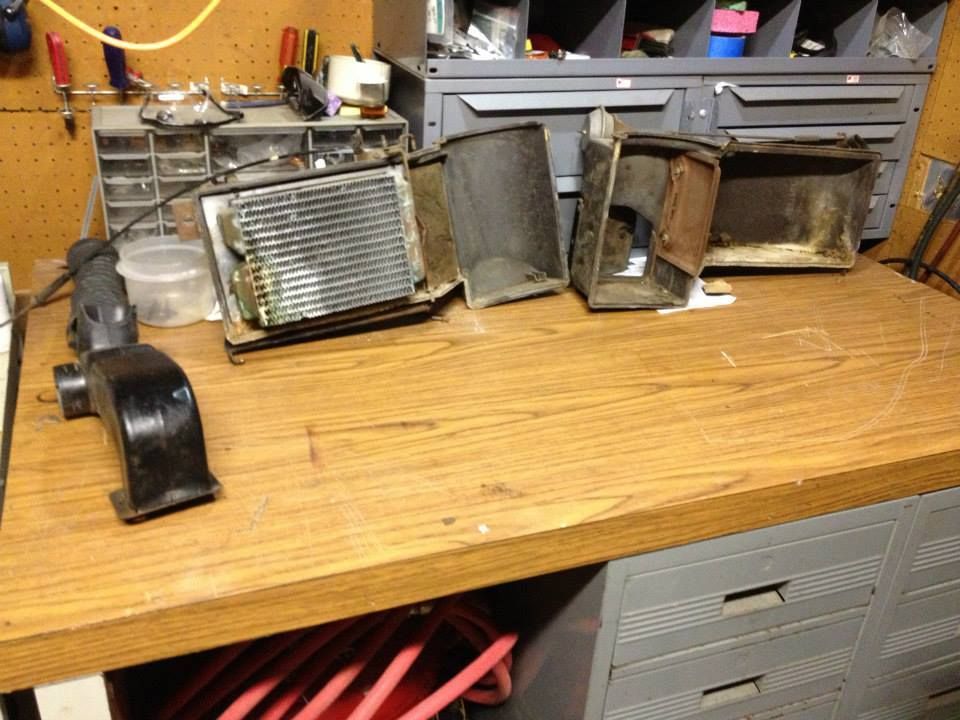
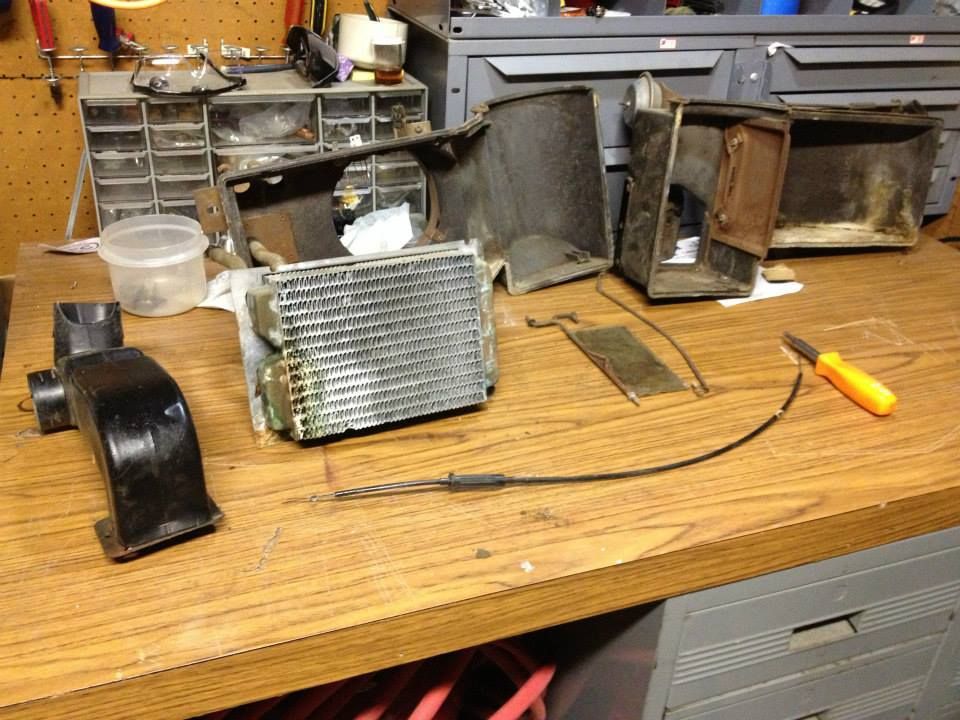
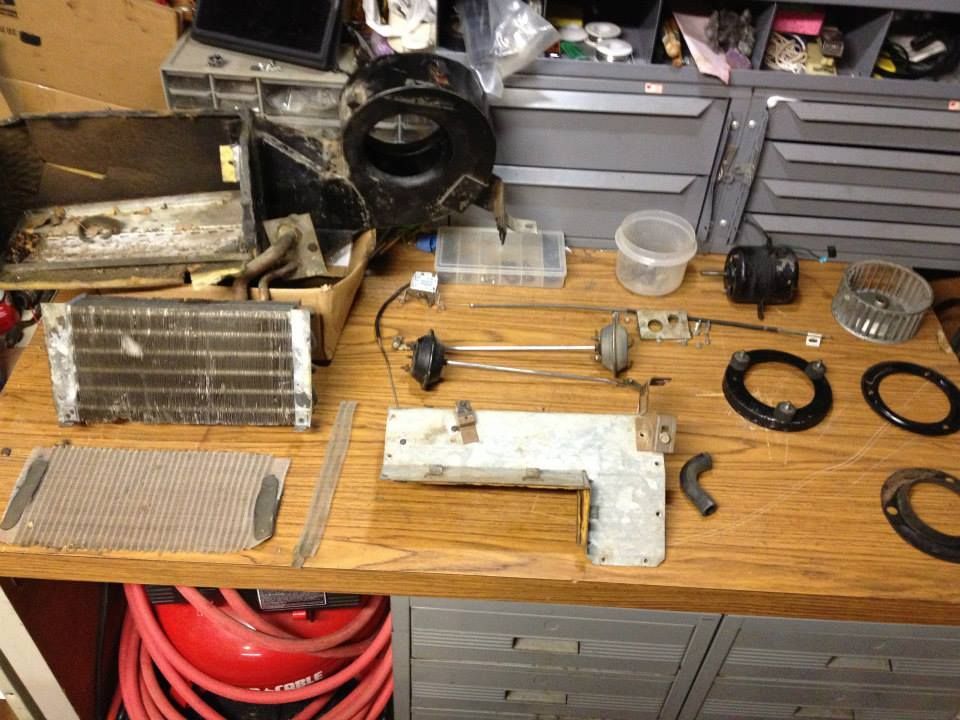
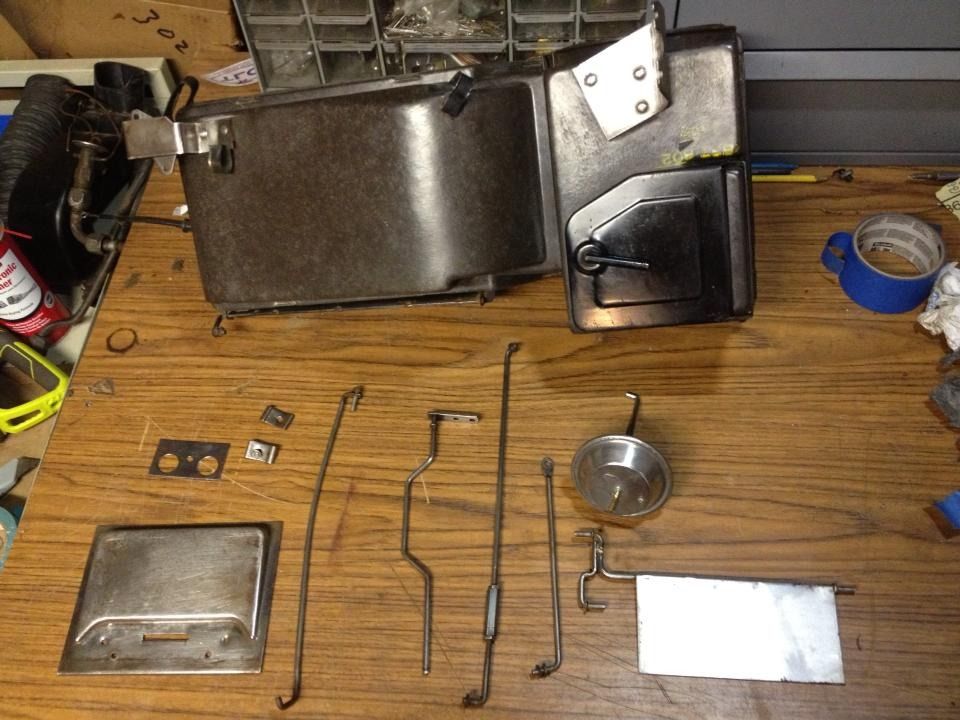
The Unit almost completely broken down. The two halves, the dampers, linkage, mixture control cable, the damper vacuum actuator, the fresh air holding rod. the heater core and the defrost duct.
Here is the heater side all cleaned up a sorted. Waiting for the new core, foams and seals.
New heater core and sealer on the back half.
New Foams and sealer on the front half
Hers the completed half with new fresh air and blower foams also a cleaned blower motor resistor element.

Moving on to the AC side. Here's what it looks like Completely disassembled. Well almost everything. There is damper the resides in the air plenum tunnel to the left of the blower not shown in this picture because it's tricky to get to and I'm still working on that lol.
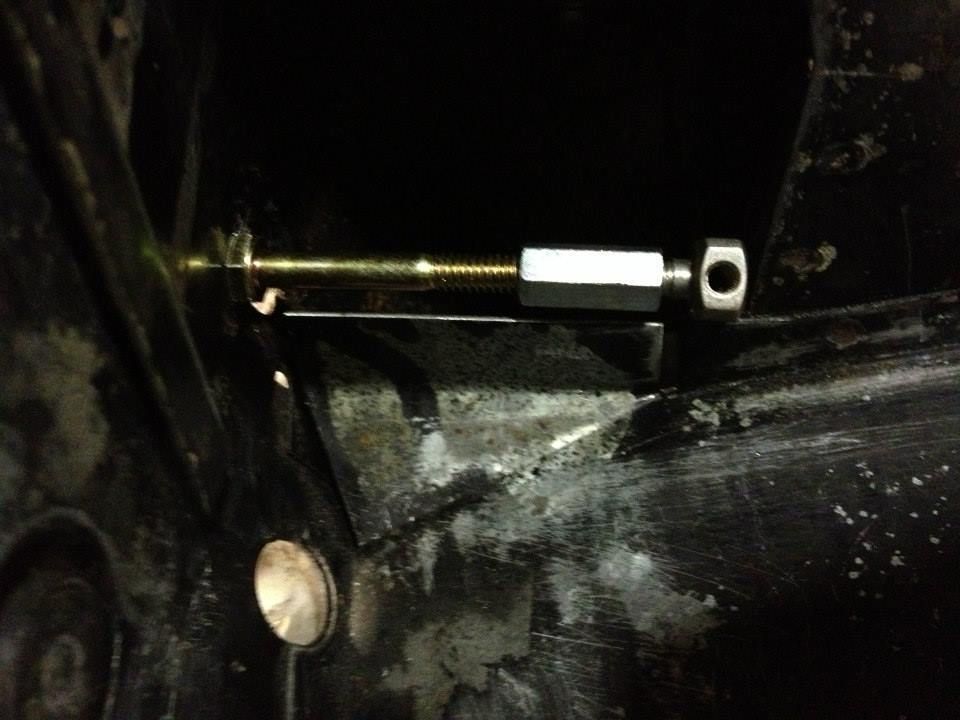
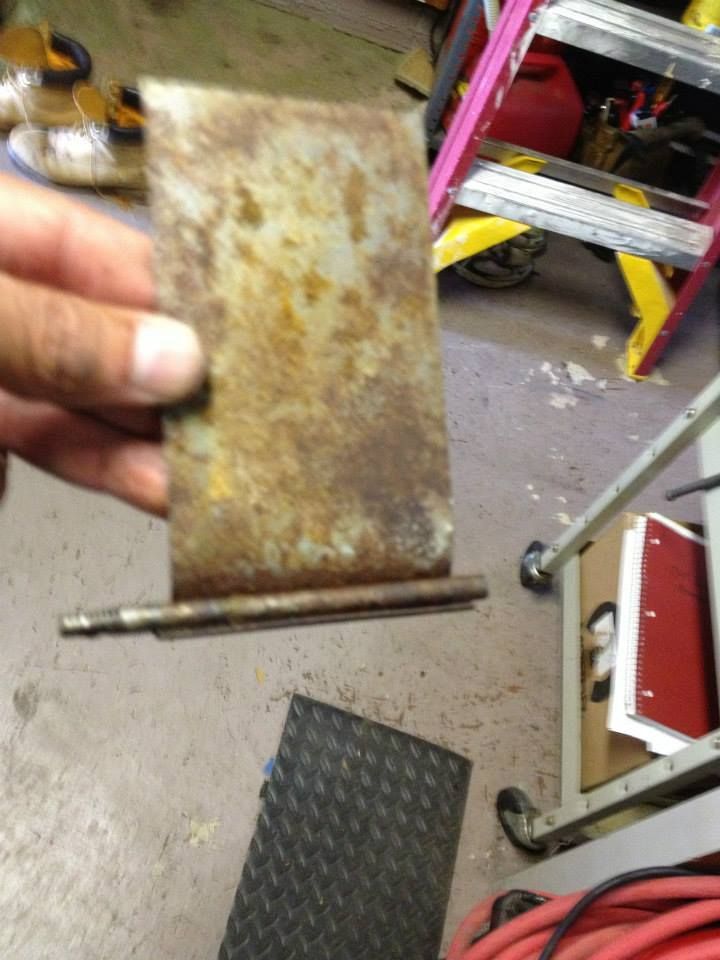
I used a 2 1/2 in screw and coupling to make an expander in order to take out a very difficult to remove flapper.
It's out! ... this is what it looks like... notice all the foam is gone.
Cleaned primed and painted housing.
Seal putty applied to gaps on the seams of the AC box.
Cleaned and cleared drain pan installed. Along with the damper fitted with new foam.

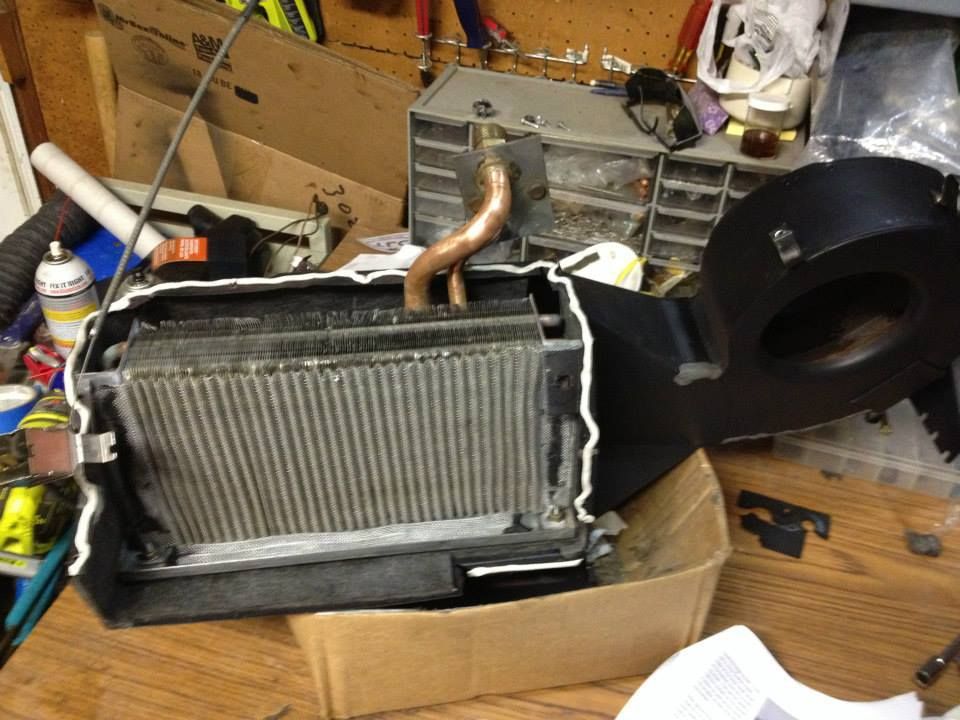
Cleaned and flushed Evaporator coil installed along with the thermostat and capillary tube.
Screens and sealer installed.
Clean Thermostat, Vacuum actuators, cable, linkages and cover installed.
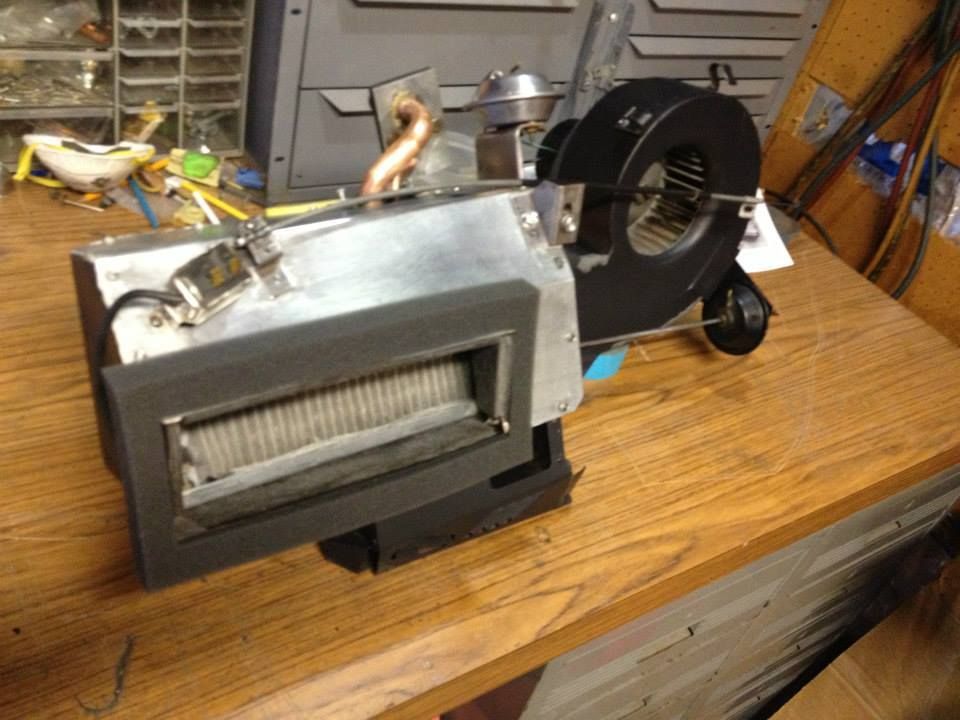
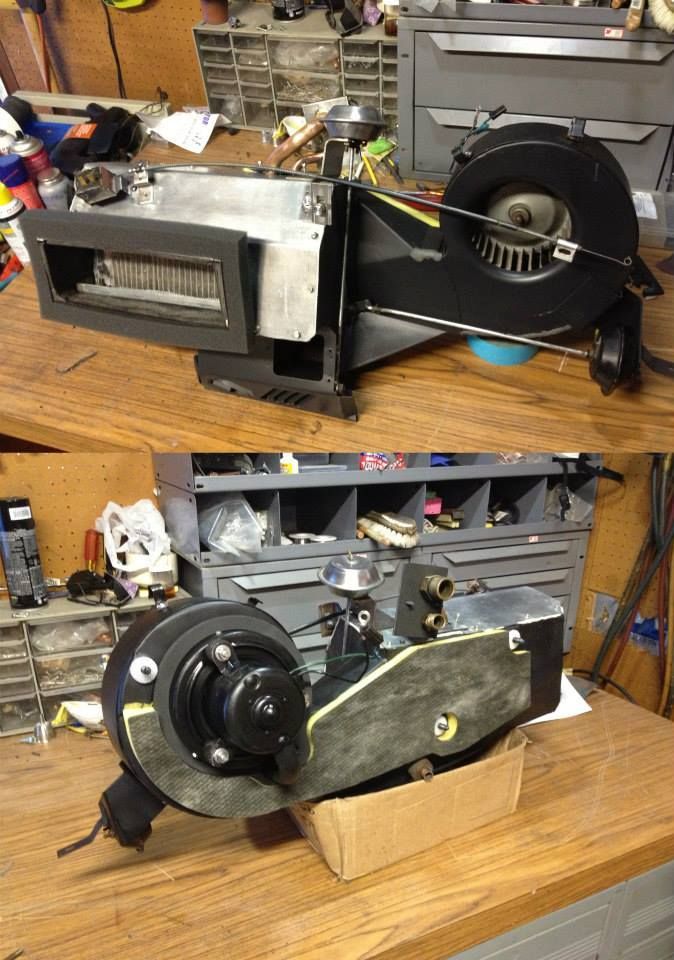
Firewall insulation, gaskets and cleaned up blower assembly installed.
Time to put the two sides together.
Before/after
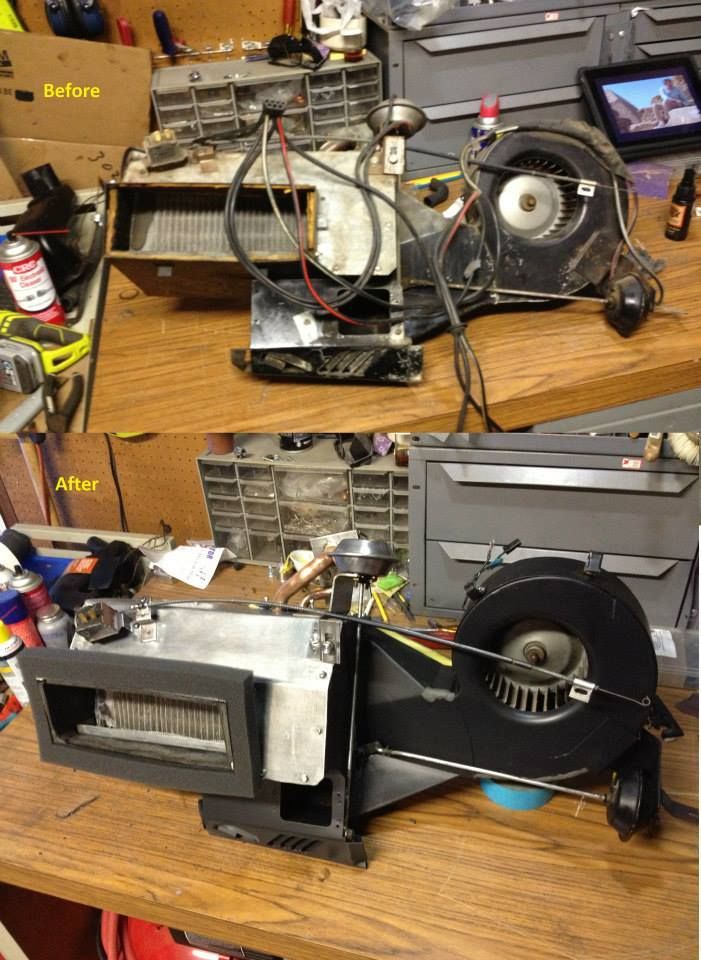
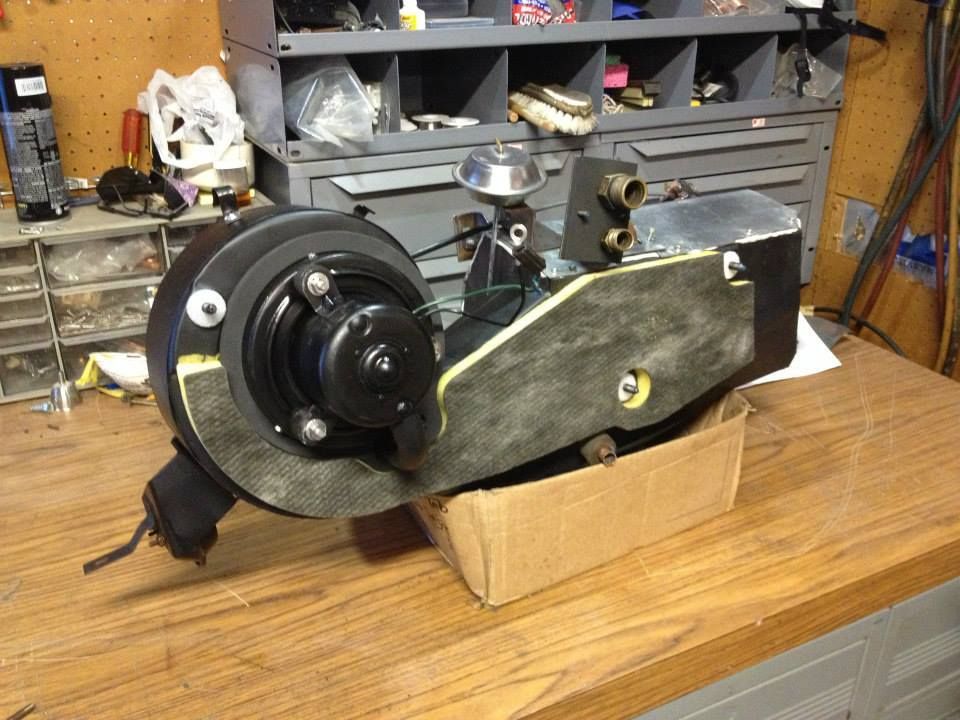
Finished and going on the shelf until it's ready to go back in. I did check all of the vacuum actuators for proper function. I also lubed the contact points and used graphite on the cables. The vacuum lines were all good and cleaned up well except for the one that connects to the engine that one was hard and brittle.
I had a lot of fun with this. I used the big kit from DMT which really worked out well.
Now that I've taken it this far and the front of the cabin is bare I think I should move on to the wiper linkage and pivot seals.
Oh boy...What have I done! :coffee2:[/QUOTE]
There it is. first steps.
Started removing the heater and AC components. First the Heater side. I have the Rebuild kit and new Heater core on order. We'll see how this goes...
I went over it for a while to get oriented before I dug in. I must have inspected it for an hour. at least it felt like it was that long trying to get an idea of how this thing is built. Kind of like taking the time to smell the roses or something like that lol It really is an impressive bit of work, along lines of: "a fine mess" or "an accurate estimate" I've concluded the unit is "Complex simplicity"!
After realizing that this is not one but two separate sections (held together by one bolt which can be seen just left of the fan) acting as one I decided to start with the heater side first. The heater side is built like a clam shell with the two halves held together by clips. There is also a rod that runs up through the fresh air intake on the right that clamps to the cowl which need to be removed.
With the clips out I removed the front half of the shell to expose the heater core.
Then I pulled the back half of the box out next leaving the ac section which mounts to the firewall.
Here it is in all of its glory, I can see the two halves, the damper contained in each and the heater core.
Next I pulled the AC section...4 mounting bolts and 4 Screws then the whole thing comes out. Since I was working alone I chose remove them in halves.
Perspective from the cabin.
And the engine bay.
The Unit almost completely broken down. The two halves, the dampers, linkage, mixture control cable, the damper vacuum actuator, the fresh air holding rod. the heater core and the defrost duct.
Here is the heater side all cleaned up a sorted. Waiting for the new core, foams and seals.
New heater core and sealer on the back half.
New Foams and sealer on the front half
Hers the completed half with new fresh air and blower foams also a cleaned blower motor resistor element.
Moving on to the AC side. Here's what it looks like Completely disassembled. Well almost everything. There is damper the resides in the air plenum tunnel to the left of the blower not shown in this picture because it's tricky to get to and I'm still working on that lol.
I used a 2 1/2 in screw and coupling to make an expander in order to take out a very difficult to remove flapper.
It's out! ... this is what it looks like... notice all the foam is gone.
Cleaned primed and painted housing.
Seal putty applied to gaps on the seams of the AC box.
Cleaned and cleared drain pan installed. Along with the damper fitted with new foam.
Cleaned and flushed Evaporator coil installed along with the thermostat and capillary tube.
Screens and sealer installed.
Clean Thermostat, Vacuum actuators, cable, linkages and cover installed.
Firewall insulation, gaskets and cleaned up blower assembly installed.
Time to put the two sides together.
Before/after
Finished and going on the shelf until it's ready to go back in. I did check all of the vacuum actuators for proper function. I also lubed the contact points and used graphite on the cables. The vacuum lines were all good and cleaned up well except for the one that connects to the engine that one was hard and brittle.
I had a lot of fun with this. I used the big kit from DMT which really worked out well.
Now that I've taken it this far and the front of the cabin is bare I think I should move on to the wiper linkage and pivot seals.
Oh boy...What have I done! :coffee2:[/QUOTE]