The Great Pumpkin - '71 Duster
So I've definitely gotten some things completed on the Duster but I've also had some setbacks to grapple with. Sometimes it seems like I spend an inordinate amount of time trying to make something work that I know is wrong. I guess that's the luxury of working on your own project, no boss is breathing down your neck but sometimes I need to stop and think before wasting so much time. I'll elaborate a little more later.
The good news is that 95% of the wiring inside the car is complete. I had to get an RPM activated switch for the shift light which I put behind the instrument cluster. The switch is mounted on the pedal bracket behind the cluster. The gauges are mostly wired except for the B+ and ground for the voltmeter and some of the wiring for the A/F gauge module. I ran the gauge back lights through an open terminal on the dash light switch so they come on with the rest of the lights. Most all the stock stuff that was left in tact went back in where it was. Hopefully it all works right when I connect the battery. `
Got the front section of carpet in. Honestly I'm not totally happy with how it came out - there's some wrinkles in it and to my eye appears a little crooked. You'd really have to look at it to notice and hopefully it will settle out some more. I guess its one of those things only you notice and know it will always bother you. The driver's side sill and kick panel is in too. I used some new fasteners from an interior screw kit I got at Carlisle to make it purty. I have to finish up the passenger side but that job is almost done.
The seat covers are done and the seats are attached to the brackets. One of the setbacks was having to re-do one of the covers because it was too loose. Luckily I had enough hog rings on hand. Second time's a charm I guess. The driver's seat is mounted to the floor. I used some grade 8 bolts and heavy duty washers. I had to drill a hole in the drive shaft loop bracket so the seat wasn't bolted to it. If it ever spits the drive shaft out, I don't want to feel that in my butt. In order to get used to the seat position, I measured the position of the the wheel in relation to where I sit and tried to mimic that in my daily driver. Seems
The second setback I encountered was with the steering column. It was converted from a column shift to a floor shift set up and was refurbished nicely if I say so myself. So I go to install my Tuff Wheel and noticed that the column lock was not locking so out it came again. I had it apart and rebuilt twice before I figured out that there were two issues. When I put the ignition switch collar together, I failed to cinch down the ignition switch all the way and it was preventing the key release from actuating properly. Couple turns of the screwdriver and it popped into place. Everything went back together and the locking mechanism now works right.
The second thing I realized was the steering shaft was totally bent. I mean, a lot. This was an Ebay purchase so who knows what forces were acting on it to make it so bowed. Its funny, I remember noticing it when I rebuilt it the first time but I guess it didn't quite register and I forged ahead anyway. I'm surprised at myself for this one. I actually had to put it in my press to straighten it out. It's not perfect but its better, there's less up and down movement when turning the wheel. :neutral:
The coupler also seems to be posing a problem. The shoes are coming out of the top of it. I forgot about the little pin in the coupler body so that will need to be installed but I'm also wondering if something else is amiss. It will have to come out again to install the retaining pin and I'll have to re-check it again. Hopefully that's all it needs. I'm about ready to throw this column through the window.
To top it all off, the lovely finish on the column I tried so hard to get correct got completely trashed during this process as did the lower bearing I installed for support. I repainted it but the it would have to be stripped and redone to be as good as it was. We'll call it patina. Too annoyed to take pics so take my word for all this.
The next setback is the brake pedal push rod. While the column was out, I figured it was a good time to put the brake push rod in. Seems like the one I had is too long and pedal is way up off the floor, like 8". I had another one so I put that one in too, same result. :banghead::banghead:
I looked into the adjustable ones and decided to try and make my own. I went to the hardware store and got some steel tubing and two jam nuts. I cut about 1/4" out of the one rod and threaded the ends for 7/16-20. I tapped the tubing for the same thread and put it in. It lowered the pedal but it was now pulling out of the back of master cylinder piston. I really can't figure out why though. I went back and forth with this all day trying different configurations but nothing was working, it would either pull out or keep the pedal too high. I eventually gave up and ordered a fancy adjustable one from Dr. Diff. Hopefully it solves the issue but I have my doubts.
Plugging away at this thing, I hope to get it fired up before it's too cold. It's been apart for almost a year at this point, getting a little antsy but I can see a faint light flickering at the end of the tunnel.
So here's a few pics.
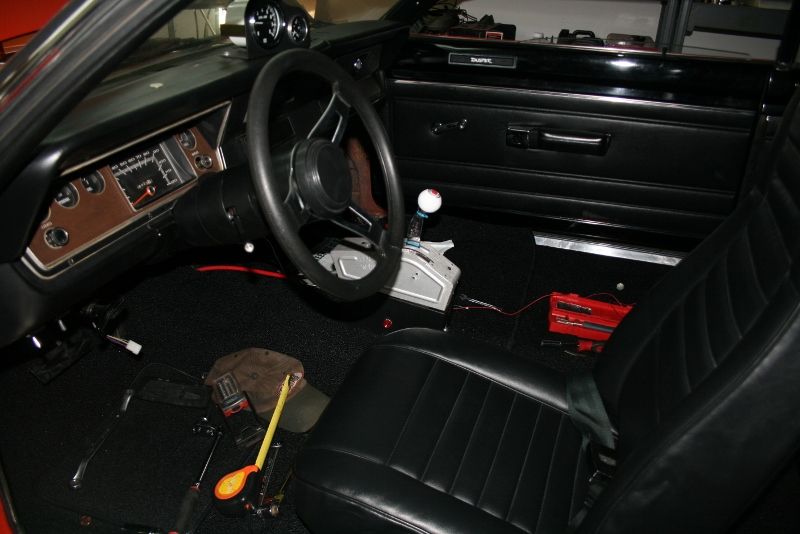
Here's the mostly finished interior.
Jesse likes it!

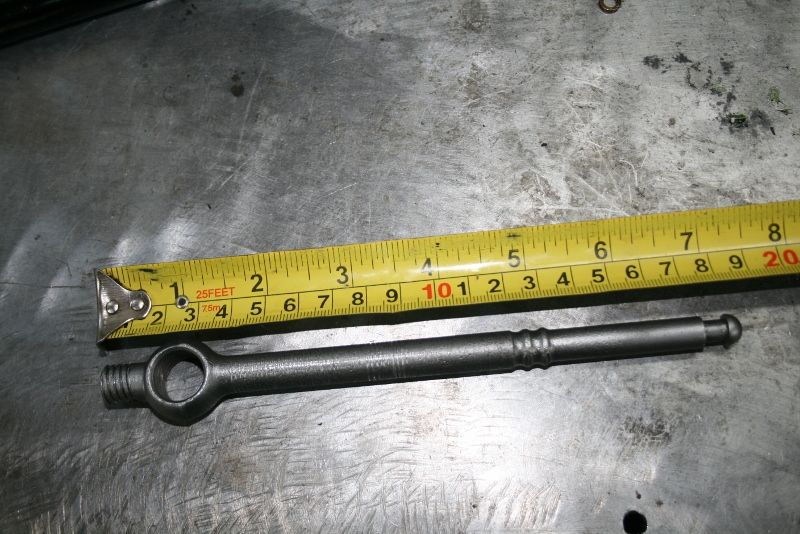
Here's a few pics of the brake push rod fail. I was all excited that it was going to work but somehow it didn't. I practiced threading the end of it just to see how it would go.
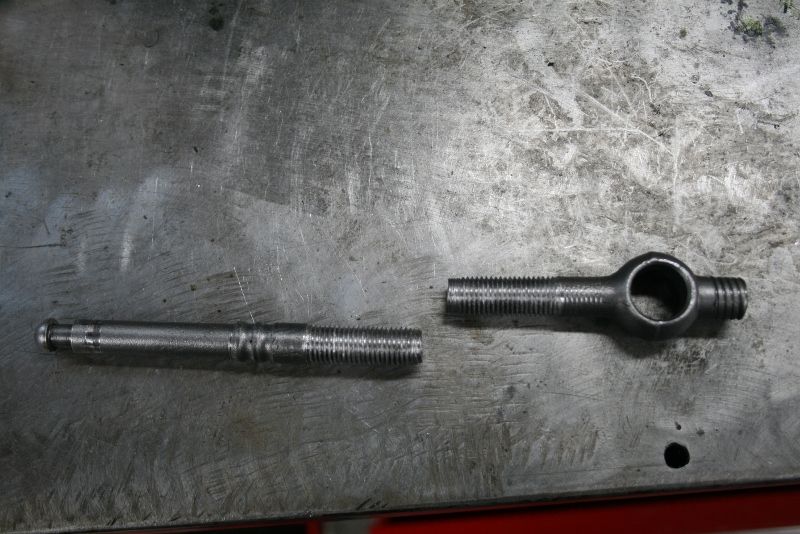
Here it is cut and threaded.
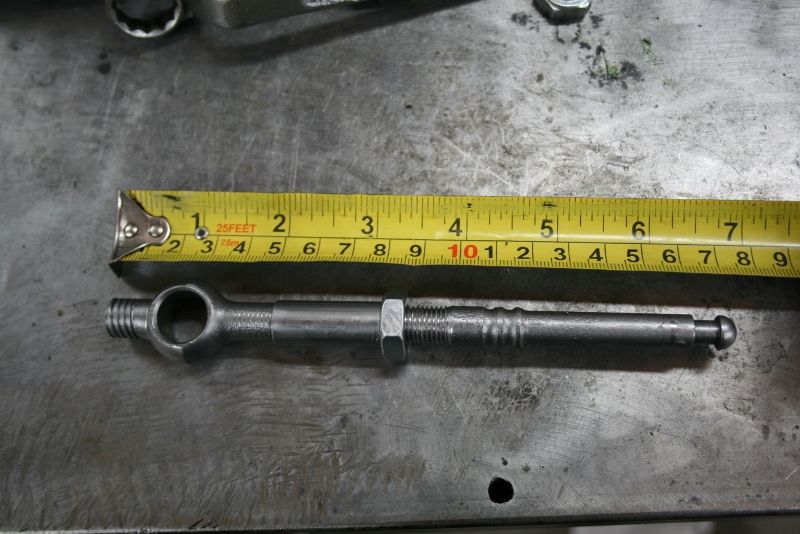
Tube and jam nut. You'd think it would work but no dice.
That's all for now. More to come, hopefully I'll have some better success next update.
So I've definitely gotten some things completed on the Duster but I've also had some setbacks to grapple with. Sometimes it seems like I spend an inordinate amount of time trying to make something work that I know is wrong. I guess that's the luxury of working on your own project, no boss is breathing down your neck but sometimes I need to stop and think before wasting so much time. I'll elaborate a little more later.
The good news is that 95% of the wiring inside the car is complete. I had to get an RPM activated switch for the shift light which I put behind the instrument cluster. The switch is mounted on the pedal bracket behind the cluster. The gauges are mostly wired except for the B+ and ground for the voltmeter and some of the wiring for the A/F gauge module. I ran the gauge back lights through an open terminal on the dash light switch so they come on with the rest of the lights. Most all the stock stuff that was left in tact went back in where it was. Hopefully it all works right when I connect the battery. `
Got the front section of carpet in. Honestly I'm not totally happy with how it came out - there's some wrinkles in it and to my eye appears a little crooked. You'd really have to look at it to notice and hopefully it will settle out some more. I guess its one of those things only you notice and know it will always bother you. The driver's side sill and kick panel is in too. I used some new fasteners from an interior screw kit I got at Carlisle to make it purty. I have to finish up the passenger side but that job is almost done.
The seat covers are done and the seats are attached to the brackets. One of the setbacks was having to re-do one of the covers because it was too loose. Luckily I had enough hog rings on hand. Second time's a charm I guess. The driver's seat is mounted to the floor. I used some grade 8 bolts and heavy duty washers. I had to drill a hole in the drive shaft loop bracket so the seat wasn't bolted to it. If it ever spits the drive shaft out, I don't want to feel that in my butt. In order to get used to the seat position, I measured the position of the the wheel in relation to where I sit and tried to mimic that in my daily driver. Seems
The second setback I encountered was with the steering column. It was converted from a column shift to a floor shift set up and was refurbished nicely if I say so myself. So I go to install my Tuff Wheel and noticed that the column lock was not locking so out it came again. I had it apart and rebuilt twice before I figured out that there were two issues. When I put the ignition switch collar together, I failed to cinch down the ignition switch all the way and it was preventing the key release from actuating properly. Couple turns of the screwdriver and it popped into place. Everything went back together and the locking mechanism now works right.
The second thing I realized was the steering shaft was totally bent. I mean, a lot. This was an Ebay purchase so who knows what forces were acting on it to make it so bowed. Its funny, I remember noticing it when I rebuilt it the first time but I guess it didn't quite register and I forged ahead anyway. I'm surprised at myself for this one. I actually had to put it in my press to straighten it out. It's not perfect but its better, there's less up and down movement when turning the wheel. :neutral:
The coupler also seems to be posing a problem. The shoes are coming out of the top of it. I forgot about the little pin in the coupler body so that will need to be installed but I'm also wondering if something else is amiss. It will have to come out again to install the retaining pin and I'll have to re-check it again. Hopefully that's all it needs. I'm about ready to throw this column through the window.
To top it all off, the lovely finish on the column I tried so hard to get correct got completely trashed during this process as did the lower bearing I installed for support. I repainted it but the it would have to be stripped and redone to be as good as it was. We'll call it patina. Too annoyed to take pics so take my word for all this.
The next setback is the brake pedal push rod. While the column was out, I figured it was a good time to put the brake push rod in. Seems like the one I had is too long and pedal is way up off the floor, like 8". I had another one so I put that one in too, same result. :banghead::banghead:
I looked into the adjustable ones and decided to try and make my own. I went to the hardware store and got some steel tubing and two jam nuts. I cut about 1/4" out of the one rod and threaded the ends for 7/16-20. I tapped the tubing for the same thread and put it in. It lowered the pedal but it was now pulling out of the back of master cylinder piston. I really can't figure out why though. I went back and forth with this all day trying different configurations but nothing was working, it would either pull out or keep the pedal too high. I eventually gave up and ordered a fancy adjustable one from Dr. Diff. Hopefully it solves the issue but I have my doubts.
Plugging away at this thing, I hope to get it fired up before it's too cold. It's been apart for almost a year at this point, getting a little antsy but I can see a faint light flickering at the end of the tunnel.
So here's a few pics.
Here's the mostly finished interior.
Jesse likes it!
Here's a few pics of the brake push rod fail. I was all excited that it was going to work but somehow it didn't. I practiced threading the end of it just to see how it would go.
Here it is cut and threaded.
Tube and jam nut. You'd think it would work but no dice.
That's all for now. More to come, hopefully I'll have some better success next update.