Hotchkis 76 Dart Build
As most of you guys know, we work very closely with Hotchkis to develop the Mopar line. I think the cat is pretty much out of the bag as to Hotchkis building a 76 Dart. The guys working on the car are the same folks who assemble all of our components we sell as well. So I think it is time for some pictures!
Hotchkis Performance East is our all-new facility in Mooresville, North Carolina that specializes in custom fabrication, cooling system optimization, racing safety equipment design and installation, and race car prep in addition to manufacturing and installing Hotchkis Sport Suspension products. It is headed up by Kevin Bryde, a designer and fabricator with over 17 years’ experience in motorsports. Kevin’s career has let him work with some of the most talented drivers in the industry including Dick Trickle, Tony Stewart, Sterling Marlin, Dario Franchiti, Juan Pablo Montoya, Martin Truex Jr., and Jamie McMurray. Most recently Kevin worked for Chip Ganassi Racing in its Engineering Department where his duties included design, fabrication, and prototyping for NASCAR, Indy Car, and Rolex Sports Car race cars. Kevin also has over ten years’ experience in all aspects of driver safety, including seat, head restraint, and race car cockpit design.
Introduction:
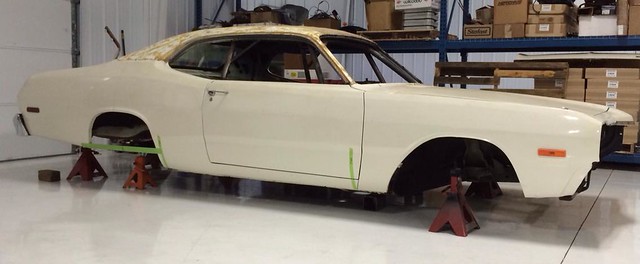

Hotchkis Performance East's latest project is a complete buildup of this 1976 Dodge Dart for Kevin Wesley, creator of the Hotchkis Autocross Taxi and avid driving enthusiast. Kevin's goal for this car is to have a car that he can take to compete in events like Targa Newfoundland and Pikes Peak, so this car has to be fast, but it also has to be safe. It will be receiving a full FIA-based roll cage, a modern 6.4L Hemi and Legend GT-700 transmission transplant, full Hotchkis TVS suspension, and more. Stay tuned to this thread as we continually update it with new pictures of the build as we overhaul this former Mopar econobox.
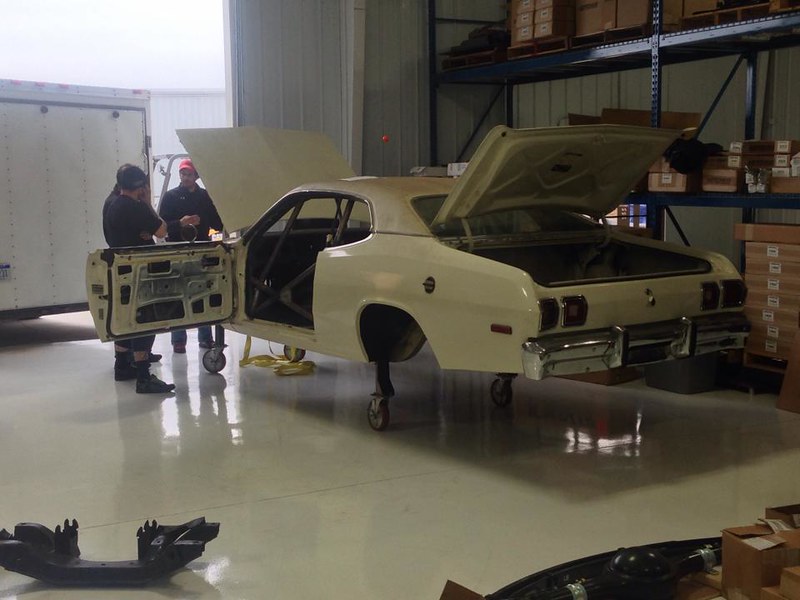
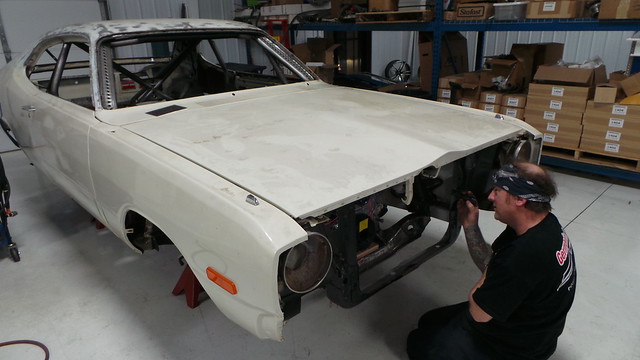
As you can see, when the car first rolled in the shop it was already stripped down and had an old roll cage in it. Though it looked a little rough, it was in fairly good shape and the body was straight and mostly rust-free.
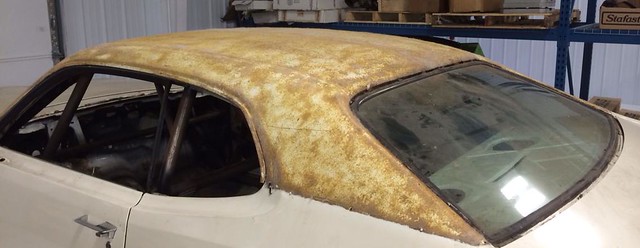
Even the roof was rust-free and only had the adhesive residue from the original vinyl top.
Step 1: Engine Mounts
The first thing we had to do with the Dart was to get its new Mopar 6.4L HEMI and Legend GT-700 transmission into place. Once we determined how much clearance was needed for the oil pan, headers, steering rack, etc, we were able to begin to design the mounts.
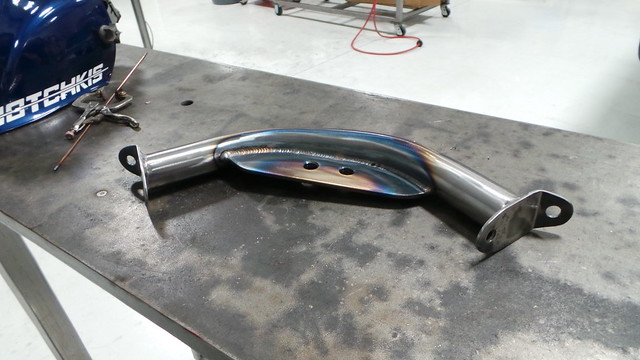
Once we got all of our measurements, it was off to the drawing board. What we came back with was this beautiful piece:
[image]http://farm3.staticflickr.com/2871/11938498455_e11826a31c_z.jpg[/image]
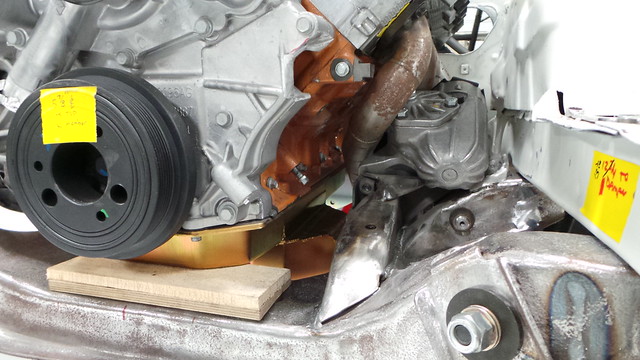
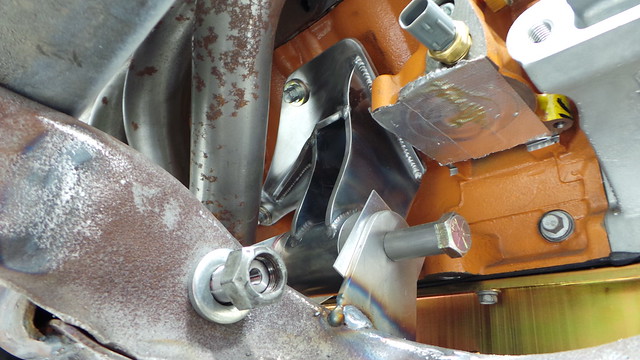
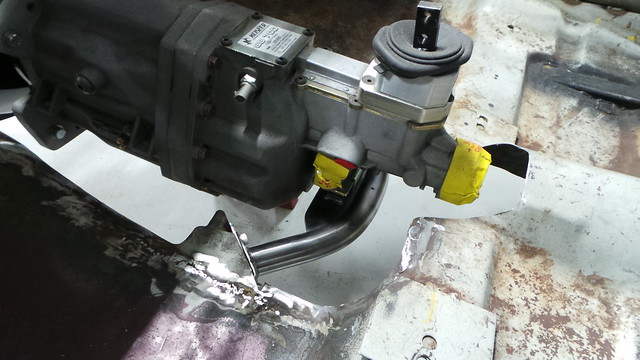
Now we were free to create the frame mounts and test fit the mounts together. Here's the passenger side:
And here's the driver's side:
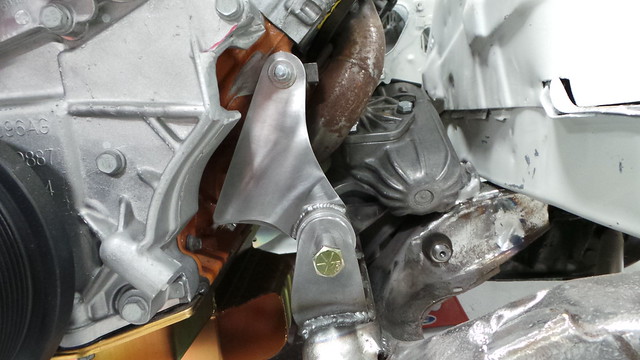
As you can see, the clearance is perfect and the new HEMI looks quite good in its new home.
[image]http://farm8.staticflickr.com/7357/11939166885_0edbf0864a_z.jpg[/image]
More photos of the engine mounts here: [ame="http://www.flickr.com/photos/hotchkis/sets/72157639748590773/"]Project 76 Dart - Engine Mounts - a set on Flickr[/ame]
Transmission Crossmember:
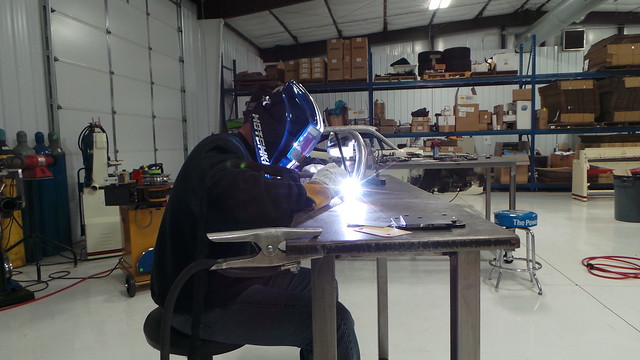
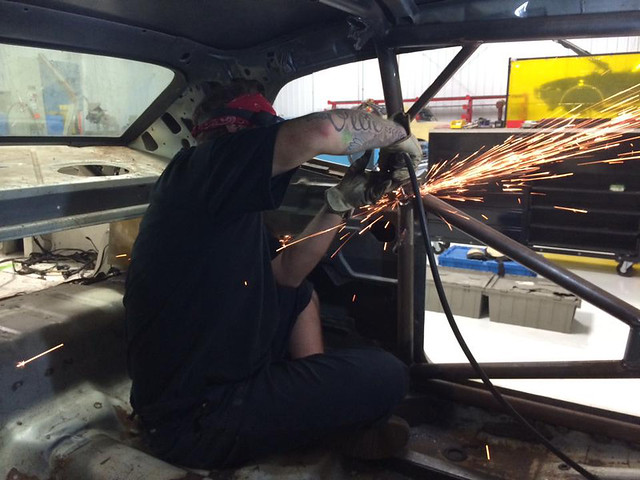
The final step to marrying the modern 392 HEMI and Legend transmission to the car was the fabrication of a new transmission crossmember. Here you can see one of our master welders and fabricators working on the end plate to the new crossmember:
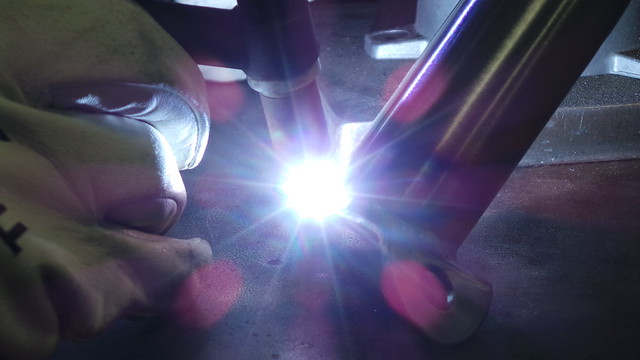
And here's a close-up of his steady hands at work:
More welding:

Here's the finished product. Gotta love the color of welding:
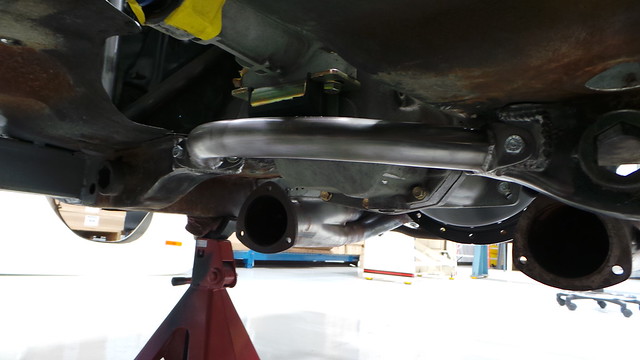
And now to fitting the newly fabricated crossmember to the car:

More photos of the crossmember here: [ame="http://www.flickr.com/photos/hotchkis/sets/72157639747282175/"]Project 76 Dart - Transmission Crossmember - a set on Flickr[/ame]
Step Two: FIA-Based Roll Cage
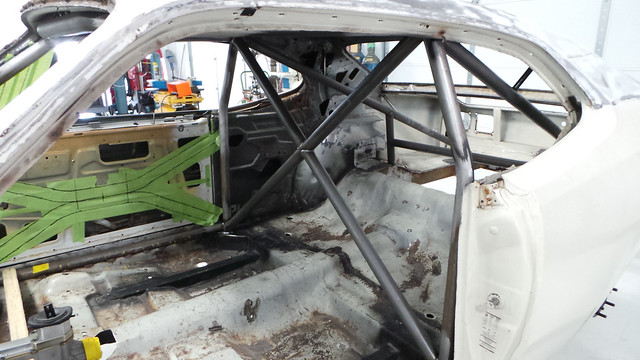
Now that the engine and transmission have been mounted, it was time to construct the roll cage. Because of the different races the owner wants to be able to use this car for, we needed to make sure that all of the safety equipment conformed to the necessary regulations so that it could be raced anywhere in the world. After consulting with the Rally America Competition Director Mike Hurst, it was time to begin the construction. But before we could do that we had to cut out a few sections of the existing cage.
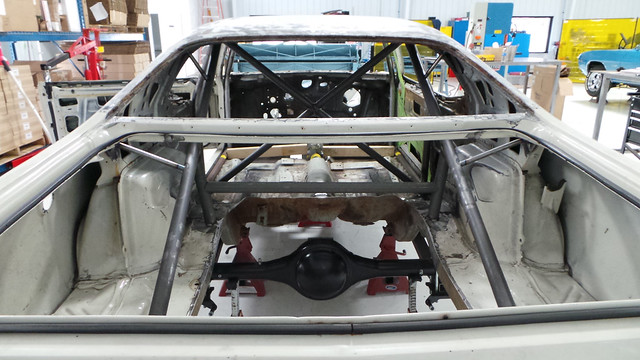
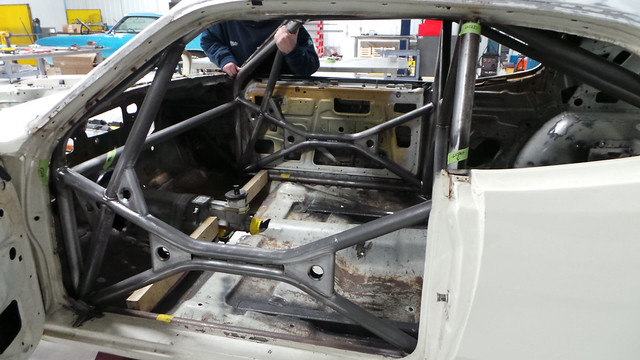
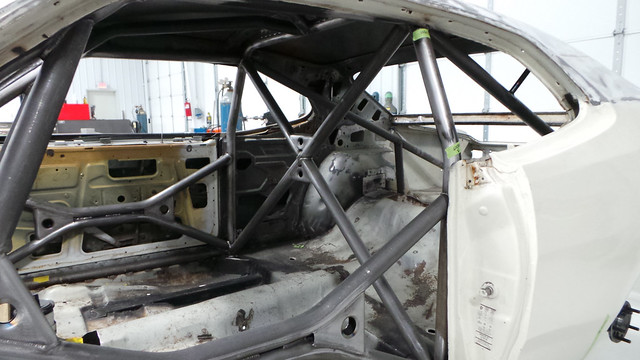
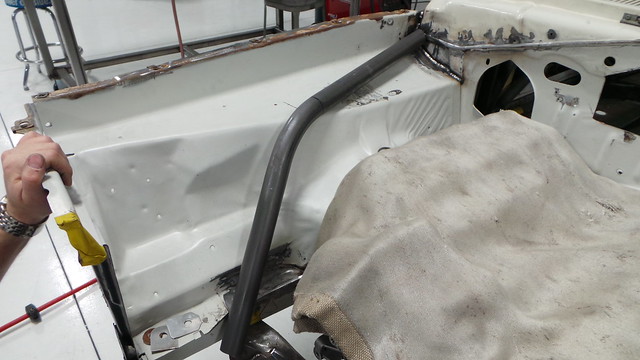
Once the parts of the old cage were removed we began by constructing diagonal bracing and rear kicker braces that connect to the main hoop. Because this is going to be a leaf spring car, the rear kickers had to extend all of the way to the rear mounting points of the springs.
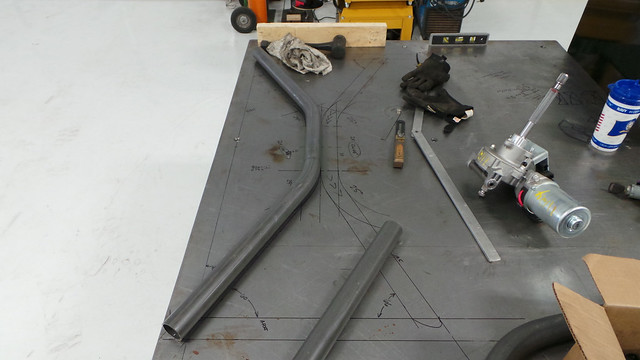
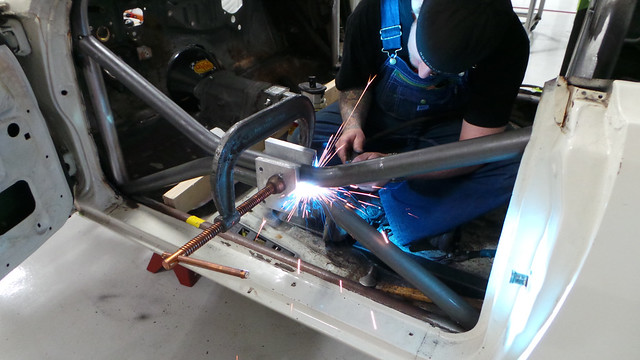
Now that the basics were covered it was time to add the increased protection required by the higher levels of motorsports. First up were the door bars, which help protect the driver and passenger from cabin intrusions from contact during wheel-to-wheel racing or from collisions with other objects. After laying out the design on the table, we bent the bars to match the pattern before fitting them to the car.
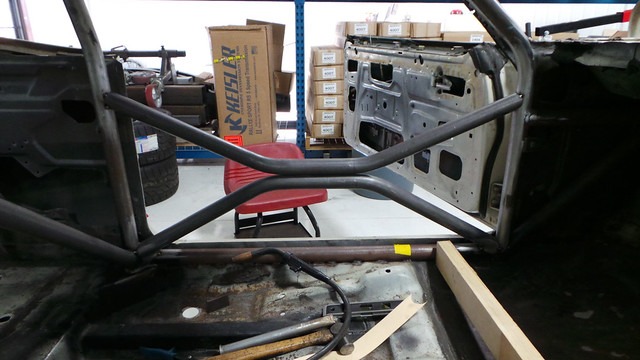
After the bars were tacked into place, we double checked all of the measurements and angles for compliance before fully welding all of the joints.
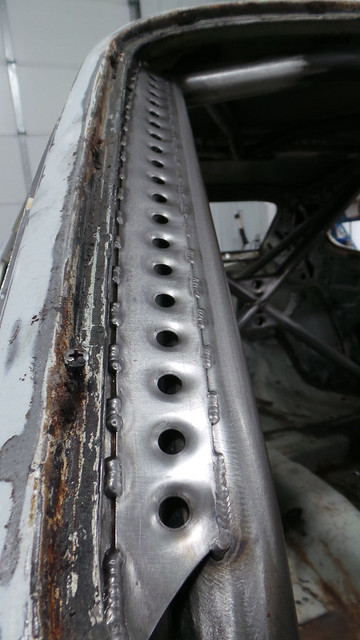
To make this cage as strong as possible, the main joints all received additional bracing and “taco gusset“ reinforcement.
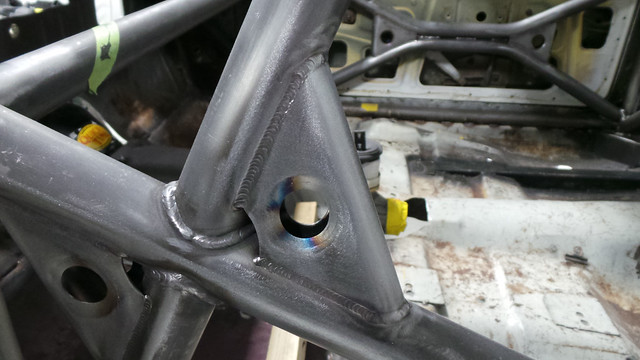
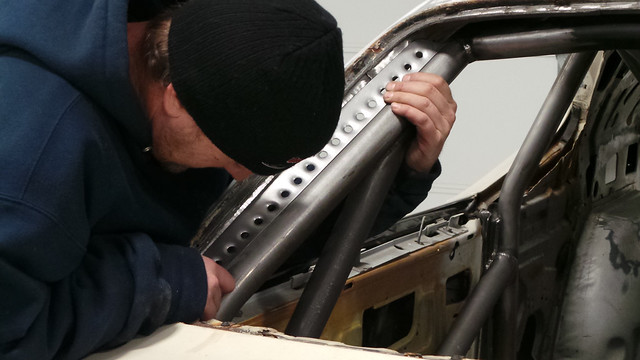
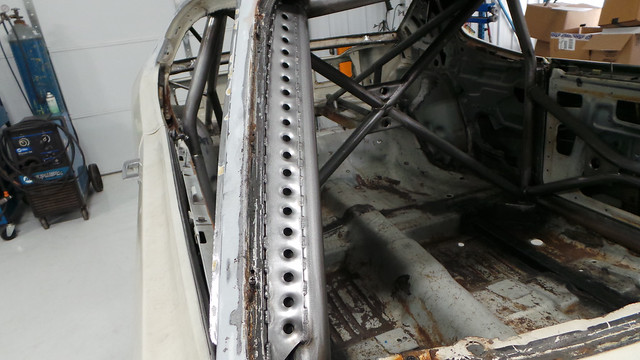
A good roll cage will tie into the unibody structure in as many places as possible. Not only does this make the vehicle safer, but it dramatically increases the rigidity of the unibody, reducing chassis flex during hard cornering. Here you can see the installation of the A-pillar gussets that are critical for driver safety in the event of a roll over.
More photos of the safety cage construction here: [ame="http://www.flickr.com/photos/hotchkis/sets/72157639747044065/"]Project 76 Dart - Roll Cage - a set on Flickr[/ame]
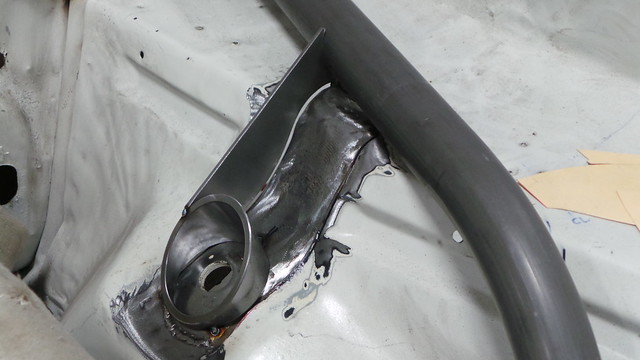
But a proper safety cage doesn’t just end at the firewall. It extends all the way through the engine bay to reinforce the front clip and add stiffness to the front of the car. This added rigidity helps handling by allowing the suspension to do its work without having to control chassis flex while also delivering improved driver safety.
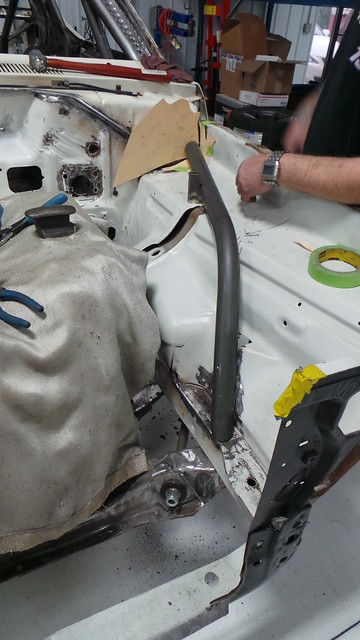
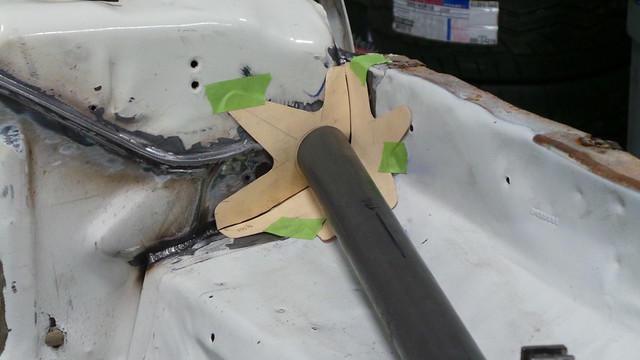
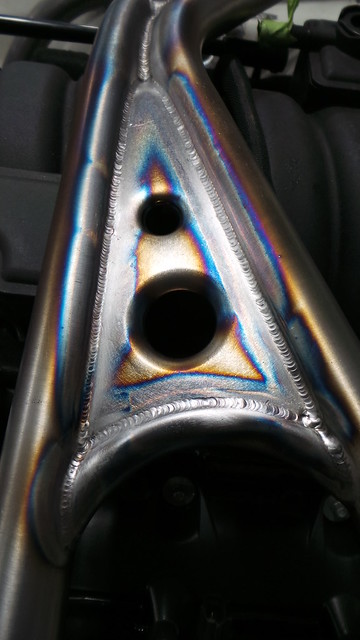
Regulations require the mounting points to be 18 square inches, so to maximize area we developed a compact mount with multiple fingers to better fit the unique curves at the corners of the engine bay while also helping to spread the load over a larger area.
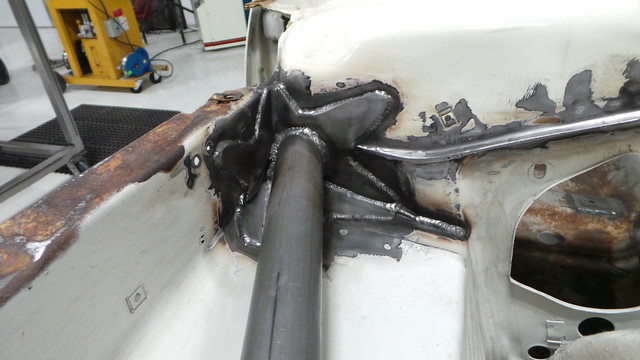
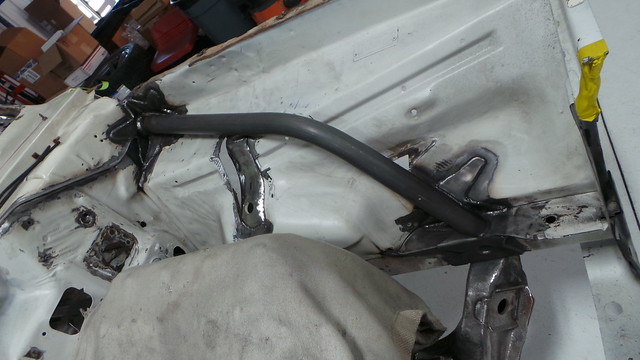
The next step to reinforcing the front end was to tie these new bars into the upper shock mounts. Like the star-shaped mounts on the firewall, these mounts are fabricated out of 16-gauge sheet metal and are designed to disperse the tremendous forces the upper shock mounts will see during racing events.

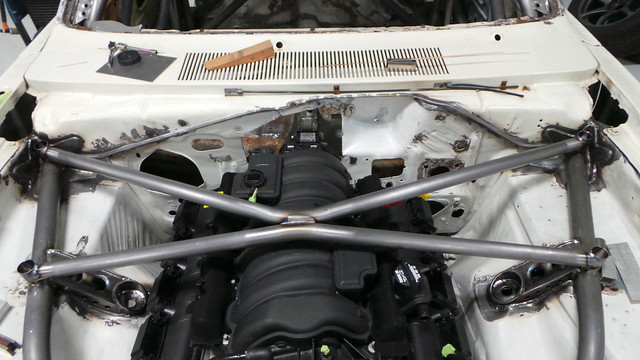
Here is the finished product with completed firewall, frame, and shock mounts:

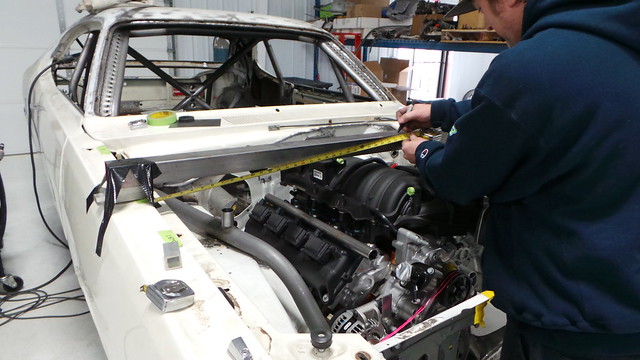
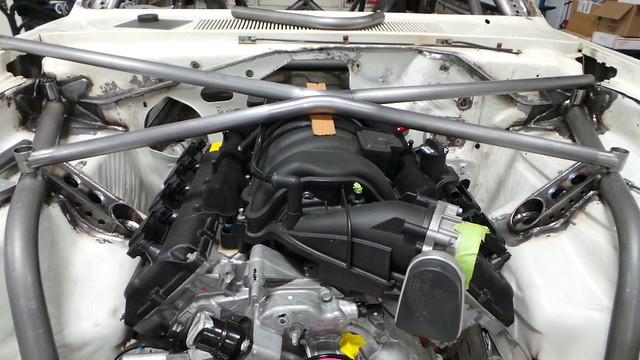
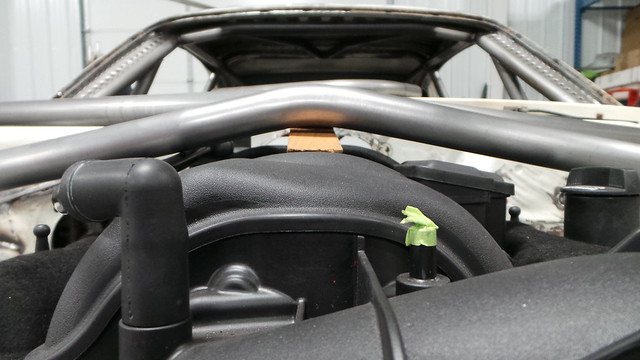
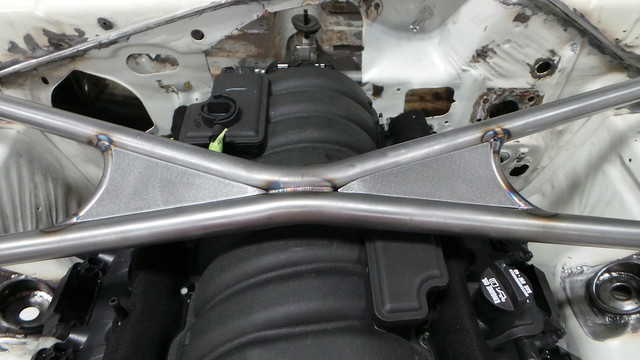
Now it was time to work on the bay bars that will tie the two shock towers together. But before we could start designing those we had to check how much clearance we had between the engine and the hood.
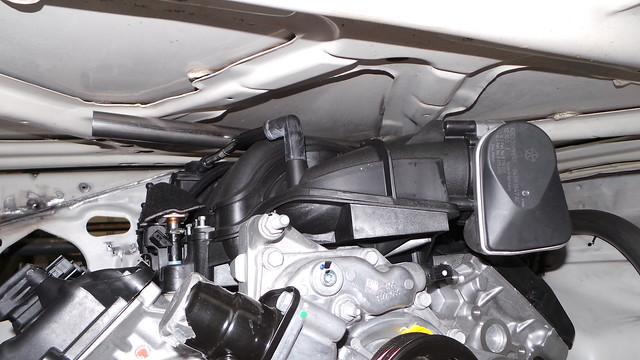
Even thought he clearance was tight, there was still ample room to fit the bars without contacting the hood or the intake manifold. Now it was time to take our measurements and begin constructing the bay bars (which act similar to a bolt-in strut/shock tower brace in street cars).
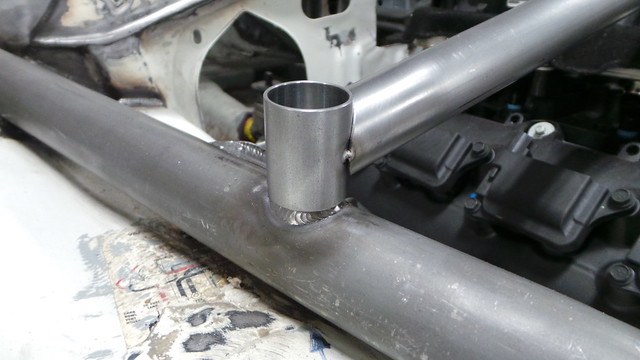
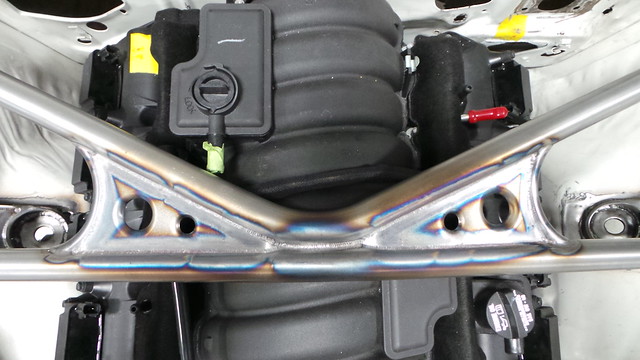
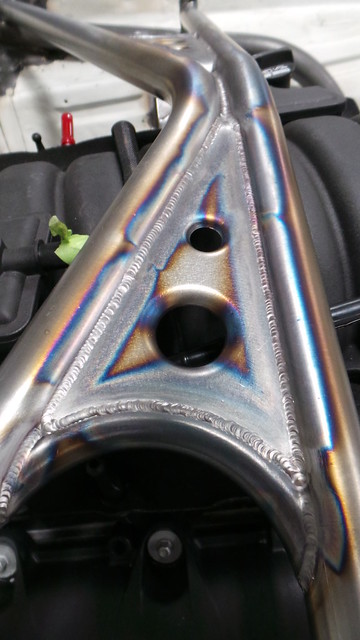
After creating the basic structure of the bay bars we reinforced them with new gussets.
As most of you guys know, we work very closely with Hotchkis to develop the Mopar line. I think the cat is pretty much out of the bag as to Hotchkis building a 76 Dart. The guys working on the car are the same folks who assemble all of our components we sell as well. So I think it is time for some pictures!
Hotchkis Performance East is our all-new facility in Mooresville, North Carolina that specializes in custom fabrication, cooling system optimization, racing safety equipment design and installation, and race car prep in addition to manufacturing and installing Hotchkis Sport Suspension products. It is headed up by Kevin Bryde, a designer and fabricator with over 17 years’ experience in motorsports. Kevin’s career has let him work with some of the most talented drivers in the industry including Dick Trickle, Tony Stewart, Sterling Marlin, Dario Franchiti, Juan Pablo Montoya, Martin Truex Jr., and Jamie McMurray. Most recently Kevin worked for Chip Ganassi Racing in its Engineering Department where his duties included design, fabrication, and prototyping for NASCAR, Indy Car, and Rolex Sports Car race cars. Kevin also has over ten years’ experience in all aspects of driver safety, including seat, head restraint, and race car cockpit design.
Introduction:
Hotchkis Performance East's latest project is a complete buildup of this 1976 Dodge Dart for Kevin Wesley, creator of the Hotchkis Autocross Taxi and avid driving enthusiast. Kevin's goal for this car is to have a car that he can take to compete in events like Targa Newfoundland and Pikes Peak, so this car has to be fast, but it also has to be safe. It will be receiving a full FIA-based roll cage, a modern 6.4L Hemi and Legend GT-700 transmission transplant, full Hotchkis TVS suspension, and more. Stay tuned to this thread as we continually update it with new pictures of the build as we overhaul this former Mopar econobox.
As you can see, when the car first rolled in the shop it was already stripped down and had an old roll cage in it. Though it looked a little rough, it was in fairly good shape and the body was straight and mostly rust-free.
Even the roof was rust-free and only had the adhesive residue from the original vinyl top.
Step 1: Engine Mounts
The first thing we had to do with the Dart was to get its new Mopar 6.4L HEMI and Legend GT-700 transmission into place. Once we determined how much clearance was needed for the oil pan, headers, steering rack, etc, we were able to begin to design the mounts.
Once we got all of our measurements, it was off to the drawing board. What we came back with was this beautiful piece:
[image]http://farm3.staticflickr.com/2871/11938498455_e11826a31c_z.jpg[/image]
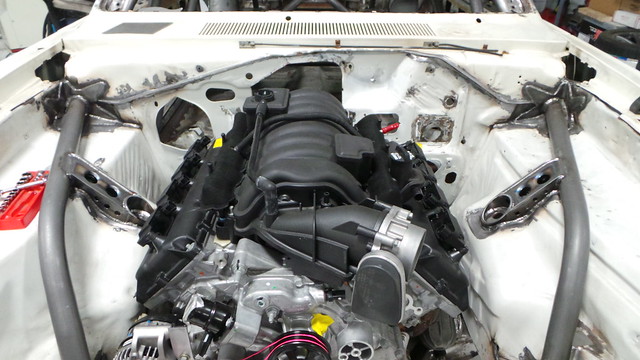
Now we were free to create the frame mounts and test fit the mounts together. Here's the passenger side:
And here's the driver's side:
As you can see, the clearance is perfect and the new HEMI looks quite good in its new home.
[image]http://farm8.staticflickr.com/7357/11939166885_0edbf0864a_z.jpg[/image]
More photos of the engine mounts here: [ame="http://www.flickr.com/photos/hotchkis/sets/72157639748590773/"]Project 76 Dart - Engine Mounts - a set on Flickr[/ame]
Transmission Crossmember:
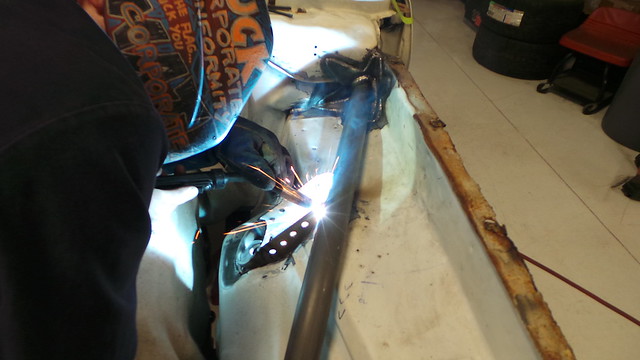
The final step to marrying the modern 392 HEMI and Legend transmission to the car was the fabrication of a new transmission crossmember. Here you can see one of our master welders and fabricators working on the end plate to the new crossmember:
And here's a close-up of his steady hands at work:
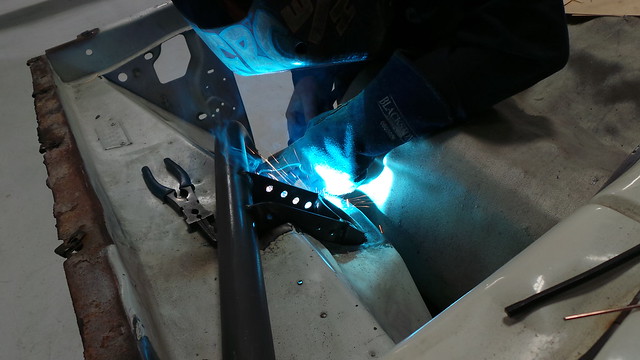
More welding:
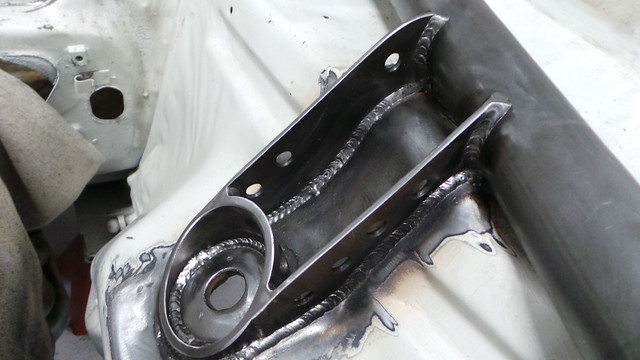
Here's the finished product. Gotta love the color of welding:
And now to fitting the newly fabricated crossmember to the car:
More photos of the crossmember here: [ame="http://www.flickr.com/photos/hotchkis/sets/72157639747282175/"]Project 76 Dart - Transmission Crossmember - a set on Flickr[/ame]
Step Two: FIA-Based Roll Cage
Now that the engine and transmission have been mounted, it was time to construct the roll cage. Because of the different races the owner wants to be able to use this car for, we needed to make sure that all of the safety equipment conformed to the necessary regulations so that it could be raced anywhere in the world. After consulting with the Rally America Competition Director Mike Hurst, it was time to begin the construction. But before we could do that we had to cut out a few sections of the existing cage.
Once the parts of the old cage were removed we began by constructing diagonal bracing and rear kicker braces that connect to the main hoop. Because this is going to be a leaf spring car, the rear kickers had to extend all of the way to the rear mounting points of the springs.
Now that the basics were covered it was time to add the increased protection required by the higher levels of motorsports. First up were the door bars, which help protect the driver and passenger from cabin intrusions from contact during wheel-to-wheel racing or from collisions with other objects. After laying out the design on the table, we bent the bars to match the pattern before fitting them to the car.
After the bars were tacked into place, we double checked all of the measurements and angles for compliance before fully welding all of the joints.
To make this cage as strong as possible, the main joints all received additional bracing and “taco gusset“ reinforcement.
A good roll cage will tie into the unibody structure in as many places as possible. Not only does this make the vehicle safer, but it dramatically increases the rigidity of the unibody, reducing chassis flex during hard cornering. Here you can see the installation of the A-pillar gussets that are critical for driver safety in the event of a roll over.
More photos of the safety cage construction here: [ame="http://www.flickr.com/photos/hotchkis/sets/72157639747044065/"]Project 76 Dart - Roll Cage - a set on Flickr[/ame]
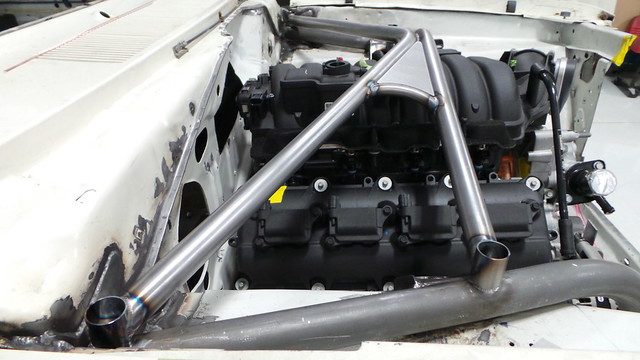
But a proper safety cage doesn’t just end at the firewall. It extends all the way through the engine bay to reinforce the front clip and add stiffness to the front of the car. This added rigidity helps handling by allowing the suspension to do its work without having to control chassis flex while also delivering improved driver safety.
Regulations require the mounting points to be 18 square inches, so to maximize area we developed a compact mount with multiple fingers to better fit the unique curves at the corners of the engine bay while also helping to spread the load over a larger area.
The next step to reinforcing the front end was to tie these new bars into the upper shock mounts. Like the star-shaped mounts on the firewall, these mounts are fabricated out of 16-gauge sheet metal and are designed to disperse the tremendous forces the upper shock mounts will see during racing events.
Here is the finished product with completed firewall, frame, and shock mounts:
Now it was time to work on the bay bars that will tie the two shock towers together. But before we could start designing those we had to check how much clearance we had between the engine and the hood.
Even thought he clearance was tight, there was still ample room to fit the bars without contacting the hood or the intake manifold. Now it was time to take our measurements and begin constructing the bay bars (which act similar to a bolt-in strut/shock tower brace in street cars).
After creating the basic structure of the bay bars we reinforced them with new gussets.