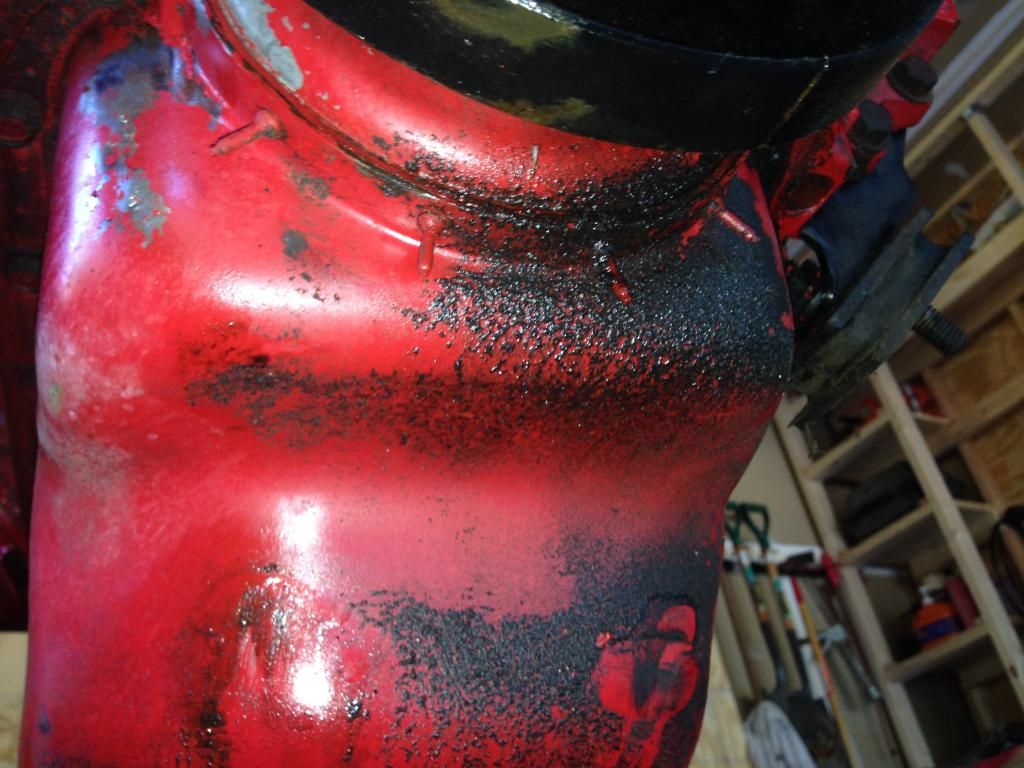
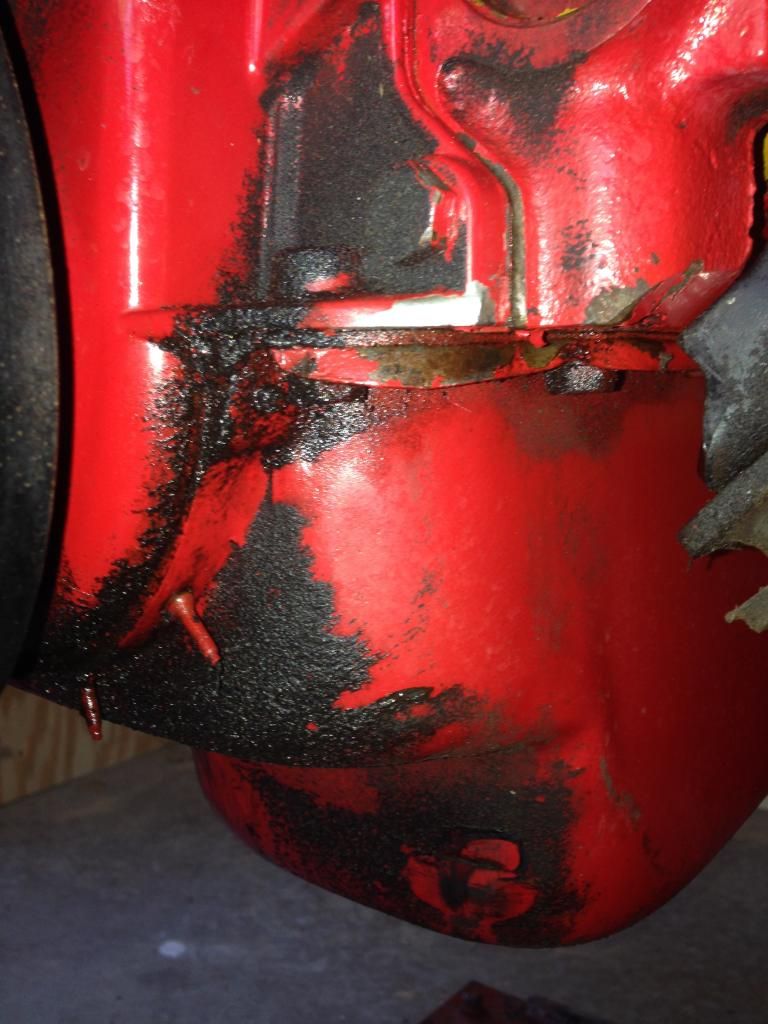
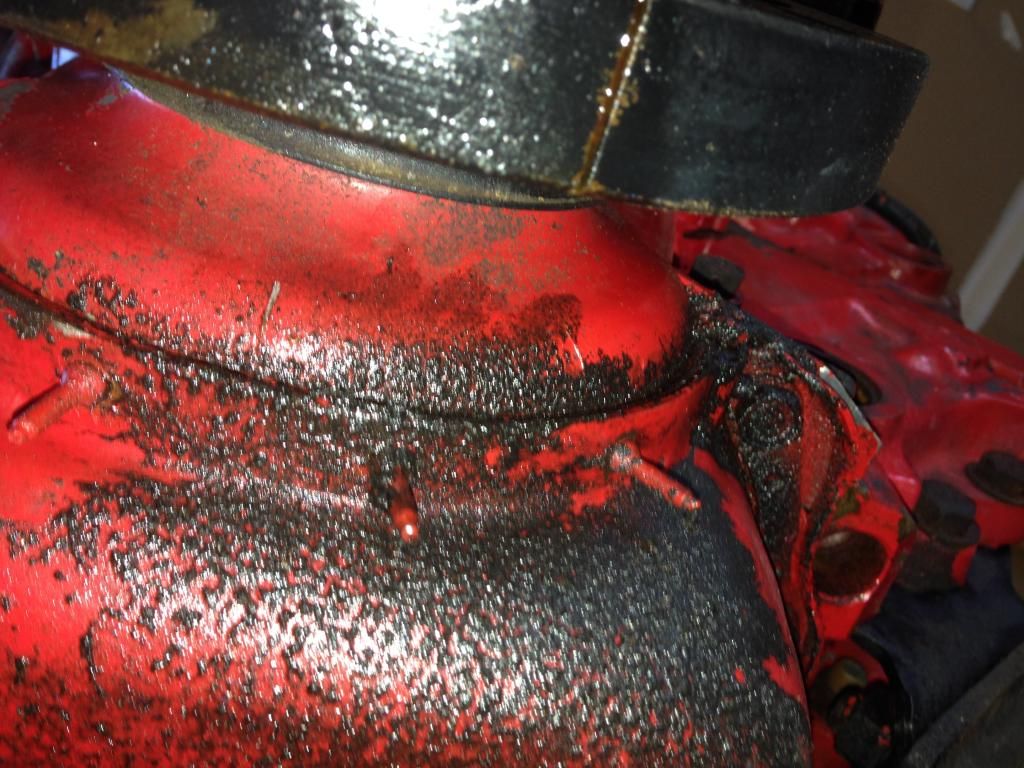
The Magnum motors were redesign3ed to help try and resolve this kind of leaking. Its not the only place the LA's had issues either. Your.s is not that bad, but looks like its been going on for some time and collecting road dirt etc.
First thing I do is buy the 2 gallon jug of purple cleaner at the auto parts store, a small assortment of bristle parts brushes, a small plastic container to hold your purple cleaner and a large plastic tarp to cover your paint job. Hold it down with quality tape as best you can before starting.
Apply the purple stuff liberally, and everywhere. Get the stuff rubbed on and rinsed off before it stats to dry (about 5 minutes). Work on small areas at a time. The stuff will amaze you as to how well it cleans, but don't let it dry when its full of dirt or you will have to start over on that spot. K
eep the stuff OFF your exterior paint finish and polished or cast aluminum. You can use it on there, but was it off with in a minute or so and then wipe the aluminum down with WD-40 or similar product. Don't let it sit on porous aluminum for any length of time longer than it takes to clean it, and then either clear it or wipe it with a WDC-40 type oil. buff with a dry cloth after.
Don't work in the sun and have a water hose nearby with a good nozzle that can go from pin point jet spray to a wide flushing pattern. I clean numerous car parts and entire engine compartments with the stuff focusing on not doing too large of an area before I could physically rub the purple cleaner evenly over the painted engine compartment panels. I rinsed them well and was careful to keep any splashes rinsed off the exterior right away. The stuff is amazing, its bio degradable and it works better than anything I've ever used.
Castrol was the first out with it, and now there are many just as effective competitors.
I use plastic, rags and tape to keep water out of any parts of the engine I didn't want it to get into. I started at the top, got everything I could see and made sure I rubbed every square inch of the surfaces to be cleaned, so it would come out even. Rinse the top of thee engine good and the engine compartment and exterior of the car really good again. Use your leaf blower or air compressor to blow the water off the top of the engine to prevent pooling.
Now the fun part, jack the whole car up in the air and us four jack stands to get it as high up as you can. Do the same routine on the bottom of the car, come back a second or third time for the really built up with grease and grime areas. Keep rinsing well and work quickly.
Wear eye protection, wear rain gear ( don't, but just jump in the shower after), keep it off your skin as it can burn eventually.
The rinse everything really well again, and blow it off real good for 10 or 20 minutes. Start the car to dry the motor out. Keep checking for areas than need an extra wipe down to avoid spotting or a possible streak of the cleaner. If it does streak somewhere, re apply to that area and use a terry clothe towel to blend the area back to normal. Rinse, rinse rinse!!!
If you have hard water in your area, buy a dedicated 3+ gallon Hudson Type Sprayer, fill it with de ionized or better yet reverse osmosis water, and then use that as your final rinse. It works great when you are washing your car too. it helps get ride of the water spots. it dissolves them almost immediately.
Use a moist soft rage to wipe down smooth painted areas under the hood, valve covers and any parts that stick out visually. I did th34 bottom of my '68's hood, which had this dingy grime that nothing else would touch, and it looked like it was brand new. I did the bottom of the hood in four sections two times. It transformed my car's underhood appearance!
Just be careful about working too big of an area at a time, scrub evenly, rinse your brush with the hose when you get into a super sludgy mess and keep going.
Once you get things all cleaned up, snug all your front cover, oil pan bolts and valve cover bolts, in fact snug all your bolts. don't over tighten them. Keep an eye out for where the oil is coming from, if you still have leaks. If you find you have to change the front cover and oil pan gasket, throw in a new regular volume oil pump. Be sure to take it apart and clean it first. I've even thrown in new rod bearings when I've had the pan off. Be sure to install a new double roller timing set if you have to get in there too.
It's amazing what a little purple cleaner and a few cans of paint will do!