Biohazard

-
Gonna start off this page with some more retro-fish action.

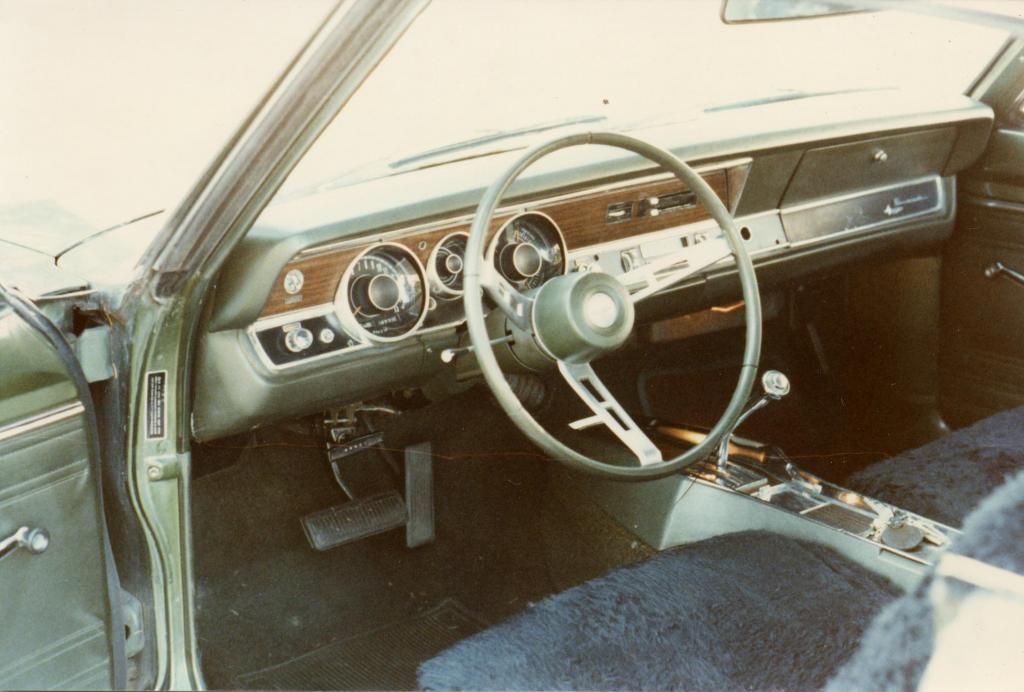
Here's the interior of that old Barracuda. Green on green on green...and I found it in Everett, Washington (how fitting). Check out that dash pad! They hold up well in the PNW.

I'm to blame for the wooly black seat covers. The factory vinyl was shredded and the heater core leaked so, I bypassed the heater core and figured the fuzzy seats would help keep my tush warm.

 
I love seeing this: just shows how that "driveway resto" gene was alive and well even when I was 18 years old.

The point of this little project was to turn green into black. Guess I never have liked colored interiors. Someone's knee must've gone into the dash frame just under the glove box so I needed to fill and blend that before doing paint. Confidence was low, by comparison, so I was timid about what I would and would not remove. That entire dash frame got painted while it was still installed! And, if you're not already completely impressed, I did all of this while living in the barracks on Fort Lewis.


Committed.
 
You do good work, don't mind the fuzzy seat covers.
My grandpa gave me my first car 65 coronet, seats were shot and the car was brown exterior/interior.
I took it and had the seats re-done black with red crushed velor (I was 16).
Gramps said the upholstery did not match, a week later the car was red.
You just have to have a vision.
 
In this shot, I'm thinking I was probably trying to paint the dash ahead of the soft pad. Got me a baller steering wheel, vinyl dyed the door panels black, but haven't yet gotten to that dent in the passenger side door.

 
Started the reassembly on the steering column...by packing the coupler with synthetic grease and stuffing the rebuild kit parts into it. What a mess! And getting that seal retainer to grip the coupler with no tools on hand...yeah, that was fun.


I basically pre-bent the securing tabs and worked the 'lid' in place over the new seal but I'll want to get some tools on it and just make sure everything is on tightly before I put the whole deal in the car. For now, its wrapped up with paper towels and tape just for tidy transport back to the mother ship.
 
I suppose it wouldn't hurt to ask.....anyone got a thumbwheel radio that's junk~status where I could get the tuning knob off of it??
 
78 degrees and 12% humidity. Am I bragging? Perfect conditions for the 3rd and final coat of black.

 
Everything is better with pictures. I haven't laid eyes on the new hubcaps yet but they are waiting for me at the house. Here's one of the seller's photos, included here for flavor.

 
Repro parking brake handle (mine's broken) and new rubber brake pedal pad - ordered.
 
Oh yeah...getting that coupler seal on is harder than it looks. I'll get some proper tools on it when I get home at the end of this hitch.

Time to get some steam up on the instr cluster.

Is it weird the blue is growing on me?

 
After two coats of chrome.

Anyone else thinking "tin man" when they look at this?

 
Well, I really wanted to be excited about unwrapping the instrument panel. In some areas, it looks great. Unfortunately, the blue tape didn't release as well as it should have and lifted some of my matter silver.
:pale:

Guess I'll put some pics up, anyway. Its all about documenting the process.
 
Here's what the awesome painters tape did for me.


In all fairness, it could be that I left the tape on too long. Paying for that mistake now.
 
I try to use automotize painters tape, it's green. And does a better job the home painters tape, blue. I learned the hard way as well. Good luck.
 
Hey man, thanks for the info. I was unaware of the green tape. I'll have to get some to do the fix on this.
 
Dude, issues aside it looks killer! I understand how discouraging little setbacks like that can be. Quick fix man!

I am looking forward to the final product!
 
Ugh, it's killing me. I really wanted to do some installing when I got home but, between this and trying to get a nice finish on the dash frame, it's not looking so good.

Got too busy with work last night so I didn't even get the steering column assembled.

Well, today has been laying clearcoat on the aforementioned frame without it being full of dust and lint and I've sanded those areas on the cluster where the paint lifted. I will DEFINITELY be securing some of that green tape before I go in this evening.

You know, to me, the two most important parts of a car are the front end (the face that everyone sees) and the dash (the face YOU always see). That's why so much love has gone into this phase of the build and the refurbishing of the grilles.

Well, back to work. Gotta make this cluster worthy of everyone's time. :)
 
Did some uber careful sanding to eliminate the edge around where the paint lifts were.

 
Took the plunge on the instrument panel and popped out the instrument lenses.
Pretty much had to in order to repair the lifted black perimeter paint.


I thought that flat black paint would dive off the panel at the first sight of a sheet of sandpaper but most of it is on there pretty good. I won't get any paint on it tonight but I may get the necessary masking done.

 
Almost forgot I brought this part with me. The brace that mounts the steer column to the bottom of the dash frame. Just had some tiny rust spots and chipped paint. Too easy to fix. But once I started working it I realized that the casting left many sharp edges so I decided to file them all down and roll the edges - helps with paint adhesion, too.

But I didn't think to bring a metal file. Fortunately, my multi-tool has one. Of course, don't they all? I just never have needed it before. Lol

 
-
Back
Top