The Great Pumpkin - '71 Duster
More progress this week but not without a few stumbles. The pistons are in. Cracked my brand-new oil pump. Ordered transmission rebuild parts and a converter. My wallet is now drained.
So as stated, the pistons and rods are in. Like many other procedures here, I had a set up on the bench and repeated the same steps for all the parts; clean the pistons, rods and caps again, clean the rings, wipe down with WD40 and install on the pistons; clean the rod bearings, install into the rods and coat with assembly lube. Lube the rod bolts with ARP moly lube and put them to the side with the corresponding cap. Install the whole thing in the cylinder with the ring compressor, tap down with a hammer handle and install the rod cap. I tapped on the cap with a mallet since you are not supposed to draw it in with the bolts. Then I put the bolts in and snugged them up to be torqued later. Rinse and repeat.
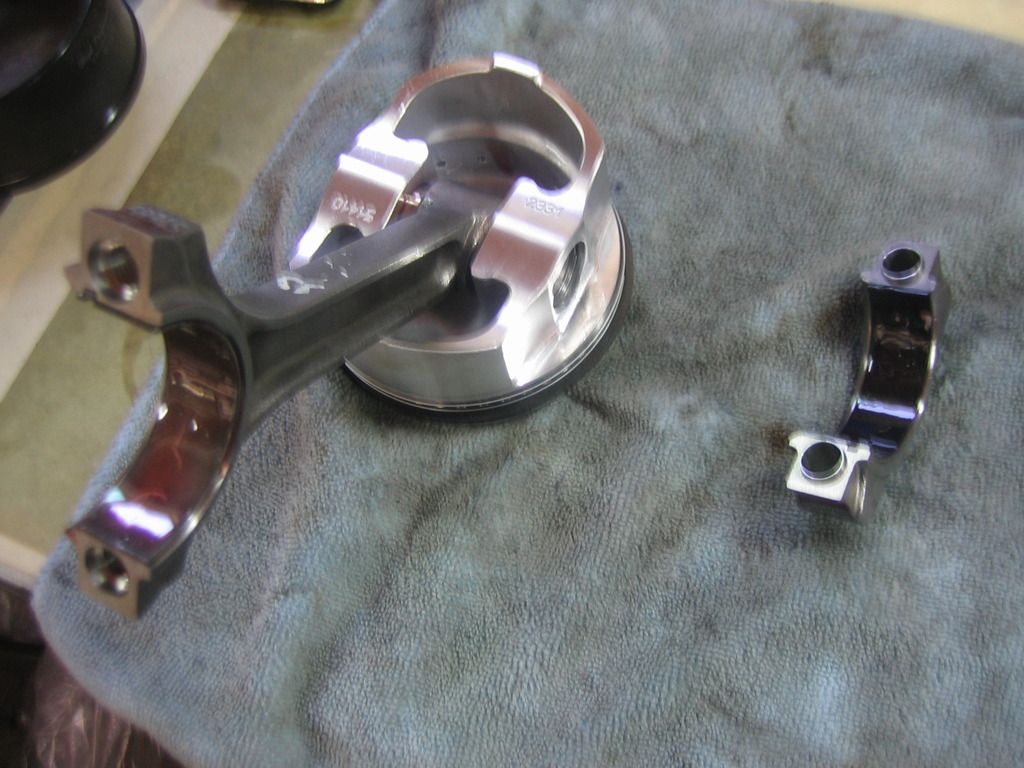
Here's the piston and rod assembly being prepped to go in the block. Yeah, the rag is a little on the dirty side.
I used a Total Seal tapered ring compressor and smacked the whole kit and caboodle home with the handle on a plastic dead blow hammer. They all went in OK but afterwords I had this sinking feeling that I was not careful enough with how I put the pistons into the bores. I started having thoughts of broken rings and other such maladies because I thought I may have forced things a little too much. I believe now it's OK and there is no evidence to suggest otherwise but lesson learned; next time I will pay closer attention to how the pistons first go in the bore and make sure things are lined up perfectly before I start pushing down.
I also tried to pay careful attention to where the ring gaps were orientated. It's tough to remember little things like that when you're in the middle of doing it, you have to stop and think about every little step. That's why guys get paid the big bucks to do this, there's so much that can go wrong.
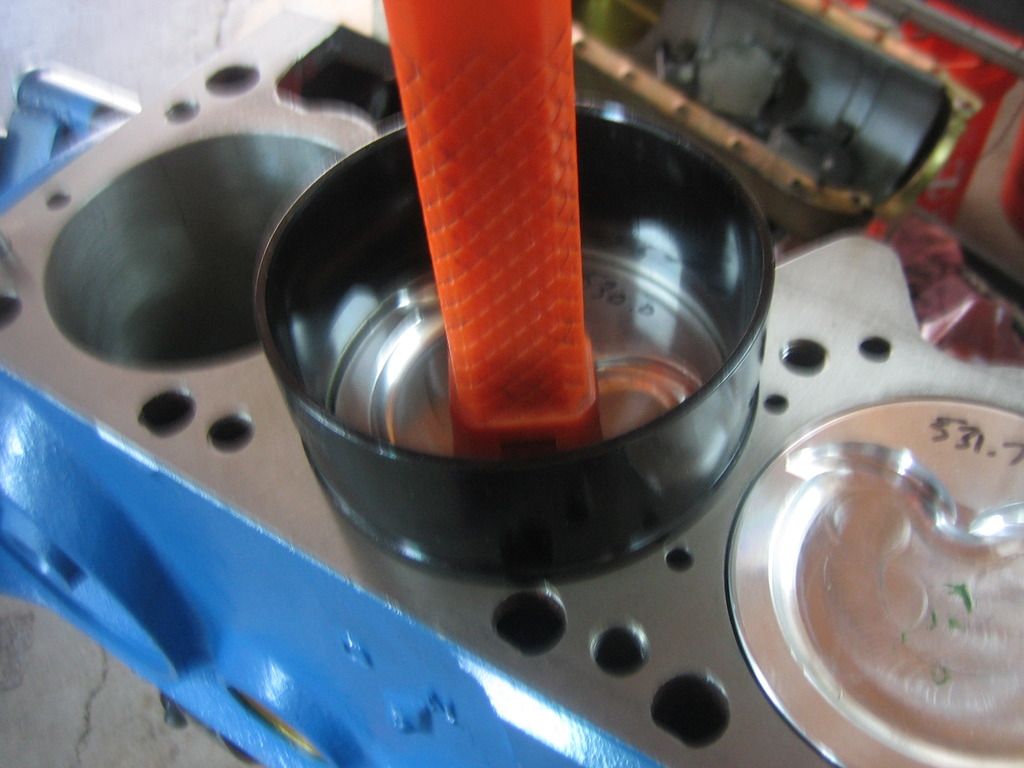
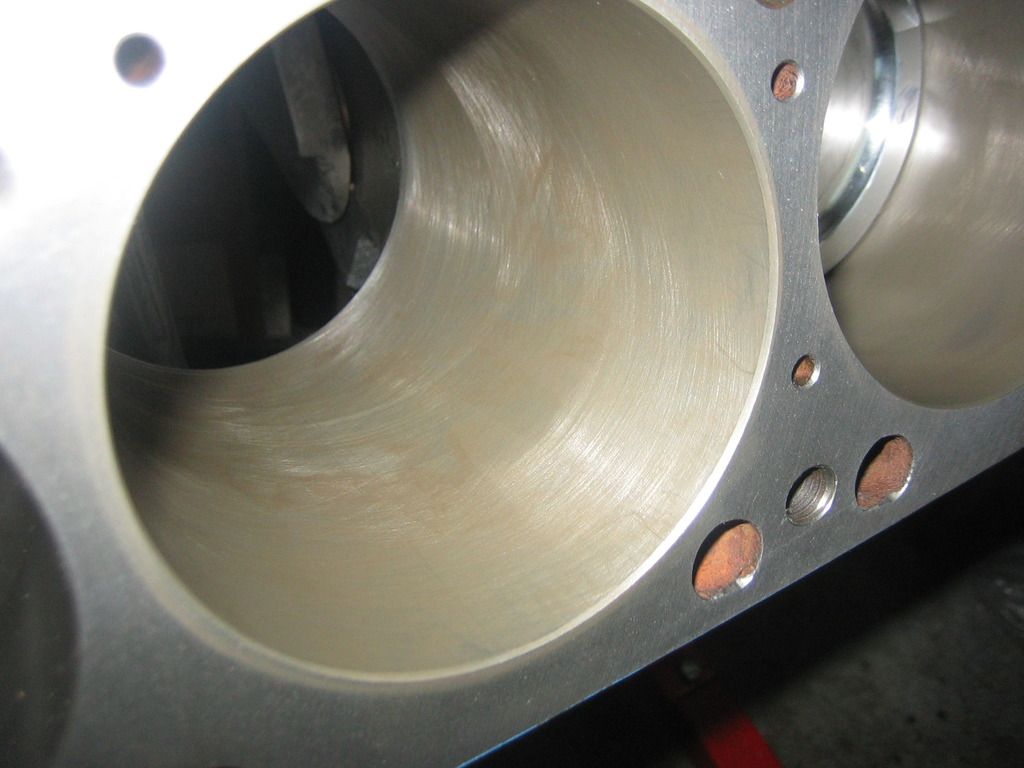
Here's the pistons going in the bore with the tapered ring compressor.
For lube, I used Total Seal "Quick Seat". This is a graphite-type powdered lube. T.S. recommends cleaning everything, spraying down the bore with WD40, wiping the excess and then rubbing the powder into the cylinder walls with your (clean) fingers. When mixed properly with the WD40, the lube mix takes on a greenish tint which is what you want. I used regular 10W40 on the skirts and a few drops of assembly lube on the wrist pins.
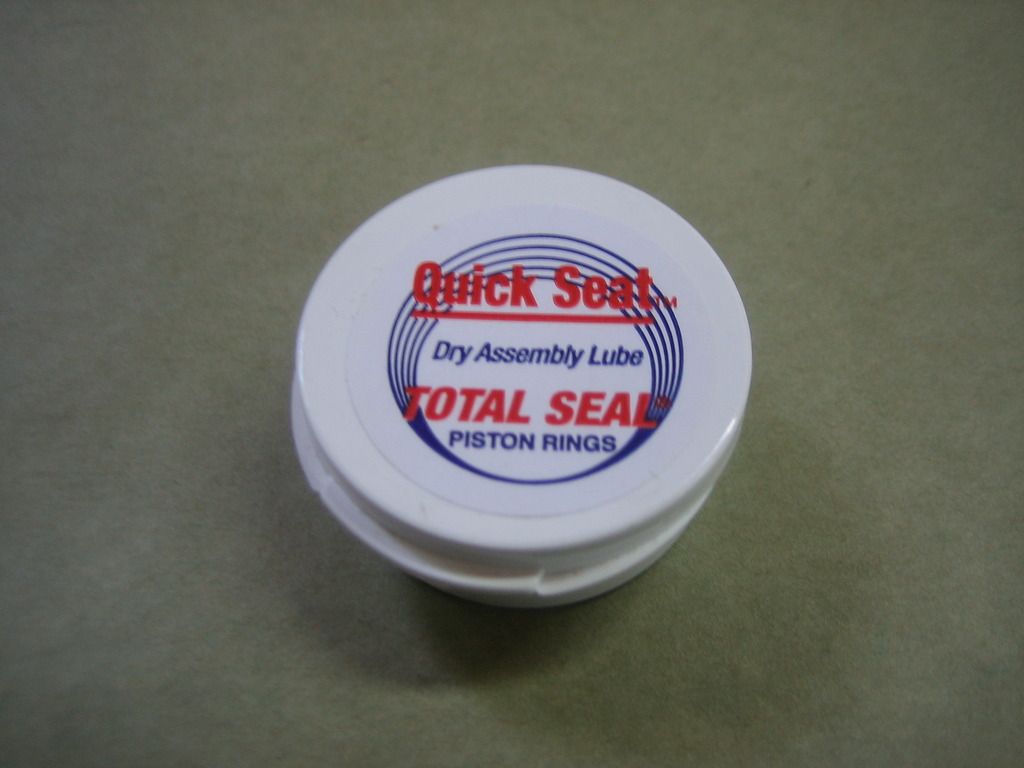
Quick Seat lube.
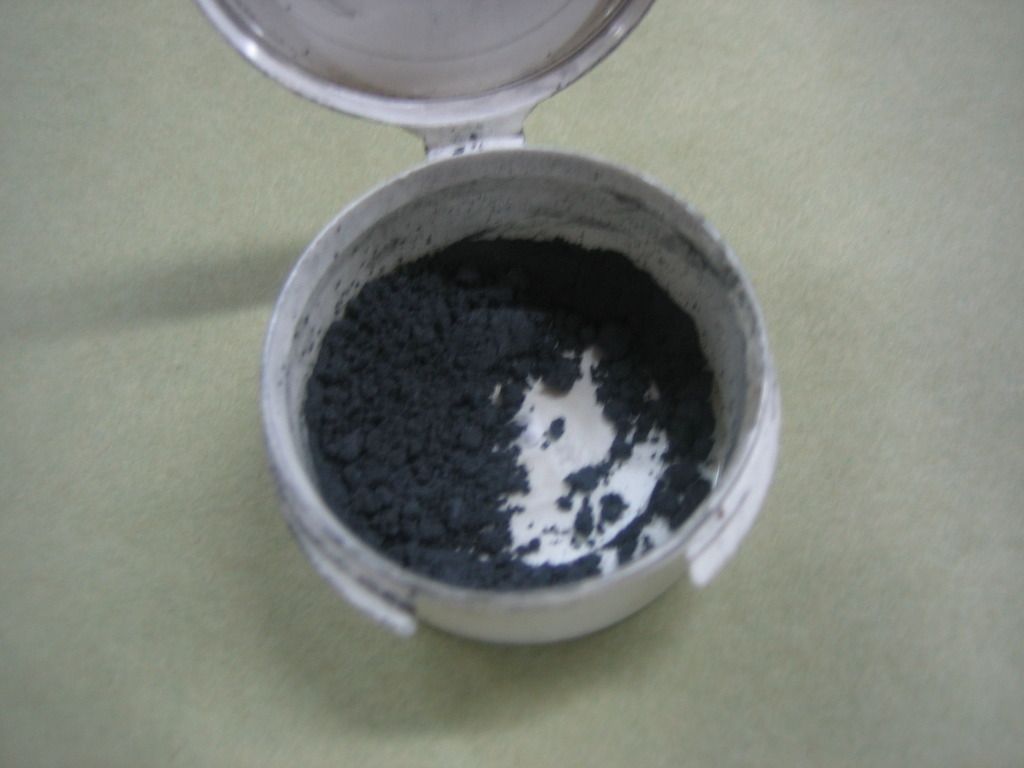
This is what it looks like. Reminds me of the graphite you used for the Pinewood Derby to lube your wheels and axles.
Here's the greenish tint once it's been rubbed in and mixed with the WD40.
I had asked about leaving it in like this while the rest of the engine is being assembled and they said that it's actually good to do so because with all the times the engine gets turned over, the rings are almost seated before first start up. Good deal!
So after the pistons were in, it was on to the rod bolts. However, instead of just torquing down the rod bolts to the recommended spec., I used a fancy rod bolt stretch gauge. According to whoever's webpage you read, rod bolt stretch is a 'more accurate' way of tightening fasteners. There's a specific way to do it though and takes a little bit to get a feel for it.
Unfortunately, I need to re-do them at this point because some of them need more stretch. There was some uncertainty on my part about how much stretch is actually needed because there is no exact spec., just a limit. I also may have interpreted the tightening procedure incorrectly. It's a little frustrating to have to do this stuff over since it's so time consuming but I guess it will be worth it in the end. I called ARP and I now know what to do so I should be good for the re-do. Glad I am not trying to make hours on this engine, I'd be pretty far in the hole!
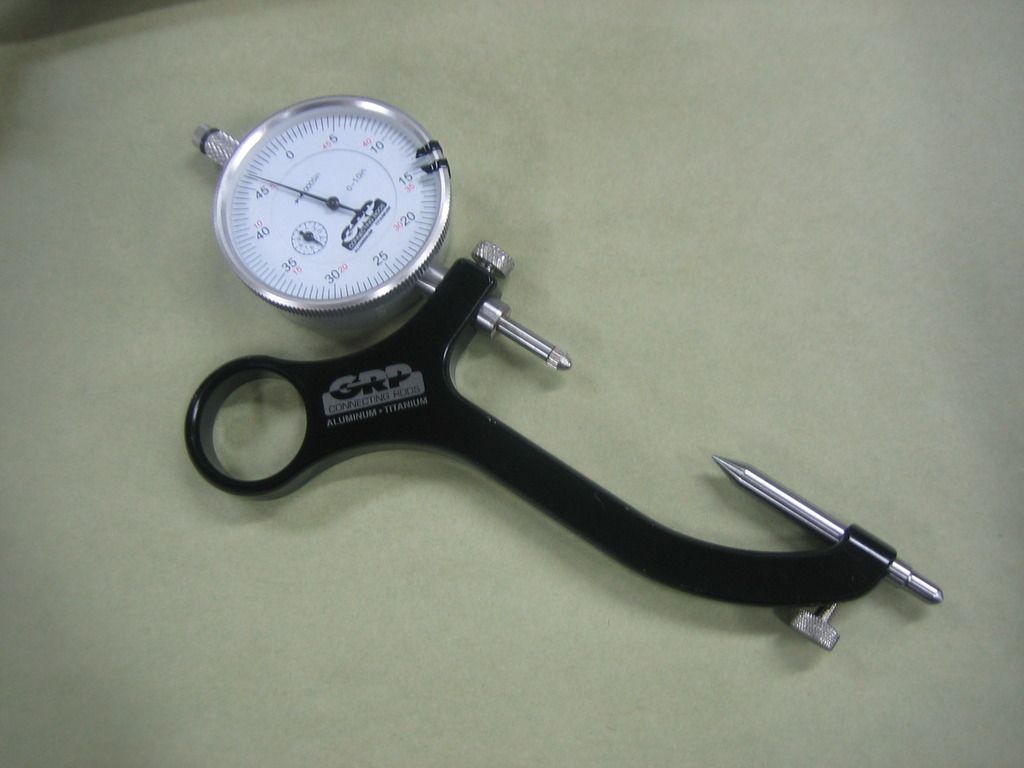
Here's the rod bolt stretch gauge.
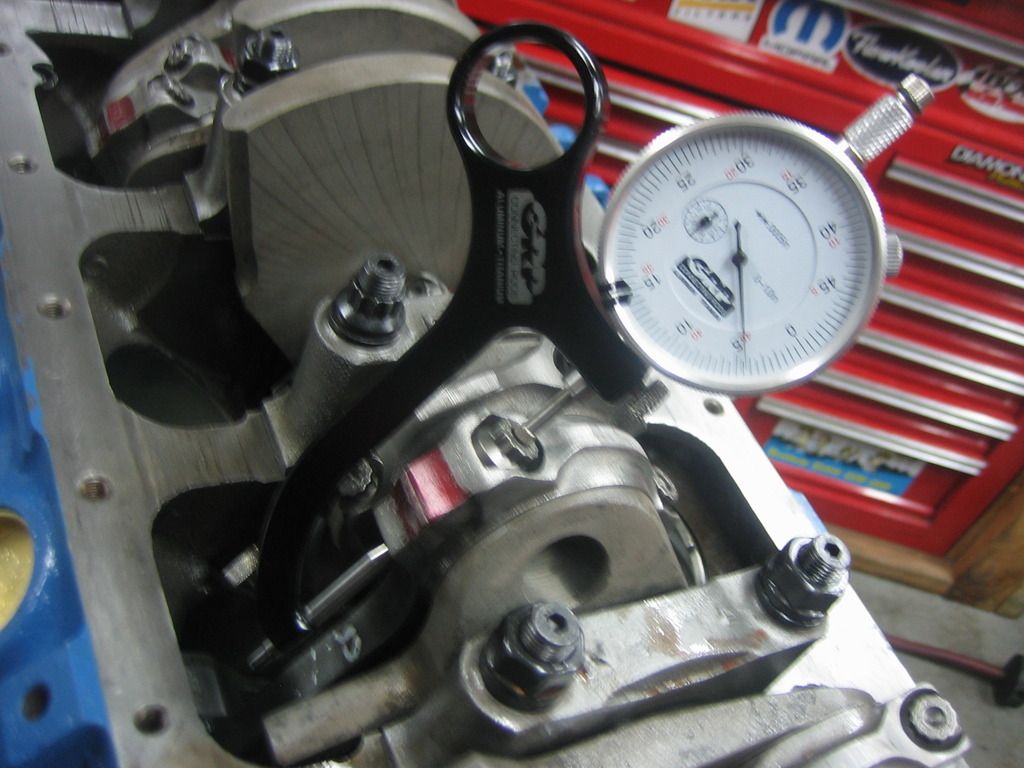
Here it is doing it's job.
So yeah, I cracked my brand new oil pump. Everyone knows that the left side bolt interferes with the pump body. I bought a main stud kit from Hughes which included a shorter bolt to clear the oil pump. But apparently, there was still a few thousandths sticking up which made the pump cocked. I didn't notice and started threading the bolts in. The outer one went in OK but the inside one started spinning. ****! I took the bolts out to look and see what happened and I glanced at the pump face - cracked all the way across. Junk!
The pump was from Precision pumps too so it was way more than just a regular HV72. I'm annoyed with myself for not looking but you think that this stuff should all go together. Live and learn.
I have the pump from my previous 340. I may just swap the newer gears and cover into the old housing or just get another pump altogether. Melling said it would OK to put the new gears in the old housing but I'm not so sure I want to do that, I gotta mull it over some more.
On a side note, I ordered some trans rebuild parts and a 'race-prepped' case for the 904 from A&A last week as well as a new 9.5" converter from Dynamic. The trans stuff should be here this week and the converter is at least two weeks out. I hope to have this car running before July.
Well, that's all the mishaps for now. More to come.
More progress this week but not without a few stumbles. The pistons are in. Cracked my brand-new oil pump. Ordered transmission rebuild parts and a converter. My wallet is now drained.
So as stated, the pistons and rods are in. Like many other procedures here, I had a set up on the bench and repeated the same steps for all the parts; clean the pistons, rods and caps again, clean the rings, wipe down with WD40 and install on the pistons; clean the rod bearings, install into the rods and coat with assembly lube. Lube the rod bolts with ARP moly lube and put them to the side with the corresponding cap. Install the whole thing in the cylinder with the ring compressor, tap down with a hammer handle and install the rod cap. I tapped on the cap with a mallet since you are not supposed to draw it in with the bolts. Then I put the bolts in and snugged them up to be torqued later. Rinse and repeat.
Here's the piston and rod assembly being prepped to go in the block. Yeah, the rag is a little on the dirty side.
I used a Total Seal tapered ring compressor and smacked the whole kit and caboodle home with the handle on a plastic dead blow hammer. They all went in OK but afterwords I had this sinking feeling that I was not careful enough with how I put the pistons into the bores. I started having thoughts of broken rings and other such maladies because I thought I may have forced things a little too much. I believe now it's OK and there is no evidence to suggest otherwise but lesson learned; next time I will pay closer attention to how the pistons first go in the bore and make sure things are lined up perfectly before I start pushing down.
I also tried to pay careful attention to where the ring gaps were orientated. It's tough to remember little things like that when you're in the middle of doing it, you have to stop and think about every little step. That's why guys get paid the big bucks to do this, there's so much that can go wrong.
Here's the pistons going in the bore with the tapered ring compressor.
For lube, I used Total Seal "Quick Seat". This is a graphite-type powdered lube. T.S. recommends cleaning everything, spraying down the bore with WD40, wiping the excess and then rubbing the powder into the cylinder walls with your (clean) fingers. When mixed properly with the WD40, the lube mix takes on a greenish tint which is what you want. I used regular 10W40 on the skirts and a few drops of assembly lube on the wrist pins.
Quick Seat lube.
This is what it looks like. Reminds me of the graphite you used for the Pinewood Derby to lube your wheels and axles.
Here's the greenish tint once it's been rubbed in and mixed with the WD40.
I had asked about leaving it in like this while the rest of the engine is being assembled and they said that it's actually good to do so because with all the times the engine gets turned over, the rings are almost seated before first start up. Good deal!
So after the pistons were in, it was on to the rod bolts. However, instead of just torquing down the rod bolts to the recommended spec., I used a fancy rod bolt stretch gauge. According to whoever's webpage you read, rod bolt stretch is a 'more accurate' way of tightening fasteners. There's a specific way to do it though and takes a little bit to get a feel for it.
Unfortunately, I need to re-do them at this point because some of them need more stretch. There was some uncertainty on my part about how much stretch is actually needed because there is no exact spec., just a limit. I also may have interpreted the tightening procedure incorrectly. It's a little frustrating to have to do this stuff over since it's so time consuming but I guess it will be worth it in the end. I called ARP and I now know what to do so I should be good for the re-do. Glad I am not trying to make hours on this engine, I'd be pretty far in the hole!
Here's the rod bolt stretch gauge.
Here it is doing it's job.
So yeah, I cracked my brand new oil pump. Everyone knows that the left side bolt interferes with the pump body. I bought a main stud kit from Hughes which included a shorter bolt to clear the oil pump. But apparently, there was still a few thousandths sticking up which made the pump cocked. I didn't notice and started threading the bolts in. The outer one went in OK but the inside one started spinning. ****! I took the bolts out to look and see what happened and I glanced at the pump face - cracked all the way across. Junk!
The pump was from Precision pumps too so it was way more than just a regular HV72. I'm annoyed with myself for not looking but you think that this stuff should all go together. Live and learn.
I have the pump from my previous 340. I may just swap the newer gears and cover into the old housing or just get another pump altogether. Melling said it would OK to put the new gears in the old housing but I'm not so sure I want to do that, I gotta mull it over some more.
On a side note, I ordered some trans rebuild parts and a 'race-prepped' case for the 904 from A&A last week as well as a new 9.5" converter from Dynamic. The trans stuff should be here this week and the converter is at least two weeks out. I hope to have this car running before July.
Well, that's all the mishaps for now. More to come.