Rallye Dash Resto
Set the park brake !
Working from the left door opening, remove the one screw that holds the fuse box up. Pull the headlight switch to full on position. push fuse box away just far enough to get a hand in the right side of the headlight switch and press the little release button so to fully remove the headlight switch stem.
Remove the retainer nut from the swictch and let it fall out (it aint going far).
Remove 4 screws in the plastic steering colum cover and rotate it out bottom first as they sometimes hook under the bezel (dont break it).
If colum shift automatic go ahead and lower the shift lever to drive.
Remove 3 colum support attaching nuts (or 3 niuts and 1 bolt depending on year model). The colum wont drop far , but enough.
Now we go whip the heater conrols....
A small allen wrench will remove the 2 chrome lever ends there.
Remove the ashtray and its hanger. Disconnect lighter well and lamp if so equiped.
Now the radio... This is tricky since so many dont have the stock radio today. Aftermarket radio ? You're own your own there.
For stock radio the 4 knobs pull straight off. Theres a thin nut (9/16 hex) to remove on each stem. Remimber to be careful putting these back. They are very easy to cross thread. The radio support is slotted at the nut on rear center of radio so to just loosen that nut should do. One screw to remove at the bottom of support and dash and it should fall out. The radio antenna cable it in the right side rear and should pull right out (take mental note of where it plugs in so it dont go into the wrong hole when going back. It would get hung and really tick you off). The radio should push out of the bezel and fall out except for the power and speaker wires. You could just move it down and toward the gas pedal but I really dont like leaving stuff hanging from 40 year old wires. I'll unplug those and lay the radio down.
having fun yet ? Where were we ? Oh yeah heater controls...
You'll need a 1/4" drive ratchet, 3/8 hex socket, and a short extension.
The 2 samll bolts we're after now are attaching the heater controls. One is between the fan switch and the levers. The other is on the right end of the lever slots. You'll reach in from bottom up which is why we removed the ashtray and radio. Here's tip... when we start to reinstall thes 2 bolts we'll use playdough, chewing gum, something to adhere the bolt head shallow in the scocket so not to drop the bolt 383836365 times. LOL
Now working right to left, remove all the chrome phillips head screws attaching the bezel to the dash.
Back at the left doorway ? Good. Seek the speedometer cable comming through the firewall and push it toward the speedometer so it push the bezel out of the dash a couple inches. Now you should be able to see behind the left side and using the 1/4" drive stuff we had before, minus the extension, remove the 2 wires (red and black) from amp gauge (mental note again which is closest to you).
You'll also disconect a 3 wire connecter to the smaller printed circuit board. BE CAREFULL ! A shot of WD-40 will help on these. Pull them straight away from the board without bending the pins. The round many wire connecter on the main circuit board can be tough to remove. WD-40 again. If you find you need to pry between the connecter and the panel, USE PLASTIC. A screw driver could damage the copper trace on the board.
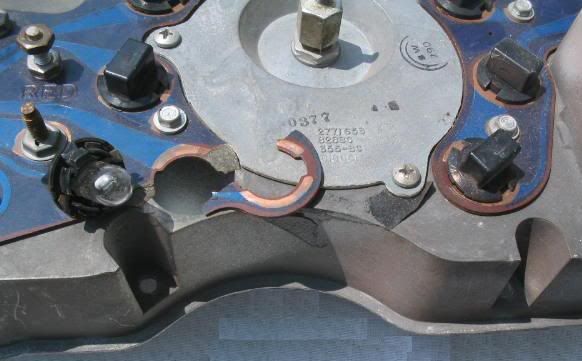
The speedometer cable will be either nutted on or have a white plastic end with a limb that serves like one half of a clothes pin. Cable pulls straight away.
Only thing left is the harness connecter on the wiper switch. These usually come off much easier than the one on that headlight switch. I saved the wiper switch for last for a reason. I needed you to be on the right end as the instrument panel comes out. This end of the plastic bezel is extermely fragile (surely you've seen them broken before). It's out. Wasn't so bad was it :)
Another word of warning... As the instrument panel goes to the work bench it will get turned upside down and handled a lot. There's a small area at the back of the center gauge opening where you may be tempted to grab and lift with one hand. Problem is, one of the printed circuit boards overhangs the potmetal just enough to allow you to break it.
It is possible to drive the car without the instrumnet panel but PLEASE DO NOT RECONNECT THE BATTERY and/or attempt to start the car in its current state. Ask what needs to be done first !
Remove negative battery cable !
Set the park brake !
Working from the left door opening, remove the one screw that holds the fuse box up. Pull the headlight switch to full on position. push fuse box away just far enough to get a hand in the right side of the headlight switch and press the little release button so to fully remove the headlight switch stem.
Remove the retainer nut from the swictch and let it fall out (it aint going far).
Remove 4 screws in the plastic steering colum cover and rotate it out bottom first as they sometimes hook under the bezel (dont break it).
If colum shift automatic go ahead and lower the shift lever to drive.
Remove 3 colum support attaching nuts (or 3 niuts and 1 bolt depending on year model). The colum wont drop far , but enough.
Now we go whip the heater conrols....
A small allen wrench will remove the 2 chrome lever ends there.
Remove the ashtray and its hanger. Disconnect lighter well and lamp if so equiped.
Now the radio... This is tricky since so many dont have the stock radio today. Aftermarket radio ? You're own your own there.
For stock radio the 4 knobs pull straight off. Theres a thin nut (9/16 hex) to remove on each stem. Remimber to be careful putting these back. They are very easy to cross thread. The radio support is slotted at the nut on rear center of radio so to just loosen that nut should do. One screw to remove at the bottom of support and dash and it should fall out. The radio antenna cable it in the right side rear and should pull right out (take mental note of where it plugs in so it dont go into the wrong hole when going back. It would get hung and really tick you off). The radio should push out of the bezel and fall out except for the power and speaker wires. You could just move it down and toward the gas pedal but I really dont like leaving stuff hanging from 40 year old wires. I'll unplug those and lay the radio down.
having fun yet ? Where were we ? Oh yeah heater controls...
You'll need a 1/4" drive ratchet, 3/8 hex socket, and a short extension.
The 2 samll bolts we're after now are attaching the heater controls. One is between the fan switch and the levers. The other is on the right end of the lever slots. You'll reach in from bottom up which is why we removed the ashtray and radio. Here's tip... when we start to reinstall thes 2 bolts we'll use playdough, chewing gum, something to adhere the bolt head shallow in the scocket so not to drop the bolt 383836365 times. LOL
Now working right to left, remove all the chrome phillips head screws attaching the bezel to the dash.
Back at the left doorway ? Good. Seek the speedometer cable comming through the firewall and push it toward the speedometer so it push the bezel out of the dash a couple inches. Now you should be able to see behind the left side and using the 1/4" drive stuff we had before, minus the extension, remove the 2 wires (red and black) from amp gauge (mental note again which is closest to you).
You'll also disconect a 3 wire connecter to the smaller printed circuit board. BE CAREFULL ! A shot of WD-40 will help on these. Pull them straight away from the board without bending the pins. The round many wire connecter on the main circuit board can be tough to remove. WD-40 again. If you find you need to pry between the connecter and the panel, USE PLASTIC. A screw driver could damage the copper trace on the board.
The speedometer cable will be either nutted on or have a white plastic end with a limb that serves like one half of a clothes pin. Cable pulls straight away.
Only thing left is the harness connecter on the wiper switch. These usually come off much easier than the one on that headlight switch. I saved the wiper switch for last for a reason. I needed you to be on the right end as the instrument panel comes out. This end of the plastic bezel is extermely fragile (surely you've seen them broken before). It's out. Wasn't so bad was it :)
Another word of warning... As the instrument panel goes to the work bench it will get turned upside down and handled a lot. There's a small area at the back of the center gauge opening where you may be tempted to grab and lift with one hand. Problem is, one of the printed circuit boards overhangs the potmetal just enough to allow you to break it.
It is possible to drive the car without the instrumnet panel but PLEASE DO NOT RECONNECT THE BATTERY and/or attempt to start the car in its current state. Ask what needs to be done first !