Mad Dart
Nothing to see Here!
Those gauges are the ****! Sweet!
Those gauges are the ****! Sweet!
Yeah I'm liking them so far. Didn't you buy a set yourself???
I have a Peak Dash - Rocky Mountain Dash?? or whatever set up for Speed Hut Gauges. I have not bought them as of yet. The 67 is on Standby.
On another note my $300.00 Stereo sounds pretty damn good. I got a Video on my Scamp Build but it was missing the 6.5's. They are all in now. Can't beat the gettooo to tunes! Lol
Ah ok. I remember you had the Peak Dash for it but couldn't remember about the gauges.
I had thought about putting 6.5's in the kick panels but I really don't want to mess with the fiberglassing. So thinking I may put pods in like you did so I'm gonna PM you about those.
You can mount a set on the rear portion of your roll bar too for the rears.
No doubt. Going to try and eliminate any sharp edges that could cut into the wires as well.
Got my headlight switch in from Haywire. The billet knob should go well with the gauge bezels. It's a 4 position switch so the brights are one pull further out than the dim beams are.
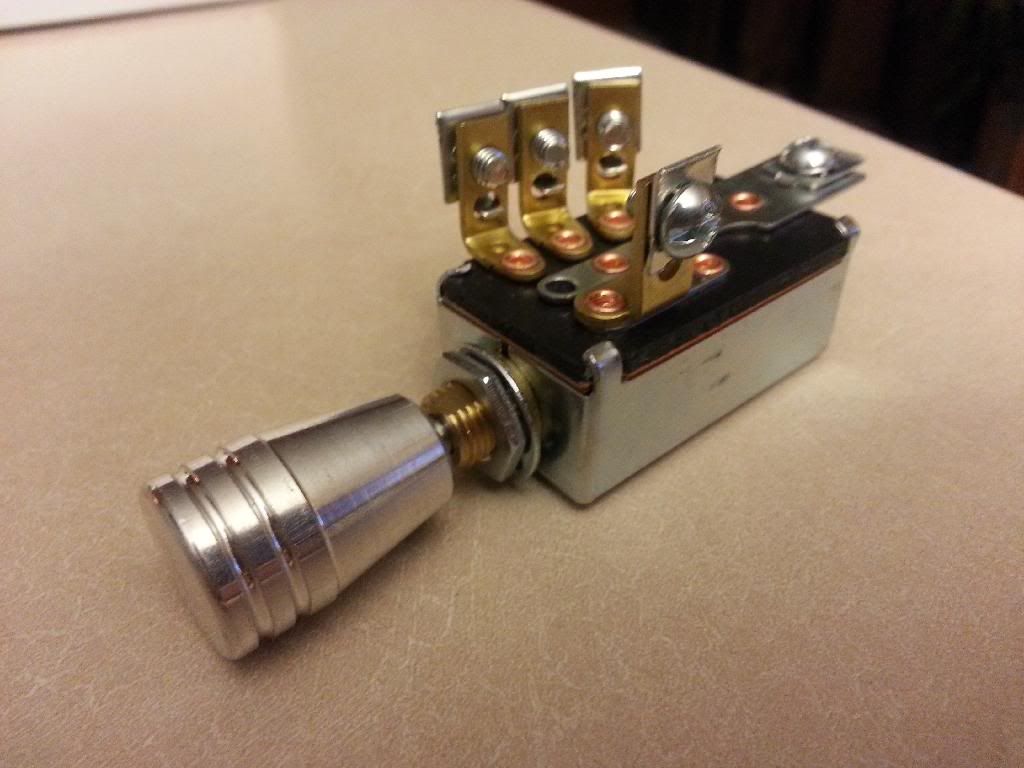
I have the same harness and switch (switched is getting shipped to me) where did you connect what wires on the switch, and how did you tie in the dimmer with this. Thanks
Nice work, man. That thing had a lot of rust. Seems crazy that the guy that had it before you A) took it to a body shop with all that rust and B) they just painted the thing without fixing any of it. Good to see it getting taken care of the right way. Looks like you're pretty involved with this thing, gonna be gnarly when it's done.
Yeah talk about learning real quick the hard way. Had I known it would be that bad, I never would have bought it. And at some points I wanted to just part the car out and be rid of the thing but I couldn't give up on it. I've wanted a bad little Dart for 15 years so I knew I had to knuckle up and just make it right even though it meant tearing the whole thing down. I just hope it will all be worth it....
No turning back now.
I've sold 'better' cars at a loss because I thought they were too big of a project. You're a braver man than me.
")
thanks for linking the build in your sig.... great story to follow along. I know it's not cheap, and was mentioned previously, but having a tube K, rack, and coil overs on the front made my Duster alot easier to work on. I came from a Mirada which had the "X" bars up front out of the way and didn't realize what a pita those A body torsion bars were! Guess I'm getting that lazy in my old age
Sneak peek

Sweet! Can't wait hear some noise
-AlV


