65 Dart Wagon Conversion to a Sedan Delivery

-
Got sidetracked again! I came across a thread concerning LCAs and cosmoline where this member used shellac to duplicate the look of cosmoline. Another member mentioned he used cosmoline from a company called Cosmoline Direct. Then I remembered I had a set of LCAs that I bought from another member a long time ago and had them drop shipped to Leanna @CudaChick1968 to do in Alien Silver which was to duplicate the look of fresh metal. Remember them Leanna? It’s been a long time ago!
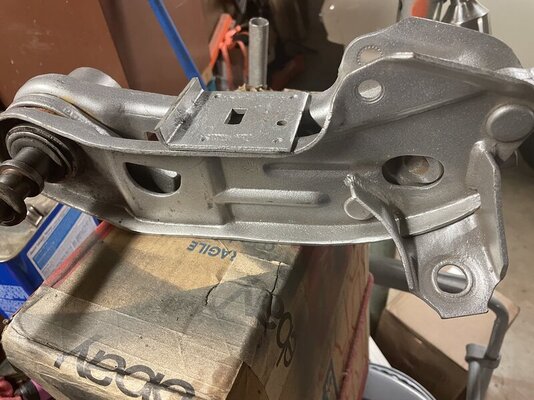
683E93D9-B94B-4C1C-924B-87300CEE6B11.jpeg

Anyway, that cosmoline thread made me decide I should use the ones Leanna did for me instead of the black painted ones I was going to use as pictured in my sway bar part of my resto. The Alien Silver wasn’t the quite right color so I hit them with some Eastwood spray gray.
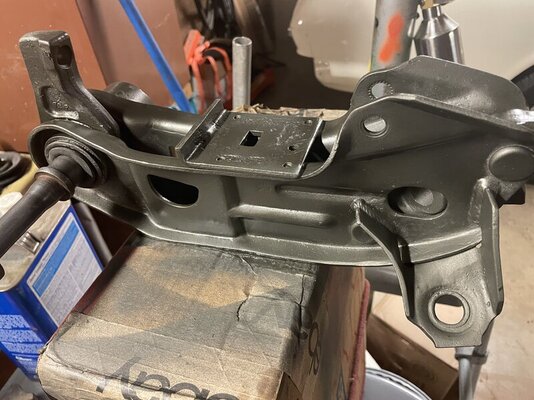

60DB162E-9635-4A12-9A9E-23B956828425.jpeg

I ordered a spray can of the amber cosmoline which arrived in due course.
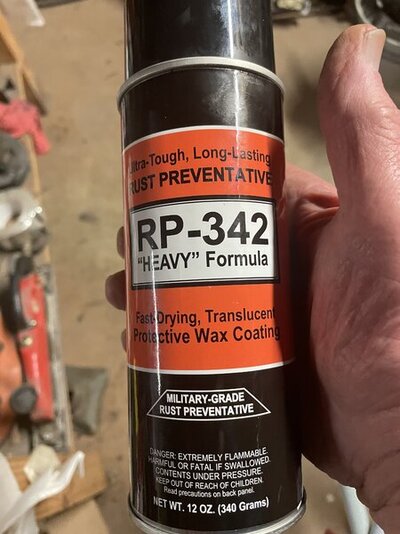
735E9A89-3B00-4B02-8A1D-E794A1F4BB1B.jpeg

I gave both control arms a couple of light coats, letting them dry overnight. Gave them another light coat and let dry. After adding the rebound bumper, they weee ready to install to the K frame. I am happy on how they’ve turned out.

D6D3AD63-76F8-4993-AE27-913523C88C2C.jpeg

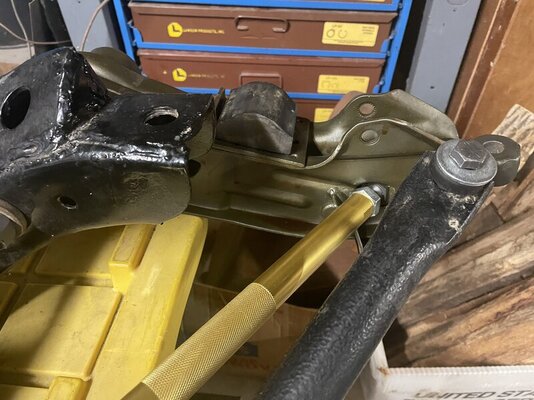
I disassembled everything on the K frame that I previously installed and loosely installed the new and improved, cosmoline protected LCAs, sway bar end links and adjustable strut rods. Everything will be torqued to specs when the car is on all 4 wheels.
3593F9E8-AD02-4CFA-9E18-5B3E5659044E.jpeg
 
I needed to call the people who rebuilt my 42RH - Proformance Transmissions (they are a companion business to Dynamic converters). I had a question about fluid type. The 93 shop manual I’m referring to for the 42RH specifies a fluid type no longer sold. He said use the Mopar ATF+4 or equivalent.

I mentioned I would be using an external cooler in addition to the stock radiator cooler. He said great idea! He said route the pump side line first to the radiator then to the external cooler then back to the transmission to get the greatest cooling benefit. Hmmm OK. I was going to do it just the opposite.

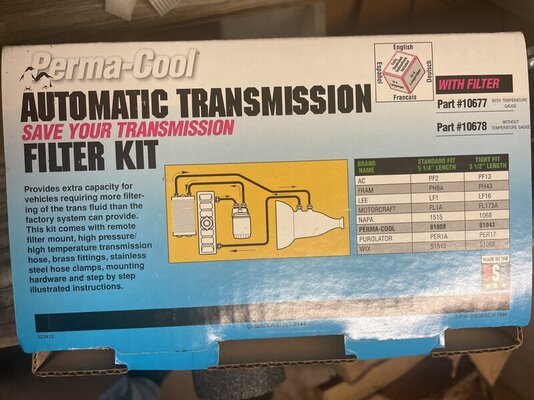
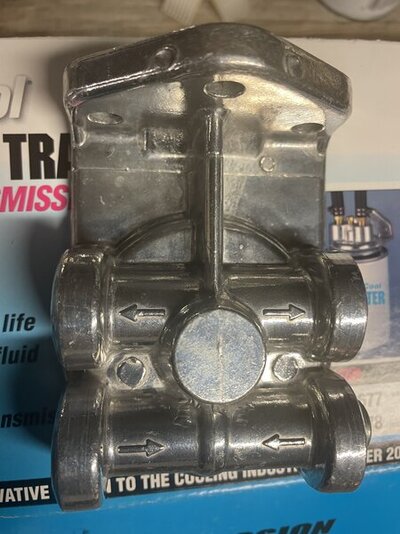
I asked about the benefit of an external transmission filter. He said another great idea for transmission longevity. The internal filter can’t catch everything - check the bottom of the pan! So i decided to add one since it can’t hurt. I found a Perma-Cool 10678 kit

C9A58560-16EE-45B4-84F5-46593993F06C.jpeg

Thats uses the Fram PH8A or PH43 or equivalent filter and is the same routing as recommended by Perma-Cool and Shawn at ProFormance Transmissions

2052019E-0F79-46E4-8576-96B4B50F6E2D.jpeg

And I will have to wait till I install the
engine/transmission/K Frame as a unit to find the best location for this.
 
Last edited:
I agree with you and disagree with the "transmission expert" on how to mount the cooler. Like engines, automatic transmissions have an operating temperature range. If you run to the external cooler first, you could cool the fluid below normal operating temperature. When the fluid goes to the radiator, it would be heated back up. Fluid back to the trans is at operating temperature. If you do it the way the 'expert' recommends, your transmission could spend most of its time below normal operating temperature, with possible reliability issues.
 
Go look at my thread trans ran fine no issues. I was shocked when I looked in bottom of pan and the metal. I plan to pull it out and do a reverse valve body as well someday or blow it up first. Fluid in mine was fine not burned and it appeared low miles so not sure what to think.
 
I agree with you and disagree with the "transmission expert" on how to mount the cooler. Like engines, automatic transmissions have an operating temperature range. If you run to the external cooler first, you could cool the fluid below normal operating temperature. When the fluid goes to the radiator, it would be heated back up. Fluid back to the trans is at operating temperature. If you do it the way the 'expert' recommends, your transmission could spend most of its time below normal operating temperature, with possible reliability issues.
Thanks for your insight on this. I am using the 93 Service manual for info for the 42RH. According to it the operating temperature is 180F. So I’m wondering what is the fluid temperature is when leaving the radiator cooler? Is it radiator (or higher) temperature and by the time it gets back to the transmission has dropped back to near operating temp? Or if the external cooler receives it last at near radiator temperature, does it cool it to near operating temperature? I can’t find any more info in the service manual. I would be interested in finding out either way of doing it. I suppose i could do it one way or the other and mount my Dakota Digital trans temp sensor after one or the either final cooler. and then swap to after the other cooler, but that’s definitely a lot of work (and money for tubing!).
 
Last edited:
Thanks for your insight on this. I am using the 93 Service manual for info for the 42RH. According to it the operating temperature is 180F. So I’m wondering what is the fluid temperature is when leaving the radiator cooler? Is it radiator (or higher) temperature and by the time it gets back to the transmission has dropped back to near operating temp? Or if the external cooler receives it ladt at near radiator temperature, does it cool it to near operating temperature? I can’t find any more info in the service manual. I would be interested in finding out either way of doing it. I suppose i could do it one way or the other and mount my Dakota Digital trans temp sensor after one or the either final cooler. and then swap to after the other cooler, but that’s definitely a lot of work (and money for tubing!).
It would be extra work and money, but we would certainly be appreciative to see what your findings are. :D
 
The trans cooler is in the bottom of the radiator. The engine's operating temperature is governed by the thermostat, located close to the top of the radiator. If you have a 180 degree T-stat, the coolant entering the top of the radiator will most likely be hotter than that. However, the coolant at the bottom of the radiator will be much cooler.
 
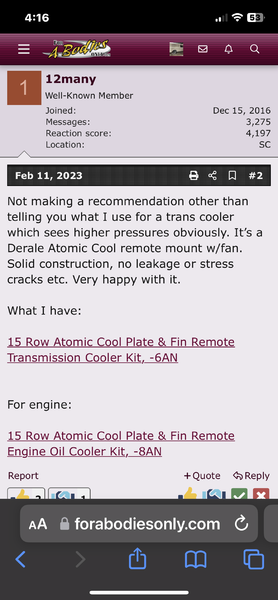
I was just looking at another thread pertaining to coolers and the member said he uses this one:

678C9712-76AA-4E63-B052-65821B58FECB.png

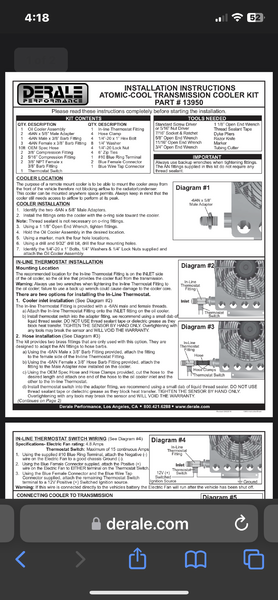
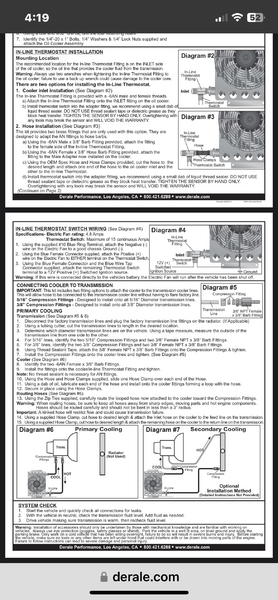
So I had a look at the instructions.
Derale also says mount the aux cooler after the radiator cooler (with the option of a bypass thermostat) or bypass the radiator completely
I
57EA5D4E-D221-4B05-A19F-206ED44BE764.png

AC98E9B0-50BD-4702-805C-9E5F16D3324E.png

The search for information continues
 
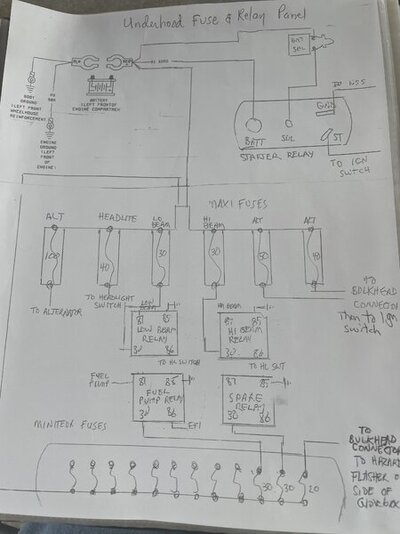
Minor sidetrack again - electrical this time. I wanted to finish confirming the wiring going to and from my underhood fuse and relay panel so I could finish the written schematic and do the final install under the battery tray. On most of our cars the alternator hot wire enters through the bulkhead and branches off after the ammeter to the headlight switch, fuse panel, ignition switch and then back out to the battery.

I routed my alternator wiring through a protective maxi-fuse back to the battery input. One fuse provides protection to the headlight switch. Two of them provide power to the headlight relays. 1 fuse goes to the hot side of the ignition awitch (and from there to the hot side of the interior fuse panel) and the last fuse also goes to the ignition switch which also branches off to the interior fuse panel when the ignition switch is turned to rin or Accy

13A2051B-B30D-4277-8F6E-9A1FEE36500E.jpeg

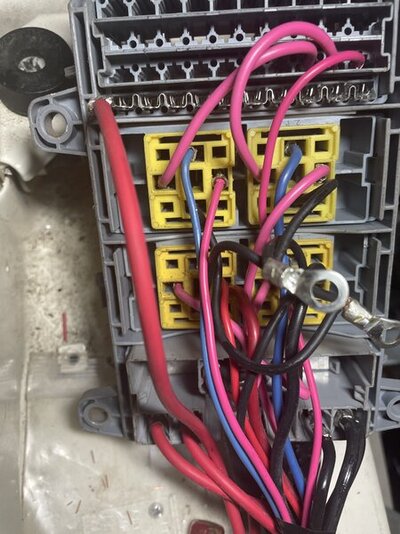
So with the help kf my multimeter I confirmed all circuits went were they were supposed to go

09D692C2-53C7-4A18-A5EE-21648AAD5730.jpeg

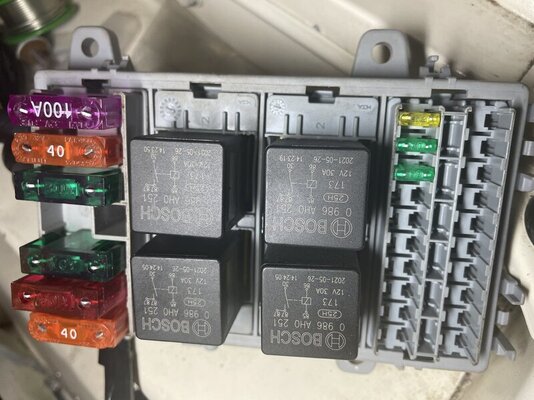
And the front side contains the maxi-fuses, relays and miniature fuses has a protective, waterproof cover.

EE14CD71-99DE-4BB7-BA99-ED4775043A8B.jpeg

The yellow fuse on the far right protects the emergency flasher system; the 2 green fuses protect and provide power for the fuel pump relay and spare relay if needed
 
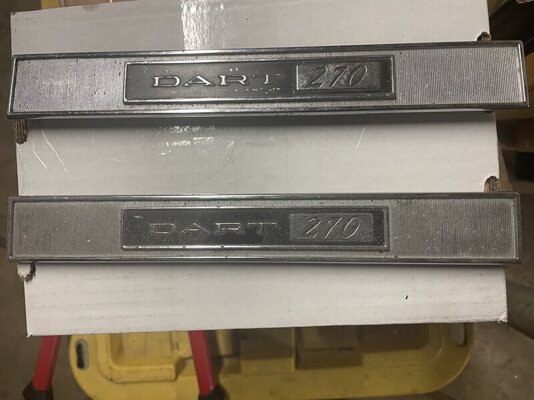
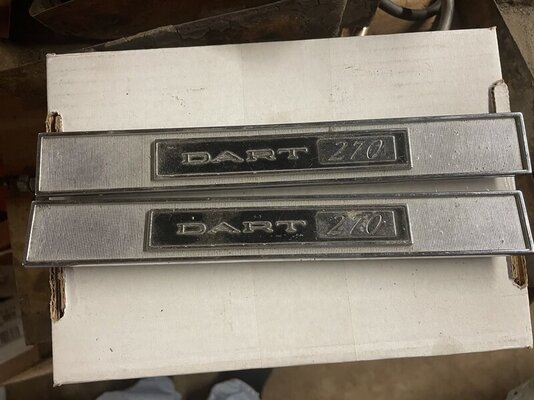
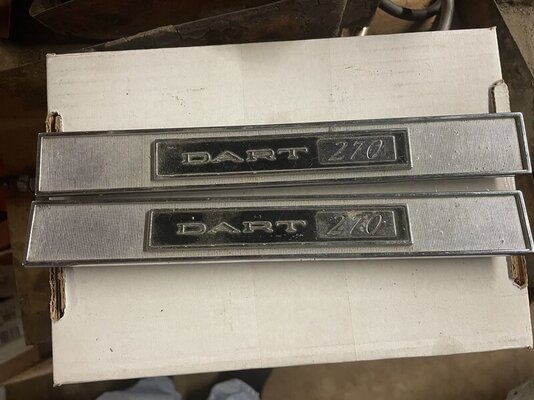
Long ago when I decided to do the conversion to a panel wagon, I used the longer 2 door sedan doors. I noticed the sedans didn’t use the inside naneplate but of couse the 270 ‘verts and hardtops did. So I found a decent set of 270 nameplates on eBay to add to the doors.

401FF77E-3AE7-40C7-AD47-FC807ADC073F.jpeg


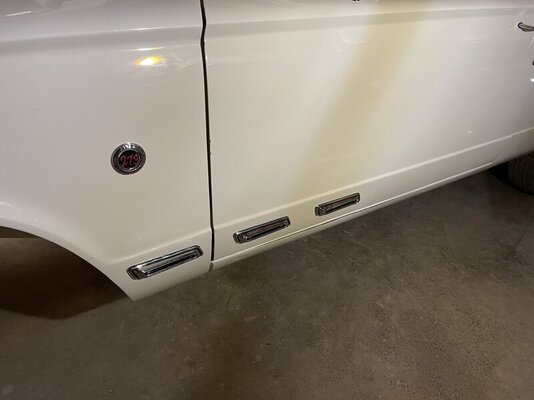
I later added the GT fender/door emblems to add some GT flair (but without the rest of the GT trim).

90F3E58A-3E0F-4E70-8A94-D1FFF8A4266F.jpeg

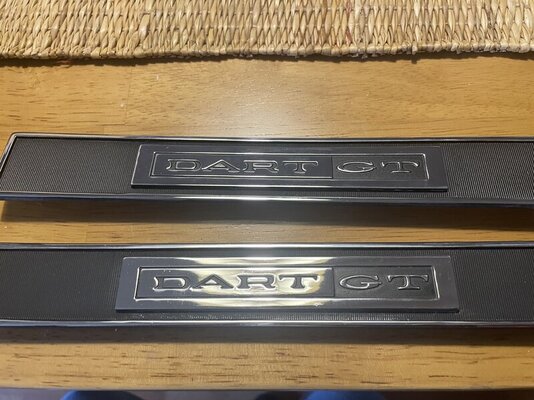
So after doing that, well, lets add the Dart GT nameplates to the inside door. I had already cut the mounting holes for the Dart 270 nameplate. Finding a decent set of Dart GT proved harder than I thought! Everything I found was pitted and looked terrible. I checked Layson’s and @Rick@Laysons told me they were in production. The wait was worth it! They’re every bit as nice as their early A inner and outer sill plates! My photo just doesn’t do them justice. They will look fantastic on my 1 of none GT panel wagon!

78E0A49F-4332-4C32-B9C9-0ABB66513DF0.jpeg
 
Last edited:
Did you pressure test the condensers before starting? Just curious.
 
I agree with you and disagree with the "transmission expert" on how to mount the cooler. Like engines, automatic transmissions have an operating temperature range. If you run to the external cooler first, you could cool the fluid below normal operating temperature. When the fluid goes to the radiator, it would be heated back up. Fluid back to the trans is at operating temperature. If you do it the way the 'expert' recommends, your transmission could spend most of its time below normal operating temperature, with possible reliability issues.
Guess it depends on where you live and the ambient air temperature. It's always hot in SoFlo, so we run the external transmission cooler after the radiator transmission cooler for maximum cooling.

If we ran to the external cooler first, it would cool the tranny fluid, and then the radiator tranny cooler would re-heat the fluid after, and that would defeat the purpose of the external cooler. So might as well not run an external fluid cooler in a hot weather scenario; the external cooler needs to be downstream of the radiator cooler.

What ambient air temperature will you be driving in? Best bet is to use a thermostat bypass as someone else said, if you have extremes in hot and cold weather. However, I would say that if your ambient air temp will always be above 60*, I wouldn't worry about over cooling the tranny fluid and using a thermostatic bypass.
 
Did you pressure test the condensers before starting? Just curious.
I bought a condenser/transmission cooler flush unit that uses up to 150 PSI from my air compresser. Both early A condensers checked good with no leaks and after several flushes, both came out clean
 
What ambient air temperature will you be driving in? Best bet is to use a thermostat bypass as someone else said, if you have extremes in hot and cold weather.
This will be basically a late spring, summer and early fall car with spring and fall average temps in the 60’s/70’s. Summers can be pretty brutal temp and humidity-wise. I like the idea of a thermostat bypass and will incorporate one.
 
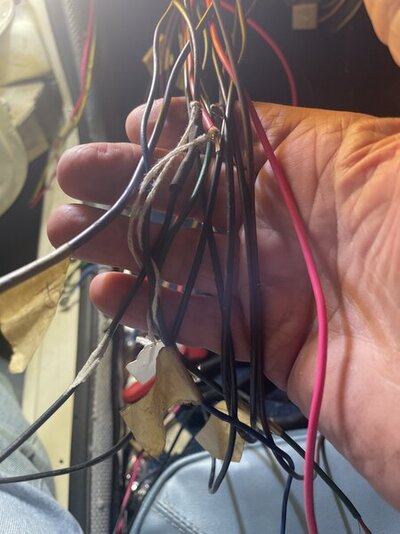
I’ve been taking Some time off from the wagon for awhile now so a couple of weeks sho I figured to spend a couple of hours a day working on this mess iof wiring thats under the driver’s side of the dash. When I constructed the dash harness I made all of these wires longer than I needed just in case.

70864119438__E498CE59-7035-4597-A9BA-68BDEC68875F.jpeg

5 of these wires go to the the rear body harness - brake lights (included a 3rd brake light incorporated in the roof rack), left snd right turn signals (yes, they are separate from the brake lights and use smber bulbs where the OEM back up lights used to reside), back up lights (now in stock 63 housings), and running lights. I did check each circuit in the body harness to make sure everything worked.

I found it awkward and time consuming while in a semi-probe position on the floor checking the loose wires to doubly check where they eent to what my marker was on the wires, then crimping snd soldering every terminal

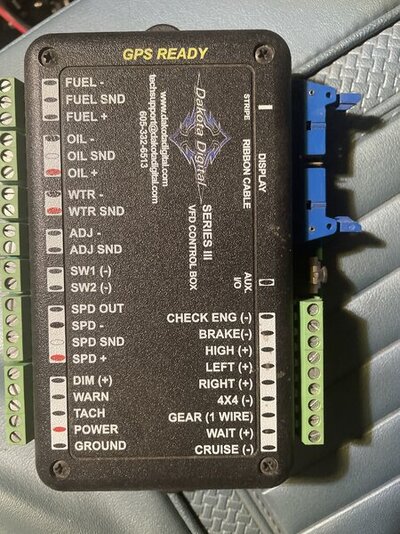
The rest of the wires are for the Dakota Digital control box for the instrument cluster and several dash harness grounds

70864164111__C876C52E-3F3A-470A-95CD-B3F001460B2E.jpeg

Five of the wires under the dash are for the left dide of the module - momentary switches 1 and 2, which show various speed readouts in the speedo and tach as needed, DIM (wire connected to the taillight circuit that dims the display when there’s power to the taillight circuit), TACH (wire to the the coil for the cluster tach), and POWER wire to the Run/Accy side of fuse box. I will have a separate ground wire. The right side of the module will have a wire for the brake warning switch snd/or emergency beake switch, high beam, left and right turn signals, GEAR - a separate module that shows the P R N D 2 and 1 on the cluster. I added a wire for CRUISE in case I decided to add a cruise module

MORE TO FOLLOW!
 
Last edited:
Long ago when I decided to do the conversion to a panel wagon, I used the longer 2 door sedan doors. I noticed the sedans didn’t use the inside naneplate but of couse the 270 ‘verts and hardtops did. So I found a decent set of 270 nameplates on eBay to add to the doors.

View attachment 1716071686


I later added the GT fender/door emblems to add some GT flair (but without the rest of the GT trim).

View attachment 1716071688

So after doing that, well, lets add the Dart GT nameplates to the inside door. I had already cut the mounting holes for the Dart 270 nameplate. Finding a decent set of Dart GT proved harder than I thought! Everything I found was pitted and looked terrible. I checked Layson’s and @Rick@Laysons told me they were in production. The wait was worth it! They’re every bit as nice as their early A inner and outer sill plates! My photo just doesn’t do them justice. They will look fantastic on my 1 of none GT panel wagon!

View attachment 1716071762
Do you happen to have the part number for those nameplates? Those look really nice. It's impossible to find stuff on Layson's website though.
 
Do you happen to have the part number for those nameplates? Those look really nice. It's impossible to find stuff on Layson's website though.

I will look later today. I do know Layson’s has never carried either the 270 or Dart GT door emblems. They now have a linited supply of absolutely gorgeous repro Dart GT door emblems. When I ordered a set about 15 months ago, i was Nr 7 on the list!
 
What? This thing ain't done YET? .......and I thought we were gonna cruise chicks in it. Deadgummit.
 
What? This thing ain't done YET? .......and I thought we were gonna cruise chicks in it. Deadgummit.
Nope, not done yet. At 77 (going on 78), I don’t move like when I was young a couple of years ago. I will ask my buddy to help when it’s time to mate the engine/42RH to the K and all that to the body!
 
Last edited:
MORE TO FOLLOW!

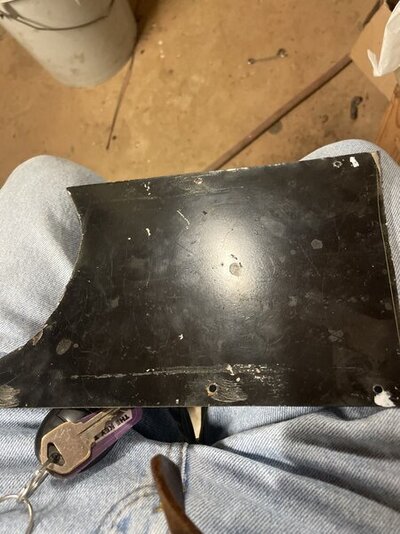
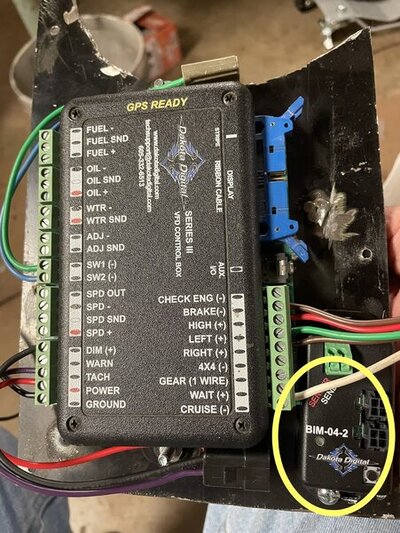
So to continue where I left off, my original plan was to mount the main control module and auxillary ones to the upper kick panel area. I didn’t like that at all. So i considered even higher on the inner panel near the cowl since I could sort of access everything through the instrument cluster opening. I thought about that and how would I secure all the wires in the limited skace I had. IMO that wasn’t really going to work either. So my solution was to fabricate a mounting plate for everything and install it to the lower dash and fresh air vent

71070847742__AC043F13-B383-490F-A858-830F9D303756.jpeg


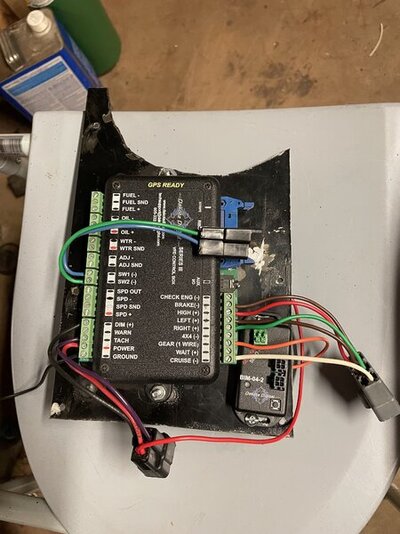
So I welded some machine screws to the plate to hold the main module and the gear position module. I figured I could then work a lot easier to install all the wires then install the modules to the plate. I soon learned 2 hands don’t work to well through a limited size oprning! So back to thinking about it. I finally decided to nake a jumper harness with terminals and connectors so all I’d have to do is plug in from the dash harness. I liked that solution. So i used a 2 terminal connector for Switch 1 abd 2, a 3 terminal connector for the DIM, TACH and POWER wires snd a 6 terminal connector for the 5 wires on the other side - Brake, Hi Beam, L and R Turn signals and Cruise (if added).


IMG_6361.jpeg

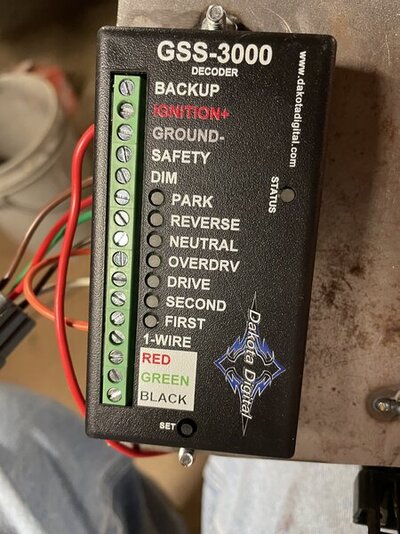
You can also see an orange wire from the GEAR and another red wire from the power wire routed to the back side to the GSS3000 logic module for it’s power and to the 1 wire terminal

IMG_6363.jpeg


The final module is kind of tucked under the wiring on the right side of the control module and circled in yellow. This is for an auxiliary temperature gauge within the cluster. It could be for transmission or engine oil temperation. This modules plugs into the main control module for its power

IMG_6354.jpeg
I’ve still got to install the wiring from the fuel sender,oil pressure, water temperature and aux oil temperature sending units. After i get the running gear installed and run those cables, i can finish this portion of the job
 
Last edited:
Do you happen to have the part number for those nameplates? Those look really nice. It's impossible to find stuff on Layson's website though.
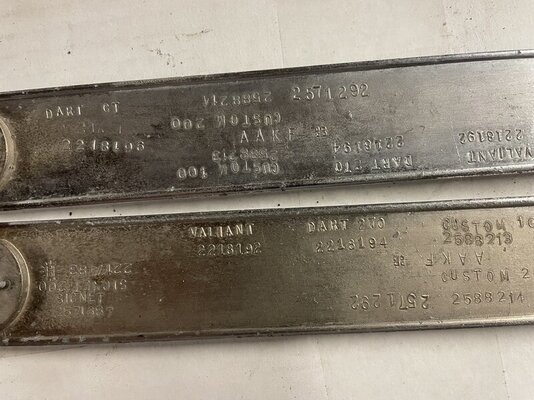
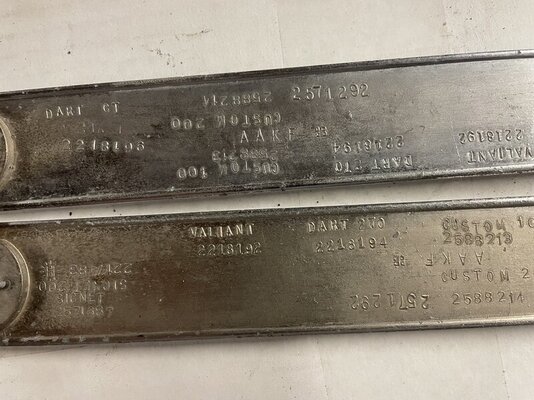
@mopowers here you go - front and rear of the Dart 270 door plate. Looks like there’s 2 part numbers - an early and a late

IMG_6368.jpeg

IMG_6369.jpeg
And the Layson’s repro Dart GT nameplates
IMG_6369.jpeg

IMG_6368.jpeg

Same thing on the part numbers
 
IMHO Chrysler should have done this body style (or a Ute) in the high end GT (and Signet) so I decided to make mine a GT with all the emblems and nameplates befitting a GT! For the purists, get over it.
 
I have been taking a sabbatical from the Dart for awhile. Yesterday I decided to do something even if was wrong. so I decided the steering column I’m going to use - a M Body tilt column needed a coat or two of light blue metallic paint to match the interior. Then I decided to install the larger steering column toe plate. Got 2 of the 5 bolts installed and dropped the 3rd bolt somewhere on the floor as i heard it hit the metal floorboard. I’ll be damned it I can find it even after sort of pulling the carpet up on the driver’s s side. Even my wife tried to find it. And I searched again today with no luck!
 
Last edited:
I have been taking a sabbatical from the Dart for awhile. Yesterday I decided to do something even if was wrong. so I decided the steering column I’m going to use - a M Body tilt column needed a coat or two of light blue metallic paint to match the interior. Then I decided to install the larger steering column toe plate. Got 2 of the 5 bolts installed and dropped the 3rd bolt somewhere on the floor as i heard it hit the metal floorboard. I’ll be damned it I can find it even after sort of pulling the carpet up on the driver’s s side. Even my wire tried to find it. And I searched again today with no luck!
Anything I can send you?
 
-
Back
Top