67 Dart Build Triangulated 4 link & Mini Tub

-
You forgot more pics,lol!


bkd Here here, MORE PICS lol
Ok hear you go.......................

IMG_1283.jpg

IMG_1284.jpg

IMG_1285.jpg

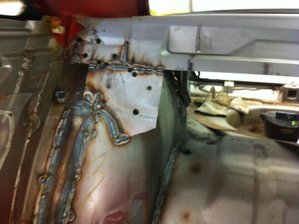
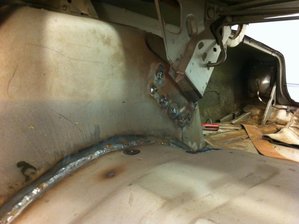
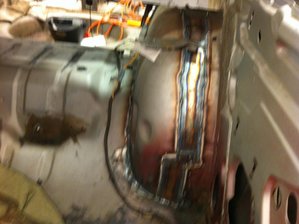
Right here you can see where I had to notch the package tray and peel it up to finish welding the upper part of the fender.
You can also see where I used a BFH inside the wheel well area to make more clearance. It cleared but it was really close.

IMG_1286.jpg

IMG_1287.jpg

IMG_1288.jpg

IMG_1289.jpg

IMG_1290.jpg

IMG_1291.jpg

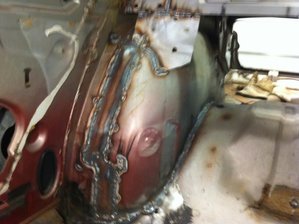
Here you can see the difference with the Dimple's still in the inner fender.

IMG_1292.jpg

IMG_1283.jpg


IMG_1284.jpg


IMG_1285.jpg


IMG_1286.jpg


IMG_1287.jpg


IMG_1288.jpg


IMG_1289.jpg


IMG_1290.jpg


IMG_1291.jpg


IMG_1292.jpg
 
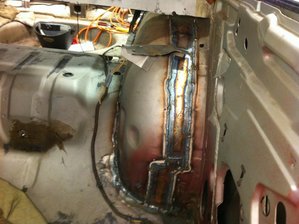
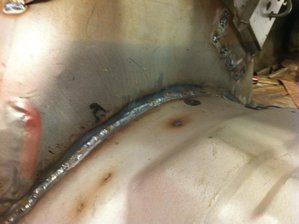
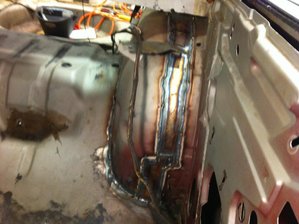
Just so you 67 and up Dart guys know that if you are going to keep all the welding inside the car it is VERY tight on top of the fender wells right below the package tray area. I had to cut the package tray on the FACE where the bracket goes from the fender up and peel it back some to finish off the welding. This will need to be done on both sides. I actually sat in the trunk and looked thru the window and the speaker cut out to finish welding it off. It is a PITA to do for sure!

I also took a BFH and Pounded the dimples in the inner fender well toward the inside of the car for more tire clearance. You can see the difference from the Passenger side to the Drivers side in the photos above. I have done it to BOTH sides, I showed 1 done and 1 stock so you all could see what I did.
 
So MadDart,how many hours do you feel you have tied up in doing the minitub?I found it,s alot more work than it looks LOL.Now get the cage in!


P.S Don,t forget to cardboard up your windows when welding the cage in.Good Luck.
 
is there a reson for a fully welded fender? i was thinking about spot welding it and then using seam sealer. (thats how the factory does it) or does it need to be fully welded?
 
I feel when doing a minitub,most are usually adding a couple hundred extra HP LOL.Welding solid will help keep the car firmer.JMO
 
yeah I can see that. I'll have about 600hp in mine, but the cage and subframe connector will add a ton of support to the car, so I don't where it's needed. But I could be wrong I have been before, and I'm sure I will be again.
 
hey awsome build I have a 70 DUSTER that i have wanted to do this for some years now but have been scared to do it cause of no real write up till now. Dont know if this ? was asked but for those like me that have relocated the springs similar to what you did on the front leaf spring birch. can i use that for this setup? AM I ahead of the cam or do i have to start again by making a custom fab birch for those end links. Also would be much appreciated if you could send me the specs cant wait to dive into this one thanks and god bless
 
So MadDart,how many hours do you feel you have tied up in doing the minitub?I found it,s alot more work than it looks LOL.Now get the cage in!


P.S Don,t forget to cardboard up your windows when welding the cage in.Good Luck.

I would say at least 32 hours so far. With the Dart fender having to be done in 4 pieces instead of 1 or 2 it takes more time, also it is REALLY tight welding from the inside of the car above the package tray. Hopefully the second side goes quicker on the top. I would say I will have at least 36 Hours into it when it is done.
 
hey awsome build I have a 70 DUSTER that i have wanted to do this for some years now but have been scared to do it cause of no real write up till now. Dont know if this ? was asked but for those like me that have relocated the springs similar to what you did on the front leaf spring birch. can i use that for this setup? AM I ahead of the cam or do i have to start again by making a custom fab birch for those end links. Also would be much appreciated if you could send me the specs cant wait to dive into this one thanks and god bless

If your perches have already been moved in with a spring relocation the only difference would be where your link brackets go on the axle. I am pretty sure you move your spring boxes in 3" on a spring relocation and cut away both sides of the frame rails. Here I just cut 1 side of the rail and moved them in 4 1/8" instead of the 3".
 
is there a reson for a fully welded fender? i was thinking about spot welding it and then using seam sealer. (thats how the factory does it) or does it need to be fully welded?

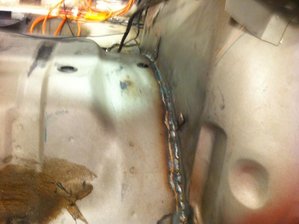
The frame rail is only 3 sided with the TOP of the rail using the Floor to box it in. Once you cut the inner fender out the floor will LIFT off the frame rail. Spot welds will not cure the problem there. Welding it off completely will stiffen it all up like Scott is saying.

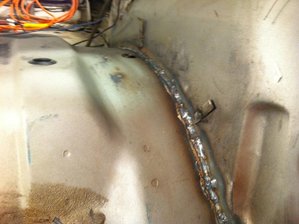
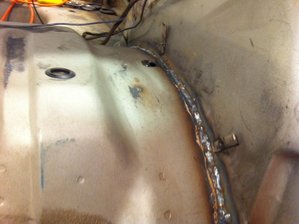
I actually welded the floor back to the rail and then GRINDED it back down flush, then I installed the inner fender with the strip of metal, I tacked it in with screws and then scribed from the inside of the trunk along the floor pan on the back side of the INNER well. I then took it apart and cut the INNER well to that line, put it back in tack welded it all then FULLY welded inside the trunk area. I also went back into the wheel well and FULLY welded the from the outside also inside the wheel well. So I have 3 welding passes along the rail.

1) floor to frame rail after inner tub removal then grind flat
2) Inside trunk
3) Outside along rail again in the wheel well itself
 
Yes i did cut both sides and welded in the box. iam glad to hear that I can do this i know this will help others thanks MAD DART as for the specs if you could email me them it would be great thanks for sharing your knowledge [email protected]
 
The frame rail is only 3 sided with the TOP of the rail using the Floor to box it in. Once you cut the inner fender out the floor will LIFT off the frame rail. Spot welds will not cure the problem there. Welding it off completely will stiffen it all up like Scott is saying.

I actually welded the floor back to the rail and then GRINDED it back down flush, then I installed the inner fender with the strip of metal, I tacked it in with screws and then scribed from the inside of the trunk along the floor pan on the back side of the INNER well. I then took it apart and cut the INNER well to that line, put it back in tack welded it all then FULLY welded inside the trunk area. I also went back into the wheel well and FULLY welded the from the outside also inside the wheel well. So I have 3 welding passes along the rail.

1) floor to frame rail after inner tub removal then grind flat
2) Inside trunk
3) Outside along rail again in the wheel well itself
i get what your saying but im not cutting the tubs all the way to the rail im leaving the pince weld, and them bending it up and welding the inner fender to that. (ill have pics up later today)

EDIT: i have the pics here at work too.....

CIMG0095.jpg


CIMG0089.jpg


CIMG0093.jpg


CIMG0099.jpg


CIMG0100.jpg
 
i get what your saying but im not cutting the tubs all the way to the rail im leaving the pince weld, and them bending it up and welding the inner fender to that. (ill have pics up later today)

EDIT: i have the pics here at work too.....

I see what you are doing now. This is the first time I have seen it done like that.
 
I see what you are doing now. This is the first time I have seen it done like that.
yeah it just came to me as i was working on it. i figured why go and cut out the factory spot welds i just cut it out between them, and then ill weld up the spots that were cut out in between. i figure that it will have enough welding to hold the floors tight to the subframe as well as making it strong enough for the inner wheel well. only time will tell. as ill be sopt welding the fenders back in and then using seam sealer on them. ill have more pics after this weekend.(to be posted in my thread) i have about 3.5 hours in it at this point, and it took about 45 min to get it cut out. (took longer to remove the old body sealer to give the plasma room to actually cut the steel) this weekend (friday afternoon, saterday afternoon, all day sunday and monday) i hope to get the wheel tubs finished and the cage started, ideally i want the cage tacked in place so that the NHRA tech inspector can look at it to make sure that it will be ok and pass tech before we finish weld it. then its time to get the hemi installed.
 
I met with the painter on Saturday. He really wants to detail the under part of the car and BAG it all before he paints it, undercarriage, frame rails, fender wells etc! He is going to shoot me a price on doing that also. The rear quarters have some waves in them but not too bad the car is almost RUST FREE with just a few spots behind the front tires in the usual areas.

I worked on finish welding the mini tubs and I got it all done. Finally DAMN that was some flippin work! I have about 36 hours in it.

Next up is the Cage! Once that is in I will strip it and it goes to paint! I will be pulling the glass out before it leaves.
 
Update,


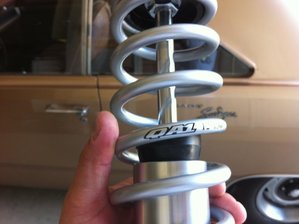
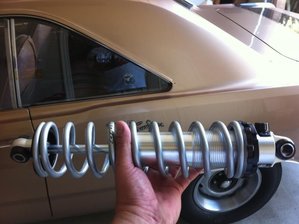
The Mini Tub is all welded off. The Shocks are put together and I am dropping off the housing and link bars on Monday for Powder Coat.

IMG_1335.jpg

IMG_1336.jpg

IMG_1337.jpg

IMG_1339.jpg

IMG_1341.jpg

IMG_1338.jpg

IMG_1342.jpg

IMG_1343.jpg

IMG_1344.jpg

IMG_1345.jpg

IMG_1335.jpg


IMG_1336.jpg


IMG_1337.jpg


IMG_1339.jpg


IMG_1341.jpg


IMG_1338.jpg


IMG_1342.jpg


IMG_1343.jpg


IMG_1344.jpg


IMG_1345.jpg
 
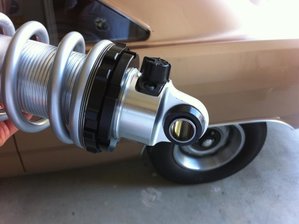
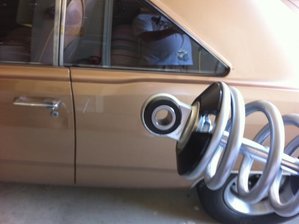
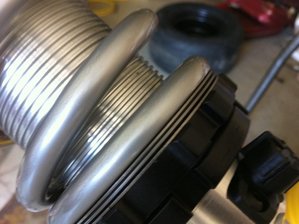
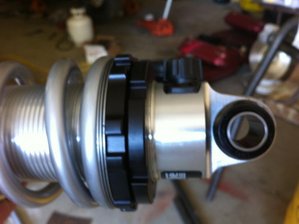
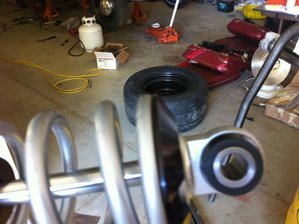
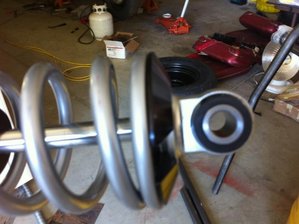
I had to change out the ends on the shocks to what you see. They came with Bearing type ends. The bottom of the shock uses a 5/8 " x 1 3/8" hardware to fit the Lower shock mounts and the top uses standard 1/2" x 1 3/8" hardware. I also used the ball bearing washer shims on the bottom of the spring, they are supposed to make for easy adjustment, we will see!

IMG_1326.jpg

IMG_1327.jpg

IMG_1328.jpg

IMG_1329.jpg

IMG_1330.jpg

IMG_1331.jpg

IMG_1332.jpg

IMG_1333.jpg

IMG_1326.jpg


IMG_1327.jpg


IMG_1328.jpg


IMG_1329.jpg


IMG_1330.jpg


IMG_1331.jpg


IMG_1332.jpg


IMG_1333.jpg
 
-
Back
Top