Finally bit the bullet and bought a TIG welder

-
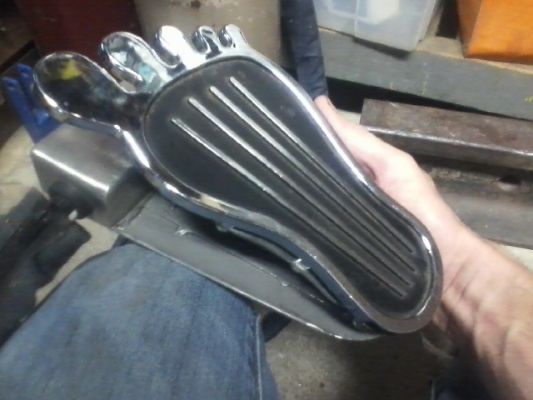
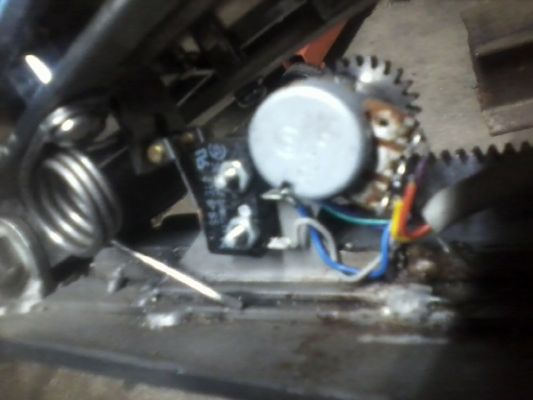
Decided to skip the adjustable link on the pedal. All that would do is adjust L arm to pedal distance, which I don't feel is necessary. The idea was to get the rack and cog adjusted to absolute ohm when the pedal is on its respective stop, but I went ahead and built the rack arm of the L linkage a little longer, so the linkage has 1/8" more throw than it needs, just to be sure.

Tigpedalproject01_zps5bf6e08f.jpeg

Tigpedalproject02_zpsac008d33.jpeg


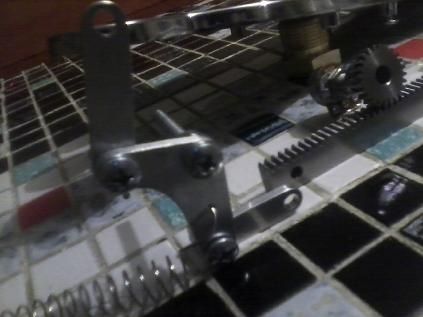
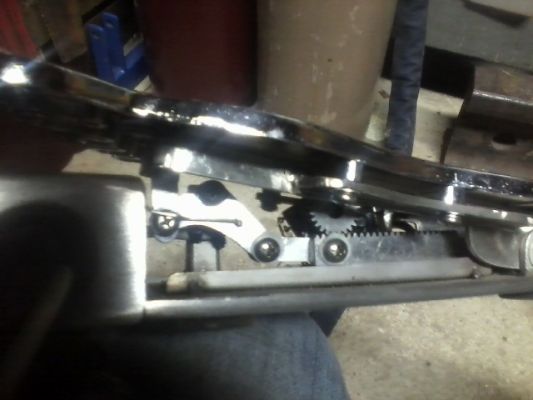
I can just put a stop screw through a push spring on either end of the rack mount for stops and call it good. The pot has stops in it, but they are only designed to stop an index finger and thumb from cranking it further. I've got my foot on this thing, so I'd rather have the linkage rely on it's own stops, even with a set of pedal down & up stops. The pics don't show the linkage, but I moved the slotted hole down into the bottom hole of the vertical link. It has 3/16" of slide travel, which I think should be enough for the pedal travel to engage the pedal recognition and arc trigger switches, before moving the amps.

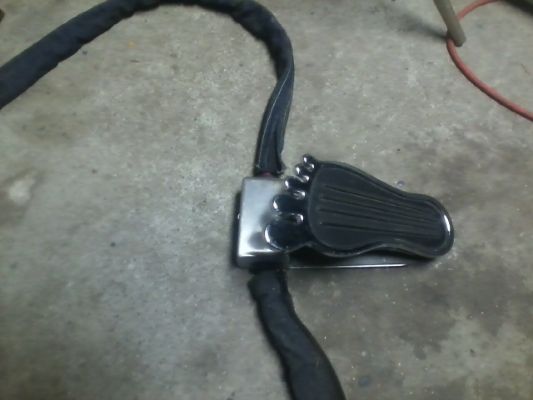
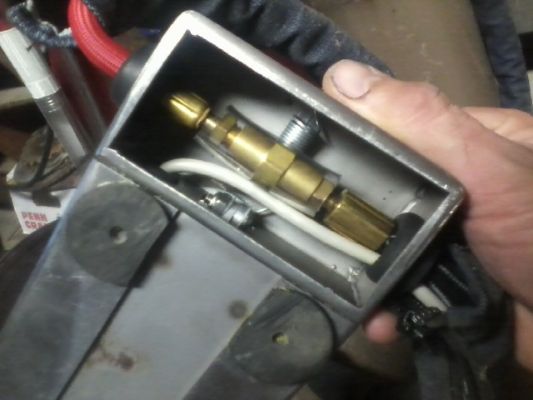
I'm still waiting on the CK line, transmitter/ receiver and a few odds and ends. I'm going to wait on the rest of the parts to arrive and test the transmitter/ receiver before I make the pedal casing. The sending unit/ key fob button may act as a spark gap transmitter (!!!) so I'm going to do some preliminary testing with me away from the torch and the transmitter on, in varying AC frequencies to see if it tries to jump to the transmitter or messes with the receiver relay output on my multimeter. Miller makes a wireless foot pedal, so I know this can be done, but I want to know that having a high frequency transmitter in my hand will be safe and work correctly.

It comes with two transmitters, so if I zap one, I guess I can use the other and receiver some other way. I thought about wiring the switch that is zip tied to the torch, down to the transmitter, a few feet below the trigger/ torch, still using the veclro for easy use. We'll see. Hopefully it just does what it's supposed to do.

If I'm using this pedal under low amp conditions and pulsing the pedal, I will be releasing it almost completely. There is a time delay on the gas, but I wonder if I should put a time delay off switch in the pedal recognition pins, or if it matters? I'll see what happens when I connect a micro switch and leads to the 6 and 7 pins to see how responsive it is. If its instant, I won't need a delay to keep it in foot pedal mode. If 6-7 activates a relay inside the welder, or if it's recognized digitally, may change my mind depending on how it processes to turn the pedal on. I'd rather not wear something out in the welder by having the 6-7 constantly switching, although it may not even be a valid concern and be like the trigger constantly switched or an arcade button and be able to take use all day long.

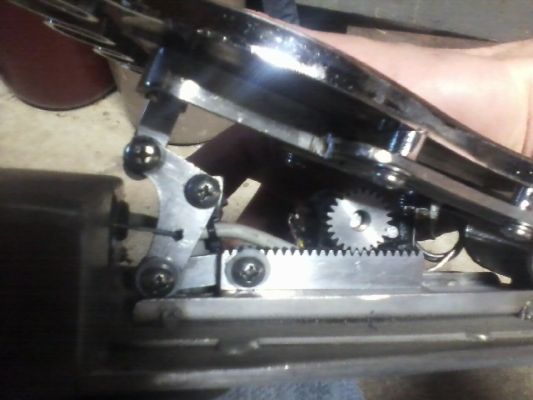
I think I'm going to put an adjustable light tension ball bearing index on the rack, at the very least, so I can hear and feel an audible click, aside from the micro switches, at min amps before the trigger is released, so I can dip down to min amps for pulsing without losing an arc. I'll just be sure to put a larger bearing in it than the dimple, so my foot has no problem running back out of the index with ease.
 
I've been anxious for a while to hear about your pedal and how you like the welder in general. I'm planning on buying a tig by the end of summer and the all-in price point you're at (11-1200?) seems good. Also considering Eastwood but idk their reviews seem all over the place.
 
SSC controls makes great pedals for the Everlast stuff. That's the way to go, especially with the 185, since you have to pay more for the Chi-com pedal. S/F....Ken M
 
Can't see it on the ssc website echo... Would you repin another to the everlast connector? Or is their site out of date?
 
Just so this is here, too;

874c28ce-1804-4c2d-8aa8-e634a5f07ebc_zps1f113408.jpg


73ef4665-2024-40d4-bfc7-1580b0e8dc7e_zps30c775d5.jpg


61802761-4aa6-4429-b6d5-e0fa10f78f8d_zps2ee519df.jpg


9fdbc95a-d101-43c5-8c49-9d7f7128aa92_zpsbefbccee.jpg


a7b8244b-0151-4456-820f-e08e06c9c425_zps2dc2ae98.jpg


7e0e724e-6600-4ae6-9c6d-8bb18e7fa513_zps34ad5322.jpg


The pedal can be made from virtually any kind of rheostat/ ohmmeter pedal.

I incorporated the torch into the front of it as a dock, to eliminate one more cable on the floor, but it can be done easier.

The link above the bell crank linkage has a slotted hole, so the pedal travels independently from the bell crank (L shaped link), and everything else with the rack, for the first 1/4" of pedal travel. This is so it can engage the two roller leaf switches toward the back/ heel of the pedal first. The first leaf switch connects the pedal to the machine, bridging 6-7. The second leaf switch starts the arc, so it is on at the very bottom of the potentiometer's amp signal.

I used 26AWG wire, so don't worry about using small cable. it only needs a signal sent through it to trigger the machine's relays. The wires don't see any more than 5V at any time. I tested the electronics against the machine in scratch start mode before building them into the pedal.

The 7 pin connector that you want for this welder is the larger diameter 7 pin;

[ame="http://www.ebay.com/itm/221350409399?_trksid=p2059210.m2749.l2649&ssPageName=STRK%3AMEBIDX%3AIT"]TIG Welding Plasma Cutter 7 Pin Large Connector Plug US Seller | eBay[/ame]

For some insane reason, he has it listed at 44.99, but I believe that price/ listing to be a true typo, because I purchased mine from the exact same seller for $4.99, which was the best price I found anywhere. Contact that seller and ask them if the price is a typo.

The potentiometer that I used is a 50K ohm. The machine calls for a 47K, but the upgraded/ US built pedal that Everlast offers has a 50K ohm potentiometer in it. Most of them use a 1/4" diameter unsplined shaft, which is easy to get parts like gears and pulleys for. This one rotates 3/4 around end to end and gave me 2" travel on the rack, so I did my math based on rack travel and adjusted the length of my bell crank link shorter by percentage to get the 1 1/2" throw of the pedal that I wanted.

If you only want to make a pedal and you don't want it switched, like mine, you can use a 5 conductor cable and simply bridge the 6-7 with a short jumper, within the 7 pin. It comes apart with screws.

I like having it switched at the pedal, because I can glance at the machine and see my max amp output at any time and barely touch the pedal to see the min/ entry amp level, but you don't have to do this.

The rack/ spur design is usually upright, like in guitar flanger pedals, but I didn't like it, because it sets the pedal up high. When the rack travels down on those, it needs dead space beneath to travel into, so you double the height of the pedal by design (rack length x2).

cry-baby-wah-wah.jpg


I have big feet, so I wanted to stand on the ground and hit it with the ball of my foot, for stability.

Another, more simple design that doesn't require linkage articulation of any kind is a box along the side with a crank out to a pedal, like a Z bar link on a clutch. This gives you the ability to put the pedal all the way to the floor and just use a roller on the crank linkage out to the side box that houses the potentiometer and the rest of the wiring.

Anyway, how you choose to trigger the torch and run the amps up and down, like with a slide potentiometer, bell crank like I did, spring and pulleys, etc is up to you.

SSC makes quality controllers as well. I looked into them, but I had my idea locked in by the time I discovered them.

Check out the everlast forum, too. Lots of helpful people there. I'm on there as well.
 
Oh wow man I am jealous! Nice rig! now lets see some of the goodness.

-AlV
 
Oh wow man I am jealous! Nice rig! now lets see some of the goodness.

-AlV

Thanks!

Here is a weld that I did last week on 304 stainless .034" sheet for an oil tank, for the other, much bigger tool that I'm about 3/4 finished making.

df8030dc-998e-45b7-ac3d-4576d490e8f3_zps3a85aa99.jpg


I have pics of that project as well, it's a lot more involved than this pedal. Once I'm done with it, I'll post that in a new thread, dedicated to that tool.

Wahhhhhhhwahhhhwahhhhhhwahhhahahahahahaha.

I thought about what a shame it was that it was going to live on my garage floor, when it could be used for an instrument. lol

I'm actually going to weld a loop on the box to hang it on a peg between the two inlet and torch outlet hose hangouts on the side of the welding cart that I'm making from a parted out stainless BBQ. It has a bearing slide drawer for all of the tig consumables, gas lenses, etc.

Once I'm done with my WWII welding mask with the adjustable auto darken lense and grind mode, with the brass lense frame, I'll post pics of it, too.
 
I've had a hankering for a tig unit for some time. I was looking at the Everlast untis a while back. Had some dialogue with one of their reps on one of the tractor forums where he advertises and decided they were likely the best value with some actual USA based customer support.
I don't have a lot to do with one but am drawn to the beauty of the weld produced, and the potential to do it on aluminum. I have not pulled the trigger because of a lack of time to devote to it but one day it will happen.
Show us more of what it can do.
 
I also purchased a tig welder 2 months ago, one of the guys i work with tig welded for years, told me to get a gas lens and cup that fit the torch end. I did that a couple of days ago. It took the welder from being good to a great welder. That would be the first thing i would tell someone to get. http://ecx.images-amazon.com/images/I/51Mhb+8OR1L.jpg
I purchased my from welder from eastwood co 400 bucks on sale works great.
 
I saw the eastwood unit as well, when I was shopping. Good machine!

What sold me on this model was what it had and what it didn't have.

What I wanted was a welder that could be used on 120v and 220v that had DC and AC with AC balance control and on an analog setup.

The Miller digital stuff is very controllable, but I hate jacking with pre-settings. If I was a welder, by trade, I'd be tempted, but a couple of switches and knobs get my projects dialed in.

I have yet to purchase a lens/ screen kit for my 17 torch, but I'm running a CK 10' whip off of my foot pedal, that has the heavier line running to it. I made a denim sleeve for the first 5 feet of it, so it doesn't shred the braid on the whip and I also made a yoke that I have a velcro loop running through, so I can attach the whip to my belt loop, with the whip looped on itself once to adjust length on the fly,easy like a hose reel.

This takes up any slack and it's super nice for doing tubing, because the only weight your hand is articulating is the weight of the torch and the really short length of the whip, from the torch to your hip. The CK whip is much more flexible and quite a bit lighter, with a 190amp rating. My machine goes to 185, but it can push 190 or so if I want to. I think it's limit is 1/4", but that's fine with me. If I have to make a weld any bigger, I'd likely mig weld with multiple passes, anyway, with pre-heat.

The lens is a great tool for some work. The pyrex glass ones can be seen through, so you can really shorten the length of stickout if you have to, but sometimes a #6 or #4 nozzle works better with about 15-20cfh gas flow, for inside corner or tubing joints, because you don't need as much stickout and it gets the cup closer to the work. If you can keep a steady hand, you don't need as much visual. I've found that as long as I can see the front of the puddle, I can tell how wide I'm letting it get with each bead.

I've found that if the weld looks dull, the gas flow is either too high or too low. I have a habit of running a short stickout length, so that usually doesn't need adjusting. I'm always on the conservative end with the gas flow, so I usually end up raising the flow or finding that I'm down around 12cfh at first, until the machine catches up with the gauges, once I turn it on. I always light up on scrap, first and get everything dialed in nice, before moving on to my work. That really helps.

I'll get some more pictures of the projects I'm working on, as soon as I have some more to show! I'm working on some turbocharger headers and an aluminum hat.
 
-
Back
Top