When I bought my Valiant about 2 years ago it had a rear end bearing noise. Since it's my daily driver and I didn't know which bearing it was or how to fix it then I just drove it instead. But recently the sound got louder and shifted in tone and I could hear that it was from the left outer wheel bearing.
I then knew that I could fix it by just press a new bearing on the axle shaft. But I found a big assortment of 7 1/4 parts: 3 housings (1 was shortened), 9 axle shaft with bearing in various condition, 2.94, 3.23, 3.55 ring and pinion gears. 1 cone diff that unfortunatly had the side gears welded to the carrier, 1 diff carrier with just 1 side gear welded to the carrier, 1 diff carrier that is working but the side gear and spider gears are a little worn. I bought all the parts cheaper then 2 new outer wheel bearing would cost. Plus I just changed from 185/70 R14 tires to 205/75 R14. So with the 2.76 gears my 225 Slant became pretty slow from stand still.
So I decided to rebuild a 7 1/4 on the cheap with 3.23 gears with all the parts I bought and learn something on the way.
Would love to put money in a 8 1/4 or 8 3/4 instead, but for the money I spent I'm pretty happy with the outcome! And for those like me that never done this before this is a guide how to do it somewhat right.
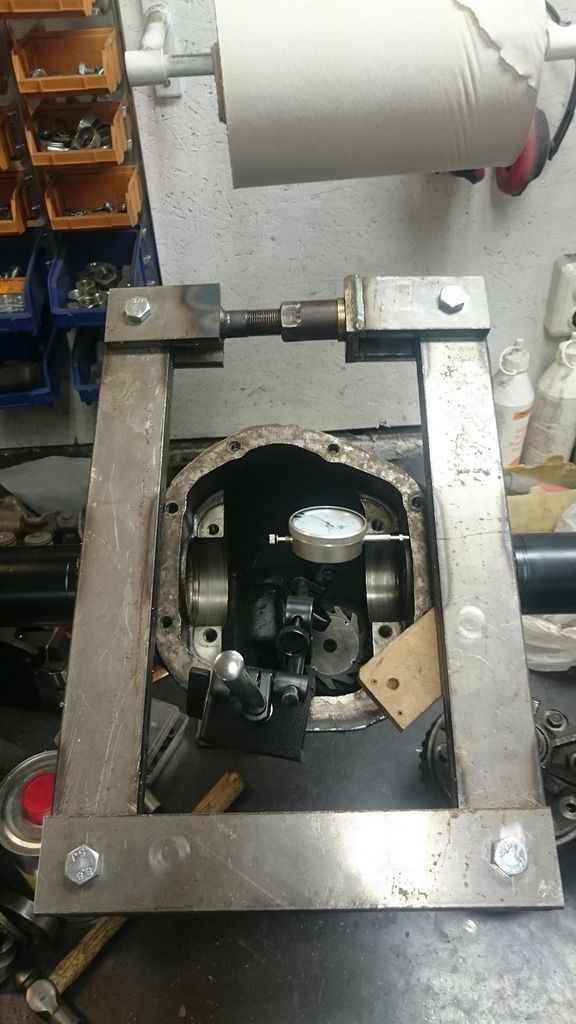
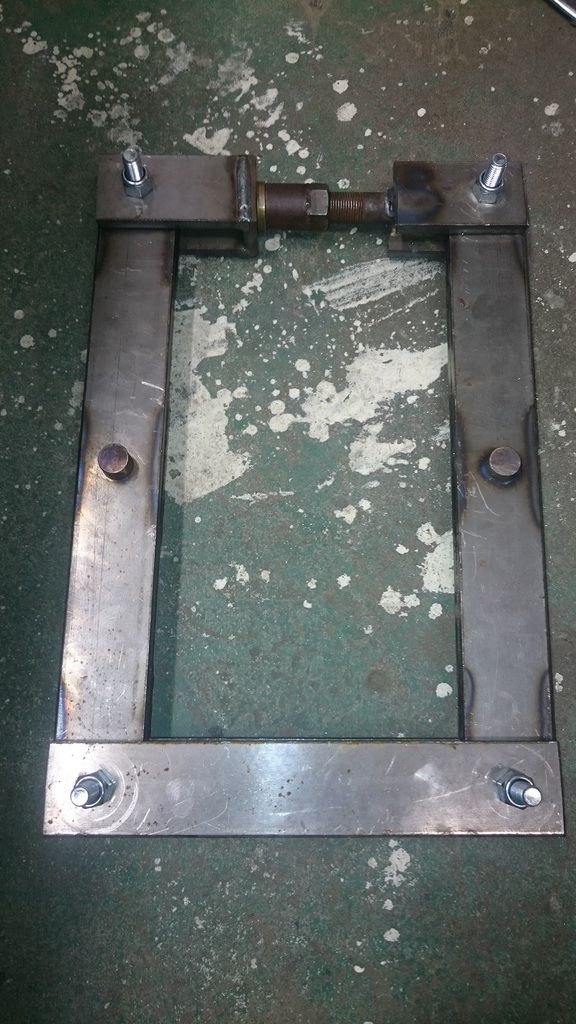
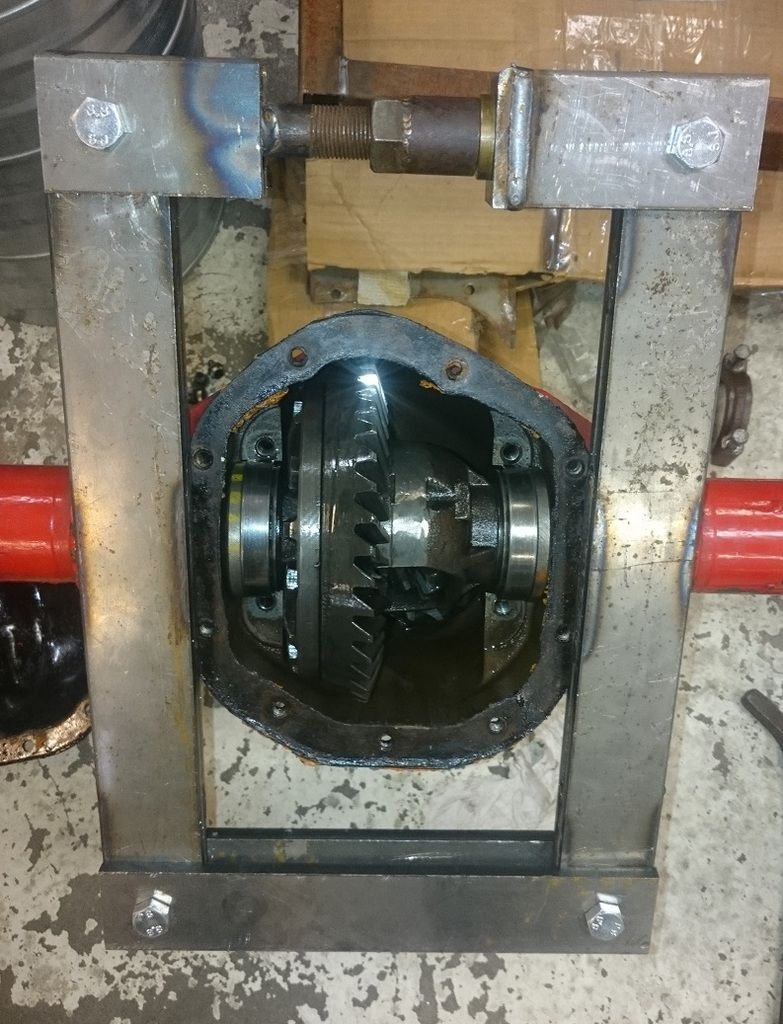
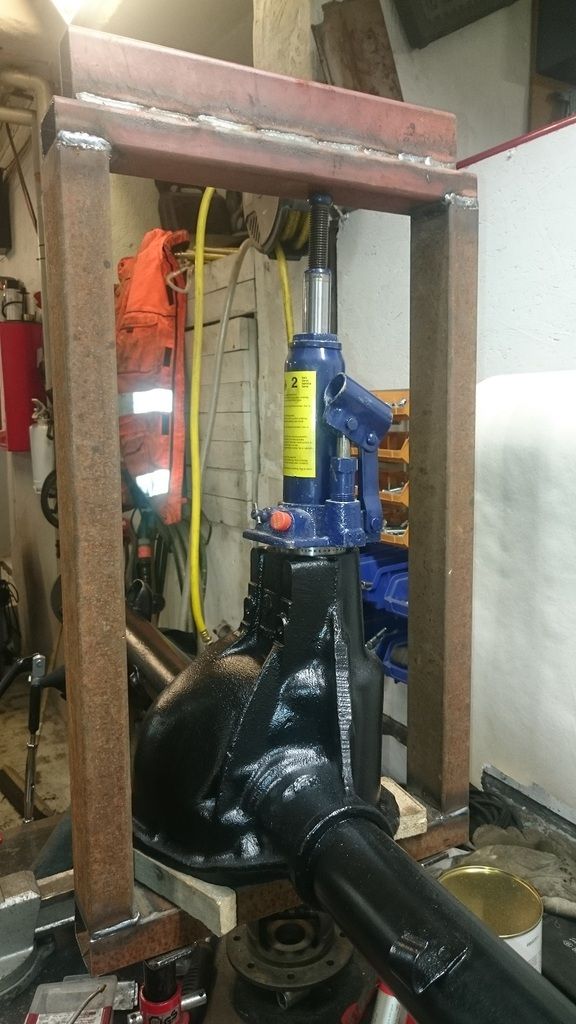
I started with making a case spreader so I could remove and install the diff carrier in the housing according to the service manual.
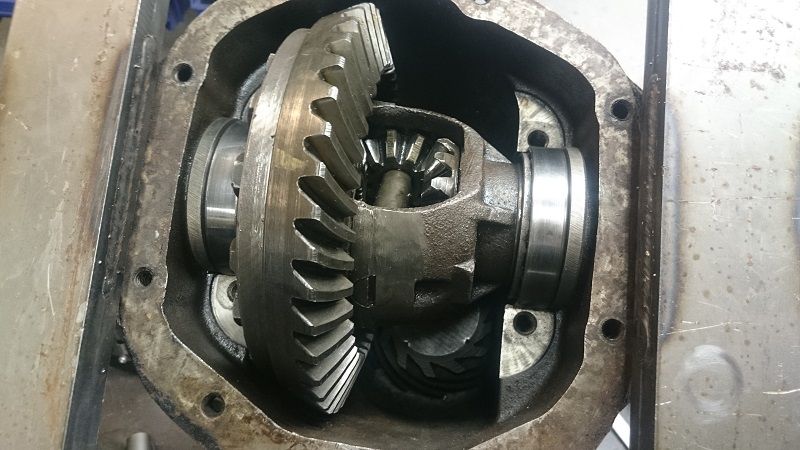
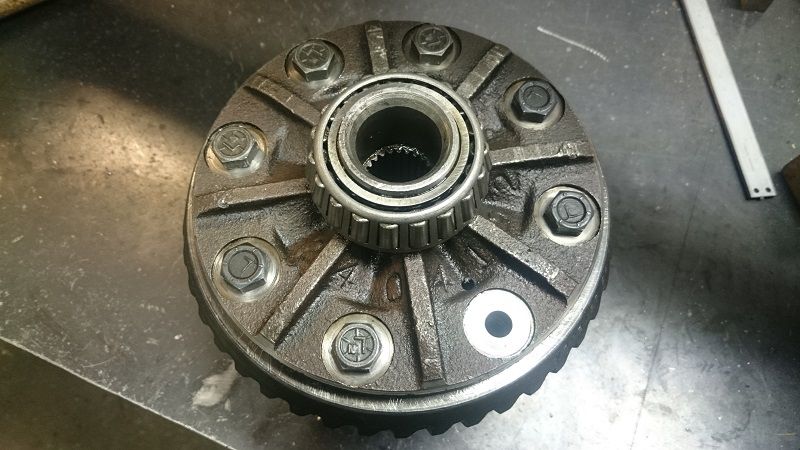
The carrier that I was going to use came out easy.
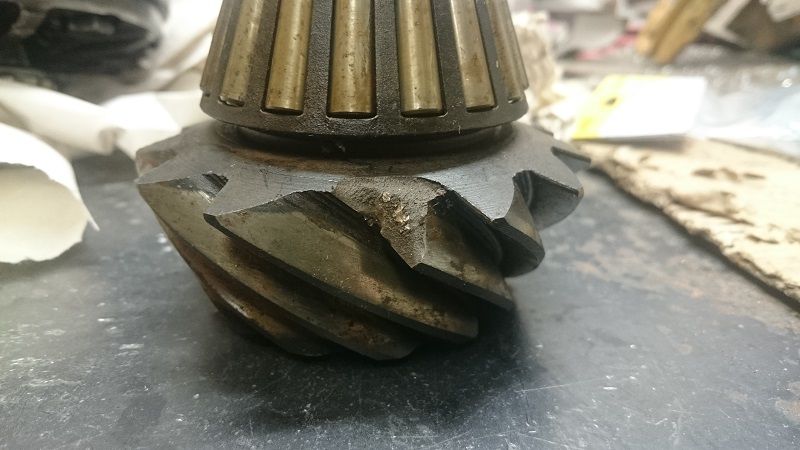
I pressed out the 3.23 pinion from one of the housing and I found 1 piece of the pinion tooth was missing. But I decided to use it anyway since I saw sign of use after the tooth was broken.
Since the inner pinion bearing was bad on the 3.23 pinion I made a clamshell bearing puller. So I could remove a good bearing from the 2.94 pinion.
Then I pressed the good bearing on to the 3.23 pinion.
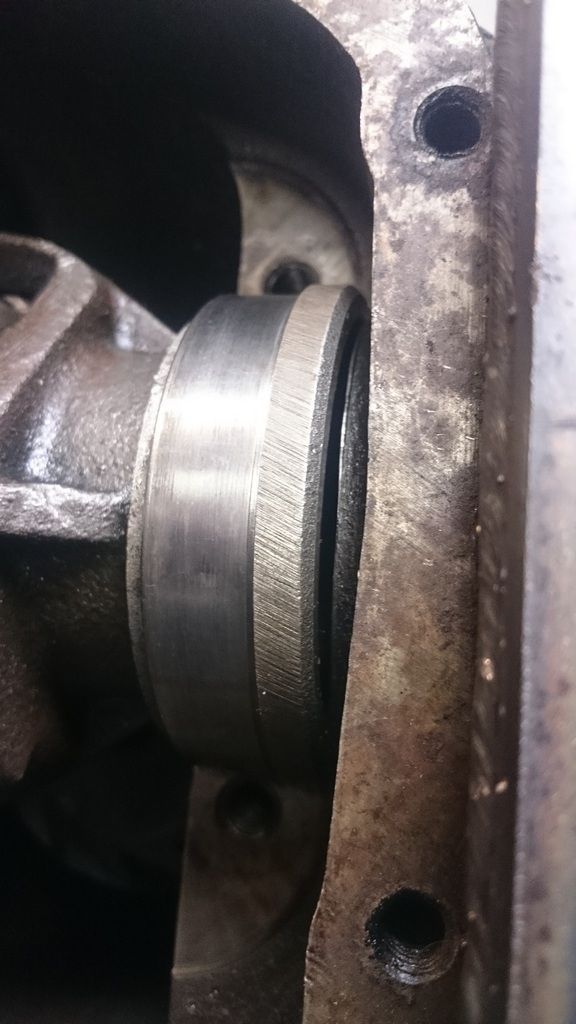
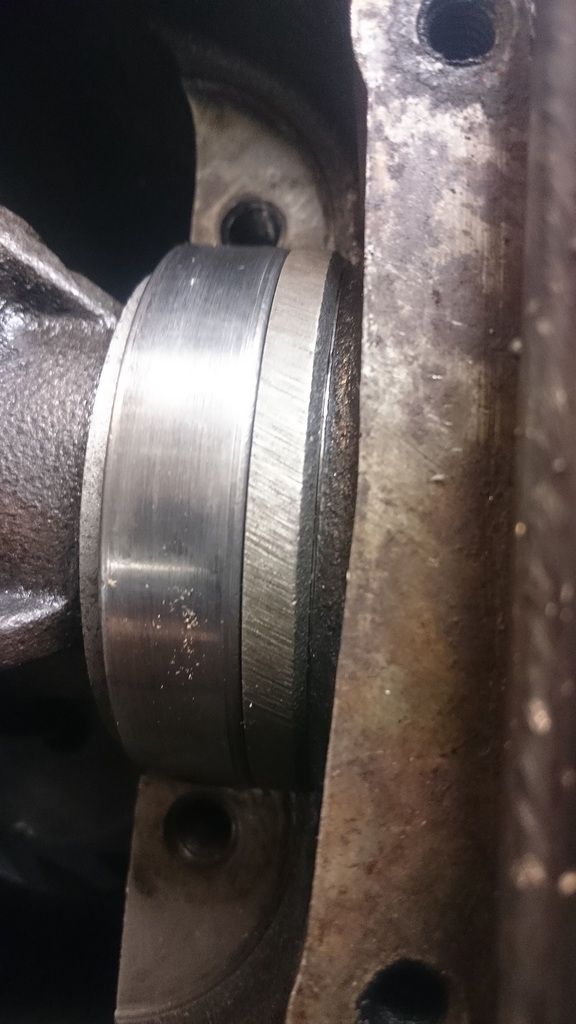
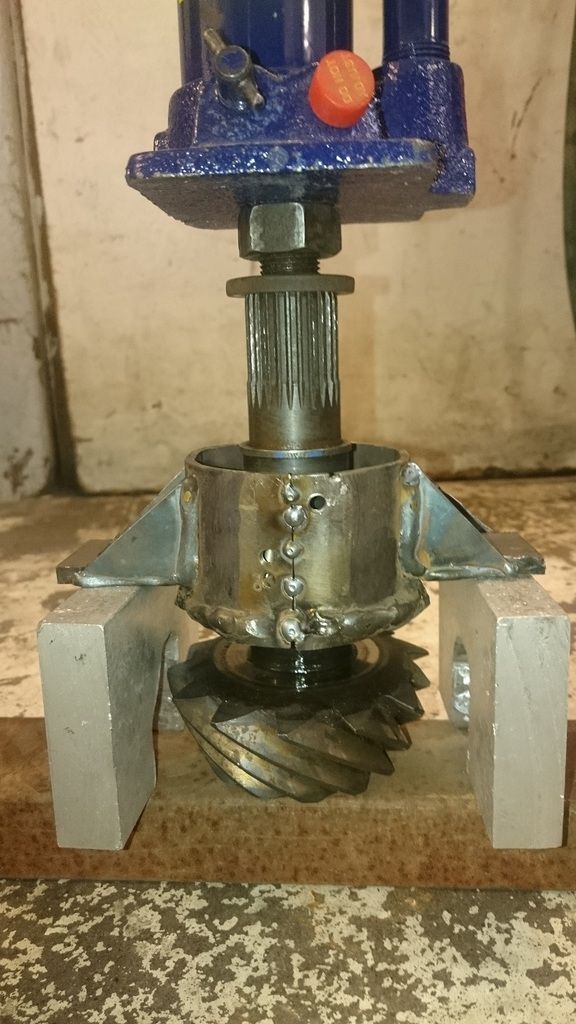
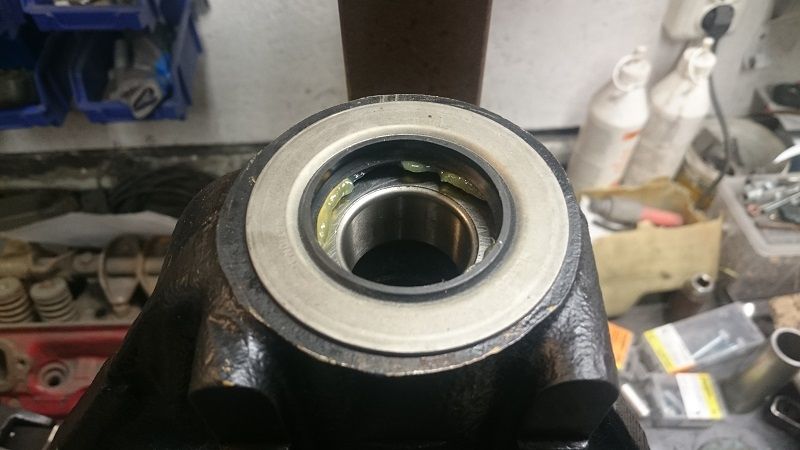
The outer pinion bearing was bad so I bought a new bearing and race. Here I press the race in place and using the old race as a driver. I had the race in the freezer so it went in real smooth with some oil.
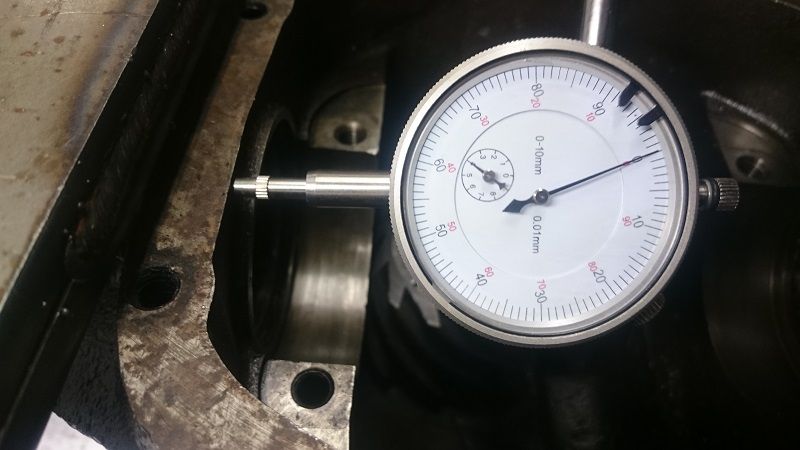
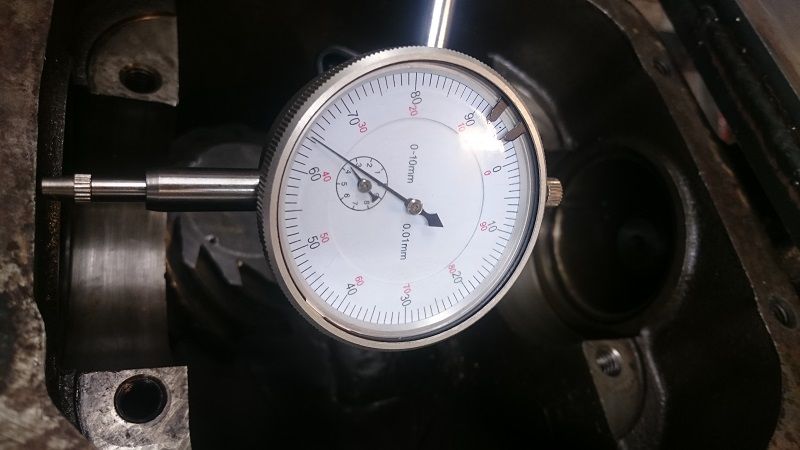
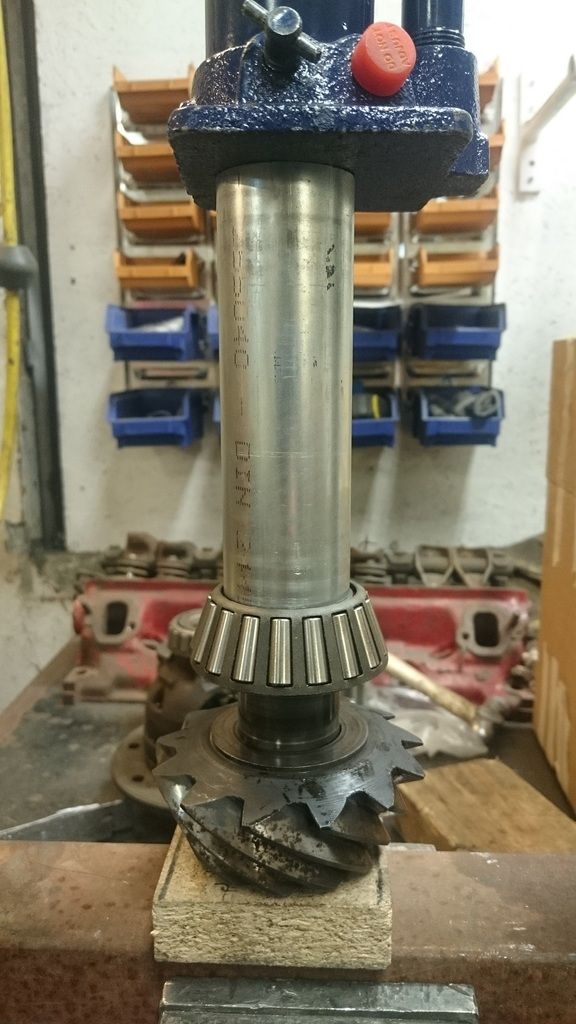
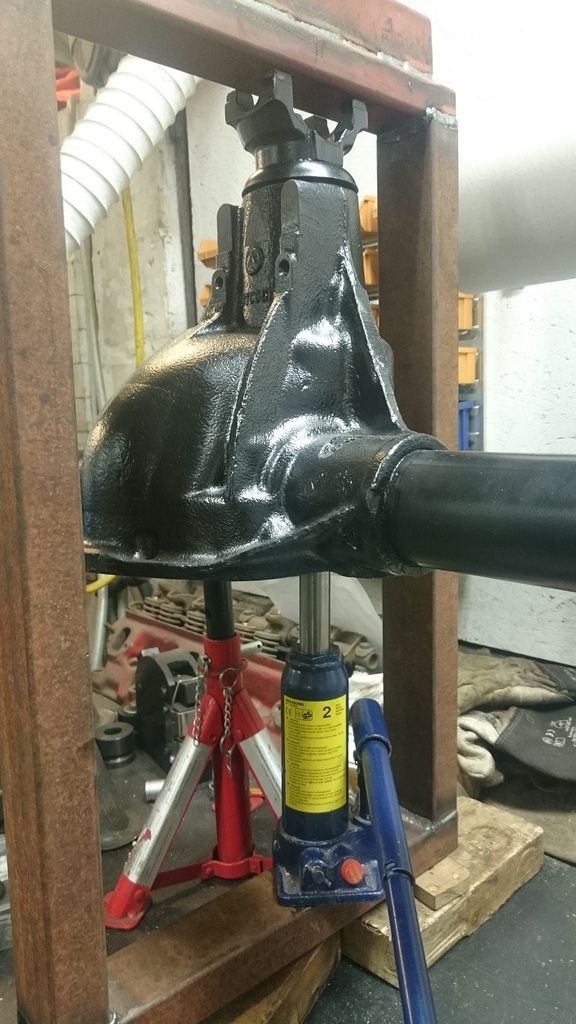
Here I press the pinion in place to check the pinion bearing preload. I think I pressed the pinion in and out 6 times until I could get the preload correct with shims.

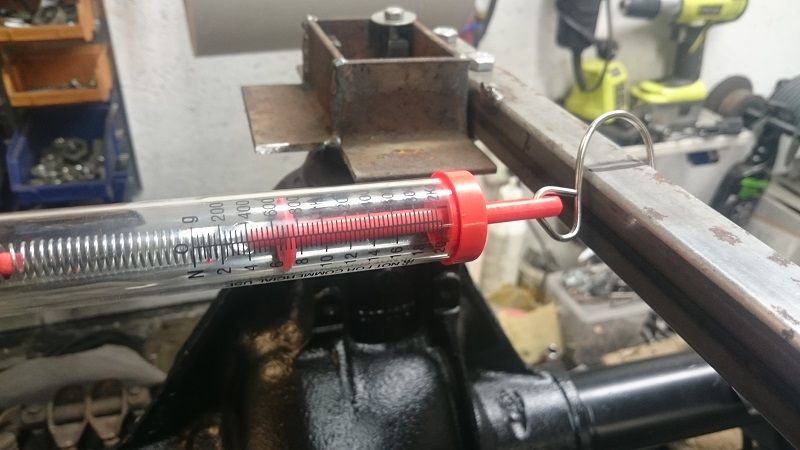
To check the pinion preload I just used a simple spring scale. Had to do some calculation to go from inch pounds to grams. Since I had 1 new and 1 used bearing I figured to have the preload between used and new. Found a list that said used bearing should have a preload between 6-7 inch pounds and new 12-14 inch pounds.
When I finally was happy with the preload and how the pinion turned I pressed everything off again to put a new pinion seal on.
And finally I pressed the pinion yoke on for the last time.
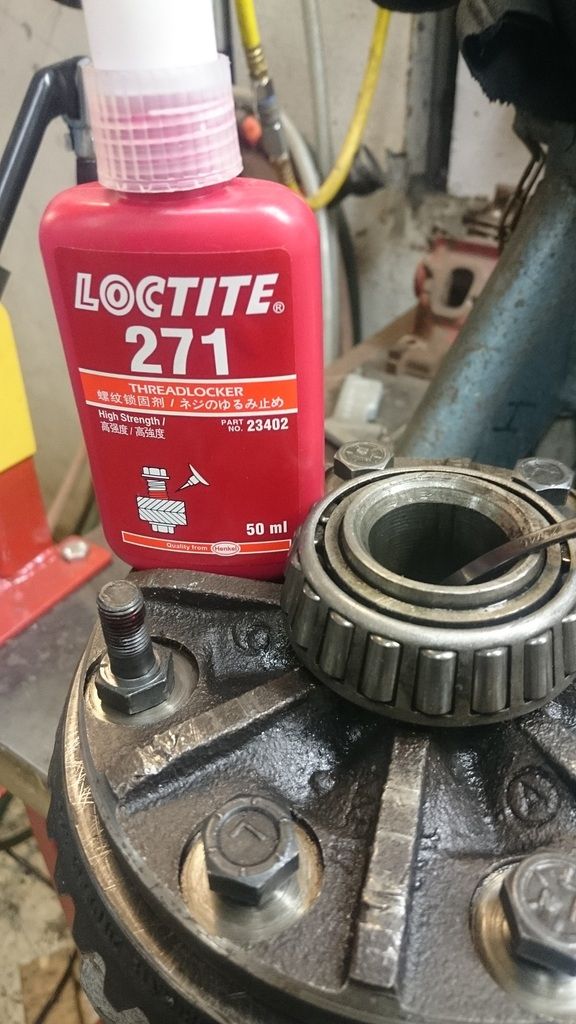
I tighten the pinion nut to 240 Nm which in this moment I realized is wrong and only 177 foot pounds. But I used loctite 271 on the threads and used solid shims and no crush sleeve so I feel confidence it will hold together.

I took a coarse file and runned over the ring gear flat area to check for any burrs. Then I put the ring gear on the carrier and screwed all bolts loosely in place to guide the ring gear when I pressed it in place. I used loctite 271 on the bolts and tighten them to 55 foot pounds. Remember that the ring gear bolts are left hand thread so you dont damage or brake them off when trying to remove them.
1 bolt hole was so damaged so it destroyed the bolt when I tried to screw it in. I feel like I have the odds against me, someone dont want me to use the 7 1/4")
I then knew that I could fix it by just press a new bearing on the axle shaft. But I found a big assortment of 7 1/4 parts: 3 housings (1 was shortened), 9 axle shaft with bearing in various condition, 2.94, 3.23, 3.55 ring and pinion gears. 1 cone diff that unfortunatly had the side gears welded to the carrier, 1 diff carrier with just 1 side gear welded to the carrier, 1 diff carrier that is working but the side gear and spider gears are a little worn. I bought all the parts cheaper then 2 new outer wheel bearing would cost. Plus I just changed from 185/70 R14 tires to 205/75 R14. So with the 2.76 gears my 225 Slant became pretty slow from stand still.
So I decided to rebuild a 7 1/4 on the cheap with 3.23 gears with all the parts I bought and learn something on the way.
Would love to put money in a 8 1/4 or 8 3/4 instead, but for the money I spent I'm pretty happy with the outcome! And for those like me that never done this before this is a guide how to do it somewhat right.
I started with making a case spreader so I could remove and install the diff carrier in the housing according to the service manual.
The carrier that I was going to use came out easy.
I pressed out the 3.23 pinion from one of the housing and I found 1 piece of the pinion tooth was missing. But I decided to use it anyway since I saw sign of use after the tooth was broken.
Since the inner pinion bearing was bad on the 3.23 pinion I made a clamshell bearing puller. So I could remove a good bearing from the 2.94 pinion.
Then I pressed the good bearing on to the 3.23 pinion.
The outer pinion bearing was bad so I bought a new bearing and race. Here I press the race in place and using the old race as a driver. I had the race in the freezer so it went in real smooth with some oil.
Here I press the pinion in place to check the pinion bearing preload. I think I pressed the pinion in and out 6 times until I could get the preload correct with shims.
To check the pinion preload I just used a simple spring scale. Had to do some calculation to go from inch pounds to grams. Since I had 1 new and 1 used bearing I figured to have the preload between used and new. Found a list that said used bearing should have a preload between 6-7 inch pounds and new 12-14 inch pounds.
When I finally was happy with the preload and how the pinion turned I pressed everything off again to put a new pinion seal on.
And finally I pressed the pinion yoke on for the last time.
I tighten the pinion nut to 240 Nm which in this moment I realized is wrong and only 177 foot pounds. But I used loctite 271 on the threads and used solid shims and no crush sleeve so I feel confidence it will hold together.
I took a coarse file and runned over the ring gear flat area to check for any burrs. Then I put the ring gear on the carrier and screwed all bolts loosely in place to guide the ring gear when I pressed it in place. I used loctite 271 on the bolts and tighten them to 55 foot pounds. Remember that the ring gear bolts are left hand thread so you dont damage or brake them off when trying to remove them.
1 bolt hole was so damaged so it destroyed the bolt when I tried to screw it in. I feel like I have the odds against me, someone dont want me to use the 7 1/4