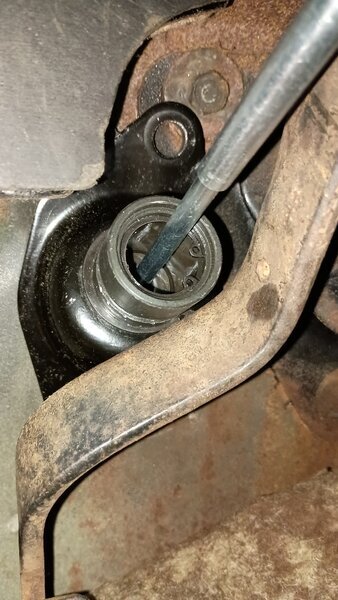
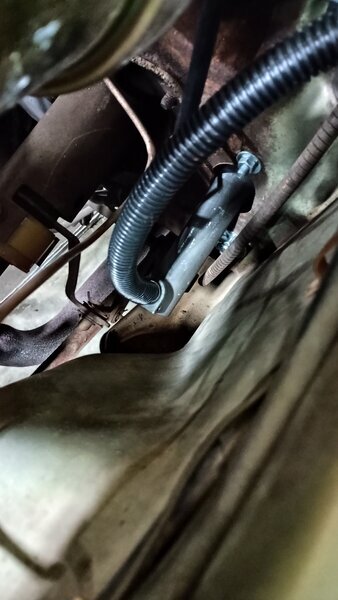
Alright, I have done some work today and think this is on a good track.
First of all, the Master has to be the Perfection Clutch Master, Part Number: 350113. This Master is made from cast metal instead of plastic, and allows the modification necessary, to make it work in an A body. I bought a Sachs pre-filled assembly, but I can not use the Master off it, because it has a different way of mounting to the bracket. I will see if I can take the line off it and mount it to the different Master.
Here is the correct Master:
Note the Cast metal look and the round base, where it connects to the bracket.
Here is the Sachs, it will not allow the necessary modifications:
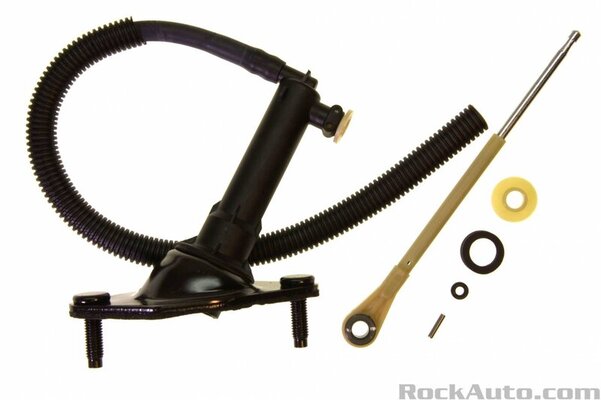
Note the base where it mounts to the bracket is different and made from plastic.
If you can find a different Dakota master than the one I have mentioned by part number, it should work, as long as it is Cast metal, and more importantly it secures to the bracket with a snap ring, instead of locking in with plastic.
Here is some pictures of how the WRONG Sachs Master mounts to the bracket:
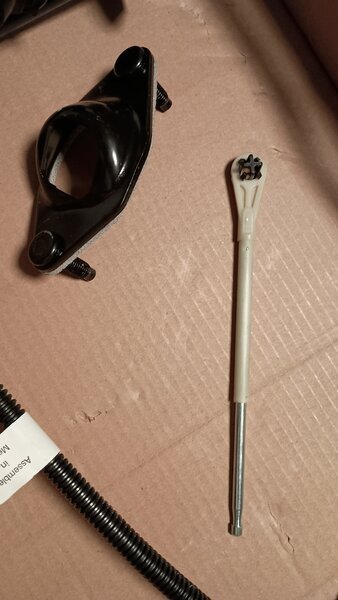
Note the Square hole in the bracket and the Square on the plastic Master
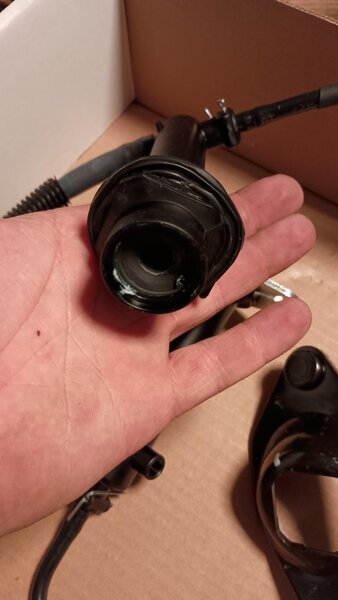
Again, this Master will not work. I will report back, if I can steal everything else off the Assembly to put on the Master I mounted on the car.
Now that is out of the way, here is what I have cobbled up today.
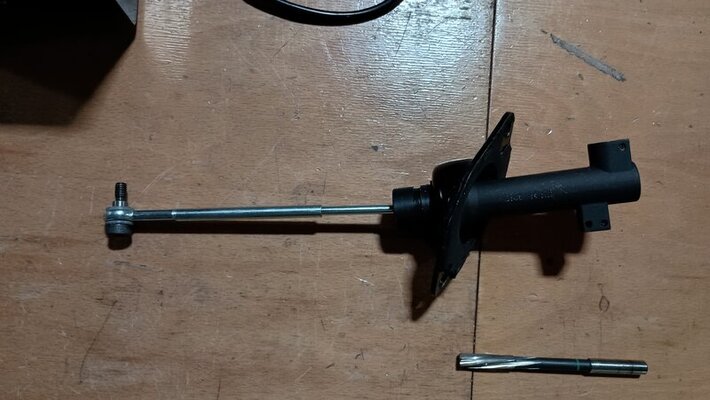
The first step is to remove the Master cylinder from the bracket. This is accomplished, by taking off the snap ring that holds the Cylinder in the bracket, and taking out the cylinder.
Now you can beat the mounting studs out of the bracket. They are pressed in and have a little swage lock, but putting the bracket in a vice and giving them a few healthy strikes with a hammer will get them out. Now you can put the Master back in from the other side and replace the snap ring. (See first picture for comparison)
Turning the Master around in the Bracket will give us two advantages. First, It will allow us to mount it from the inside of the firewall. I see this as an advantage, as now the whole surface of the flange dissipates the force on the firewall, instead of just the two bolts.
Secondly, and more importantly, it will give us the necessary clearance to the inner fender. It looks to be a tight fit, maybe even impossible to mount this master to the outside.
As you can see in the Picture I used a 10mm reamer to ream the plastic bushing in the end of the pushrod to accept a 10mm shoulder bolt. (Sorry in advance, I only work in metric when doing stuff like that, as that is what tools and materials I have at hand)
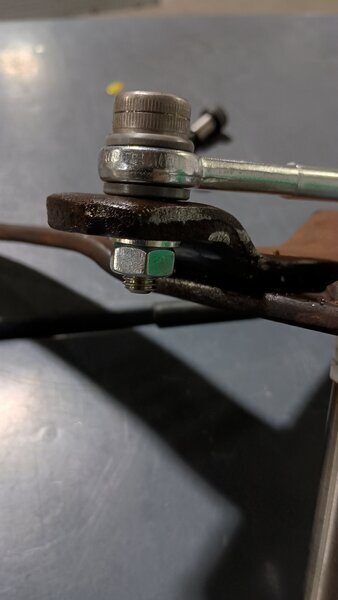
I also ground off the swaged end of the stud, to which the original pushrod attaches, and pressed it out of the pedal assembly. I then reamed out the hole to a 10H7 fit for the shoulder bolt. The shoulder bolt now passes through the bushing and pedal and the nut bottoms out on the Bolt itself. This seemed to be the best way of getting a fit with minimal play. I am very happy with this setup.
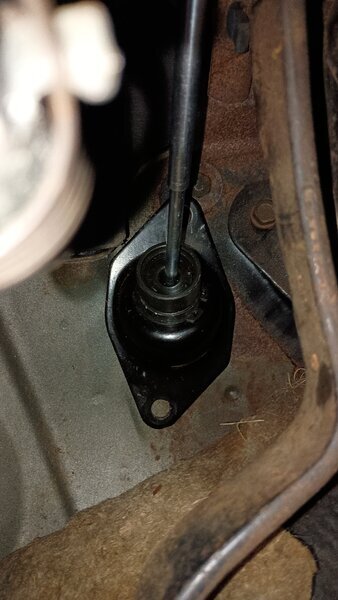
Next, I test-fitted everything. (Here you can see the retaining snap ring more clearly) I put the Master through the existing hole in the firewall for the clutch linkage and rotated it, until I was happy with the geometry of the cylinder to the pushrod. As the bracket has some sort of compound curve to it, you have quite a lot of adjustment by rotating it.
As you can see the next problem was that the mounting flange overlapped the Mounting plate for the column. To address this, I made some modifications to the Clutch bracket.
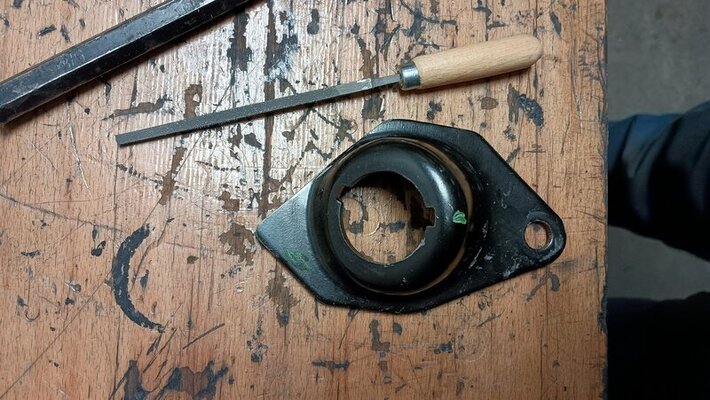
I cut off the upper mounting ear, to clear the column mounting plate. I also marked the bottom of the bracket in relation to the car and filed in a new notch. These notches are what locks the cylinder in rotation-wise. It has a tab on it that will only allow it to be mounted in a notch. Filing in a new notch makes sure that the fill and pressure port are straight up and down respectively.
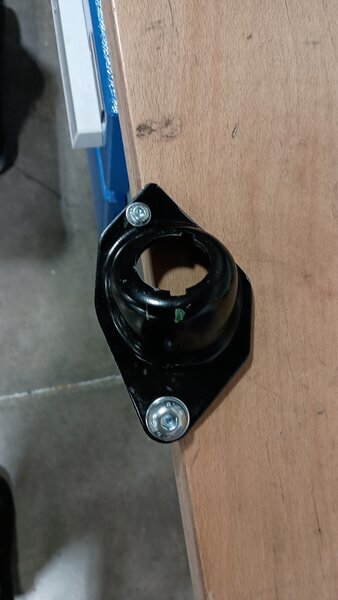
I drilled a new hole for mounting to the firewall. I chose to go with M6, as it does not need to hold much force, and there was not much room to go with anything bigger. It is offset to the left for accessibility when the pushrod is in the Cylinder. The lower hole is using an M10 bolt.
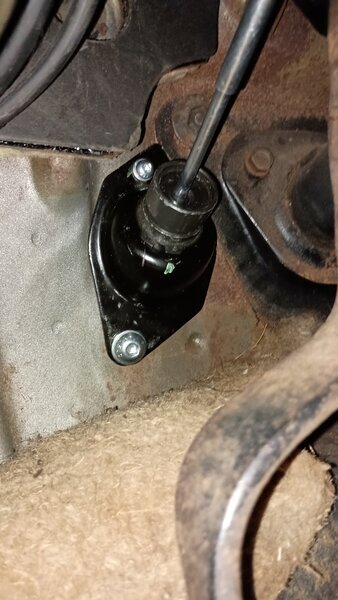
I then went back to the car, lined everything up again, marked the holes, drilled them out, and mounted the Master to the firewall. Interestingly the stock pushrod that came with the cylinder has a pretty good length. The pedal is a little lower than the brake pedal and hovers about 5 mm over the pedal stop when released.
I don't have a picture of it, but the rod does come into the master at an angle. There is still clearance to the bore through the full travel. Time will tell if this causes it to wear out in an unreasonable time.
I am pretty happy with how the pedal feels. It does bottom out against the firewall before it does in the cylinder, so I will have to see if the pushrod needs to be lengthened a little bit to get more throw on it, but that is something that I can only test when the transmission is in the car. This is by no means tested, so take everything I did with a grain of salt. It might not even work. Will report back after some further testing.

 Please document it all. Thanks


