I'm so confused! Summoning the FABO Wiper linkage Gurus .

-

AlV

Crabs in a barrel
Joined
Sep 24, 2012
Messages
1,753
Reaction score
350
Location
new jersey
Greetings,
I need help, yes I know what you're thinking but not kind of help :banghead:
My wiper linkage has got me baffled. I removed the linkage from the car (never actually saw the wipers work) to cleaned them up, install new bushings and send the motor out to passion4mopars to get rebuilt. It's a 3 speed motor with the variable switch in the 69 Dart.

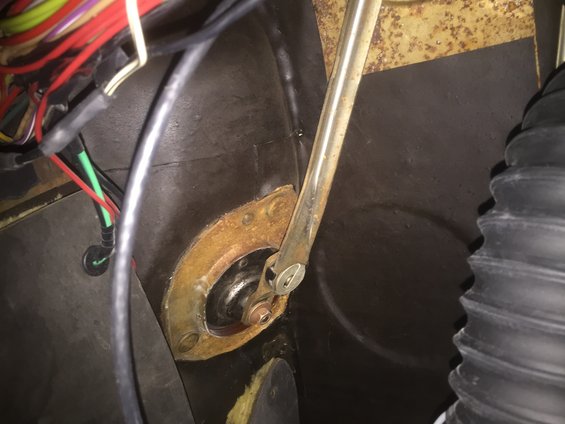
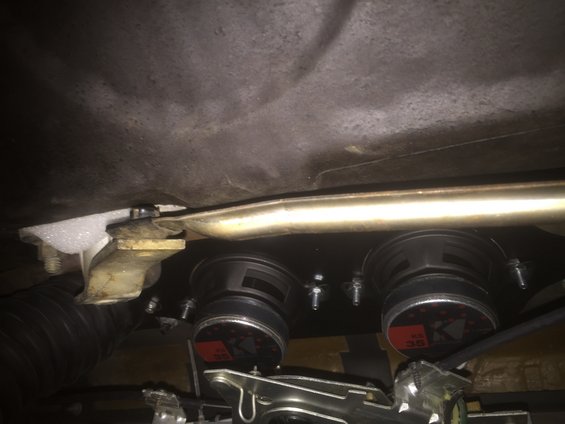
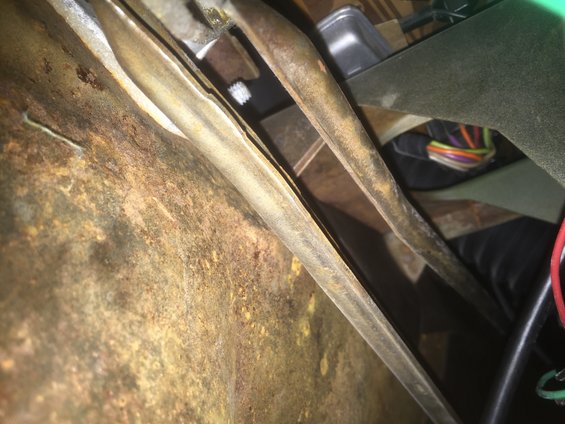
Got the motor back (looks Great!) and installed it back in the car. When I try to connect the linkage it doesn't line up! The link that connects the drivers pivot to the motor crank appears to be a half inch too long! How could this be? If I flip the crank 180 degrees I can connect the linkage but the assembly binds up.

These are the pieces I have:
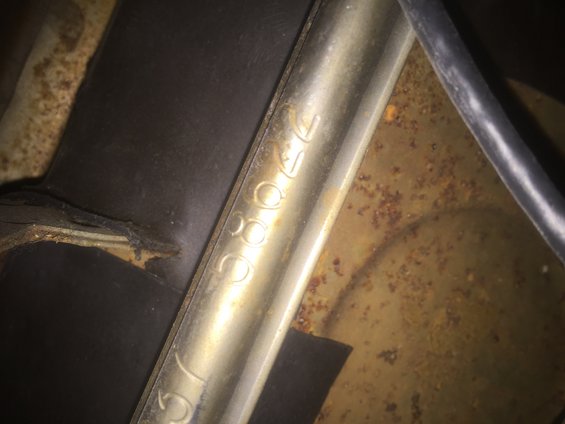
  • Crank link is a 2822272 with a "32" stamped on the front.
  • My Linkage reads 2857937

Do the cranks come in different lengths? Maybe this could be resolved with a shorter crank.
Or maybe the linkage itself can be replaced with a shorter arm.

I'm so confused!

Any thoughts?

Thanks
AlV
 
This may not help much but try it anyway (I suspect you already have)

Is it possible that you have the arm that goes from the motor to the linkages switched with the one that goes between the two wipers? (probably not)

Turn the motor on with nothing connected to it and then shut it off.
Make sure the wipers are in the fully down position and everything should go right together.
If not you have a wrong part there in either the arm on the motor, or the wrong motor to linkage arm.

Post pics so people who know the parts can see what you have.
Post the motor arm, the motor to linkage arm, and the wiper pivot to wiper pivot arm.

I suspect that you have part of an early system as well as part of a later system, and I believe you need the entire later system with the three speed.
 
Not sure about that part number but you have to have the correct crank for 3 speed motor. On second thought I believe the crank is the correct part number.
Do have the wiper arms installed? Also is the motor in the park position?
 
Is this any help? Let me know if its not and ill remove it


image.jpeg


Not sure the pic helps but maybe this will.

1. Install bushings in motor crank arm pin, position drive link on bushing so large side of pivot bushing faces away from drive crank arm. Large side of bushing will be on same side of link as crank arm retainer.

2. Install spring washer with convex side towards link and install retainer.

3. In heater equipped vehicles, insert drive link assembly under left side of panel, position crank arm on motor shaft, indexing flats on shaft with flats on arm and install retaining nut.

4. Insert connecting link into place with "R" (right side) and "L" (left side) facing instrument panel side. Press link bushings onto pivot crank pins.
 
Thanks for the feedback everyone!

Trail beast: I do believe the parts are assembled correctly mostly because the link that connects to the motor crank is the one with the big Hole for the busing.

And I'm posting some pics, hope help explain what I'm seeing.

Cudascott: I have the arms installed and the motor is in park. I know this is tru because I bench tested it and then followed the parking procedure prior to reinstalling. Take a look at the pictures.

71DodgeDemon340: taking all the info I can get thanks!

LJ67barracuda340: that kind of looks like mine what numbers are on those?
 

Attachments

  • 11009931_843186502430392_107957457201272795_n.jpg
    35.8 KB · Views: 261
  • 11698774_843186485763727_3846521732412128728_n.jpg
    35.9 KB · Views: 220
  • 6A60FE03-E366-40AA-8DA6-FC47BA7F572C_zps5ydzc1so.jpg
    55.4 KB · Views: 203
  • C342609B-571F-4362-8398-D015C61B914F_zpsliyy6jrj.jpg
    27.7 KB · Views: 228
  • 42A81DE1-60FC-416A-AB0A-F1AF6C503EFA.png_zpsqvj3k84q.jpg
    16.2 KB · Views: 228
  • C4CFC7F9-49A2-4CA7-BC0F-D250406A4059.png_zpsabxntvem.jpg
    16.1 KB · Views: 213
I'll take some more pics tomorrow if I can. You can change where the motor parks by loosening the 3 screws on the motor and rotating the cover. On mine there are some markings on the body and the cover for reference (like timing marks). Maybe it didn't end up in the same spot after the rebuild.
 
I'll take some more pics tomorrow if I can. You can change where the motor parks by loosening the 3 screws on the motor and rotating the cover. On mine there are some markings on the body and the cover for reference (like timing marks). Maybe it didn't end up in the same spot after the rebuild.

Cool. I didn't think you could adjust the park position I would appreciate instruction on that. I don't see that in the Manual
 
Ok bear with me lol


Heres the linkage going to the motor
Right of pic is toward the roof and left is toward the floor

image.jpeg


Linkage going from drivers to passenger wiper
Left lower corner of pic is drivers side right upper corner is passenger side
image.jpeg


Linkage and right wiper. Left side of pic is pass side, right sude is drivers. Pic taken upside down,
image.jpeg
 
Ok bear with me lol


Heres the linkage going to the motor
Right of pic is toward the roof and left is toward the floor

image.jpeg


Linkage going from drivers to passenger wiper
Left lower corner of pic is drivers side right upper corner is passenger side
image.jpeg

I have the same linkage 58622 is also stamped on mine.
Is there a difference between 2 speed and 3 speed linkage? the crank arm looks different for sure. Do I see a 2 speed motor there?
 
Sorry for the wierd angles, left linkage in both pics goes to motor, right linkage goes to pass wiper. Bottom of pic is toward floor, top of pic is toward the roof
image.jpeg


image.jpeg
 
2 speed and 3 speed linkages are the same. And cranks are for sure different between 2 speed and 3 speed motors. And looking at your pics adjusting the park position isn't going to help because the motor rotates 360 degrees so it will bind at that same point during operation.
 
2 speed and 3 speed linkages are the same. And cranks are for sure different between 2 speed and 3 speed motors. And looking at your pics adjusting the park position isn't going to help because the motor rotates 360 degrees so it will bind at that same point during operation.

I'm wondering if adjusting the parking position wouldn't help. When I was bench testing the motor I noticed that the shaft would move in to center when running then back out when going into park. It could be enough to run with out binding.

Question is can I adjusti the parking position and how does one make the adjustment.

This is a pic of my motor.
 

Attachments

  • 12654232_938680856214289_1633556719971115090_n.jpg
    61 KB · Views: 182
Here's some pics of the three speed setup in my 69' bee notice it has the same 5 digit part number on the linkage. I'm thinking you may have the wrong linkage. Here's some pics just for reference
 

Attachments

  • image.jpg
    16.2 KB · Views: 195
More pics
 

Attachments

  • image.jpg
    15.3 KB · Views: 171
Another
 

Attachments

  • image.jpg
    15.1 KB · Views: 189
I'm wondering if adjusting the parking position wouldn't help. When I was bench testing the motor I noticed that the shaft would move in to center when running then back out when going into park. It could be enough to run with out binding.

Question is can I adjusti the parking position and how does one make the adjustment.

This is a pic of my motor.

On that style motor the park positions are not really adjustable. If you look closely at the switch plate you'll see a small tab that is in a slot on the transmission housing if memory serves me right there are around 4 positions it can be placed in. It's usually a position for what body it was installed on. Like one notch for b body one for e body one for a body and maybe one for C body. I do think that the drag link between the pivots are the same for a and b bodies it's the link fron the motor crank arm to left side pivot that differs between body platforms.
 
Here's a pic of my 3 speed motor I restored for my bee you can see the notches I speak
of at the screw on the left in the pic. It looks like there are 5 park positions to choose from.
This one is in the slot for a b body.
 

Attachments

  • image.jpg
    17.2 KB · Views: 180
Here's a pic of my 3 speed motor I restored for my bee you can see the notches I speak
of at the screw on the left in the pic. It looks like there are 5 park positions to choose from.
This one is in the slot for a b body.
Here is a close up of my motor. Far as I can tell it looks like yours and the screw on the left is in the same position. This could mean mine is set up for a B body.
Do you agree? To adjust it is it simply a matter of removing the screw and placing it in either the hole or is it more involved?

Being cautious, not wanted my to do something silly to the expensive rebuild lol
 

Attachments

  • image.jpg
    15.2 KB · Views: 169
The screw it's self is not what moves. If you look closely at the switch plate near the said screw
u should see a small tab sticking out on the switch plate it will be in one of the notches on the housing
Near the screw in the left of the pic I will get some pics for you for illustration
 
-
Back
Top