Since I'm replacing my column shifter with a floor shifter, but also retaining my bench seat, I decided to fab my own shifter bracket. I didn't really want to wait to find one, and I figured it wouldn't be that hard to make. The real kicker is that it was generally done with hand tools. Here's the tools list:
Pliers
Tin snips
Sharpie markers
Tape measure
Straight edge (metal yardstick)
Dremel
Angle grinder (only to cut the flat metal fairly close to the shape)
Vise
Hammer
Dolly
File
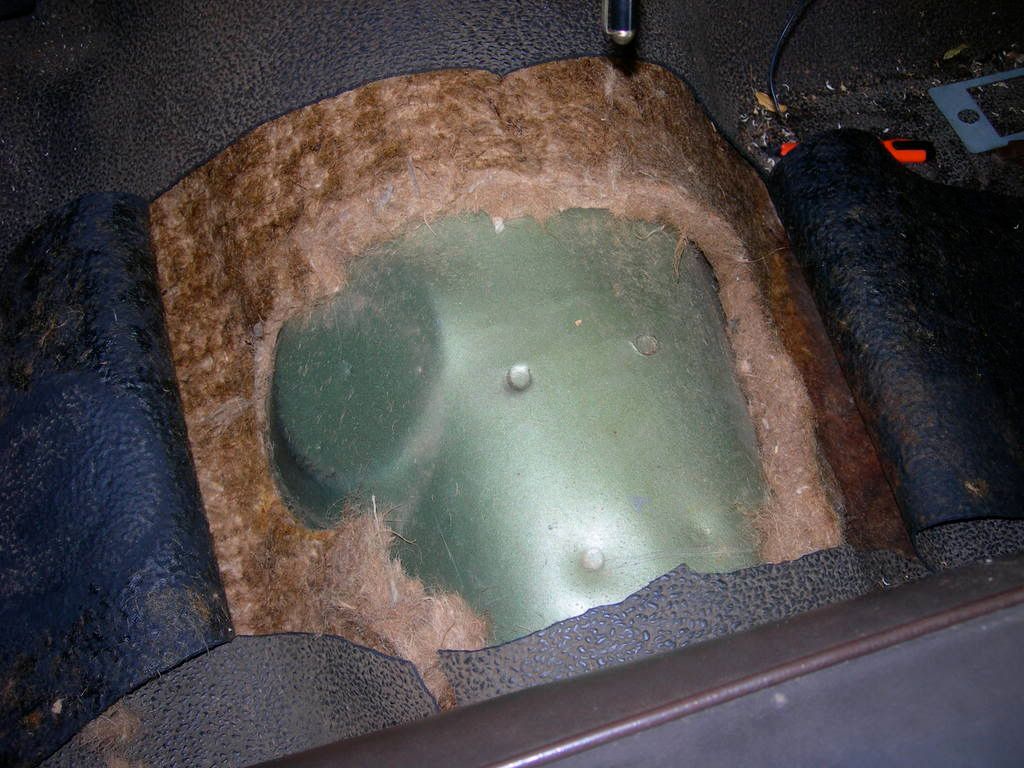
Here I cut the rubber floor mat apart and removed the jute to see what I had to work with:
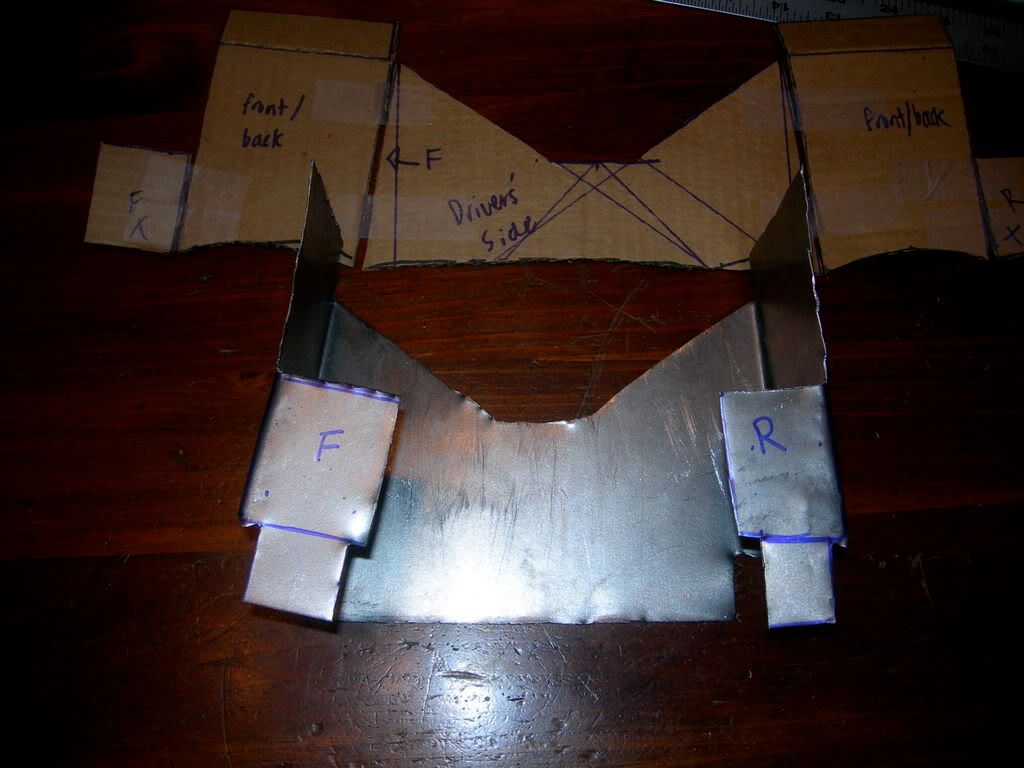
Then I made a template out of pieces of cardboard, after many measurements. After a test-fit on the transmission tunnel, I deemed it ready to go:

I traced the cardboard onto the 22ga sheet stock, and then straightened each line for precision. I then added the tabs, and it was ready to be cut out.
First I used the angle grinder to trim most of the excess metal away, making it easier to cut with tin snips. Then I used the tin snips to cut the shape precisely, using the dremel when I couldnt maneuver the tin snips well enough.
Then when it was all cut out, I used a file to dull the edges. I will go over it tomorrow with the dremel to smooth it out better. Once the edges were dull, I placed the piece in the bench vice at the locations of the bend, and used a hammer and dolly (the dolly acting as an extension for the part that was too long for the vice) to bend each side down to ninety degrees, working my way from the outside in.
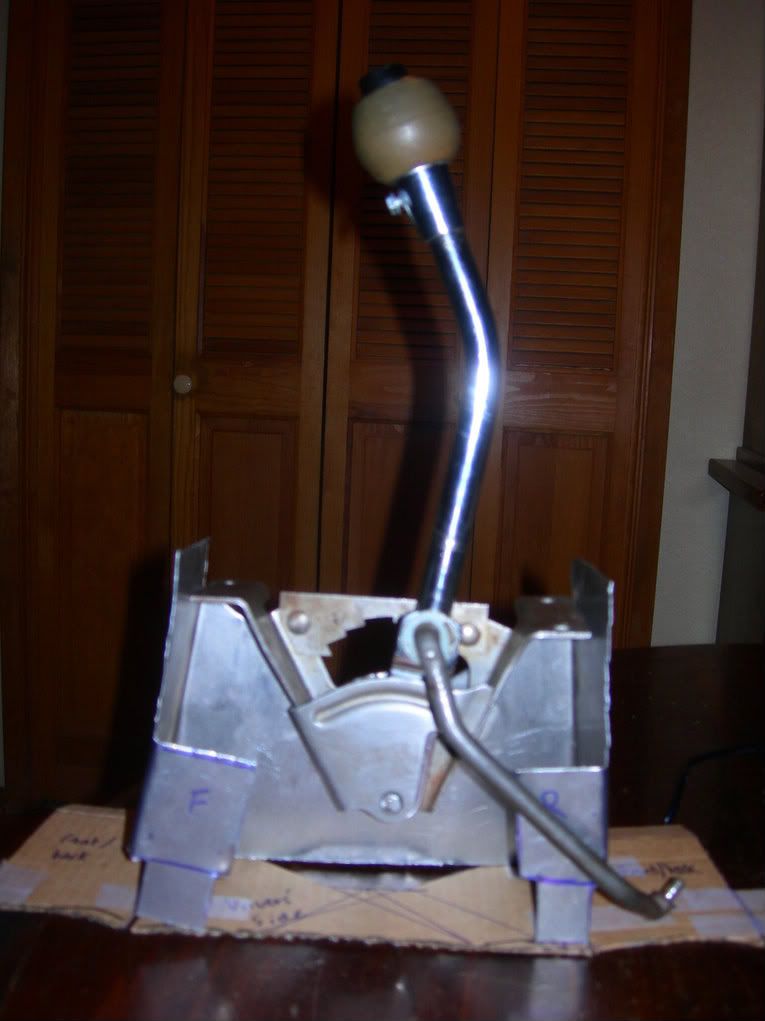
For my first bracket, I think it turned out okay. It will get smoothed, straightened, and primed for now, and will be put into the car with at least 7 bolts. Here are some pictures of the finished product:


The mounting tabs need to be bent, as do the shifter mounting tabs at the top. Also, I doubt anyone would need to, but I have the template still if anyone would like a copy of it. I can either trace it onto paper, or send you the original.
What do you think?")
Pliers
Tin snips
Sharpie markers
Tape measure
Straight edge (metal yardstick)
Dremel
Angle grinder (only to cut the flat metal fairly close to the shape)
Vise
Hammer
Dolly
File
Here I cut the rubber floor mat apart and removed the jute to see what I had to work with:
Then I made a template out of pieces of cardboard, after many measurements. After a test-fit on the transmission tunnel, I deemed it ready to go:
I traced the cardboard onto the 22ga sheet stock, and then straightened each line for precision. I then added the tabs, and it was ready to be cut out.
First I used the angle grinder to trim most of the excess metal away, making it easier to cut with tin snips. Then I used the tin snips to cut the shape precisely, using the dremel when I couldnt maneuver the tin snips well enough.
Then when it was all cut out, I used a file to dull the edges. I will go over it tomorrow with the dremel to smooth it out better. Once the edges were dull, I placed the piece in the bench vice at the locations of the bend, and used a hammer and dolly (the dolly acting as an extension for the part that was too long for the vice) to bend each side down to ninety degrees, working my way from the outside in.
For my first bracket, I think it turned out okay. It will get smoothed, straightened, and primed for now, and will be put into the car with at least 7 bolts. Here are some pictures of the finished product:
The mounting tabs need to be bent, as do the shifter mounting tabs at the top. Also, I doubt anyone would need to, but I have the template still if anyone would like a copy of it. I can either trace it onto paper, or send you the original.
What do you think?


