Logan
Well-Known Member
Took awhile but Im finally getting the underpinnings squared away. I couldnt have done it without all of the info on this site.
Ive read plenty of How Tos on FABO and dont expect to repeat much here but thought Id make observations for any Mopar nuts wanting to do similar modifications.
Removing undercoating- I first tried Jasco paint remover with limited success. Even with gloves and eye protection it was dangerous and just wasnt working. I ended up using my 4.5 grinder with a large diameter but very narrow heavy duty brush. It really ripped through the undercoating quite quickly. A full face mask and heavy gloves are a must. Try to do both sides during the same session because it makes a huge mess to clean up.
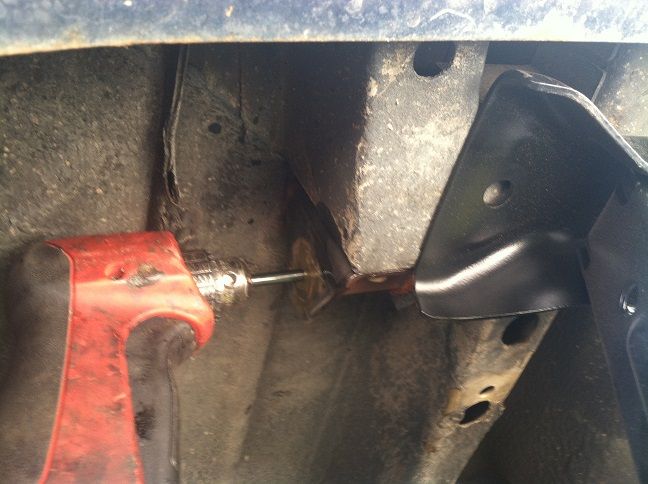
Rear Shackle mount- I wanted to move the springs in along the axis of the upper shackle bolt to maintain the exact same mounting point distance between the front and rear spring eyes. I did this by drilling out two 3/16 fender washers to 1/4, used a 1/4 bolt as a mandrel, chucked everything into a drill and turned the washers OD down with my bench grinder so they centered up perfectly on my old rear spring hanger. I brazed the washers to each side of the hanger and bolted the hanger in place. I put a long ¼ drill bit through the holes in the bracket, pushed the bit against the frame, attached a 90 degree drill motor and drilled a hole. This bit wasnt long enough to go through to the opposite side of the frame so I had to cut down another long drill bit to finish the job. Then, I used the holes for the pilot bit on a 1-3/8 hole saw to enlarge all the ¼ holes. A machinist buddy of mine made some sleeves that slipped into the holes snugly with a bore to accept the rubber bushings. Reinforcement plates finished the job off.
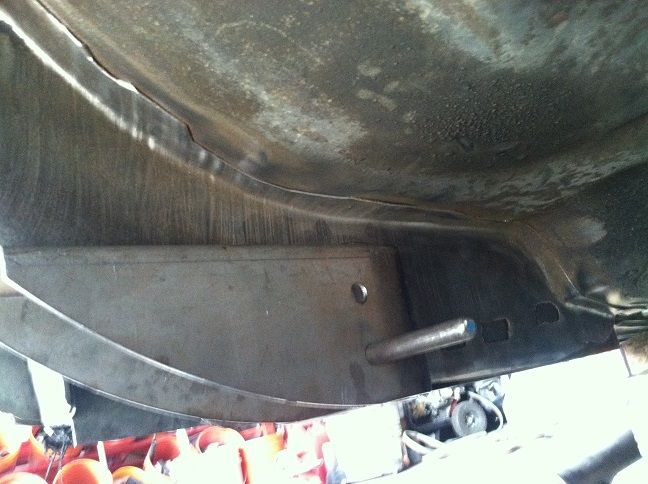
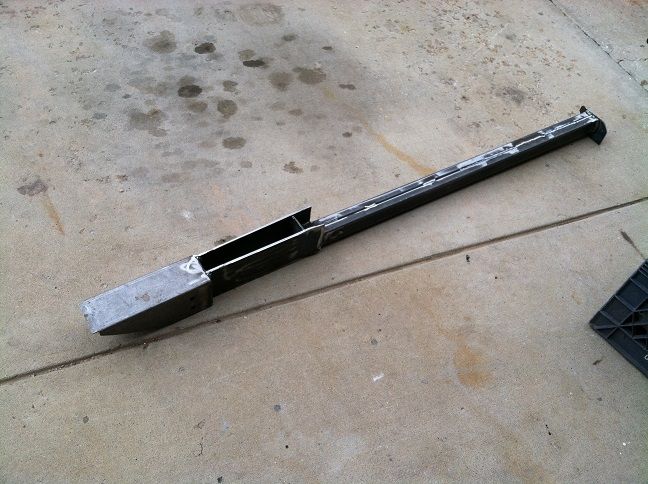
Locating the front spring eye- My bolts were ½ diameter so I just used 1 ½ rod, put it through the holes on the original hanger and the holes in the spring relocate bracket and slid it in the same amount as the rear mount was moved and welded the bracket to the frame stiffeners- not to the car yet.
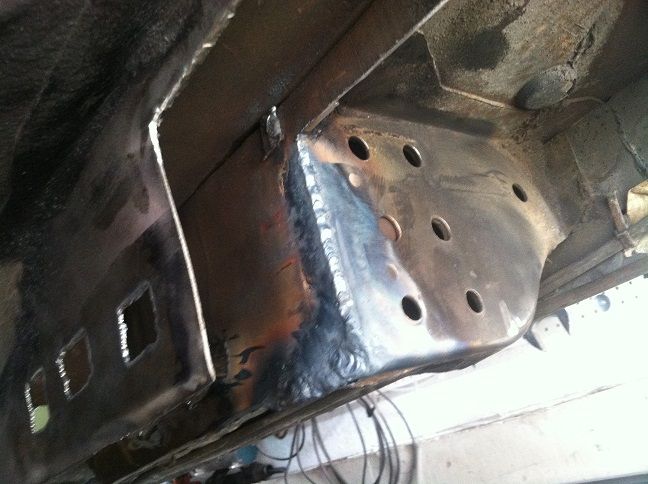
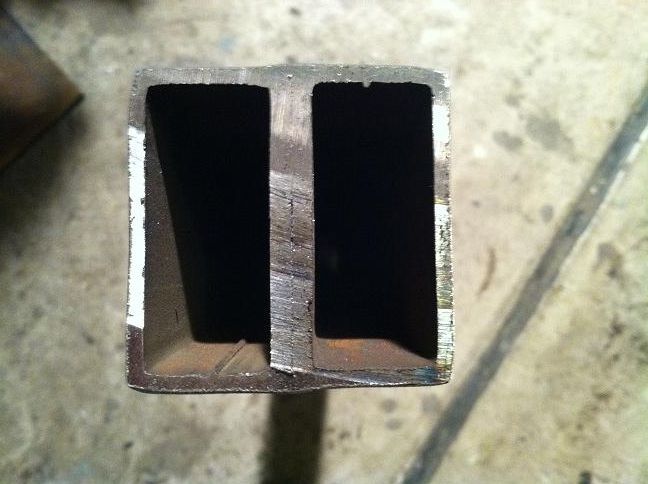
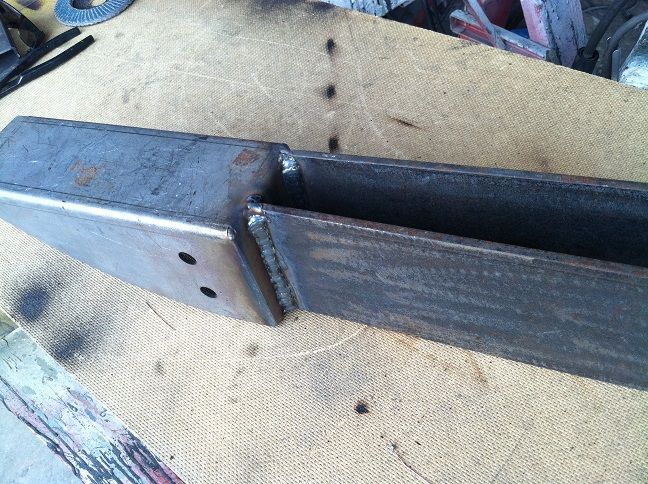
Frame stiffeners- I decided to use two rectangular tubes for each side (1 x 2) for enhanced strength skip welded together. (Together. They were 2 x 2.) They poke through the floor in the rear passenger compartment but not by much. I tied the stiffeners directly to the spring relocate bracket at the rear. The stiffeners were tacked together in place, then removed for welding. They were then jacked straight up into place. With a ½ rod placed through the old and new front spring hangers the whole assembly was final welded to the floor and front cross member.
Relocating the rear end- I read where there were clearance problems for tall tires at the front of the wheel opening so I decided to move the rear back 1. I talked with the local spring shop and they recommended redrilling the center bolt hole in the main leaf (only) back one inch and reassembling the spring. I expect it will work just fine. If I had it to do over, I would only have gone ½ to make the other adjustments less severe (shock mounts, hydraulic brake hose, rubber snubbers, etc.).
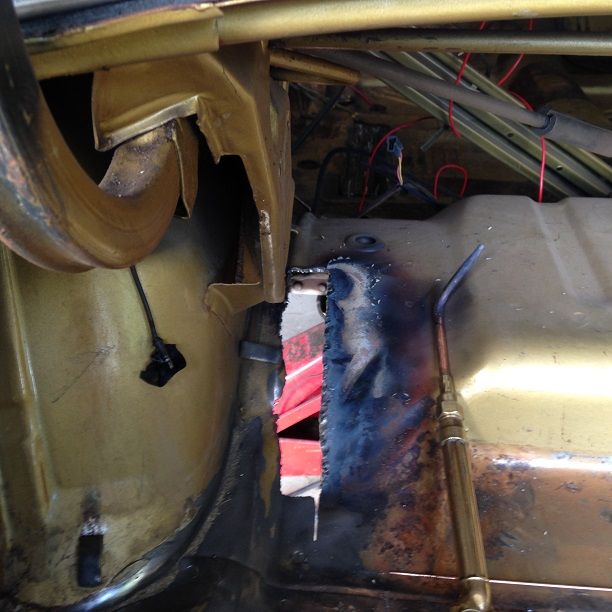
Reducing distortion in the trunk floor- I learned from reading other posts not to make a long cut in the trunk floor adjacent to the frame or else the floor will become unmanageable. I made a cut just a few inches long, cut away at the sheet metal that was about to be scrapped anyway which made enough room to weld the floor to the frame. I repeated this several times until the floor was completely welded to the frame without distortion.
Patches for the mini tub gap- My neighbor is a body man and I asked if he could drop off some patch metal for me. He gave me some door skins from typical modern cars which I used but wished I had metal from an older vehicle without any rust proofing. The welds showed the tell tale smokey white residue indicating the presence of zinc which made welding more difficult. When the wheel house was out of the car, I noticed tire rub marks in the under coating. Recognizing this would be the most likely spot for tire rub, I decided to tilt the wheel houses in at the top toward the center of the car just a bit. The gap where the patches were added were 3-3/8 near the trunk floor and 4-1/8 at the top. Trying to butt weld patches in place is almost impossible with sheet metal that is so thin. I ended up making patches that overlapped about ¼. I found gas welding to be easiest for most places. The mig worked best where the metal was thicker.
8-3/4 Rear end- I was lucky to find a rear from a 67 Coronet . This saved me a ton of $. No narrowing or special axles. The wheels, however, will need a ton of back space which I dont particularly care for.
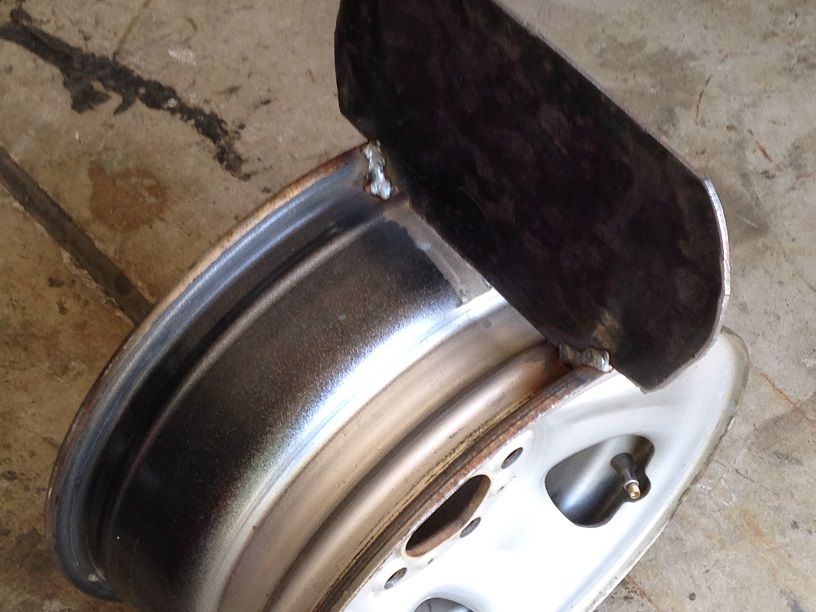
Measuring wheel offset- I made a dummy rear end that fastened to the front spring hangers. The assembly could be jacked up and down and the axles slid in and out so I could see clearances around a dummy tire. The tire was a flat plate welded to an old rim. Dimensions for the 275-60/15 tire came from the Tire Rack web site. Centered in the wheel well, the tire had just about 1-5/8 minimum space before rubbing on either side. I recorded the following dimensions (71 Swinger):
Spring center bolt to spring center bolt- 35-1/2 (After modifications)
Rear Housing flange to flange 54-7/32
Axles in place and end play eliminated- 59-3/8 flange to flange
Center of tire to center of tire- 52-9/16
I find it easier to think in terms of offset rather than backspace. Zero offset is where the axle flange is half way into the rim. Positive offset is when the mounting flange is away from the car and negative offset when the flange is closer to the suspension. So, based on the dimensions above, it looks like I need wheels with a positive offset close to 3-13/32. I plan to use 10 wide wheels.
Winter projects include rear sway bar, 4 speed auto trans mount, gas tank and fuel lines. Planning for MegaSquirt throttle body injection, and ignition.
Ive read plenty of How Tos on FABO and dont expect to repeat much here but thought Id make observations for any Mopar nuts wanting to do similar modifications.
Removing undercoating- I first tried Jasco paint remover with limited success. Even with gloves and eye protection it was dangerous and just wasnt working. I ended up using my 4.5 grinder with a large diameter but very narrow heavy duty brush. It really ripped through the undercoating quite quickly. A full face mask and heavy gloves are a must. Try to do both sides during the same session because it makes a huge mess to clean up.
Rear Shackle mount- I wanted to move the springs in along the axis of the upper shackle bolt to maintain the exact same mounting point distance between the front and rear spring eyes. I did this by drilling out two 3/16 fender washers to 1/4, used a 1/4 bolt as a mandrel, chucked everything into a drill and turned the washers OD down with my bench grinder so they centered up perfectly on my old rear spring hanger. I brazed the washers to each side of the hanger and bolted the hanger in place. I put a long ¼ drill bit through the holes in the bracket, pushed the bit against the frame, attached a 90 degree drill motor and drilled a hole. This bit wasnt long enough to go through to the opposite side of the frame so I had to cut down another long drill bit to finish the job. Then, I used the holes for the pilot bit on a 1-3/8 hole saw to enlarge all the ¼ holes. A machinist buddy of mine made some sleeves that slipped into the holes snugly with a bore to accept the rubber bushings. Reinforcement plates finished the job off.

Locating the front spring eye- My bolts were ½ diameter so I just used 1 ½ rod, put it through the holes on the original hanger and the holes in the spring relocate bracket and slid it in the same amount as the rear mount was moved and welded the bracket to the frame stiffeners- not to the car yet.


Frame stiffeners- I decided to use two rectangular tubes for each side (1 x 2) for enhanced strength skip welded together. (Together. They were 2 x 2.) They poke through the floor in the rear passenger compartment but not by much. I tied the stiffeners directly to the spring relocate bracket at the rear. The stiffeners were tacked together in place, then removed for welding. They were then jacked straight up into place. With a ½ rod placed through the old and new front spring hangers the whole assembly was final welded to the floor and front cross member.


Relocating the rear end- I read where there were clearance problems for tall tires at the front of the wheel opening so I decided to move the rear back 1. I talked with the local spring shop and they recommended redrilling the center bolt hole in the main leaf (only) back one inch and reassembling the spring. I expect it will work just fine. If I had it to do over, I would only have gone ½ to make the other adjustments less severe (shock mounts, hydraulic brake hose, rubber snubbers, etc.).
Reducing distortion in the trunk floor- I learned from reading other posts not to make a long cut in the trunk floor adjacent to the frame or else the floor will become unmanageable. I made a cut just a few inches long, cut away at the sheet metal that was about to be scrapped anyway which made enough room to weld the floor to the frame. I repeated this several times until the floor was completely welded to the frame without distortion.

Patches for the mini tub gap- My neighbor is a body man and I asked if he could drop off some patch metal for me. He gave me some door skins from typical modern cars which I used but wished I had metal from an older vehicle without any rust proofing. The welds showed the tell tale smokey white residue indicating the presence of zinc which made welding more difficult. When the wheel house was out of the car, I noticed tire rub marks in the under coating. Recognizing this would be the most likely spot for tire rub, I decided to tilt the wheel houses in at the top toward the center of the car just a bit. The gap where the patches were added were 3-3/8 near the trunk floor and 4-1/8 at the top. Trying to butt weld patches in place is almost impossible with sheet metal that is so thin. I ended up making patches that overlapped about ¼. I found gas welding to be easiest for most places. The mig worked best where the metal was thicker.
8-3/4 Rear end- I was lucky to find a rear from a 67 Coronet . This saved me a ton of $. No narrowing or special axles. The wheels, however, will need a ton of back space which I dont particularly care for.
Measuring wheel offset- I made a dummy rear end that fastened to the front spring hangers. The assembly could be jacked up and down and the axles slid in and out so I could see clearances around a dummy tire. The tire was a flat plate welded to an old rim. Dimensions for the 275-60/15 tire came from the Tire Rack web site. Centered in the wheel well, the tire had just about 1-5/8 minimum space before rubbing on either side. I recorded the following dimensions (71 Swinger):
Spring center bolt to spring center bolt- 35-1/2 (After modifications)
Rear Housing flange to flange 54-7/32
Axles in place and end play eliminated- 59-3/8 flange to flange
Center of tire to center of tire- 52-9/16
I find it easier to think in terms of offset rather than backspace. Zero offset is where the axle flange is half way into the rim. Positive offset is when the mounting flange is away from the car and negative offset when the flange is closer to the suspension. So, based on the dimensions above, it looks like I need wheels with a positive offset close to 3-13/32. I plan to use 10 wide wheels.

Winter projects include rear sway bar, 4 speed auto trans mount, gas tank and fuel lines. Planning for MegaSquirt throttle body injection, and ignition.


