You are using an out of date browser. It may not display this or other websites correctly.
You should upgrade or use an alternative browser.
You should upgrade or use an alternative browser.
Modified Z-bar for Doug's Headers (pic)
- Thread starter domdart
- Start date
-
Well done.
Not hard to do with a persuader.")
Not hard to do with a persuader.
mpaahana23
Well-Known Member
mpaahana23
Well-Known Member
a body special z bar
What is that? Sure isn't a SB z bar. Probably a BB bar.
Ironmike
Well-Known Member
What is that? Sure isn't a SB z bar. Probably a BB bar.
Hey man that's how mine looked after cutting and re-welding. Mine's a smallblock.
mpaahana23
Well-Known Member
Z bar from tti headers
mpaahana23
Well-Known Member
Z bar from tti headers sb
I agree, mine had to be cut and re-welded. One of the arms gets flipped over, not going to do that with a hammer and vise.
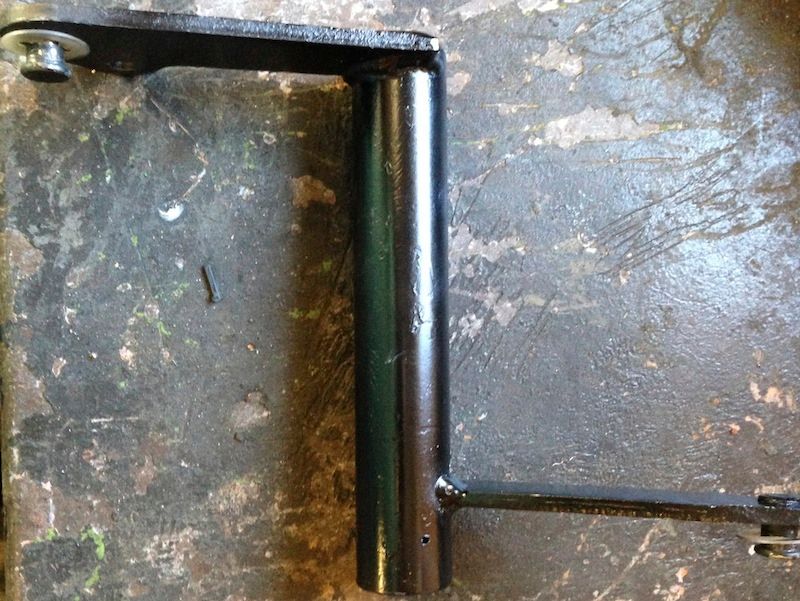
Instructions are in the PDF I attached, it shows the difference between the stock and the modified z-bar. It's a really tight window to get it to clear. I labeled it for Doug's because that's what I have, but it's basically the same for the TTI headers. I actually think I downloaded this off the TTI site awhile back.
Instructions are in the PDF I attached, it shows the difference between the stock and the modified z-bar. It's a really tight window to get it to clear. I labeled it for Doug's because that's what I have, but it's basically the same for the TTI headers. I actually think I downloaded this off the TTI site awhile back.
Attachments
JoesEdge
Well-Known Member
I agree, mine had to be cut and re-welded. One of the arms gets flipped over, not going to do that with a hammer and vise.
Instructions are in the PDF I attached, it shows the difference between the stock and the modified z-bar. It's a really tight window to get it to clear. I labeled it for Doug's because that's what I have, but it's basically the same for the TTI headers. I actually think I downloaded this off the TTI site awhile back.
That's kinda how mine looks like after I got done with it. The only difference is that I didn't flip the stud around.
Here's the trick I used when I did mine.
I cut the lower leg off and then installed the Z-bar long with the top pushrod. I pulled the Z-bar back (i.e. rotating it back towards the rear of the car) using a bungee cord. This causes the clutch pedal, pushrod, and top leg of the z-bar to be tight to eliminate any slop.
I got back under the car and started positioning the lower leg. Basically, I just had to slide it as far towards the center of the car as possible. It was basically almost at the end of the Z-bar tube.
Not only did I slide it over, but I also angled it on the tube as far forward (i.e. toward the front of the car) as possible. I think mine came pretty close to touching my mini-starter. This will make it so that the lower clutch adjusting rod isn't too short (i.e. so that the nut isn't all the way towards the front of the car).
Its pretty tight in that area between the header tubes and bell housing, but try to mark the position of where you have the lower leg of the Z bar. Once you have it clearly marked where you want it welded, then take out the z-Bar.
Once it's out, just keep the lower leg perpendicular to the z-bar tube and align it with the marks and burn that sucker in good and hot.
Install it, and you should be good to go. It worked for me!
weelze
Member
Im looking for a z bar for my 66 valiant. Anyone have one to part with? Please
JoesEdge
Well-Known Member
Im looking for a z bar for my 66 valiant. Anyone have one to part with? Please
Brewer's Performance sells z-bars. You might want to see he has what you need. Give them a call.
mpaahana23
Well-Known Member
im looking for a z bar for my 66 valiant. Anyone have one to part with? Please
ebay
-


