Plan B. Jack it up and drive a new one underneath it.

-

Thanatos340

Well-Known Member
Joined
Oct 23, 2012
Messages
138
Reaction score
20
Location
Marietta
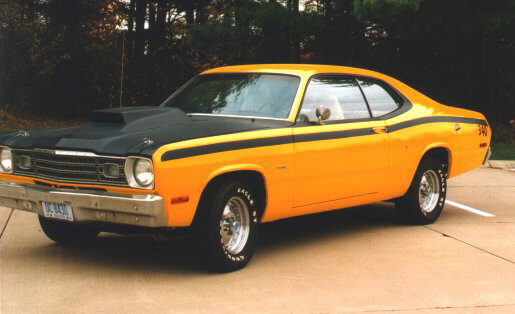
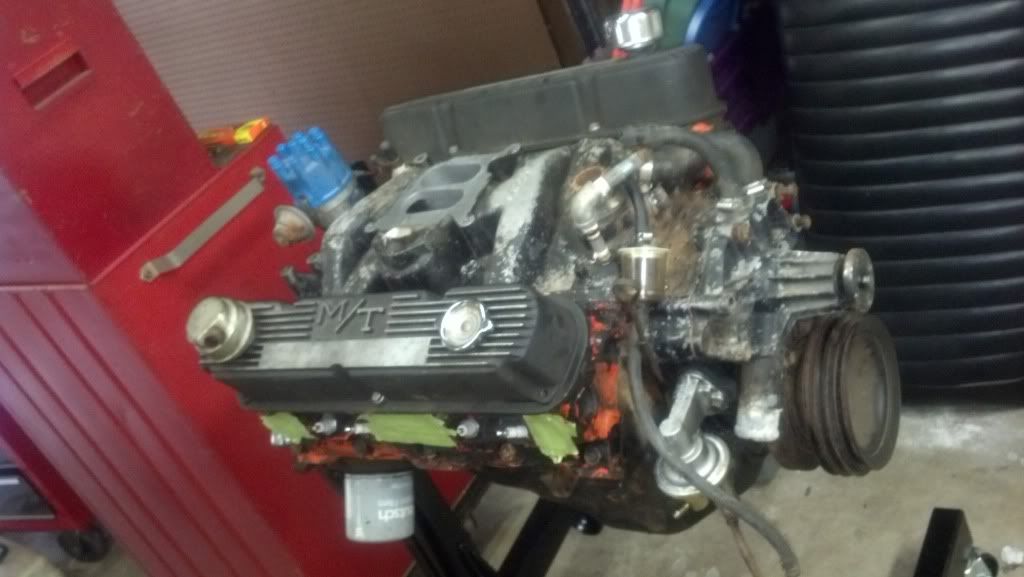
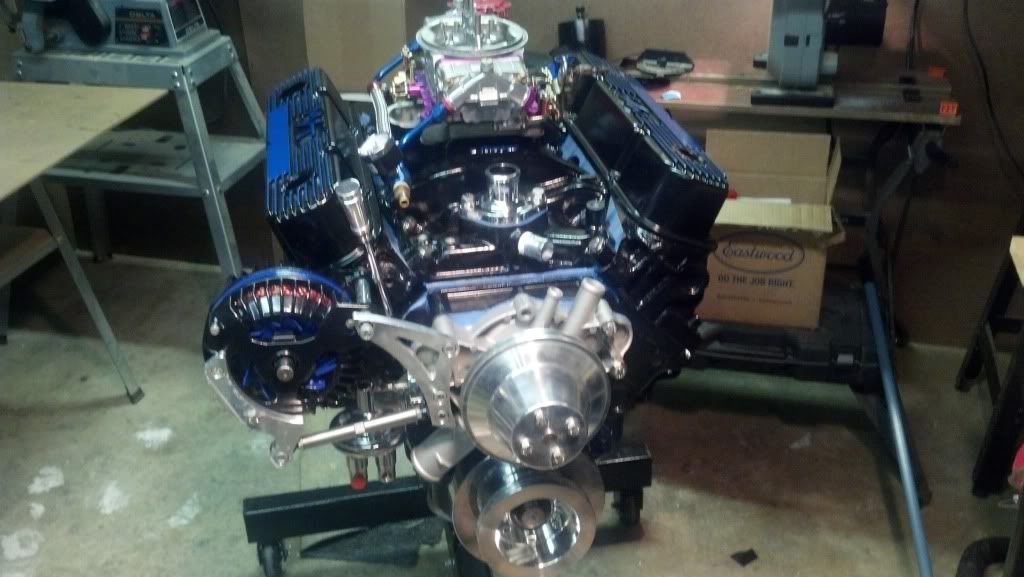
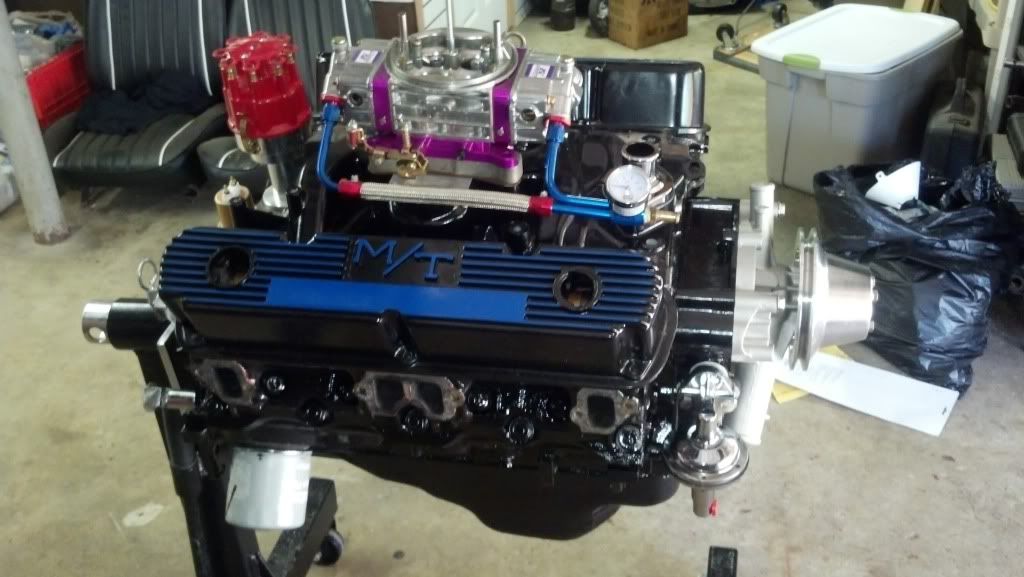
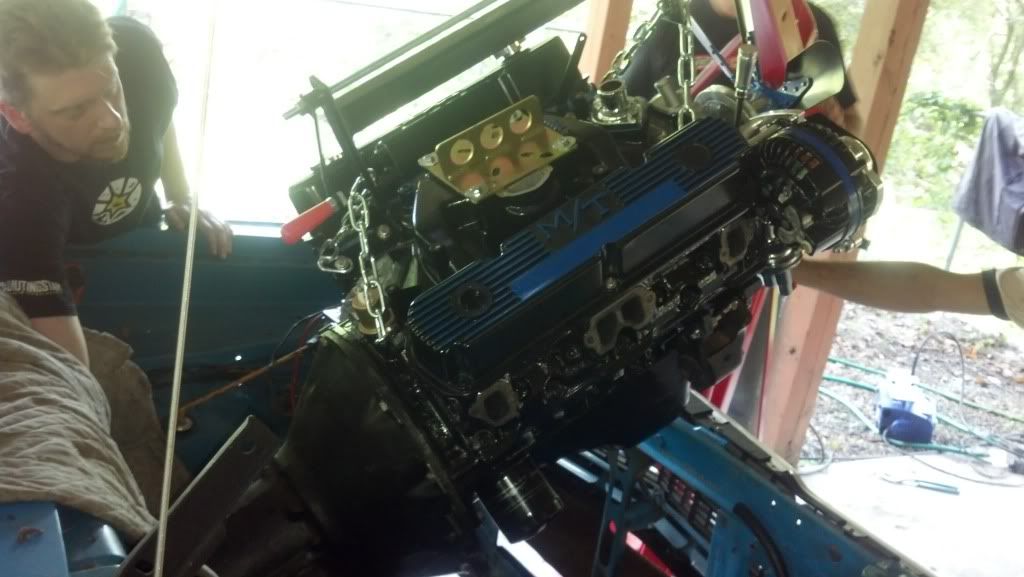
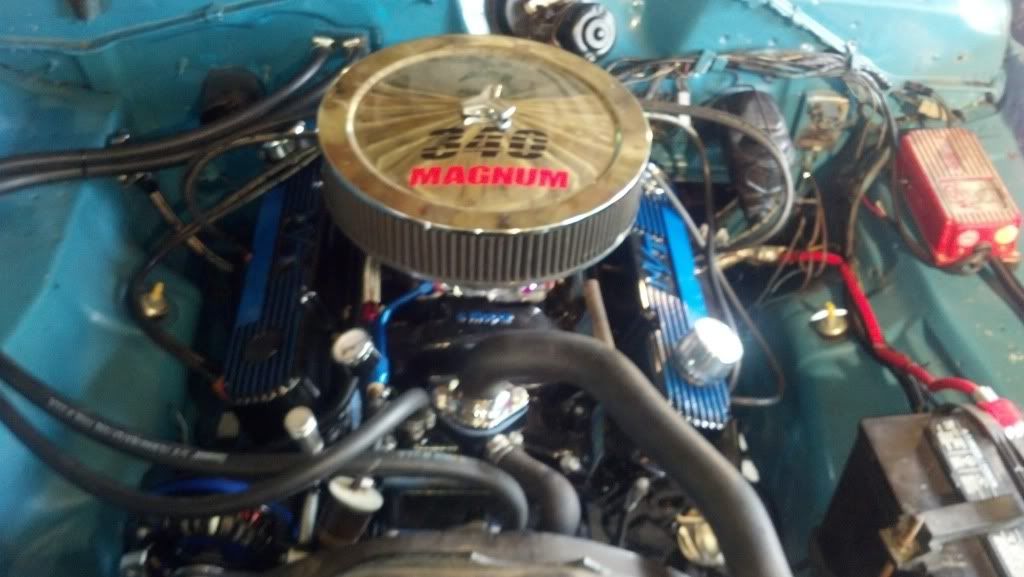
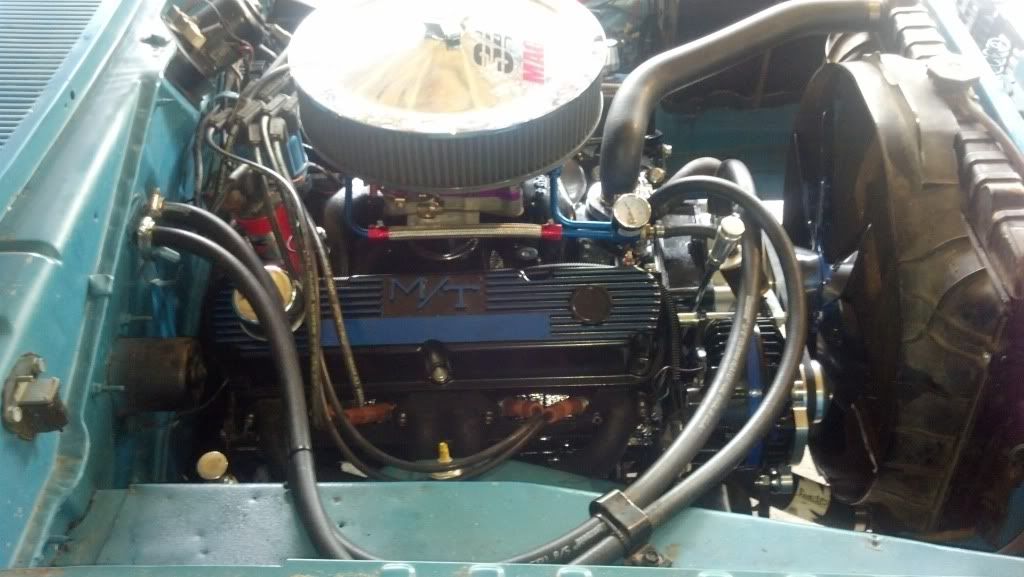
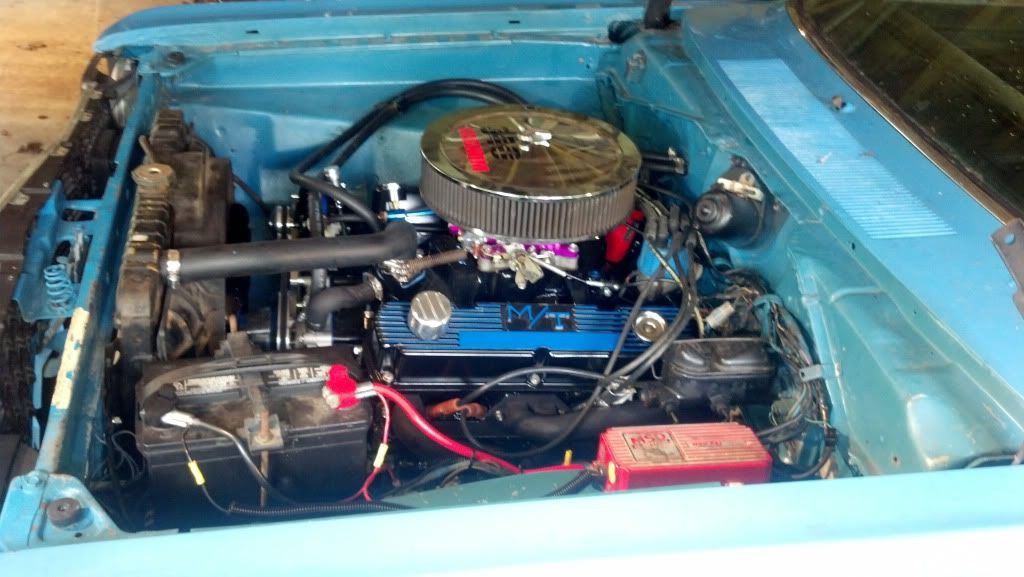
Here we go.. I had a 76 Duster/Valiant I was trying to fix up but it was going to require new lower quarters, a new tail panel and other body work that I just was not comfortable doing. Major body panel replacement is beyond my skill set. I had already replaced the interior in it, had the seats recovered, new carpets, ect.. but the body was scaring me. The 76 has a 69 340 in it that has tremendous sentimental value to me as it was the last engine my built before he passed away. What to do...

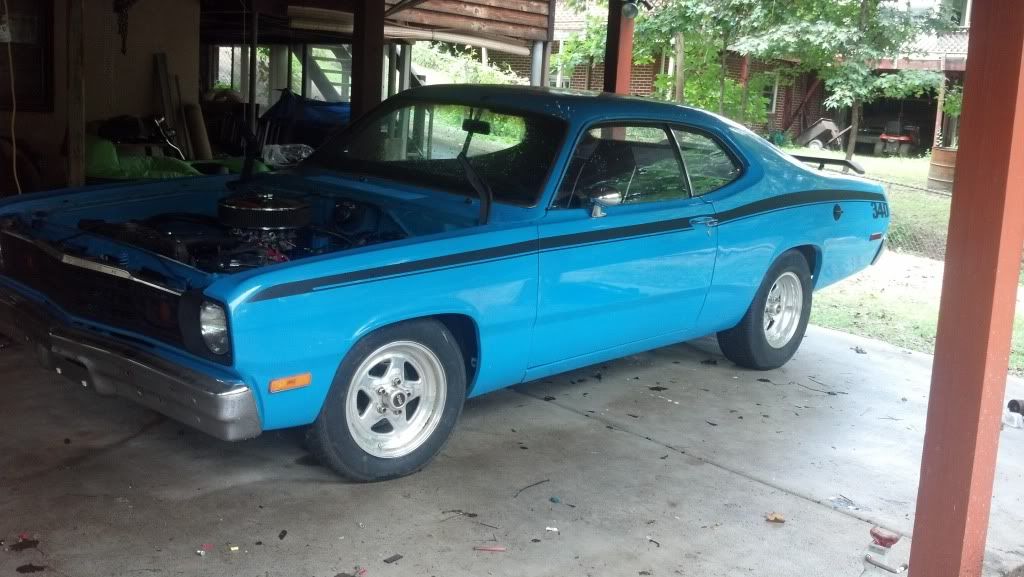
I lucked out and found a 73 in fantastic condition but needed an interior and I was able to buy it as a roller.

This weekend we were finally able to get started. The floorpan had a good bit of rust but was not far gone. This weekend it was pull the interior, sand it down to metal from the trunk forward, Por 15 the floor pans, Epoxy prime and finish off the rear and trunk area.

Also since I am not a huge fan of the B3 Blue and chrome look it had, Try to change it up some by adding adding some black. Blacked out the bumpers and added a Black Stripe to the Hood.

Plans for next weekend:
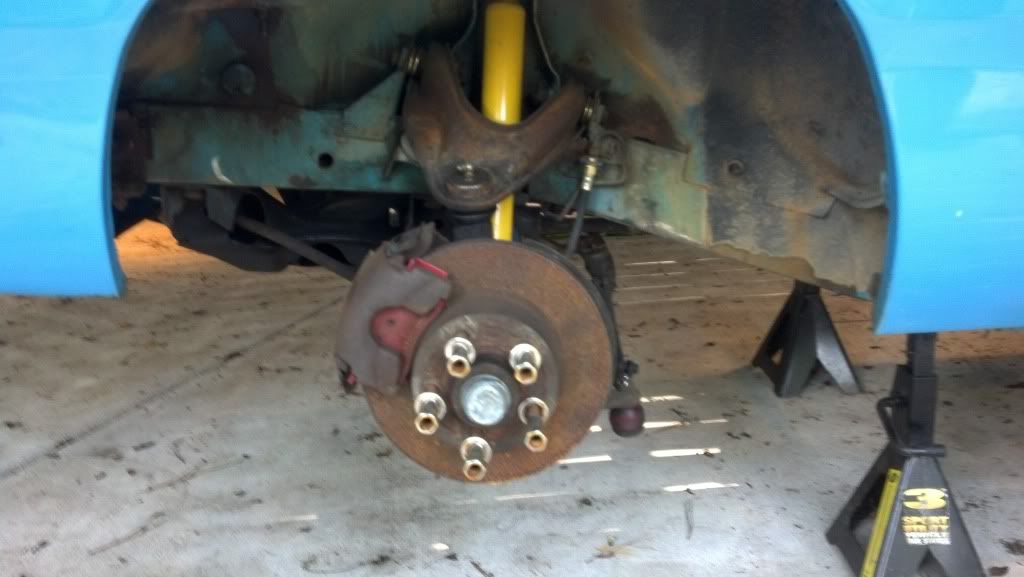
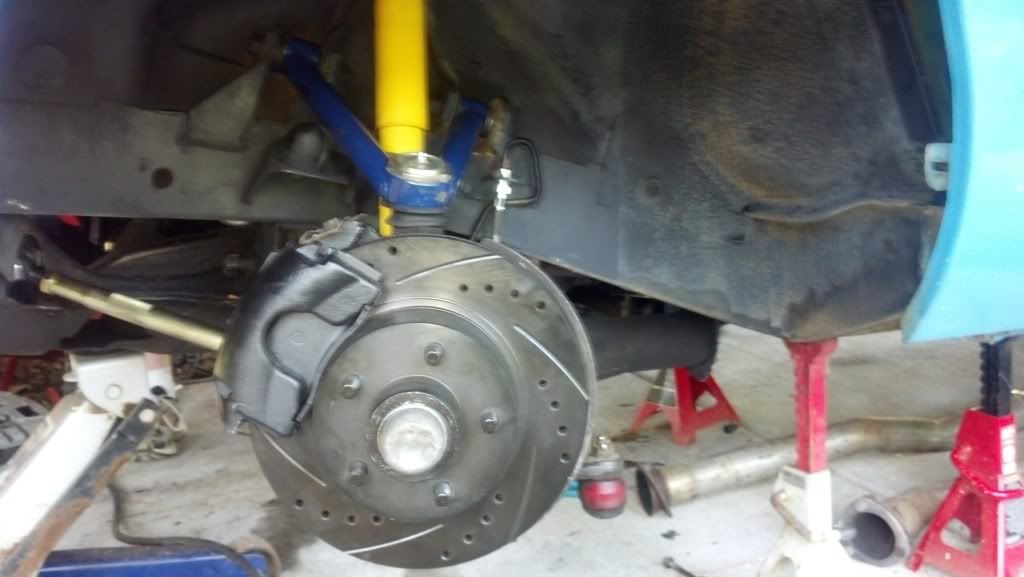
Address the front end problems with the car. It has one bent strut rod and the other strut rod has a bad bushing. I will be replacing them with some Dillinger Adjustable Strut Rods and hopefully some adjustable UCA`s if I can scrape up enough change. Then adding Flat Black 340 Stripes and a Go wing.

Then it is just a matter of moving the Motor, trans and interior from the other car over.

This is not a full resto, Just trying to fix up the car the best I can with resources I have.

Here is round 1:
 

Attachments

  • before exterior.jpg
    113.1 KB · Views: 679
  • Inside after.jpg
    103.2 KB · Views: 683
  • inside sanded.jpg
    82.1 KB · Views: 663
  • Inside sanded 4.jpg
    76.4 KB · Views: 653
  • Inside sanded 3.jpg
    75.2 KB · Views: 681
  • Inside sanded 2.jpg
    76.4 KB · Views: 661
  • Inside before 1.jpg
    99.4 KB · Views: 664
  • Inside before.jpg
    79.8 KB · Views: 660
  • Inside before 2.jpg
    108.5 KB · Views: 654
More pics...
 

Attachments

  • After.jpg
    74.2 KB · Views: 677
  • hood one.jpg
    62 KB · Views: 655
  • Hood 2.jpg
    62.3 KB · Views: 652
  • Brackets.jpg
    78.4 KB · Views: 649
  • Bumper 1.jpg
    61.4 KB · Views: 659
  • Interior after final.jpg
    72.3 KB · Views: 668
  • trunk Eposy prime.jpg
    63.9 KB · Views: 653
  • Interior por 15.jpg
    103.1 KB · Views: 658
  • inside por.jpg
    93.3 KB · Views: 666
Sorry, but I think you started with a nice car beat it with an ugly stick.

The black hood and bumpers look like crap. I realize my post isn't what you wanted to hear.
 
Sorry, but I think you started with a nice car beat it with an ugly stick.

The black hood and bumpers look like crap. I realize my post isn't what you wanted to hear.
Oh I don't know my mama always told me "if you can't say anything nice don't say anything at all" Personally I like it how about painting the grill black?? I did mine that way I liked the look IMO, AND it's your car do it how you want!!!
 
I like the black on your duster. It gives a nice contrast. Not sure if I would have done the bumper though. To each their own. I like a Duster hood painted like this:
dusters6.jpg

I like the way the the tops of the fenders are painted also and then continued back to around the rear windows.
 
I like the black on your duster. It gives a nice contrast. Not sure if I would have done the bumper though. To each their own. I like a Duster hood painted like this:
dusters6.jpg

I like the way the the tops of the fenders are painted also and then continued back to around the rear windows.

Yes. That is my favorite paint Scheme. My 76 Duster has that same treatment. Pretty sure I will do this one the same way eventually.

As for the Bumpers (And the Hood Stripe) I wasn't sure if I would like it or not myself. That is why I did them in Plasti-dip. Got the idea from a thread on here, Did some research and found that it getting to be pretty common with the rice burner crowd. Tested it out and found it worked well. First time I did the Hood I didnt like the line edge, Just peeled it off (No damage at all to the paint or clear coat underneath) and redid it. Same with the bumpers, Chrome is still there underneath, Peel off the black and it will be right back to where it was. Nice way to see if you like a paint scheme and try out some new ideas.
 
Since you're experimenting with plasti-dip, before you peel it off I suggest full black hood carried back like jr suggests, with full blackout of the grille and add the stripe.
 
That plasti-dip is a cool idea, I have never heard of that. I am gonna paint everything now. LOL
 
If you look on youtube you'll see guys doing all kinds of craziness with it. Everything from wheels to complete cars, even two tone jobs on exotics etc.
 
Since you're experimenting with plasti-dip, before you peel it off I suggest full black hood carried back like jr suggests, with full blackout of the grille and add the stripe.

I would be worried about trying the Plasti Dip on the grille as it would be a royal pain to pull off because of all the small pieces. Fortunately the Grille has already been painted black on my 76 so all I have to do is swap them to see how it will look. I will probably do that in the near future just to see how it looks.

Here is my 76 (I will do this same paint job to the blue 73 once I can afford to have it done right).
 

Attachments

  • Duster 1.jpg
    77.2 KB · Views: 584
Looks like a nice starting point. Im not a fan of painted bumpers though. Heres another Duster with the hood done close to yours.
 

Attachments

  • 440demon 003.JPG
    119.5 KB · Views: 567
I'm not a fan of blacked out bumpers or grille....BUT (and thats a big butt) that yellow car Adam posted has a few things that would make your hood stand out a little more. Things like that additional pinstripe line around the blacked out center really set it off, and the blacked out grille on that yellow car is brought to life with those silver pinstripe appointments.

I think what ties the yellow car together even more is the half vinyl top being black also, and of course the hood scoop too. I know the vinyl top is a stretch for your car, but IMO those small detail pinstripes would really make your blackout POP!! That black sidestripe on the yellow car would really go well on your color as well!!

I would return the bumper to chrome also if it were me, but it's your car, and as the great philosopher and thinker of thoughts The Burger King once said...."Have it Your Way"!!! Nice car though, a much more solid start if I read right!! Geof
 
I think the blacked out hood running up by the side windows looks great. I think the bumpers might look better body color. It's always good to see someone getting something done. Good luck with the project!
 
I got my ugly stick out and took a few more whacks at it. ;p
Actually I agree, The Hood stripe and black bumpers did not look good. Just glad I did them in the Plasti-Dip so all was easily removed.

I pulled the Blacked out grill from my 76, Touched it up and installed it (I still have the 73 grill in original condition If I ever wanted to change it back). Added some 340 Stripes and I think all is back on track.

Started getting the interior installed and then ran into a problem with the seat tracks. I had the seats in my 76 reupholstered last year and will be using them in the 73. No catalytic converter hump in the floor pan in the 73 so I am going to have to find some new seat tracks (Or at least the just the drivers inside track which I think is the only difference).

Also going to be installing a B&M Stealth Pro Ratchet shifter that I bought soon as I get the seats installed so I can check placement. The trans going in has a Reverse Manual VB so I really liked the idea of a Ratchet shifter and love the look of the Stealth Pro. Still contemplating building a custom console. Will be working on that over the next could weeks.

Ordered a set of custom Speedhut Gauges and have been working on a mockup for the Dash. After reading about how flimsy the molded aftermarket dash carriers are, I decided to just re-purpose the stock carrier with a plate to mount the gauges to. The original dash carrier was pretty beat up so I didn't mind carving it up.

Had a problem around the drip rails where the seam sealer/filer was dried out, cracking and the paint was peeling. I taped it off, and managed to get all the old sealer out, primed it with some Rust destroyer and refilled with Black Seam Sealer.

Got the new Adjustable Strut Rods ordered and hope to add tubular A Arms to that order this week.

Still moving just as fast as my wallet will allow.
 

Attachments

  • Stripe and grill.jpg
    82.7 KB · Views: 523
  • Drip rail before 3.jpg
    73.7 KB · Views: 530
  • dash mock up after.jpg
    46.8 KB · Views: 525
  • dash 3.jpg
    71.7 KB · Views: 539
  • dash before 2.jpg
    66 KB · Views: 539
  • Dash before.jpg
    76.1 KB · Views: 519
  • seats.jpg
    174.7 KB · Views: 510
  • Stripe 2.jpg
    80.4 KB · Views: 520
  • Drip rail after 1.jpg
    90.8 KB · Views: 516
Had a lot going on since I last updated this thread. I found a buyer for my 76 Duster and that gave me the funds to get all the parts I needed (Not necessarily all that I wanted but who ever has all the parts they want? ;p)

I have not made as much progress as I wanted on the interior as I am still trying to find bucket seat brackets for a 73 Duster. The buckets that I had just reupholstered that I kept from my 76 will not work because of the Catalytic converter hump in the floor pan. I am being stubborn and holding out hope that I will find a set or at least the drivers side for a somewhat reasonable price soon. I know I could just make some spacers and get longer bolts but like I said.. just being stubborn. If I don't find some soon I will give up and make the spacers.

On to what has been done.. I Sold the 76 as a roller and pulled my 340 out of it. It was looking pretty rough even though the motor really only had a couple thousand miles on it (If that) since it was rebuilt about 14 years ago.

Beforeengine_zpsefd98bc8.jpg


Time to freshen it up. First step was to send the Intake, Valve Covers, Timing cover, Alternator covers and all brackets to the Powder Coaters. The blue color that I did not care for at first has started to grow on me since I added the Black 340 stripes and blacked out the grill so I decided to stick with it and carry that on through the engine. Went with a semi gloss Black and Mirror blue powder. I love the way they came out.

powdercoat_zps1f335d1d.jpg


8696631731
I repainted the engine with Por15 engine enamel and pretty happy with that as well. It was a self leveling brush on that was ideal for what I doing since I was not tearing down the bottom end at all and would not be able to vat anything before repainting. Just me and wire brush and some sand paper.

AfterEngine1_zpsef6c31fd.jpg


Afterengine2_zps5f40396b.jpg


Also since I was going with some Billet under driven pulleys when it went back together, I upgraded to a higher volume water pump. Got carried away and replaced all the other bolt ons on the engine with shiny stuff.

Engineafter4_zpsb5b782d5.jpg


8696632107

Also got my new custom Speedhut gauges in and finished up the dash insert. I used a aluminum backing plate that I had powdercoated black. I opted not to spend the money on a volt meter and just go with a 5 Gauge set up. The "Mopar Mode" I had put on the Speedo was a nod to my daughter. When she was very young (5,6 years old) and we would go for rides in the old car, she would always ask me to "Put it in Mopar Mode" when we were driving around which meant get on it a little.

newcluster_zps0e4c2b2e.jpg


Once I finally find those seat brackets I need, I will finish up the custom console I am working on and then get the interior in, Then finish up the front end (adjustable strut rods and tubular A Arms) and drop the drive train in.
 
I like it, motors looking real good... I like that blue, keep up the good work. I play with plasti-dip on my daily from time to time (grill/wheels), I liked the hood for sure... The speedhuts are sweet too, I cant wait to get mine goin and see how they work.

JOE
 
Wow motor looks really good. If it were my car I would go back to the silver 73 Grille. Just looks better IMHO.
But other than that it looks great the black stripes look great.
You could do the center hood stripe if you also did a dual snorkel scoop on it too
 
Definitely on the Home stretch with this project. After 6 months of scrounging for parts, Spending every dollar I could get my hands on and working on it when I could.. I finally got take her for a spin yesterday.

Recap of the process since some of my pics are no longer showing:
http://s450.photobucket.com/user/Thanatos340/story/10683

Since I last updated, I finished rebuilding the front end. I added Dillinger Tubular Upper Control Arms, Adjustable Strut Rods, Drilled and slotted Rotors, rebuilt and cleaned the calipers and added braided stainless brake lines.

Before Picture:
IMG_20130622_132204_963_zps29d16c93.jpg

IMG_20130622_132204_963_zps29d16c93.jpg.html


After Picture:
IMG_20130804_165415_746_zps283faf5f.jpg


Finished the Engine:

Before Picture:
IMG_20130409_183827_709_zps0a07e4bb.jpg


After Picture:
IMG_20130430_204155_941_zps7cab3d1b.jpg


Ok.. One more after Picture.. (Love the way engine came out, Runs as good as it look too so far)

IMG_20130421_180947_774_zpsb924bb9a.jpg


Got it all bolted together to the new rebuilt 904 w/ reverse manual valve body and MSaine built 3200 Stall converter and dropped in:
IMG_20130804_155841_259_zpsa258d5bf.jpg


Spend the next couple days fighting various unexpecteds, Wiring problems, Impossible to find correct Transmission line fittings,Brand new Billet distributor that ended up being a POS and cost us 4 hours trying to find the ignition problems.. But Finally get R Done.


IMG_20130819_135202_433_zpsb52b604f.jpg


IMG_20130819_135211_572_zps912b240e.jpg


IMG_20130819_135150_496_zps93689bfa.jpg


IMG_20130819_135103_498_zpsc245c32c.jpg


There has been a lot of negative feedback on some of the choices I made along the way but I could not be happier with the way it looks right now. You could not kick the grin off my face when I finally got to drive it around the neighborhood yesterday. MY car, Done My way and I love it.

Still a good bit of work to go on the interior. Also did not have the kickdown linkage so I ordered a Lokar cable system that should be here this week so I can really take it for a test drive.

Also still need a few odds and ends to finish her up (Wiper Arms (Lost the ones that came off it somehow), Headlight Switch Knob/Pull (Stepped on the old one and broke it), Steering Column Cover (Never had one).. If you happen to have any of these cheap, Message me.

Otherwise, Looking forward to hitting any upcoming Cruise ins and such anywhere near Atlanta in the near future.
IMG_20130804_165411_038_zpsfd37ed37.jpg.html
 
looks good ,im not a huge fan of chrome.when I finally get started on my 73/71 front clip dart haven't decided if body color bumpers or blacked out yet.but def no chrome.
 
This project is now prettly close to done. Ready for serious cruising time.
 

Attachments

  • Interior 4.jpg
    40 KB · Views: 166
  • Interior 3.jpg
    41.1 KB · Views: 165
  • Interior 1.jpg
    47.4 KB · Views: 153
  • Engine 3.jpg
    62.4 KB · Views: 170
  • Engine 2.jpg
    63.1 KB · Views: 150
  • Car 6.jpg
    56.3 KB · Views: 165
  • Car 5.jpg
    51.4 KB · Views: 197
  • Car 3.jpg
    57.8 KB · Views: 165
  • car 2.jpg
    59.3 KB · Views: 188
  • Dash 1.jpg
    34.9 KB · Views: 181
-
Back
Top