Offset spring shackles hangers set ups

-

straightlinespeed

Sometimes I pretend to be normal
Joined
Oct 21, 2012
Messages
10,630
Reaction score
4,399
Location
Uvita, Costa Rica
Hi guys, Im curious about the offset spring shackles and hangers. What all is involved in setting this up? Those of you that have done this I would love to see pics. Thanks
 
The 3/4" offset kit is mostly a simple bolt-in. The hardest part is cutting off the old spring pads and rewelding new ones in the proper position/pinion angle. Gotta watch how you weld so the welding doesn't overheat the housing tubes, which can tweak/bend them a bit.
 
Wow that does sound simple. So my other question is there any performance benefits to it or is it just so you can fit bigger tires?
 
Yep bigger tires are 1 benefit, but if ya add solid bushings and new springs and frame connectors its a big difference to stock! Did it on my 66 and i can run 15x8 rim with a 275 tire with no rubbing,Here's a pic with 255's on a 15x8 rim.
 

Attachments

  • 001.jpg
    46.8 KB · Views: 827
Yep bigger tires are 1 benefit, but if ya add solid bushings and new springs and frame connectors its a big difference to stock! Did it on my 66 and i can run 15x8 rim with a 275 tire with no rubbing, Here's a pic with 255's on a 15x8 rim.


I do plan on installing frame connectors, keeping the springs that are on the car, but I guess I can say I never heard of solid bushings. I like the look of the wider tires!
 
I do plan on installing frame connectors, keeping the springs that are on the car, but I guess I can say I never heard of solid bushings. I like the look of the wider tires!
Sorry i should have been clearer, I used solid aluminum front spring bushings insted of rubber.:burnout:
 
Ahh yes, now those I have heard of, but arent they more for drag racing.. I want this this to still be streetable.

Where is a good place to buy a kit from? Summit?
 
The 3/4" kit I bought didn't require welding on the forward spring perch. If I remember correctly the perches have offset bolt holes so you can bolt it directly where the old bolts were located. But I did have to do a little cutting for clearance for the perches to sit square against the rear frame rails. The rear perches stay the same. I can take pics tomorrow if you don't mind waiting.

Treblig
 
Ahh yes, now those I have heard of, but arent they more for drag racing.. I want this this to still be streetable.

Where is a good place to buy a kit from? Summit?
I bought a Mopar Performance off set kit here in the parts section, Maybe Mancinis have them.
 
I bought a Mopar Performance off set kit here in the parts section, Maybe Mancinis have them.

hey straightline, I`ve got an idea for u. take one new spring pad, cut it in exactly in half on a band saw. trying to be perfect. you can bring it down to exactly 3/4" wide on a fixed belt sander.
these 2 pieces can be clamped up against ur original spring pads ( leveled perfect w/ them,of course on the inside to to get the offset right)
weld them in short runs, alternating from side to side as not to get your housing too hot and warp it, may let it cool a little between welds. weld it to the pads on the spring surface too, u can finish grind the weld back flat when done. redrill a couple of holes 3/4" over, and it`s done, u don`t have to cut the original pads off, if done this way. I came up w/ the idea when thinking about keeping the pad angle right. worked like a charm, faster, and easier to do, don`t get ur housing hot cutting the old pads off. if you need a spring pad to cut in half, I still have the new one I didn`t use. guess I could cut it and finish sand it for you for a small fee if your worried about doing it yourself--------------------bob:blob:
 
Dr Diff says you can only offset the springs 1/2" The MP kit says 3/4". So, who's right?
 
They alow for a 10.5" section width tire in a 67-69 dart.

Another option for your bushings is to go poly.
 
I didn't see it mentioned, but you will also need to cut a hole on the outside of the frame rails on each side for clearance of the nut on the front spring hanger. After installation, those nuts will actually be inside the outside flange of the frame rails.

When I installed the 3/4" MP kit on my '71 Duster, I cut the original spring purches from my housing and reused them. Without tubbing, I was able to fit a 305 50 15R, or my 28.5 10.5 15 slicks, on Draglites with 6.5" BS easily without rubbing. That was with a stock width B-body Dana.

if I remmeber right, I put the bolt head in the enlarged hole in the frame so the nut would be easier to work with. mine moved so close to 3/4" that`s what I`d call it on the 68 barracuda.
 
Dr Diff says you can only offset the springs 1/2" The MP kit says 3/4". So, who's right?

It's closer to 1/2-5/8 than 3/4"

You could always build your own.
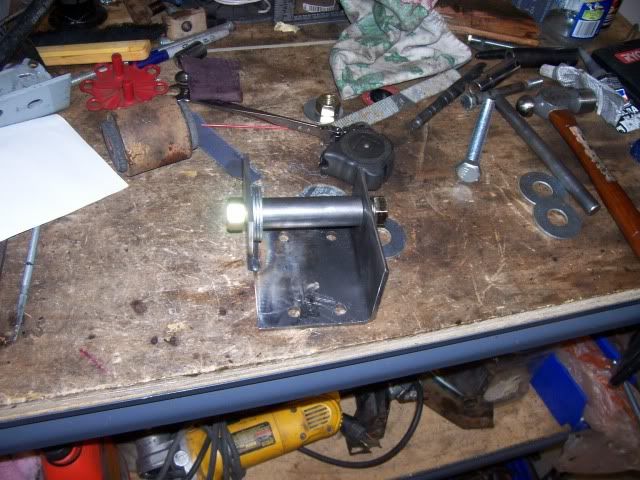
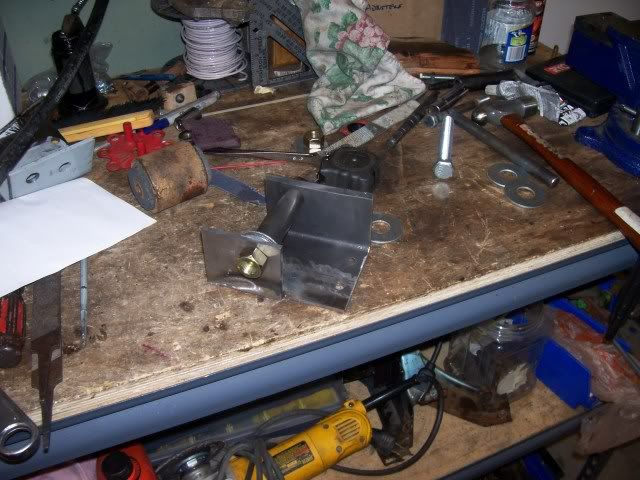


Longer bolt and a short spacer, good to go.
 
if I remmeber right, I put the bolt head in the enlarged hole in the frame so the nut would be easier to work with.

Good point; it was the bolt head, not the nut.

I agree with crackedback; if you have the ability and the tools to do it, I'd build them myself and save a lot of money.
 
Here is a pic.

I would just go ahead and do the mini tub. You are better off in the long run.
 

Attachments

  • gas tanksmall.JPG
    82.7 KB · Views: 495
I just ended up drilling new holes for the front hanger and butting them to the frame and moved the rear hangers as well. Easy peezy... No need for a "kit."

And yes, 3/4" is a misnomer. The front hanger can't move that much without hitting the frame. On mine anyway. I could only get about 1/2"-9/16" per side. I'm still happy though because I'm able to use 275/60s without rubbing.
 
Here are the pics I promised.
If you look closely at the third pic you can just see the hole I had to put in the rail so the nut on the spring bolt wouldn't keep the new spring perch from seating against the rail. The kit I bought uses the stock mounting holes as you can see. I can measure it but it sure look like I gained 3/4".


treblig
 

Attachments

  • DSC03443.jpg
    49.2 KB · Views: 773
  • DSC03444.jpg
    39.5 KB · Views: 598
  • DSC03445.jpg
    58 KB · Views: 620
  • DSC03446.jpg
    46.8 KB · Views: 671
  • DSC03447.jpg
    47.2 KB · Views: 610
This is how mine looked,after install. Was closer to 3/4" than 1/2"......^^^^^^
 
hey straightline, I`ve got an idea for u. take one new spring pad, cut it in exactly in half on a band saw. trying to be perfect. you can bring it down to exactly 3/4" wide on a fixed belt sander.
these 2 pieces can be clamped up against ur original spring pads ( leveled perfect w/ them,of course on the inside to to get the offset right)
weld them in short runs, alternating from side to side as not to get your housing too hot and warp it, may let it cool a little between welds. weld it to the pads on the spring surface too, u can finish grind the weld back flat when done. redrill a couple of holes 3/4" over, and it`s done, u don`t have to cut the original pads off, if done this way. I came up w/ the idea when thinking about keeping the pad angle right. worked like a charm, faster, and easier to do, don`t get ur housing hot cutting the old pads off. if you need a spring pad to cut in half, I still have the new one I didn`t use. guess I could cut it and finish sand it for you for a small fee if your worried about doing it yourself--------------------bob:blob:

That is a great tip to cut a spring perch in half and do that process so you keep the same angle and you can always put it back to stock if you so choose.

They alow for a 10.5" section width tire in a 67-69 dart.

Another option for your bushings is to go poly.

I would like to run wider tires for sure. What width rim is recommended for a tire that wide?


Those look good man, to bad I dont trust my fab skills for something like this.

Here is a pic.

I would just go ahead and do the mini tub. You are better off in the long run.

Thank you for pic, I like the look for sure! Mini tubbing is more than I want to get into on this project.

Here are the pics I promised.
If you look closely at the third pic you can just see the hole I had to put in the rail so the nut on the spring bolt wouldn't keep the new spring perch from seating against the rail. The kit I bought uses the stock mounting holes as you can see. I can measure it but it sure look like I gained 3/4".


treblig

So basically you just have to drill a hole large enough for the head of the bolt in the frame rail. Do you drill this all the way thru so you can get a socket on it to tighten it all or just one side? Looks like a fairly simple install, hardest part is welding on the perches IMO. If I dont have spring sag and my springs seem to be in good condition I dont have to get new ones do I?
 
That is a great tip to cut a spring perch in half and do that process so you keep the same angle and you can always put it back to stock if you so choose.


I would like to run wider tires for sure. What width rim is recommended for a tire that wide?


Those look good man, to bad I dont trust my fab skills for something like this.


Thank you for pic, I like the look for sure! Mini tubbing is more than I want to get into on this project.


So basically you just have to drill a hole large enough for the head of the bolt in the frame rail. Do you drill this all the way thru so you can get a socket on it to tighten it all or just one side? Looks like a fairly simple install, hardest part is welding on the perches IMO. If I dont have spring sag and my springs seem to be in good condition I dont have to get new ones do I?

Yes, you just drill a hole (make a hole) large enough to let the bolt head "live" inside the frame rail. You can drill all the way through but since you can tighten it before you bolt up the perch you don't have to drill all the way through (I didn't), it's your choice. If you ever have to remove the spring you just unbolt the perch and access the big bolt. The spring replacement is a personal thing. In my case I wanted a little "rake" in my car's stance. I have it raised up where I want it now with new 3" extra arch springs from McVieghs. They were only $180/pair if I remember correctly. Or you can simply put your axle below the springs since you're replacing (moving) the spring pads anyway. That's what I should have done but with 50 year old springs I didn't want to have to revisit the problem a few years later. Just remember to keep your pinion angle correct whichever way you decide to go.
One more thing, if you raise the rear at all you're also putting more weight on the front torsion bars so you might want to get the front end re-aligned BUT only if you change the stance.
PS - Those are 295 X 15s on the back of my car and they are still just inside the fender well.
treblig
 

Attachments

  • DSC01625.jpg
    34 KB · Views: 485
I would like to run wider tires for sure. What width rim is recommended for a tire that wide?


You want the widest rim you can get that will fit. It flattens out the tread giving you a better footprint. This is especially true for radial tires. However if you go to wide it looks weird.

For a 10.50 section width tire i'd run 8 or 8.5" rim.

My 12.50's (13.5 section width) are on 11.25's adn that is about the max i'd go
 
-
Back
Top