AlV 69 Dodge GTS project

-
I am absolutely fascinated with this thread and read each part 2 to 3 times. I really look forward to reading each step. I am not computer literate so showing pics of mine does not seem possible lol.

Hey Scamper... No worries about positng the pic lol ... glad you're diggin the thread. :D
 
Good Lord!
The quarter glass kicked my ***.

I pulled this from the drivers side which is the side that had body damage. Looks pretty nice inside the quarter so that is a relief.

The passenger side should hopefully come out easier now that I've wrestled with this one.

quarternotated_zpsbe760371.jpg


quarter1notated_zps9d8720d4.jpg


quarter2noted_zpse083fc4d.jpg


quarter3notated_zpsf0798935.jpg


quarter4_zps54f545f8.jpg


On a side note..I've been showing my son Jake some of the family projects you folks are working on in the hopes that I can get him away from his computer. I think it's seeping in because today He asked if he could help :D Oh yeah!! Glad to have the extra hands ya know.

Now we're both not looking forward to putting this glass back in. lol
 
Makes you wonder, how did the factory have the assembly line workers efficiently install that rear glass?
 
nice car . love the blue color, and thank you for putting all the info very informative with picture
 
Makes you wonder, how did the factory have the assembly line workers efficiently install that rear glass?
You said it...It really does! But then they probably had it down after a few hundred lol

On the second quarter glass we didn't follow the service manual which in my opinion was not very clear on the procedure. We used the service manual as a guideline and then adapted what I learned from removing the first one to modify the procedure for removing the second.

We ended up approaching it this way (need a second pair of hands for this, thanks Jake!)

(With the window aprox mid way up)

1. Removed the spring clips per the service manual.
2. Removed the up stops per the service manual.

(This is where I improvised)


3. Remove the rubber door jam seal.
4. Removed the bolt that holds the front guide top rollers to the frame.
5. Loosened the front and rear guide adjuster retaining nuts
6. Turned the adjusters clockwise to pull in the guides
7. Removed the mounting bolt on the bottom of the front guide.
8. Separate the regulator studs from the rollers freeing the window frame (hold/support the Window).
9. Remove the window /w the frame. (I tipped the back down into the quarter raising the front while working out towards the cabin. (It takes some wiggling.)
10. Unbolt and remove the front and back guides.
11. Unbolt and remove the regulator.


This worked for us but there is probably a better way.
The result was that we were able to remove it in a lot less time.

We weren't able to get to the door glass because there isn't enough space in my garage for me to swing the door enough to get to the fasteners behind the door plugs. *shakes head* I'll try to make room, or roll the car out to the driveway to pull those.

Happily stumbling along :cheers:
Stay tuned...
 
nice car . love the blue color, and thank you for putting all the info very informative with picture
Hi silverex! Thanks man. Your 72 is looking sweet also.
I'm glad you like the thread (thanks for following) and hope you find it useful :D
 
What in the World is the deal with these glass assemblies!! Ugh!

We thought the quarter glass was difficult, these side glass assemblies are ridiculous.

We must have missed something, because that seemed nearly impossible to remove from the door. lol

The Drivers side glass is out. Believe me when I tell you that it was not an easy task. The service manual did not offer any help. I did as instructed and could not complete the task as described. From there I just wrangled it.

This assembly has to be removed as one piece! That means the side window and the vent wind frame have to come out together at once because they are attached. The only way to separate the two is out of the door. Once out the assembly must be inverted to slide apart because the track is only open on the bottom!

In the end we were able to clear the driver's door, but I don't know how we're going to get this back together. lol

And in my frustration I destroyed the slider seal :wack:

1395796_534515409964171_1641281573_n_zpsjpyhd2sv.jpg


1455052_534515489964163_143458855_n_zpstqhjwsmq.jpg


1450833_534515483297497_1525545077_n_zpsm8ebqznp.jpg


1385204_534515403297505_1897241511_n_zpsyw6ecjcs.jpg


1383639_534515416630837_1100684495_n_zps420qgexe.jpg


559374_534515476630831_1601772460_n_zpsa2vg1vob.jpg


1441199_534515589964153_1321821562_n_zps0wzi43gu.jpg


If you're reading this and have experience removing these assemblies please enlighten me on the removal technique because we still have the passenger side to do and I don't want to mangle that one also. :banghead:

On a side note check out the original B5 paint we found under the side mirror gasket :thumbup:

1379734_533509063398139_2001902631_n_zpsjrnwrrco.jpg


natural light

1395775_533509080064804_1711768571_n_zpscrp5zbfy.jpg


Finding this was really nice... We both looked at each other like whoaaaaa! hahahah
 
Wow! Great thread....consider me subscribed! One thing sorta rolls into another, doesn't it? Love your attention to detail. That dash looks fantastic! You also have mad skills with the pic taking and all the circles and arrows and things. Wish I could figure that crap out.
 
I attempted to take the vent window out of my 68 hardtop to replace that slider and gave up for now. I see that the whole window unit has to come out now. Thanks for the info, the slider pin at the top was gone causing the window to bind when going up. Just going to wait till ready to paint the car to deal with it.

Ian
 
Wow! Great thread....consider me subscribed! One thing sorta rolls into another, doesn't it? Love your attention to detail. That dash looks fantastic! You also have mad skills with the pic taking and all the circles and arrows and things. Wish I could figure that crap out.

Hiya Cap'n.. one thing rolls into the other for sure. lol

Thanks for the props on the dash (I'm really happy with how that turned out) and the thread :iconbigg:. This thread is a part of my strategy for managing this project. I plan to write a little bit about my approach on your "why we don't finish" thread. Good idea for a thread btw.

I'm glad you like the thread and thanks for following. The catalyst for the image notations stemmed from the need to remember what I did so that I can reference them in the future when I am putting it back together and to serve as a reference for anyone who might be working on the same stuff. This site has been a great resource for me and I hope that as I stumble through that my stuff can help the next guy.

Great work on your Duster! please remember to tell MR. Scott to have your Dilithium Chrystal ready. He always leaves a little room for more power. :cheers:
 
I attempted to take the vent window out of my 68 hardtop to replace that slider and gave up for now. I see that the whole window unit has to come out now. Thanks for the info, the slider pin at the top was gone causing the window to bind when going up. Just going to wait till ready to paint the car to deal with it.

Ian

Heya Ian. Holy Cow! What a puzzle these things are, Who comes up with this! lol.

Glad the post helped provide some insight for you. Hopefully I'll figure something, or even better some one jumps in with the magic combination for easy extraction. stay tuned. lol

btw, where did you find the replacement slider? I'm going to need one :(
 
It wasn't a new replacement, it's from another year dart used. I actually for now used a plastic pin that I shaped to fit in there for now. I haven't been able to find any new or re-pop sliders.
 
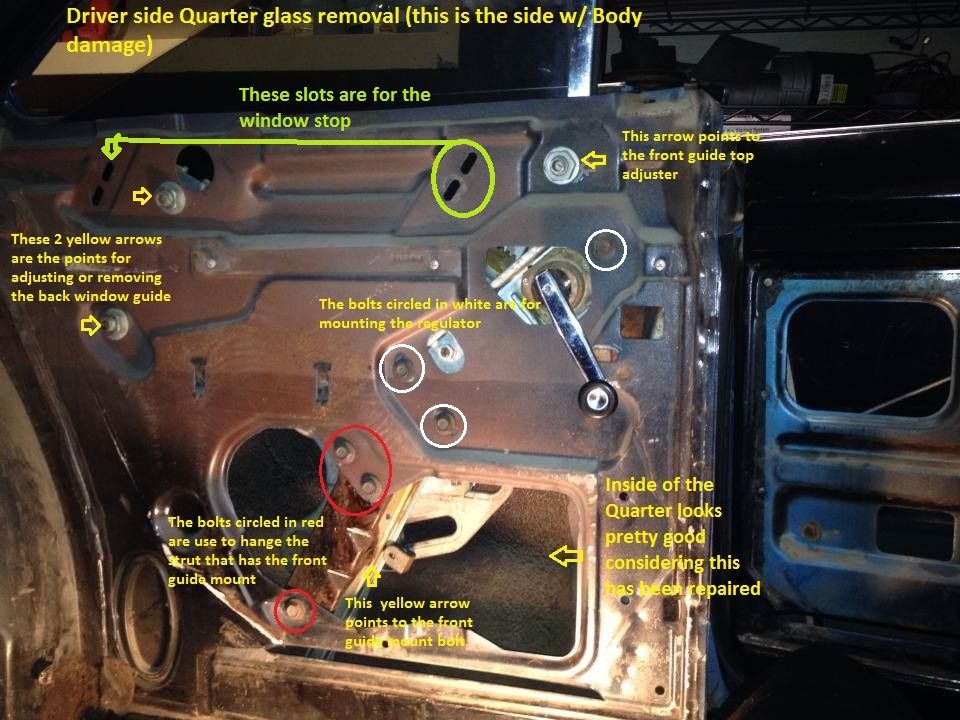
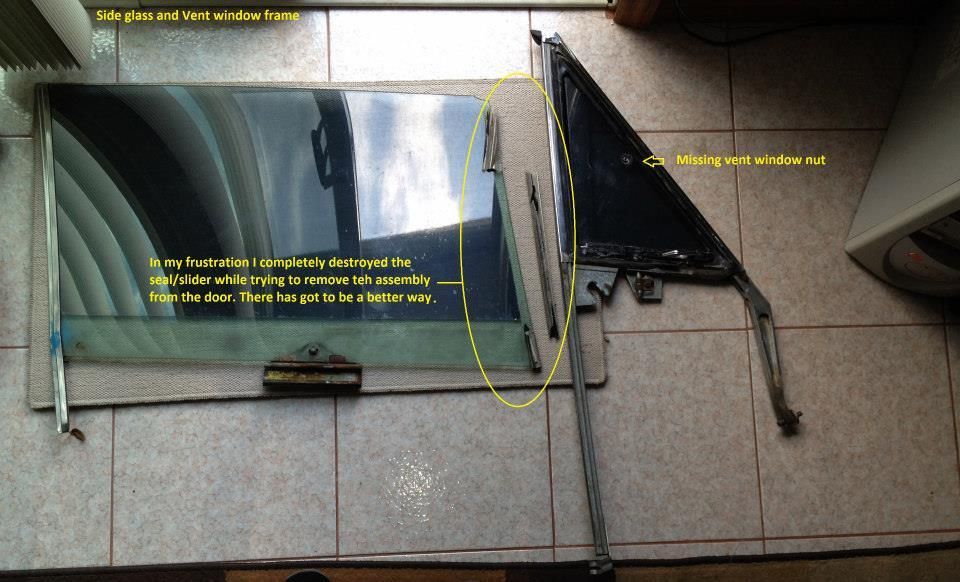
Eurekaaaa! We've figured something out.... a magic combination to remove the side glass assembly.

After the fight we had with the drivers side we took some time to get a better understanding of how this all comes together.
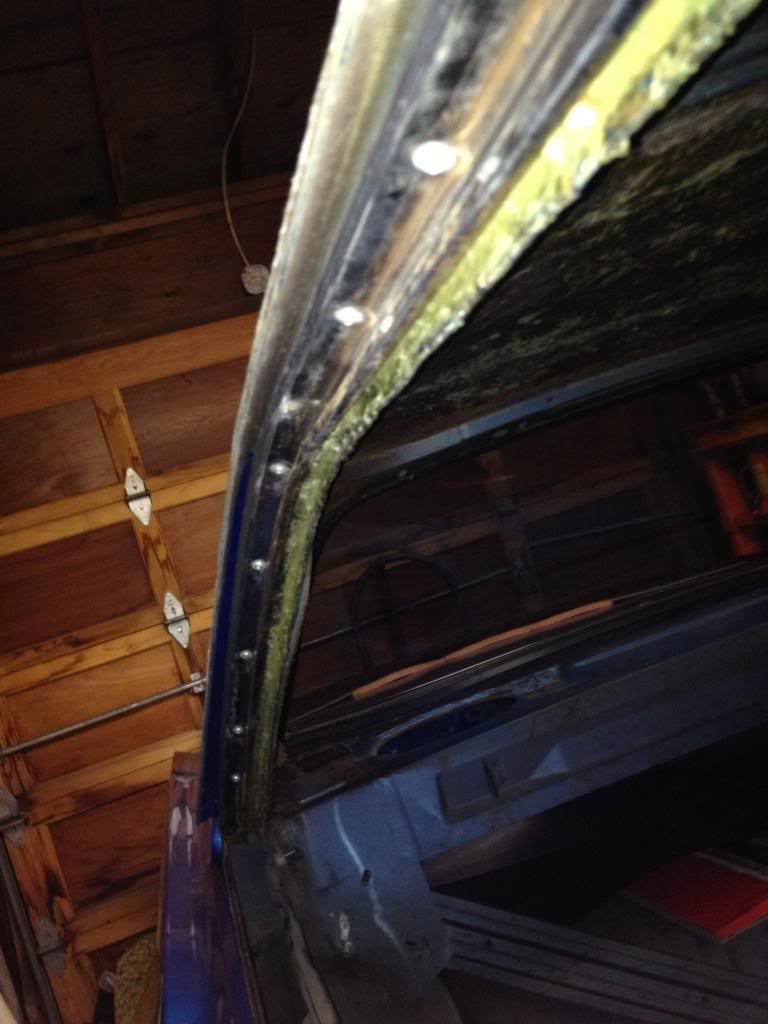
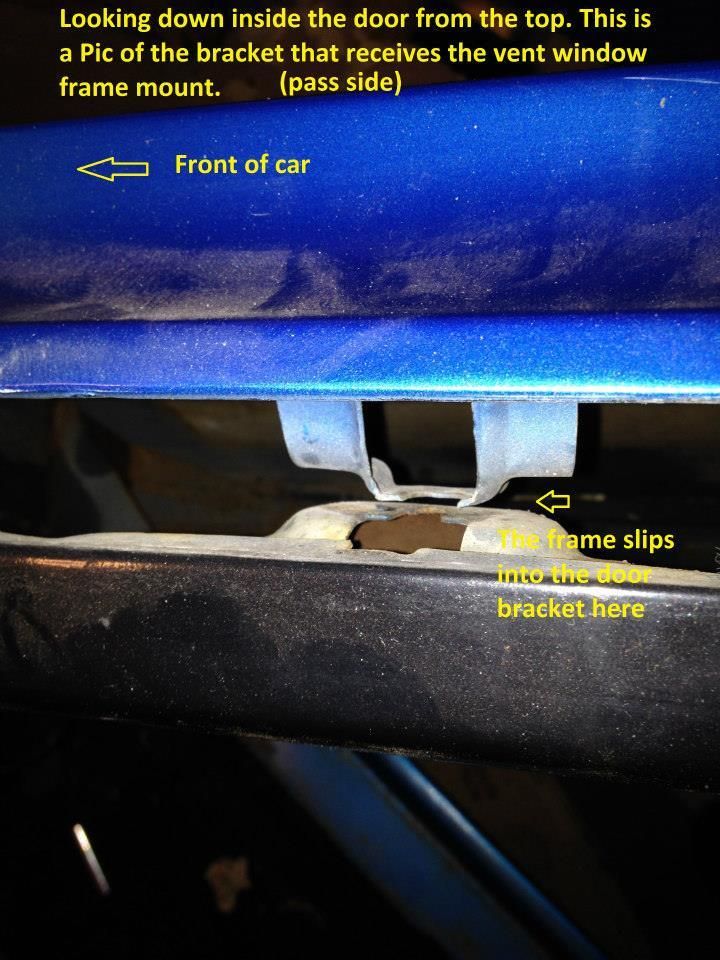
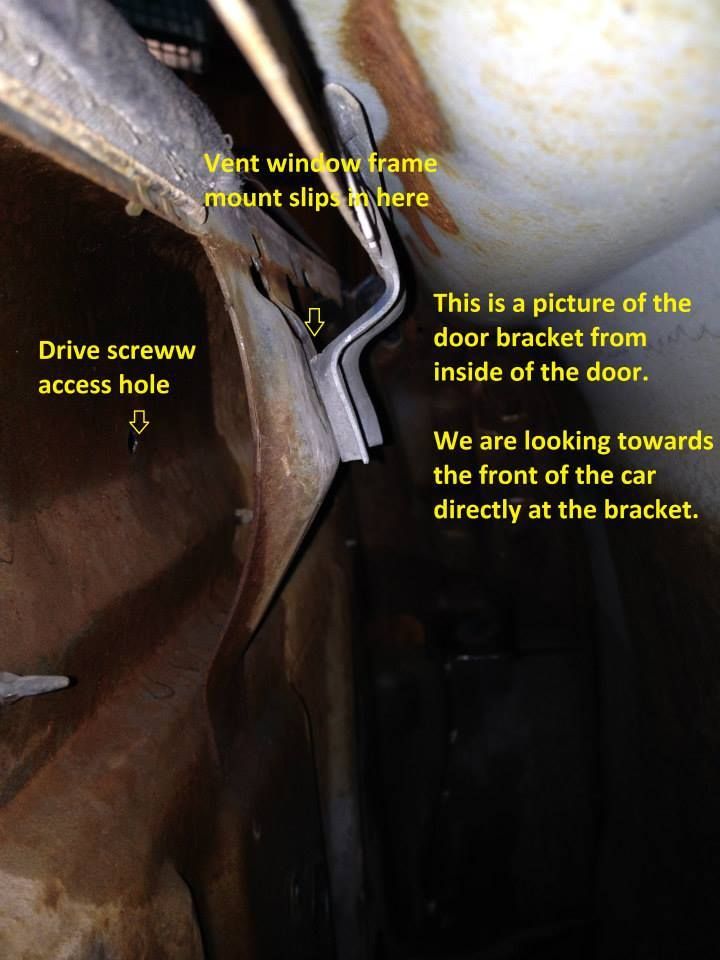
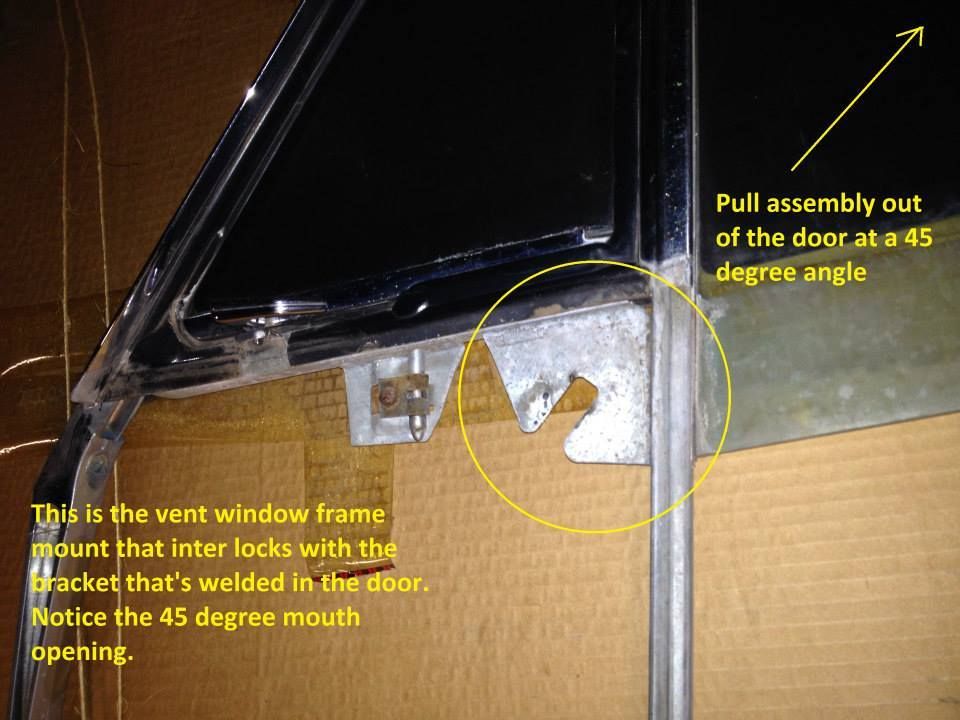
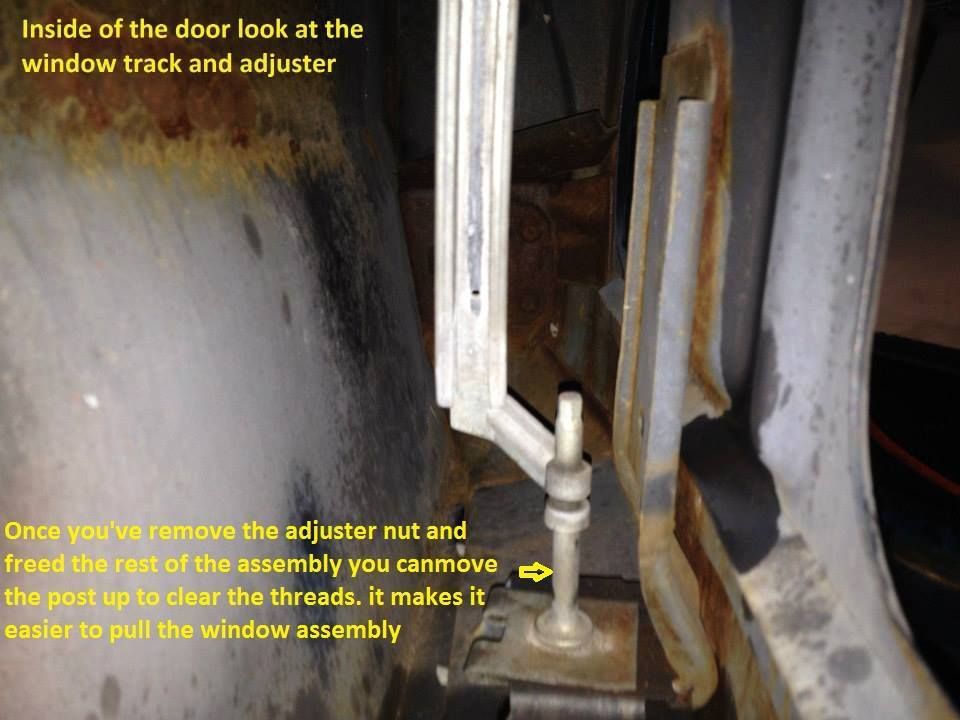
We studied the window assembly and the door internals of the side we just did and things became clear.
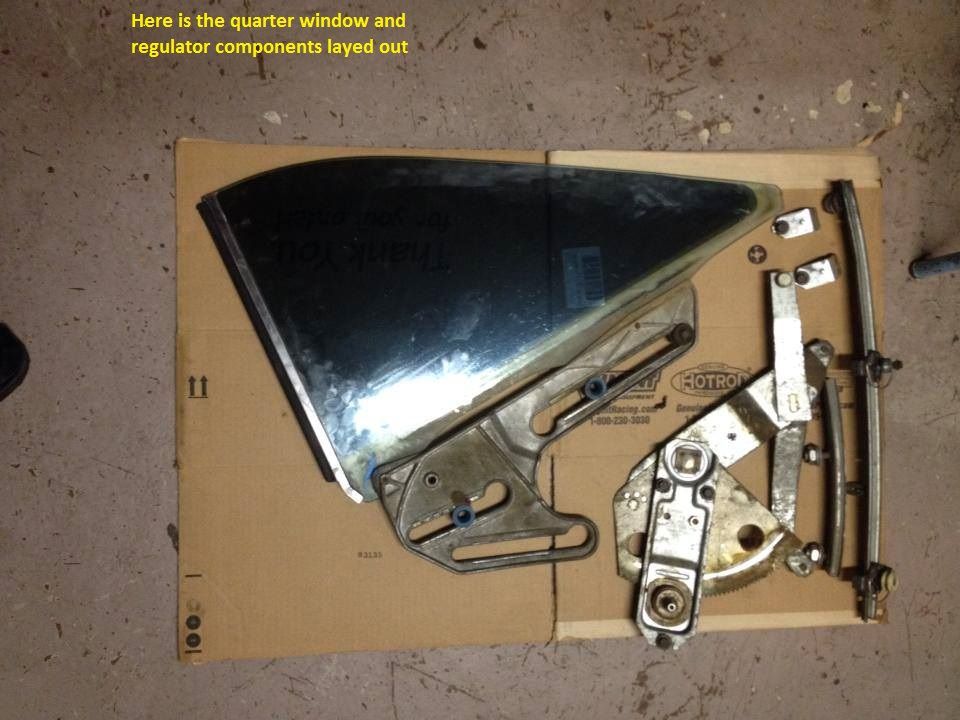
The passenger side came out in under 15 minutes and we didn't break or destroy a thing!! :cheers:

On the second side glass we adapted what we learned from removing the first one to modify the procedure for removing the second.

Our approach

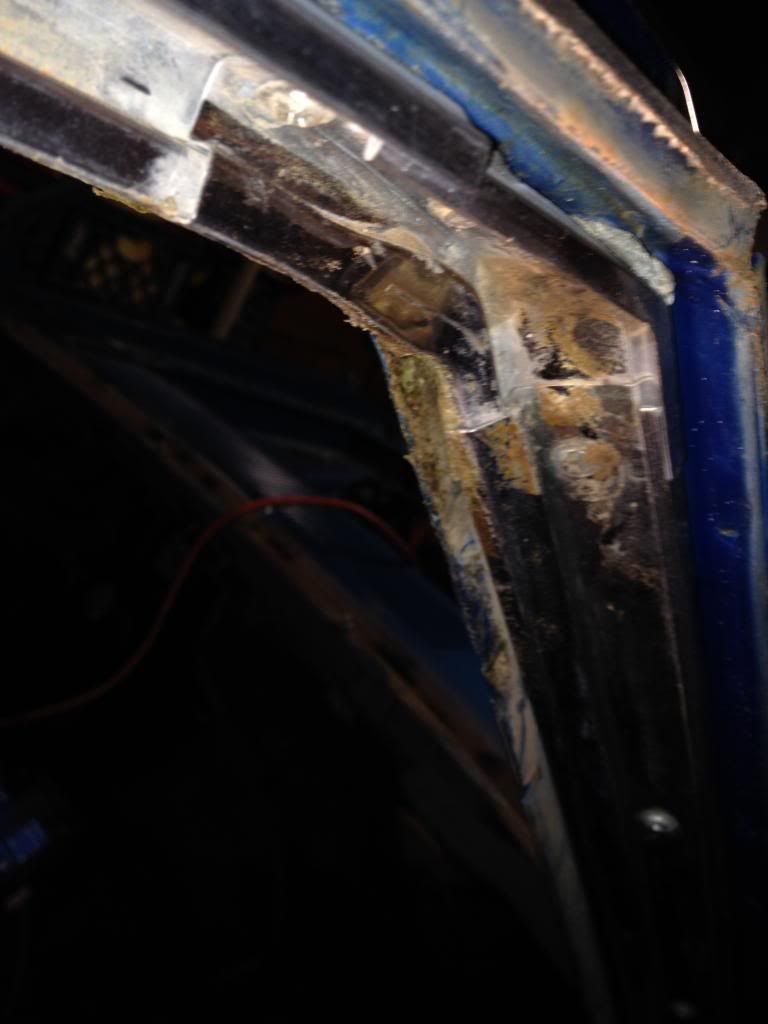
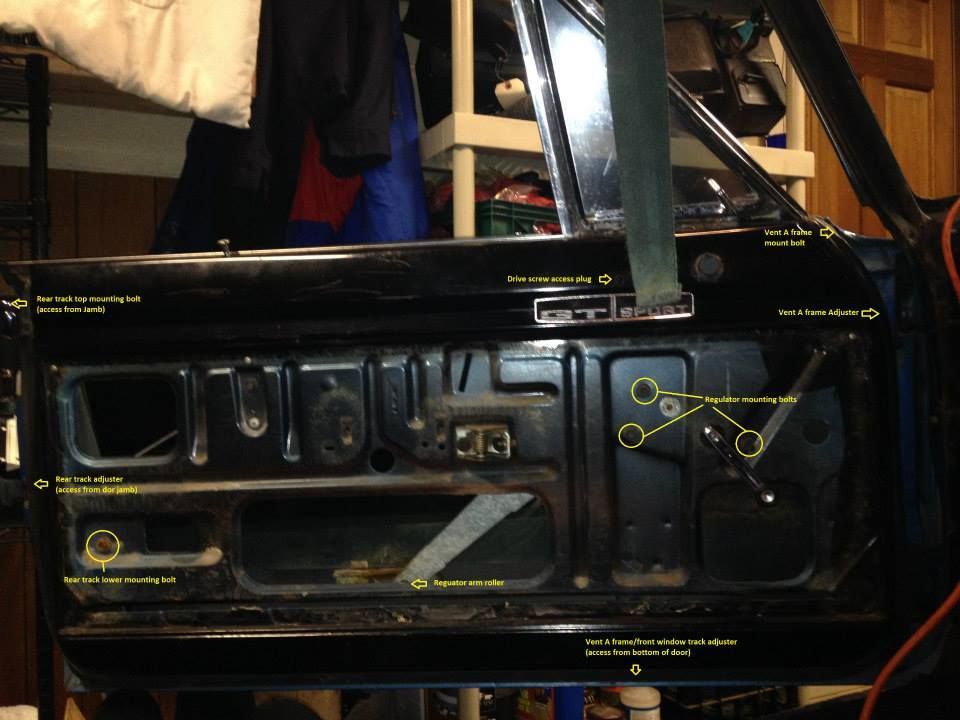
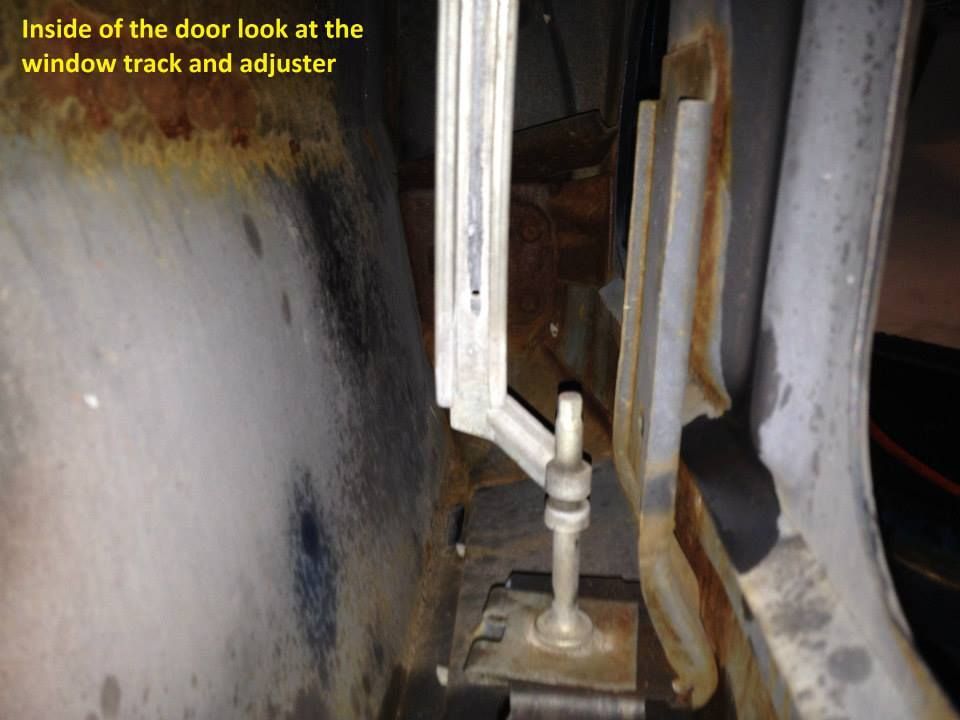
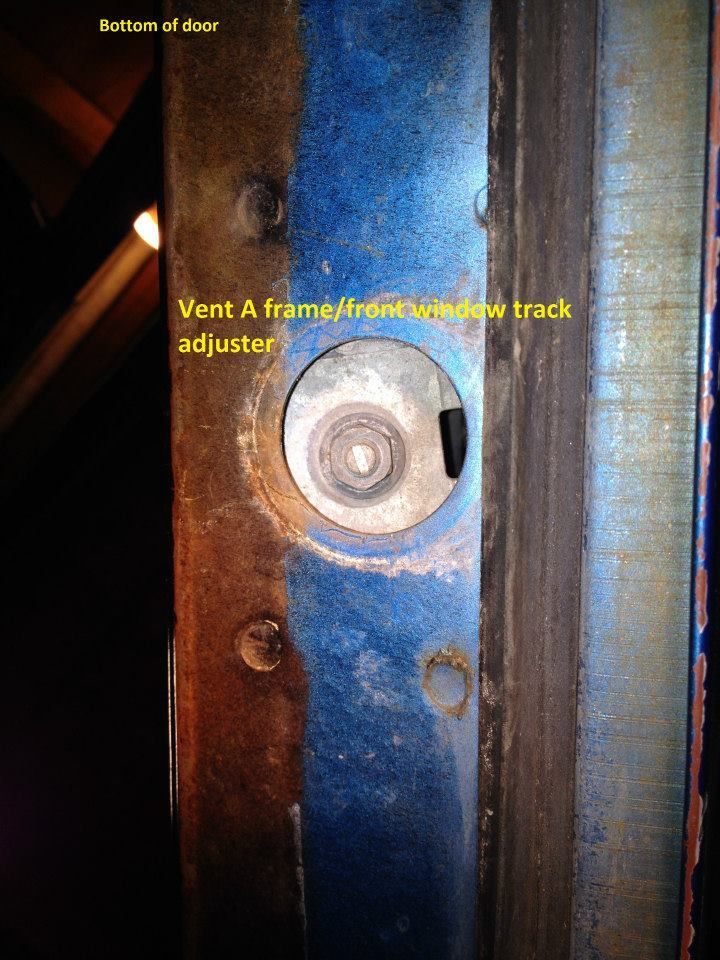
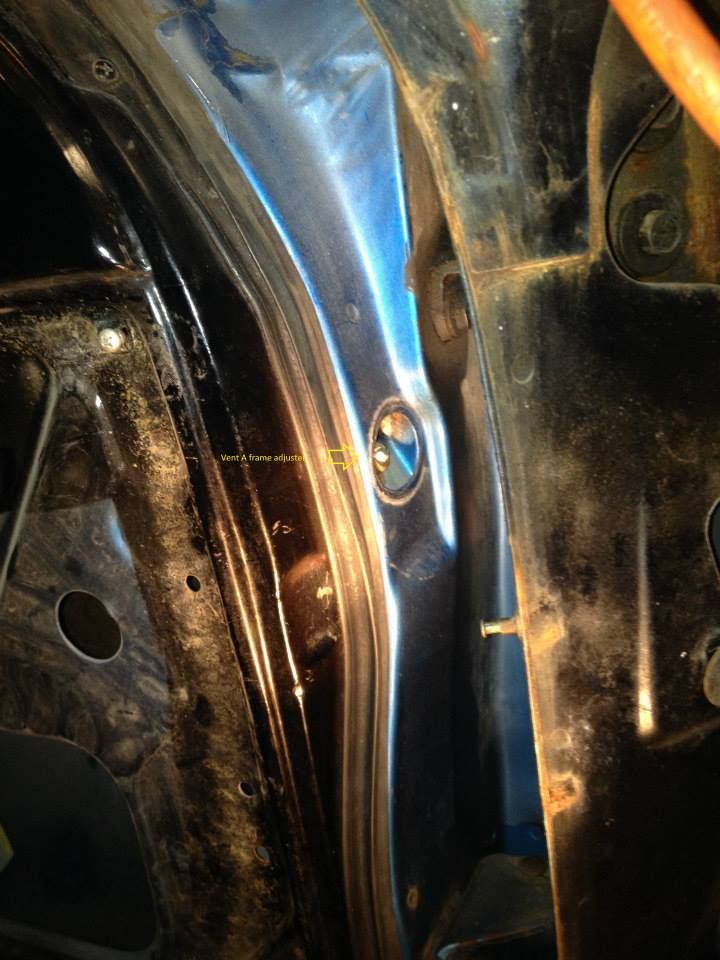
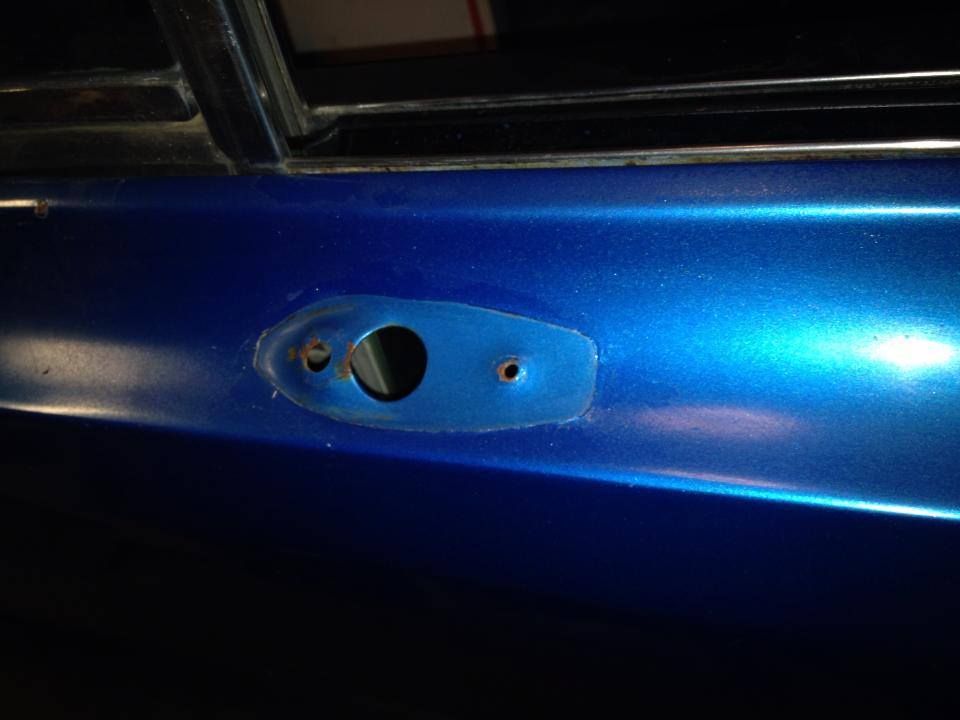
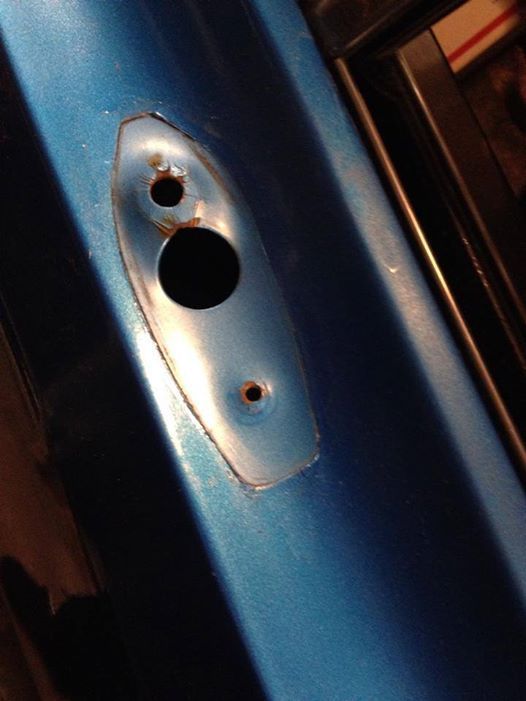
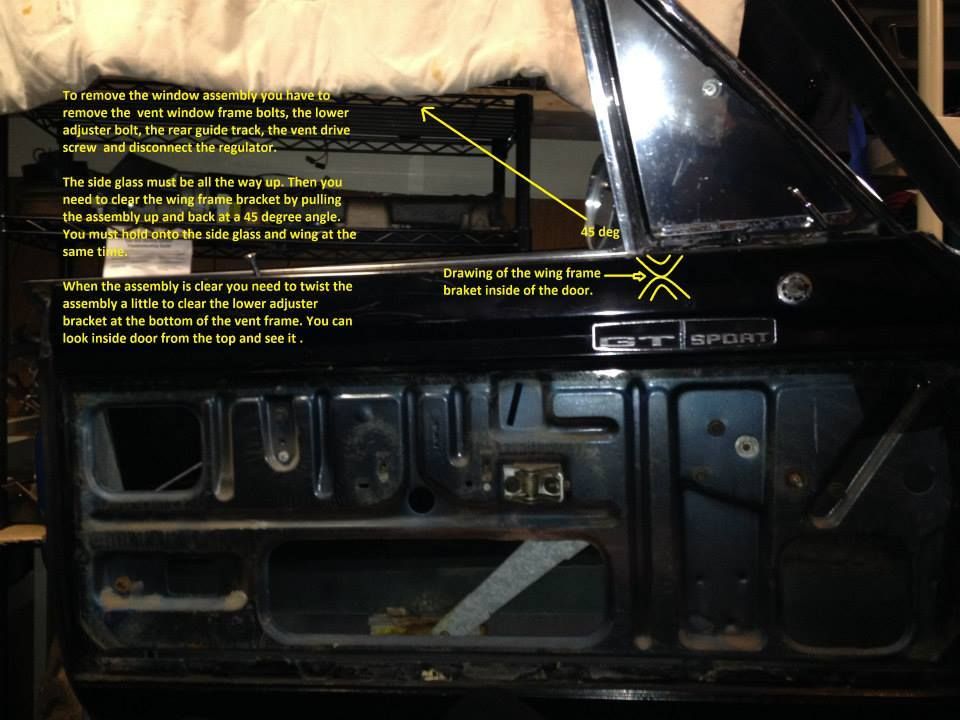
1. Removed the vent window frame bolt at the top of the front.
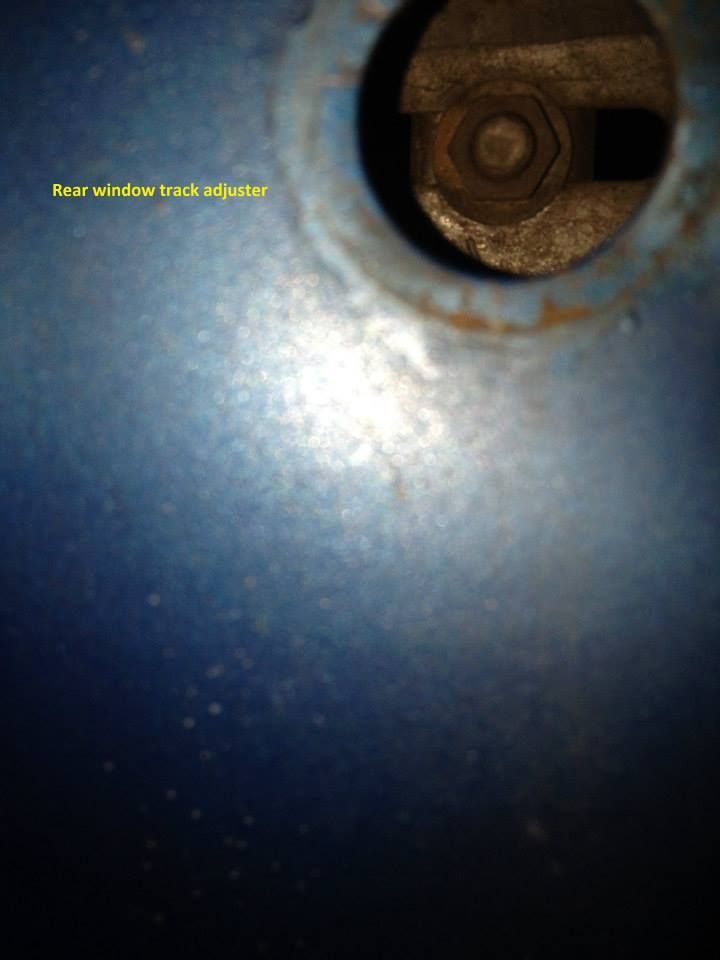
2. Removed the vent window frame nut and the washer from the adjuster on the front.
3. Removed the lower adjustment nut
4. removed the drive screw and block
5. Remove the rubber door jam seal.
6. Removed the plastic rivet from the side glass that acts as the up stop to the frame.
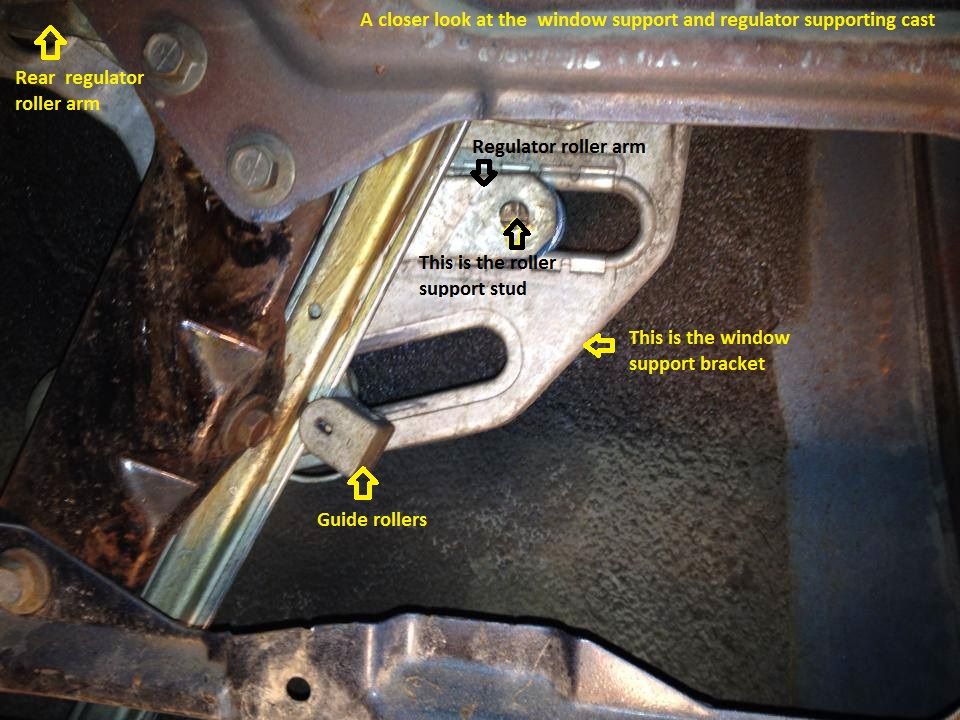
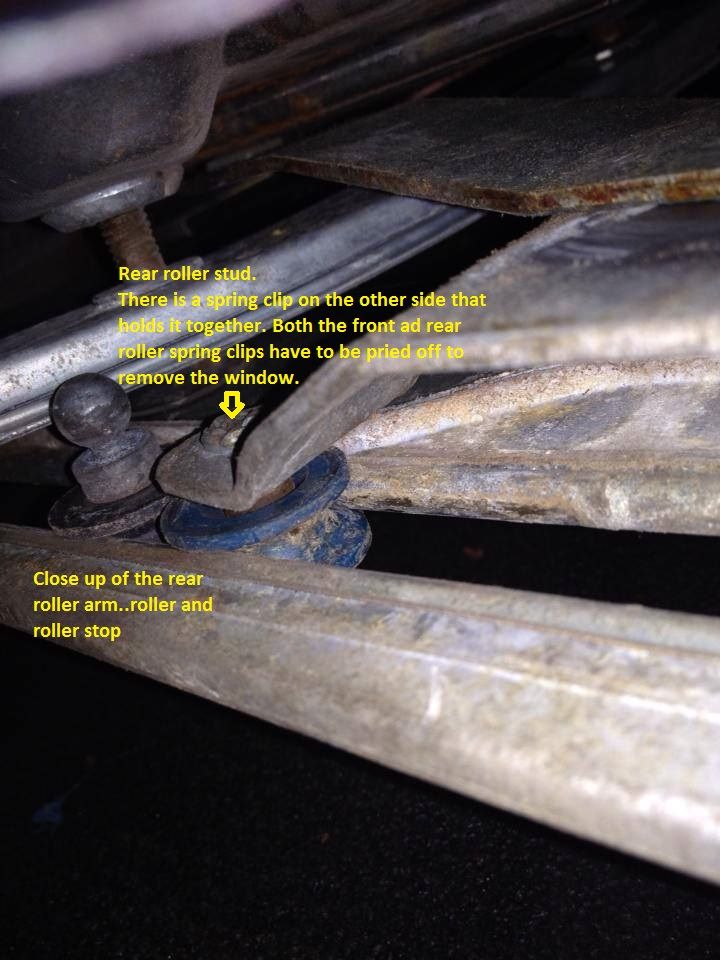
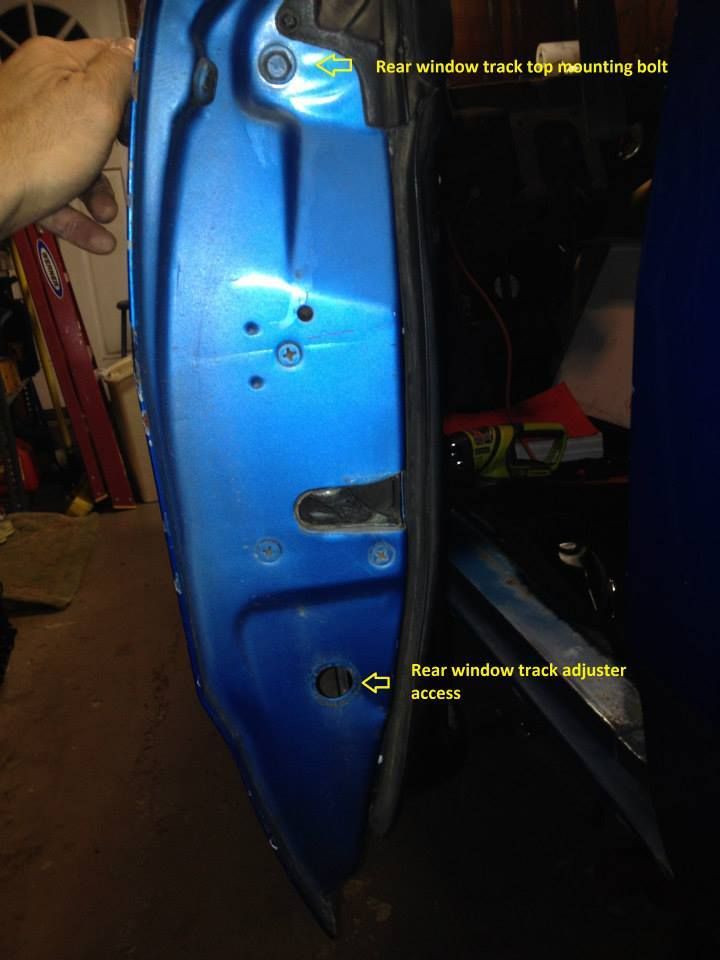
7. Removed the top and lower bolt from the rear guide and removed the guide track from the door.
8. Removed the 3 bolts holding the regulator and remove the regulator from the door.

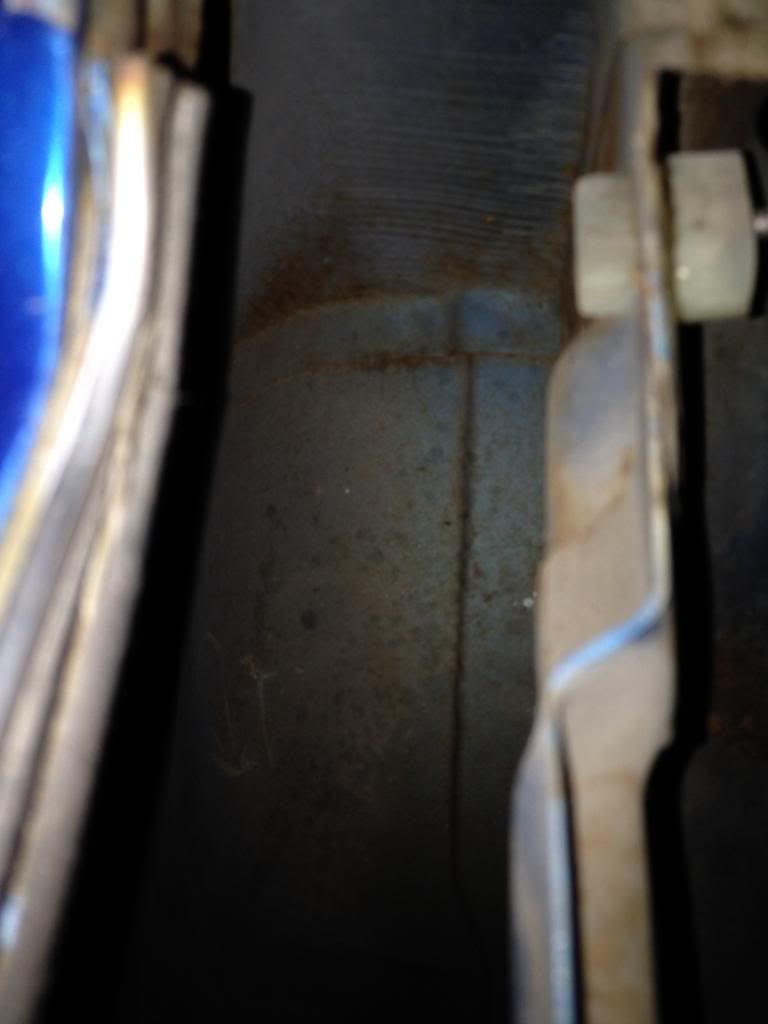
A this point the side glass is moving freely so be careful.


9. slide the window to the top poisition.
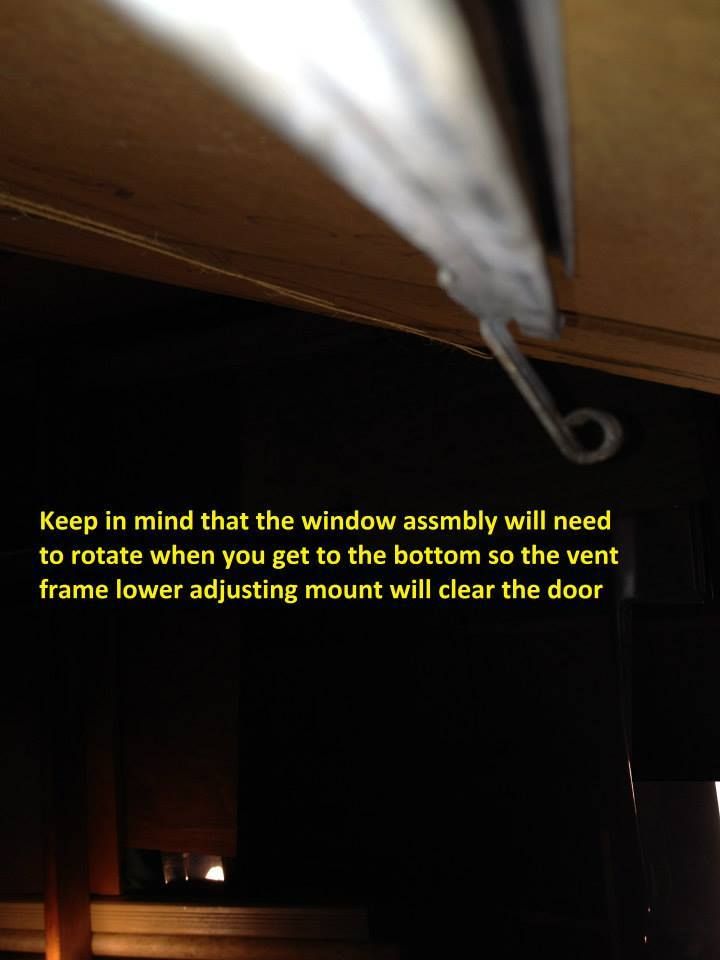
10. holding the side glass and vent window frame lift the assembly up and back simultaneously at a 45 degree angle.
11. Just before you remove the assembly you'll need to twist the window glass to clear the lower adjusting mount at the foot of the frame.

This worked for us but there is probably a better way.
The result was that we were able to remove it in a lot less time.

1392036_536653449750367_1375734938_n_zpsntvioz30.jpg


988746_536653453083700_1406906869_n_zpscfvqg7vt.jpg


1451428_536653399750372_822382485_n_zpsvvfgy2g7.jpg


1425681_536653396417039_551157914_n_zpst3qz01ap.jpg


1455058_536653426417036_1633941519_n_zpsfgz2qvtv.jpg


1464131_536653393083706_1777427033_n_zpsdiu7fpfr.jpg


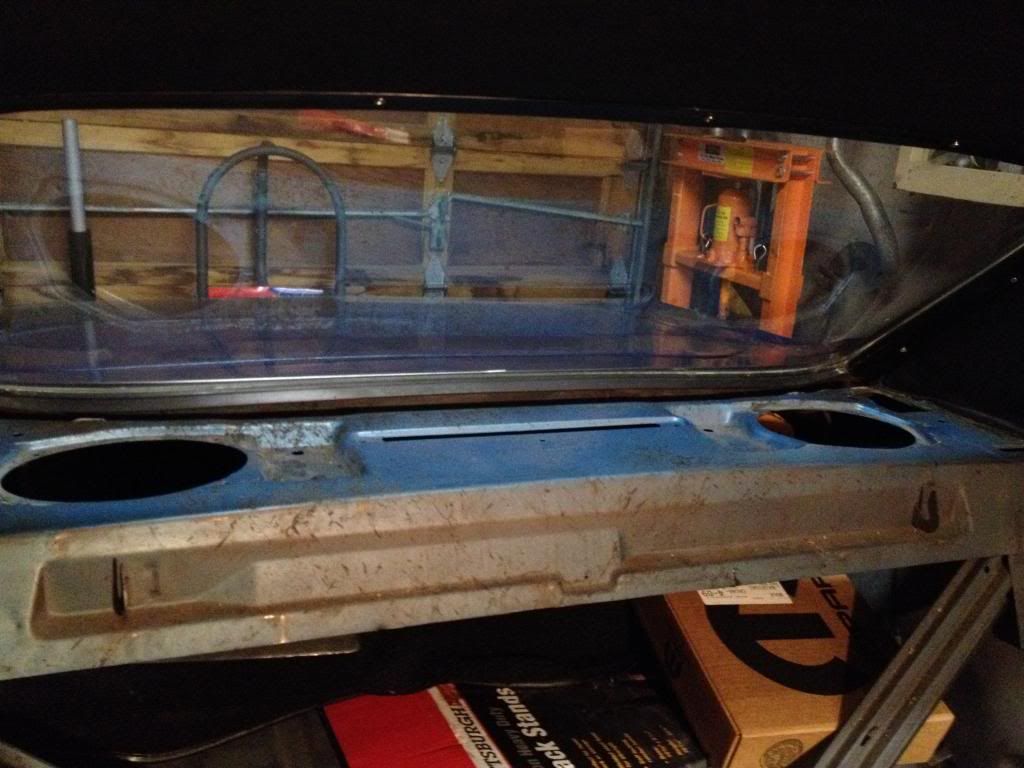
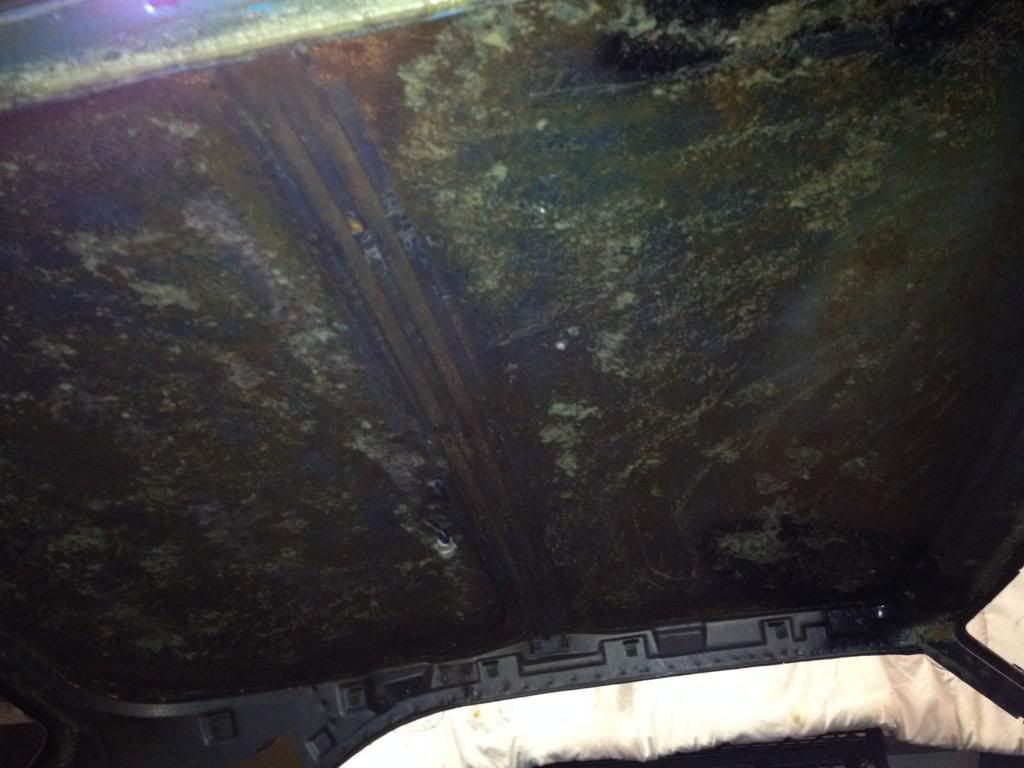
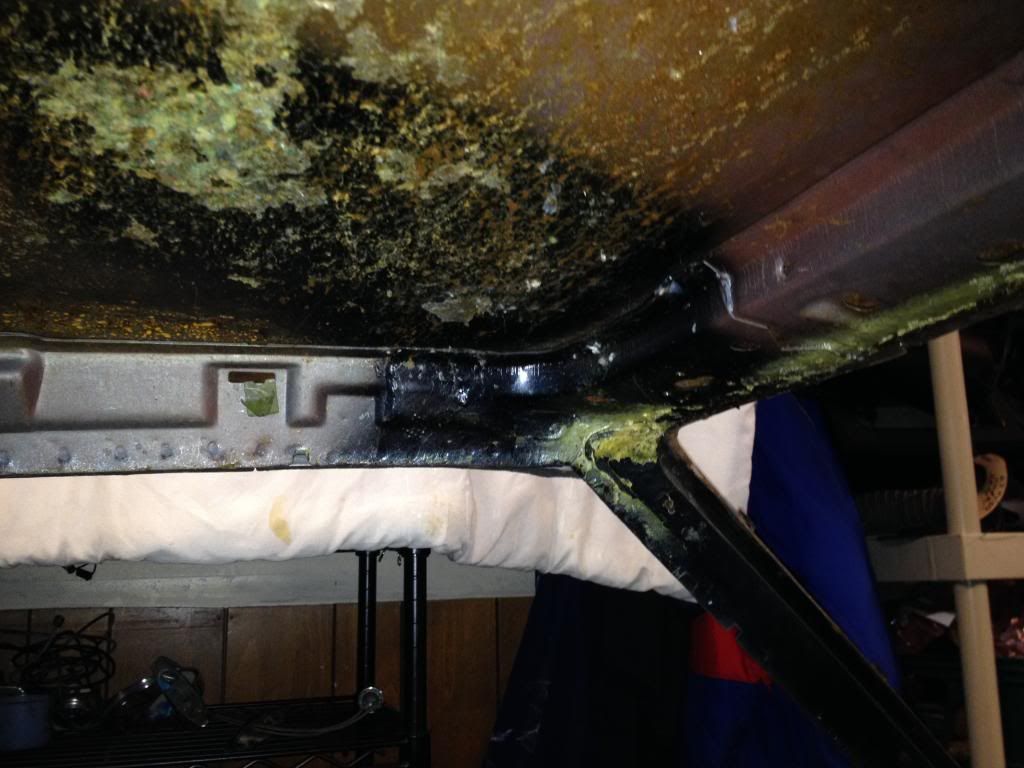
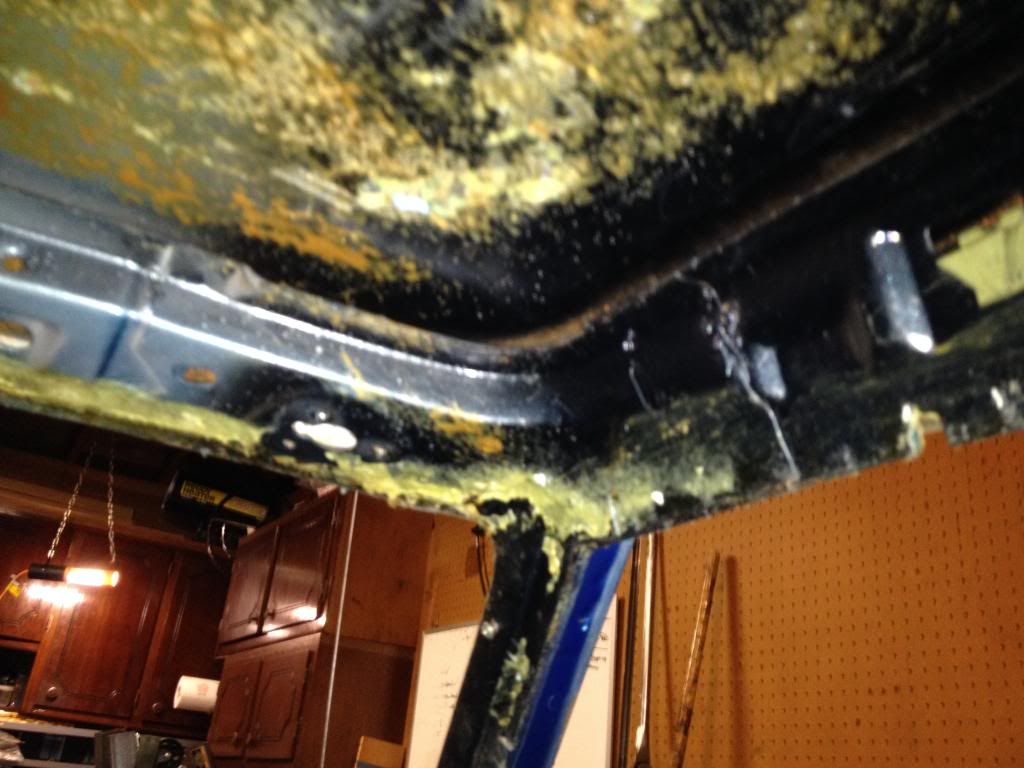
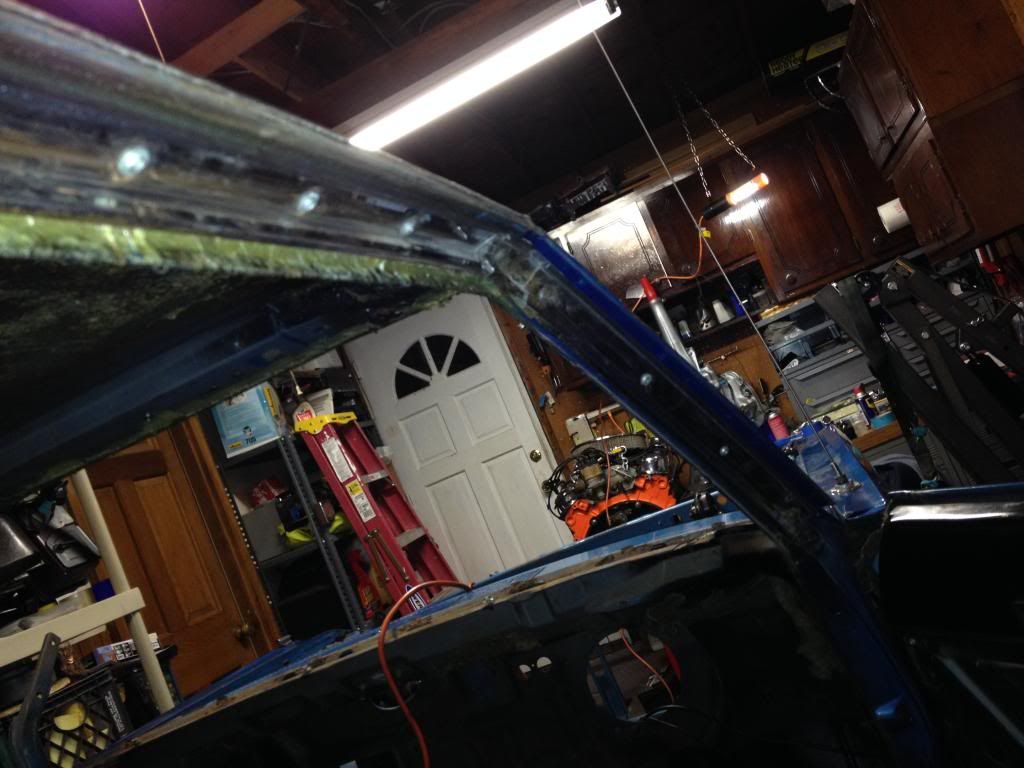
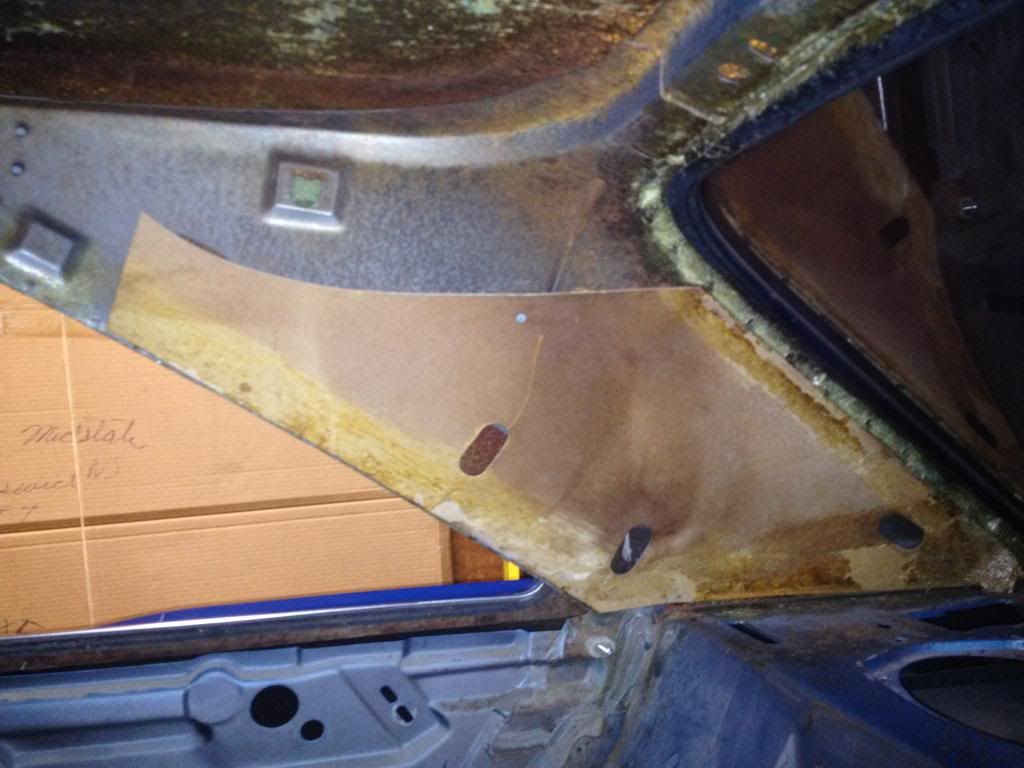
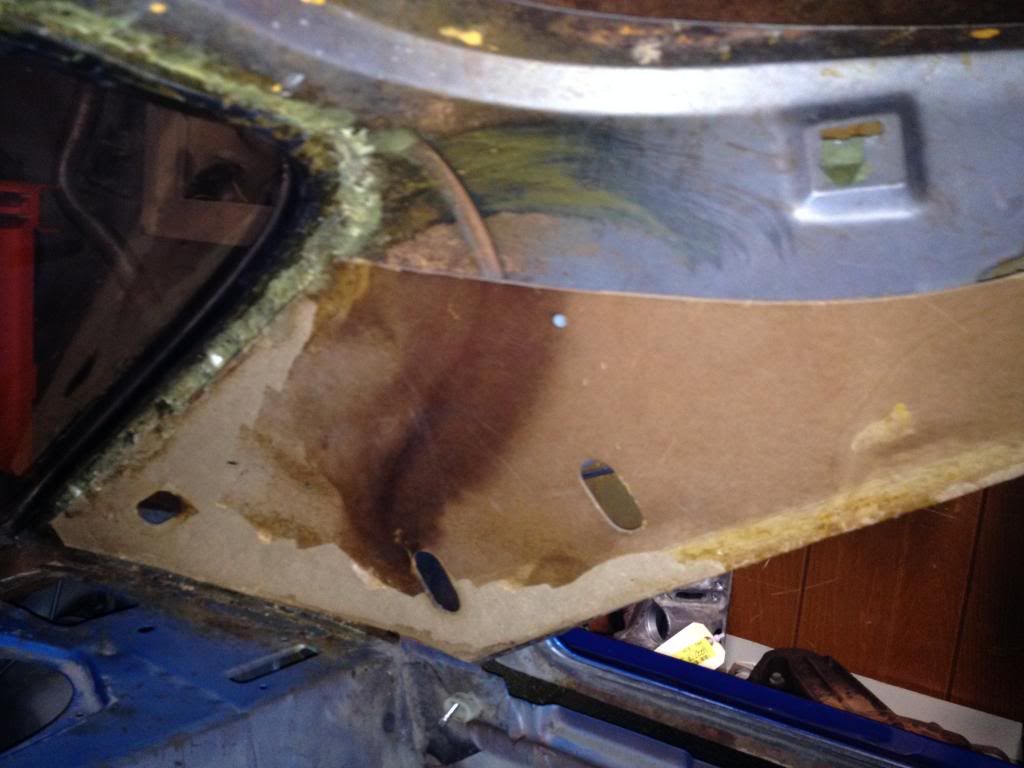
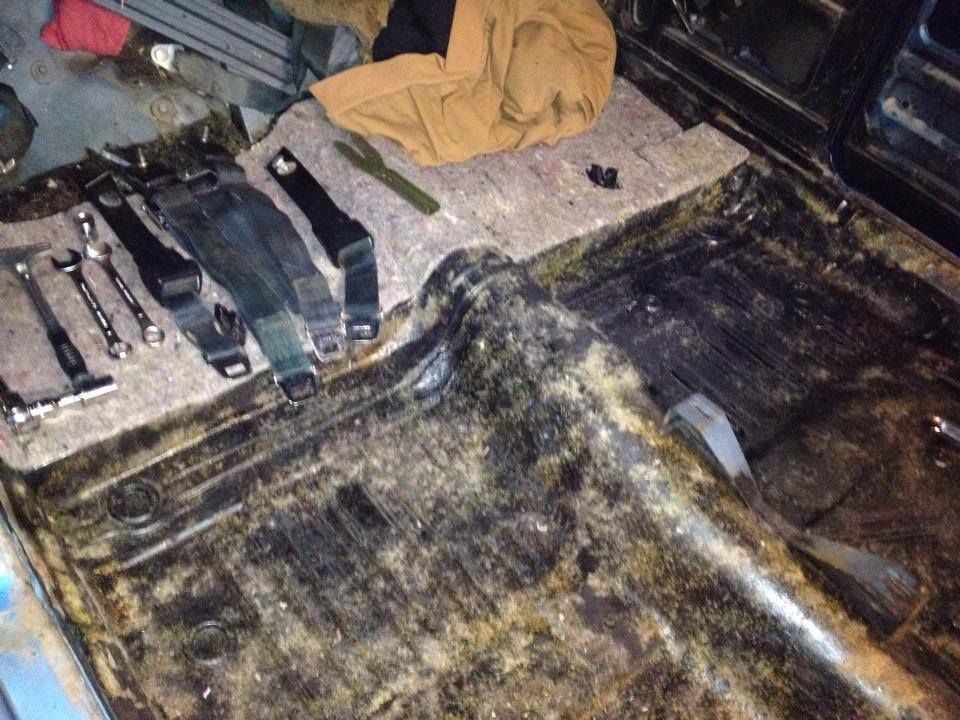
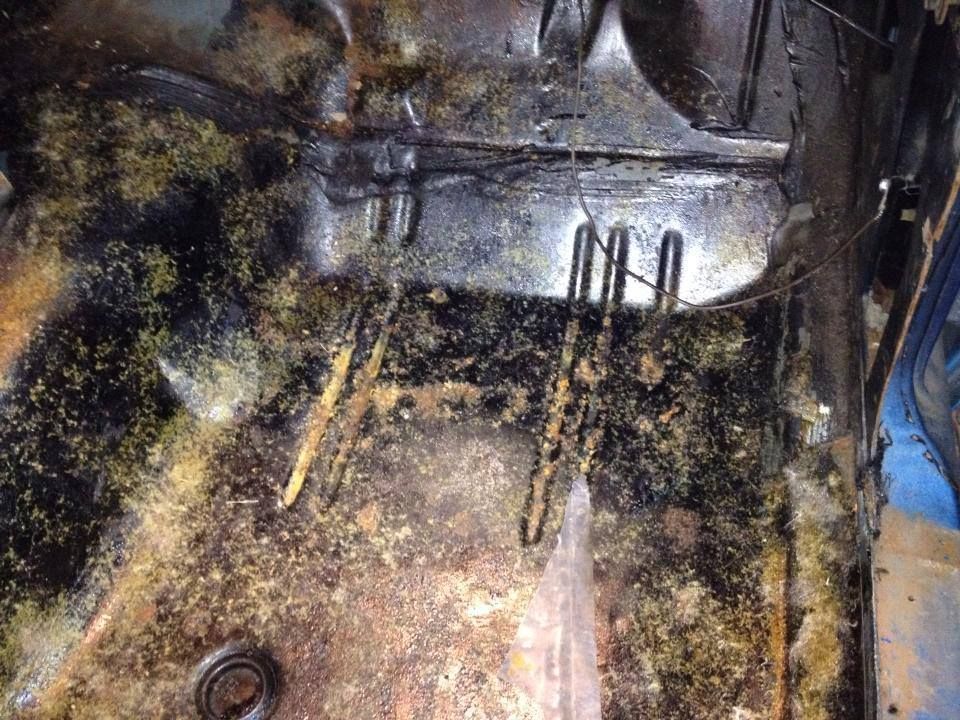
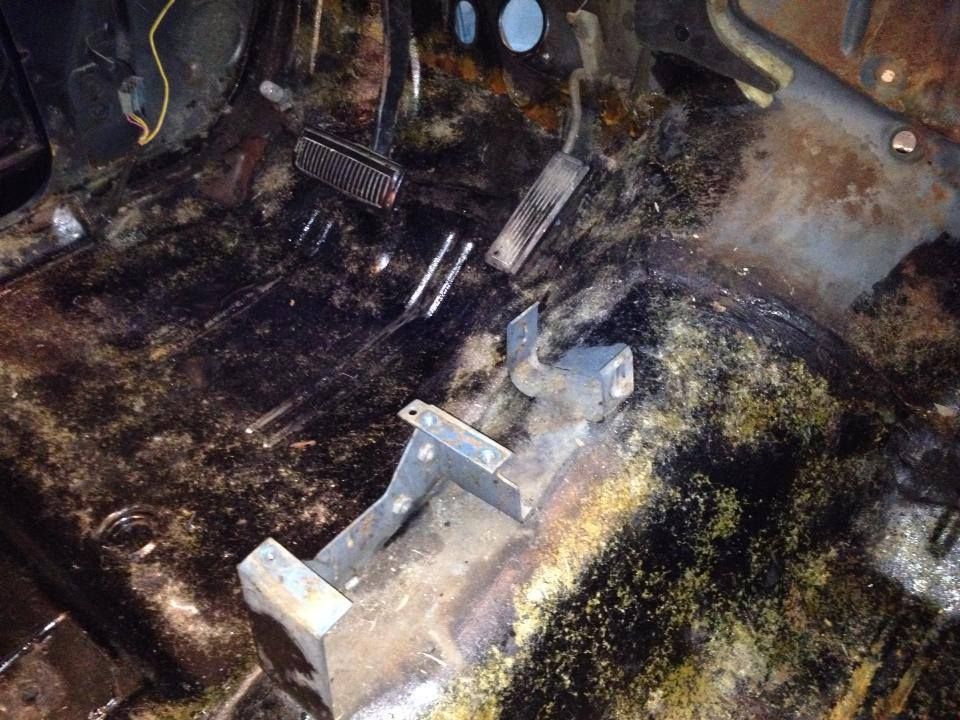
Now that we have the door glass out our next step is to pull the headliner (and trim) and carpet. Then the interior will be stripped.

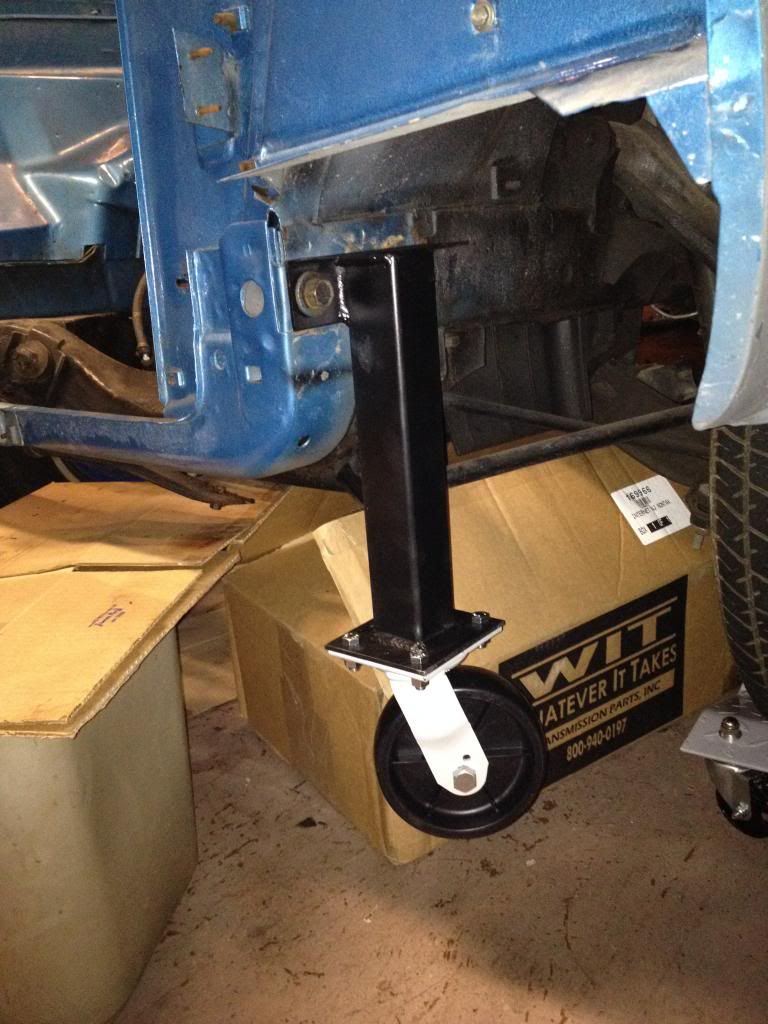
We bought a set of FABO member "Crackbacked" fab'ed body dollies. They are in transit and we look forward to installing them on the body.

We haven't decided whether we are going to target the front suspension or the fuel system next...

Happily stumbling along :D
Stay tuned...
 
The Dollies I asked Crackedback to make arrived. He did a real nice job with them, they came out great and bolted right into the frame where the bumper brackets mount. It's almost time to remove the K-frame and front suspension. :cheers:

1461504_537032243045821_1898575404_n_zpsdqizy0wa.jpg
 
Now that the glass and assemblies are out and all the parts are bagged and tagged we turned our attention to the carpet. What lies beneath????

We'll it looks like it's been treated but wasn't given time to cure before the carpet was laid as you can tell by the fibers stuck in it.

No surprises so far, it's looking pretty good.

1461312_537042103044835_368441484_n_zpszo28kz02.jpg


1385899_537042199711492_1723321827_n_zps9ysrxukt.jpg


1379405_537042173044828_1353408075_n_zpspj6anoxv.jpg


999622_537042146378164_845357936_n_zpsvytqhakn.jpg
 
Cool the dollies arrived and you are happy.

Put them to good use!
 
Cool the dollies arrived and you are happy.

Put them to good use!

We're definitely pleased.
It's been a little busy around here but we plan to pull the "K" this weekend.

Here's a picture of your work on the car. Ready to go:cheers:

IMG_5708_zps29c412bd.jpg
 
It's been a busy week. Work for me and extra curricular activities for Jake. Needless to say we've haven't made any big strides, but it's cool because we're not in a rush :) I've been spending so much time with my son that I wouldn't mind if this thing took a little to longer finish. You know what I mean.:glasses7:

We did find some time to pull the headliner and the Side window seal and trim. There was some underlay glued to the roof so we pulled that along with the rear window trim.

I'm surprised by the condition of this car. I haven't found any serious rust, outside of some surface rust this thing is leaving me in suspense waiting for the shoe to drop.

Here are some more pics of the body.

IMG_5696_zps18b2a408.jpg


IMG_5712_zps5ad2542b.jpg


IMG_5713_zps5c785267.jpg


IMG_5714_zps8d37e042.jpg


IMG_5697_zpsdeb40e32.jpg


IMG_5698_zps3b42176f.jpg


IMG_5700_zpsfc142c27.jpg


Inside of the quarter.

IMG_5716_zps2c10a040.jpg


IMG_5718_zpsaa02dc91.jpg


IMG_5717_zps63694c96.jpg


Okay, so we weren't sure what the story is with the cardboard.. Our guess is that it has something to do with the headliner.

If you know what they are and are for please let us know.

Thanks!
 
Thanks!
I really like reading your thread your story is fantastic. Great read :coffee2:

Thanks! Much appreciated!
You are making excellent progress. Keep at it but spend the family time when you can You can always work on the car any old time!
 
And the chill arrives like a lion. The little garage is becoming a bit of a chiller lately hovering between 30 and 40 at night. I really wish I had taken the time to better insulate like I planned, but i didn't lol.

It's not terrible yet and I have the propane heater ready for when it gets really cold. We finished removing the rest of the weather seal and trim. The only thing left on the body are the rear light assemblies which will come off tonight. We had planned to remove the "K" with he front suspension this weekend and let it sit on the dollies but we have a minor change in plans.

I've made arrangements for next week to have it looked over and asses the body and paint. I want to come up with a game plan to strip, straighten, seal, and paint by may 2014. We'll see how that goes. We will keep it a roller for now and then remove the "K" and the rear before it goes to the shop to be worked on.

If all goes well, I'll pull the front and rear off so we can work on them while the car is out of the garage. It will be good to have some room to move again. :D I hope to have the car off to the shop by the end of the month.

Stay tuned..:coffee2:
 
A collage of numbers.

I think all but one is pictured here. Can you tell which one is missing? :happy1:
 

Attachments

  • Numbers.jpg
    103.9 KB · Views: 974
on rear quarter , or trunk . Drivers side i think . Should be the last 6 . Great build ! !
 
Just got thru reading this entire thread and your skills are as impressive as the documentation!
Son-stick close with your Dad on this build. You are learning/gaining valuable info and skills.

Oh ya Dad.....I gotta call BS on this being your 1st build too!
 
-
Back
Top