You are using an out of date browser. It may not display this or other websites correctly.
You should upgrade or use an alternative browser.
You should upgrade or use an alternative browser.
1968 Barracuda Notch - Plano, TX
- Thread starter mosleyme
- Start date
-
TexasDart
Well-Known Member
I'm getting excite for you...can't wait for a ride. Let me know if you need help....I'll send Steve over. ")
It is looking good but I am kinda missing the pantina
Carl - this will be the first time in about 30 years the car has been one solid color.Oh, by the way... remember that rocker?

Started cleaning up the garage last night... one thing for sure, car takes up a lot more space when it is in pieces.
Dropped by the shop today. Block sanding is done. Console position set today and brackets welded. Drilled holes for the rear seat outboard seatbelt anchors. This afternoon they were set to do the final welding on the sub frame connectors then take the car apart to go back on the rotisserie. Inside and bottom of the car is going to get primer next.
Dropped by the shop today. Block sanding is done. Console position set today and brackets welded. Drilled holes for the rear seat outboard seatbelt anchors. This afternoon they were set to do the final welding on the sub frame connectors then take the car apart to go back on the rotisserie. Inside and bottom of the car is going to get primer next.
buckshotbishop
Old Soul
i kinda liked the yellow primer and purple smoke guide coat it had going on
i kinda liked the yellow primer and purple smoke guide coat it had going on
It did look pretty smooth, especially when it had the two tone dull yellow light purple colors and the bright yellow tape accent stripes on the body lines. Monday they welded in the console brackets and I drilled the holes for the outside rear seat belt anchors.
Stopped by today and it looks like they are going in reverse. They finally welded the subframe connectors at the front and to the floor. Sam wanted to wait until all the panel alignment and gaps were done before he made that final connection with the weight of the drivetrain in the car. Then they pulled the hood, decklid, doors and fenders. They are sanding and doing prep for the car to go on the rotisserie to do the primer for the bottom and the insides. I will go in Saturday to pull the drivetrain and put the car on the rotisserie. I stopped by today after work and pulled the fuel tank and brought it home. I have a van load of parts I need to retrieve over the next few weeks. I also have to figure out where to store everything. Over the last four months I have been bringing one or two parts at a time as they needed them for fitment, that has piled up to cover a picnic table and some adjacent floor space.
Attachments
Block sanding is done, final prime on the fenders, doors, decklid, header panel, front valance, and hood are done.
Put the car back on the Rotisserie today so they can do the final primer and finishing work for the inside, underneath, and outside of the body. My son Alec and I went to the body shop at 8am, pulled the engine, transmission, front suspension, brakes, wheels, rear axle, and rear suspension. Put the car on the rotisserie, removed the wiper motor and a few other odds and ends still on the car. We left at 11:15, ate some lunch and went to a car show...
Sure makes things easier when you have a lift and air tools you can use.
First picture shows the 2x2 cross brace Sam installed. We started w/ the XV brace, modified it to the correct width, raised it to match the height of the factory piece, cut pockets in the corners to clear the cross flow radiator, put nutserts into the front for the latch support to bolt to, and added stand offs to the corners for the front valance attachment points. Sam also cleaned up the edges where the radiator opening had been expanded to fully expose my 27-1/2"x19" radiator core.
Second picture shows the engine-transmission-suspension assembly which drops out as one complete unit with the removal of a whole 12 bolts. Pulled it out in about 30 minutes, and only took that long because an 11 year old was doing much of the wrenching.
Third picture is of the car after the fact back on the rotisserie.
Attachments
Nice progres!
626notchback
Mopar Rookie
Tried looking through your past post, not sure...so Ill just ask. Are you running Brembo front brake kit? If so,what about the rear brakes? Also, did you do a mini tub to get the rear wheels to fit? I also have a 69 notch and am interesting in running a 18x10 305 rear tire
thanks!
thanks!
cuda20
Well-Known Member
Looking good.
Are you running Brembo front brake kit? If so,what about the rear brakes?
Dr Diff kits.
Front: http://www.doctordiff.com/brembo-style-13-front-disc-brake-kit.html
Rear now: http://www.doctordiff.com/rear-disc-brake-kit-10.7-rotor.html
Rear future: http://www.doctordiff.com/rear-disc-brake-kit-11.7-rotor.html
Also, did you do a mini tub to get the rear wheels to fit? I also have a 69 notch and am interesting in running a 18x10 305 rear tire
Inner wheel housings are new and flush to the frame. With the outside lip rolled I have over 14" tire clearance. I had 325/50-15 tires on the car and they cleared easily, but they are not as "square" as the low profile performance tires. With the 295/40-18 I have on there now, which measures 10.9" section width, and a 1/2" spacer I have about 1-1/2" clearance on the outside and 1-3/4" clearance on the inside. A 325/30-19 would fit almost perfect and a 345/30-19 might fit...
305 would not be an issue.
Inner wheel housing relocation:
http://www.forabodiesonly.com/mopar/showpost.php?p=1970263991&postcount=157
Edit: My springs are relocated... not sure if you can fit that big without the spring relocation.
626notchback
Mopar Rookie
I see, very nice set up...I am thinking of going with a four-link rear...so hopefully I can fit the 305. Are you planning on running power steering up front? If so, did you get a larger pulley or pump?
On another point, kind of a distraction. I still don't believe I got this dinosaur of an intake to fit under the hood. With carburetors it for sure would not fit. I think that is the ultimate "retro restomod" kind of theme. Take something like a 1970 Super Stock intake that is probably the best cast six pack intake ever made that you "can not run on a street car" because of fuel puddling in the upper plenum. Then convert it to a dry manifold with multipoint EFI.
Attachments
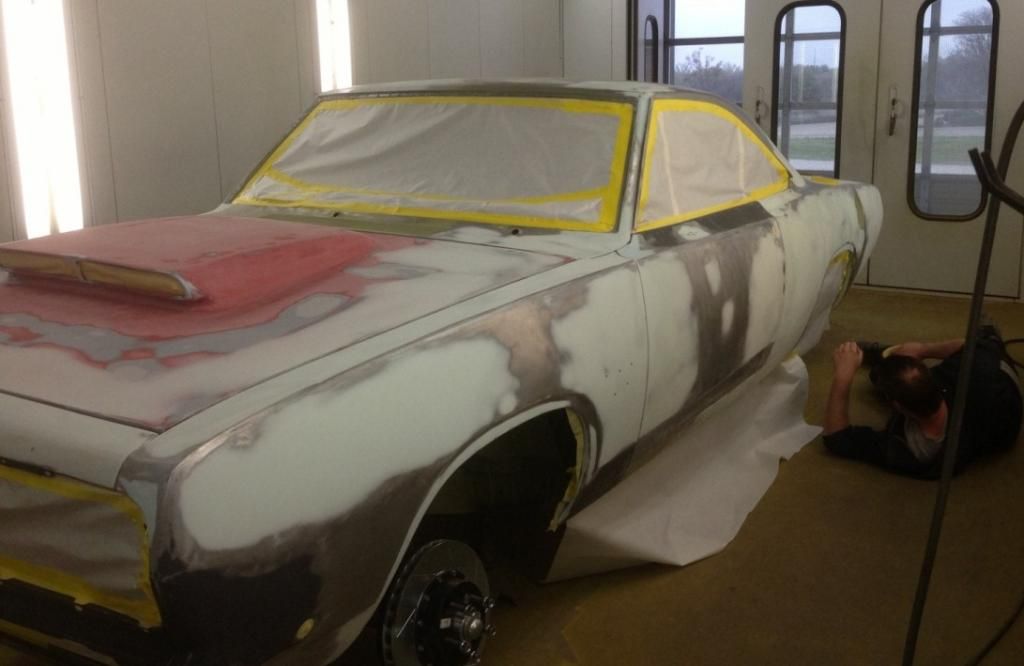
Some pictures of the car in final primer:
One picture shows underside of the front half of the car showing the new tunnel, new t-bar cross member, torque boxes, frame plated, sub frame connectors, and the lower radiator support.
View attachment P82A04481s.jpg
Pictures of both of the front inner fenders.
View attachment P82A04531s.jpg
View attachment P82A04551s.jpg
Another picture showing the relocated inner wheel house, the rear torque box, frame plated, front spring mount, the rear of the sub frame connector, and the relocated outer seat belt anchor.
View attachment P82A04561s.jpg
One picture looking into the trunk to show widened wheel tubs and the frame that ties the rear frame rails together and supports the fuel tank.
View attachment P82A04801s.jpg
One picture that shows the smoothed firewall. I think the two harness clips will disappear tomorrow, since the harness is relocated and the firewall feed through is gone they are not needed.
View attachment P82A04841s.jpg
And a picture of the car on the rotisserie.
View attachment P82A04901s.jpg
dodgedartgt
Well-Known Member
- Joined
- Dec 2, 2006
- Messages
- 215
- Reaction score
- 19
Hi Michael,
Been following along, though haven't read all posts. Please explain phrase "frame plated", not sure what you mean.
Thnx, Mike in FL
Been following along, though haven't read all posts. Please explain phrase "frame plated", not sure what you mean.
Thnx, Mike in FL
I have heard the term before, and that is also what Sam called it, may not be common terminology. The stock frame has a few holes in it and was also a bit beat up. It looked beat in a little, kind of dished, and looked like some one had pulled it in a few spots with a hook, possibly with a tow truck. Sam welded a piece of flat plate over it to add strength, make it easier to weld the torque boxes to, and for cosmetics. Without the plate there it would have been a pain to weld the torque boxes or he would have had to beat them down to follow the contour of the damaged frame which did not make sense.
Here is the frame after media blast, I have arrows drawn so you can see the holes:
View attachment Frame Before.jpg
Here is the front with a plate welded in place and the torque box before primer:
View attachment Front.jpg
And after:
View attachment Front After.jpg
Here is the rear with the plate and torque box welded:
View attachment Rear.jpg
And after:
View attachment Rear After.jpg
Harness clips are gone. A picture of the engine bay and two more of the car on the rotisserie. Sanding on the bottom of the car is done. Mike (painter) popped a lid on a can of paint with the bed liner material mix ready for the undercoating to show me the color. All I have to say is wow! I can't wait!
Attachments
-


