1973 Dodge Dart Swinger

-

Pompis

Well-Known Member
Joined
Nov 16, 2012
Messages
229
Reaction score
22
Location
Sweden
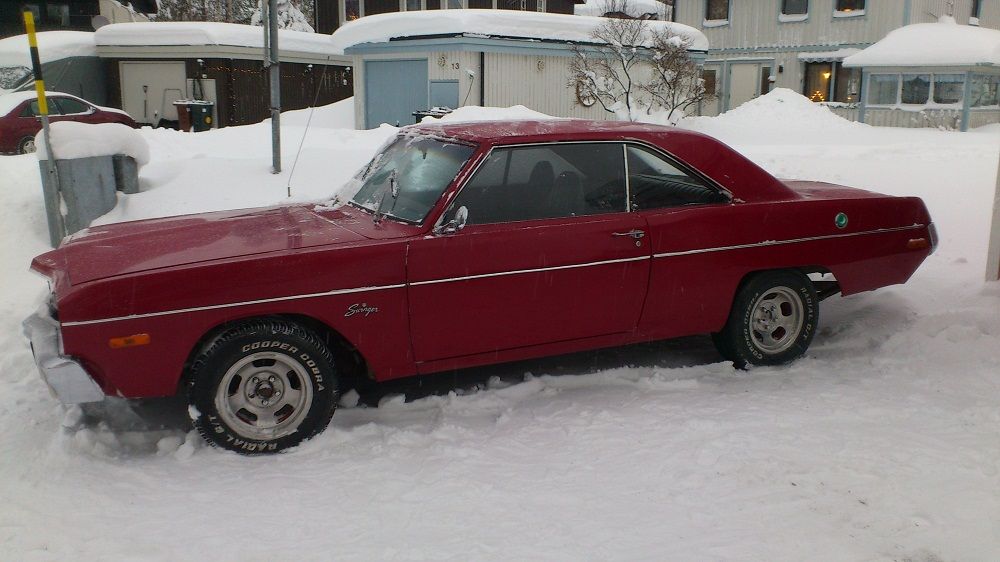
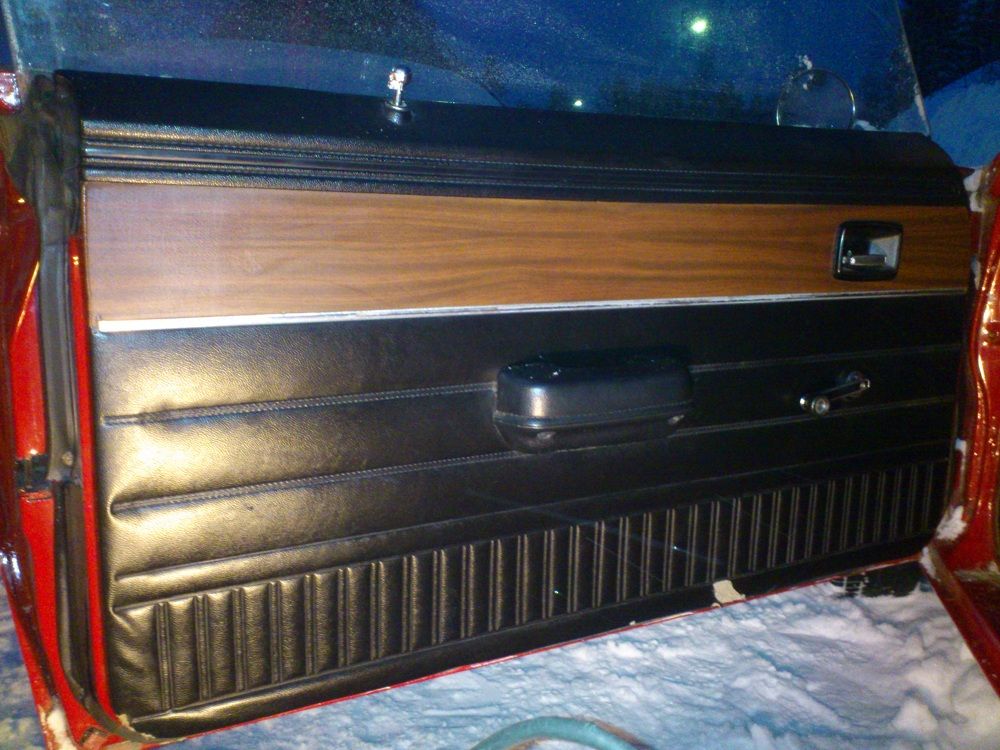
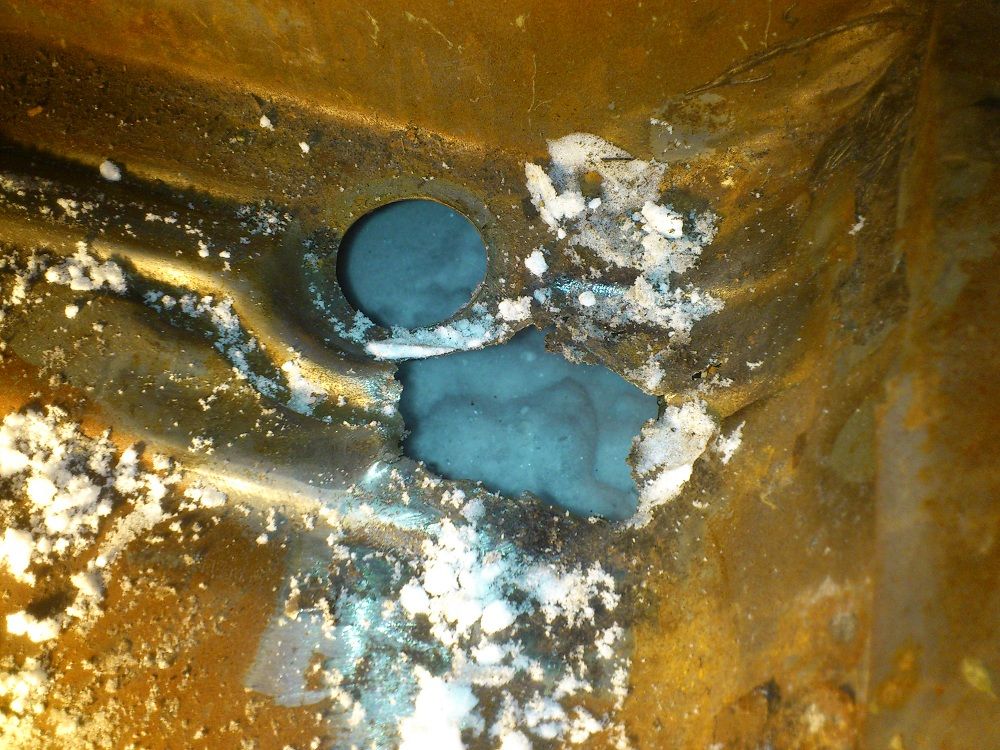
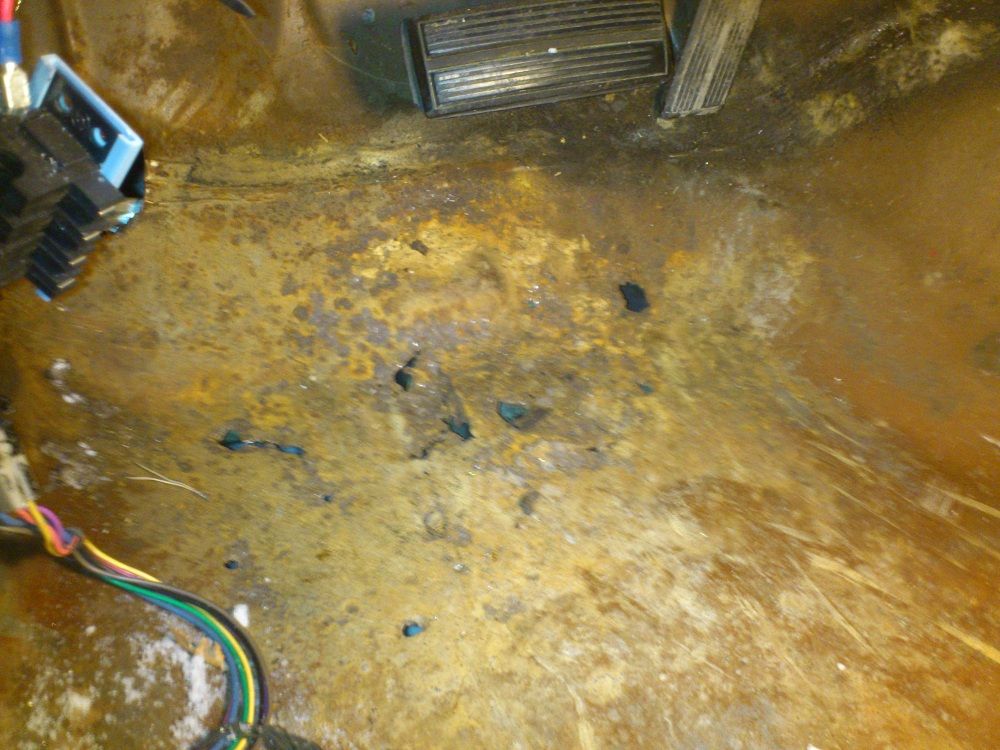
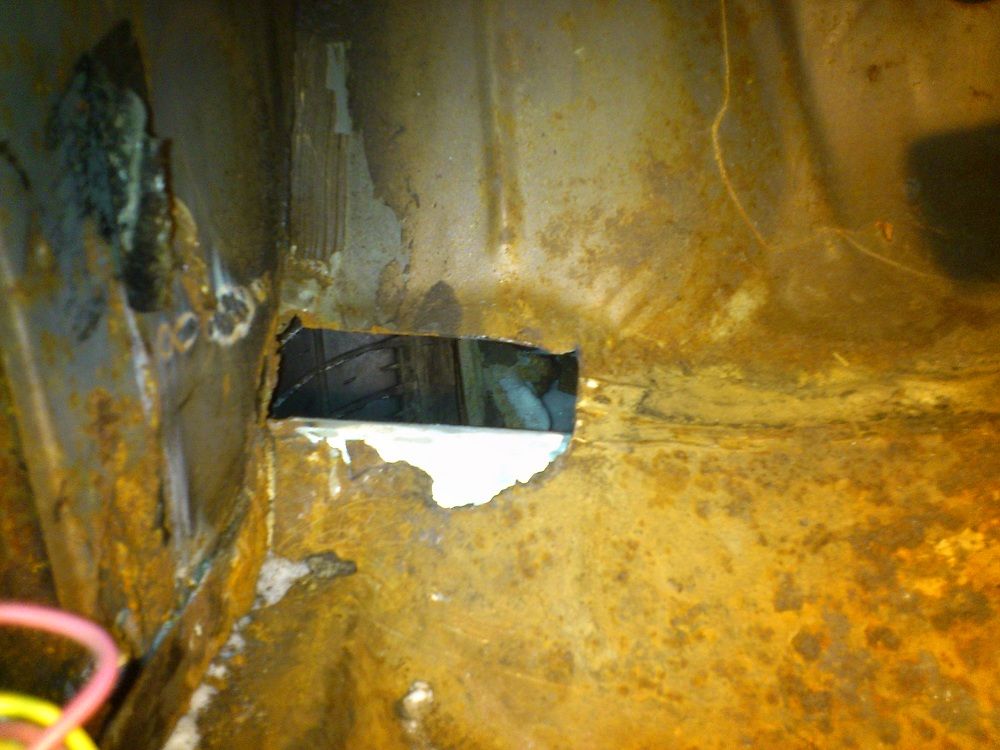
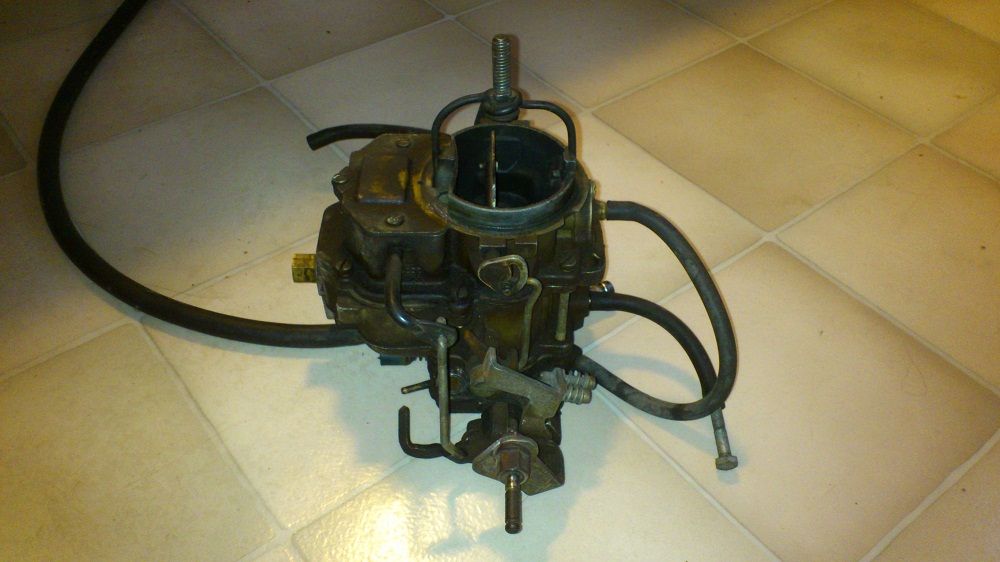
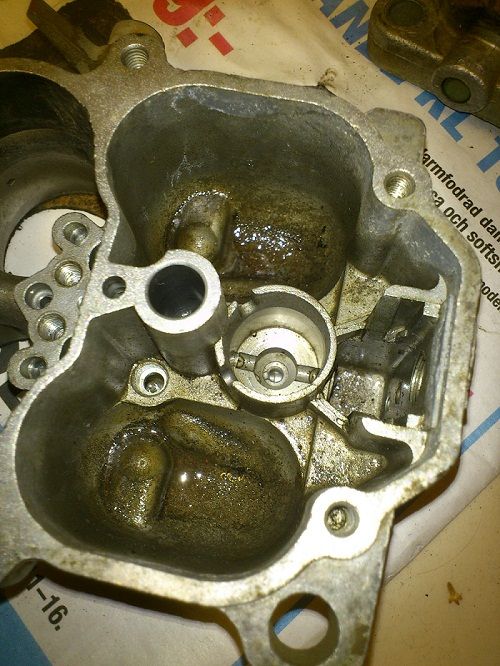
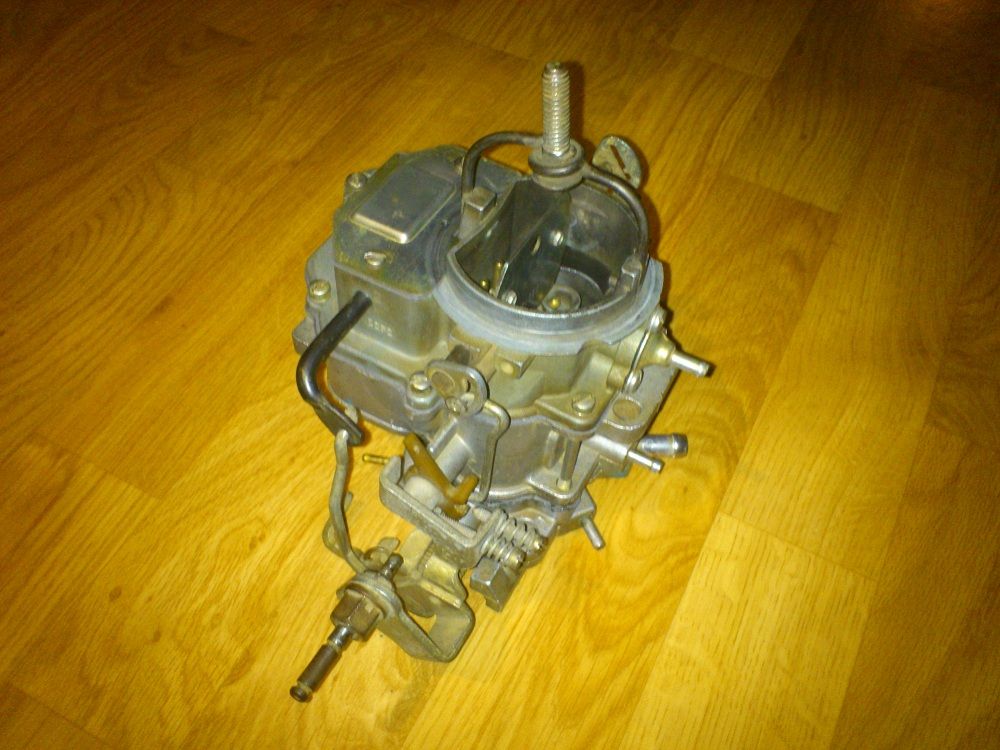
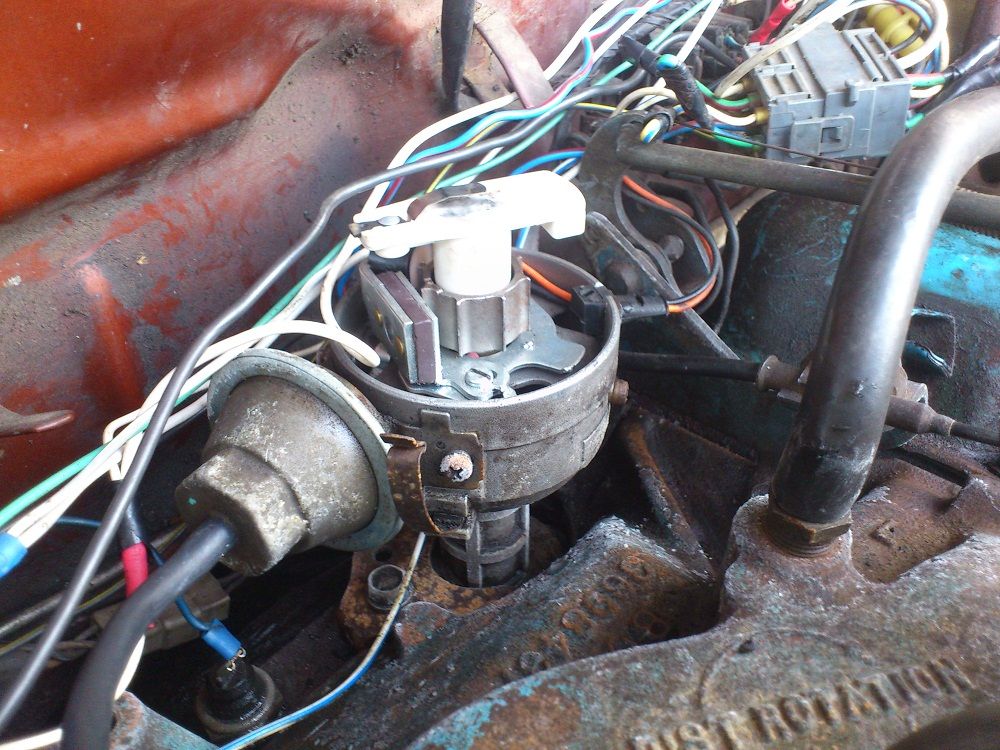
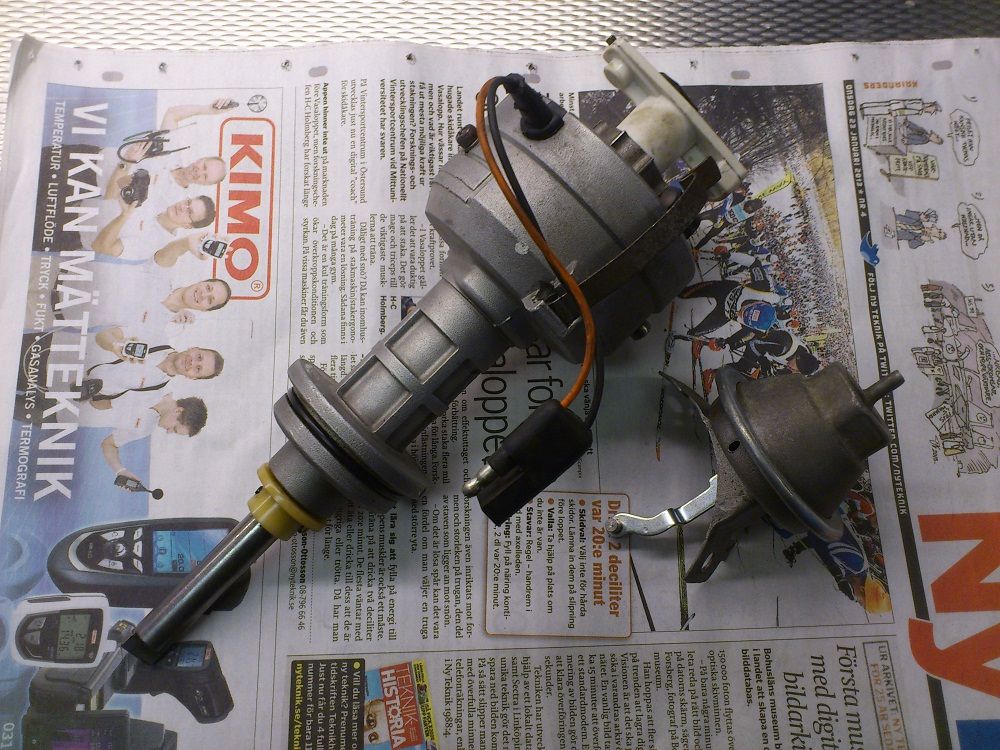
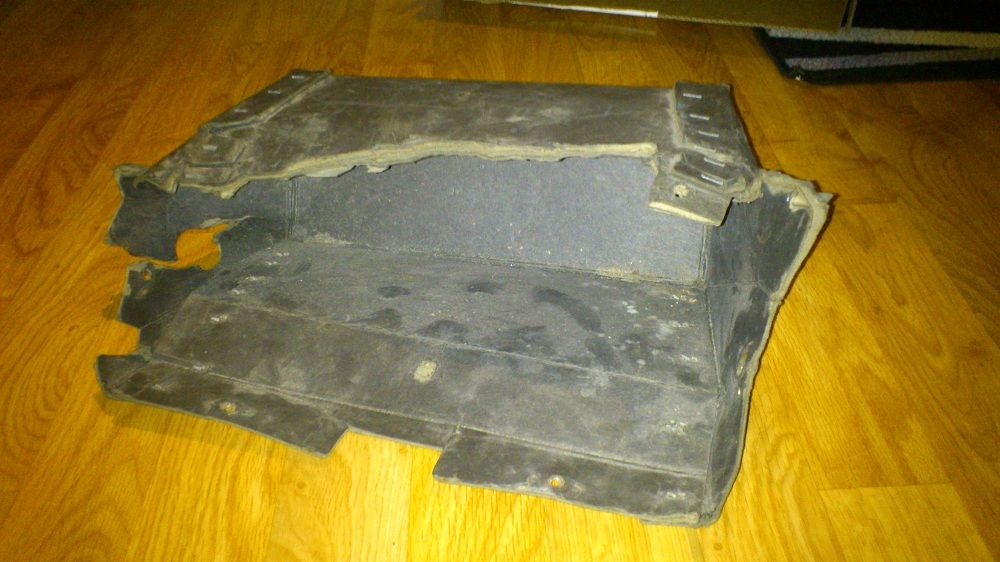
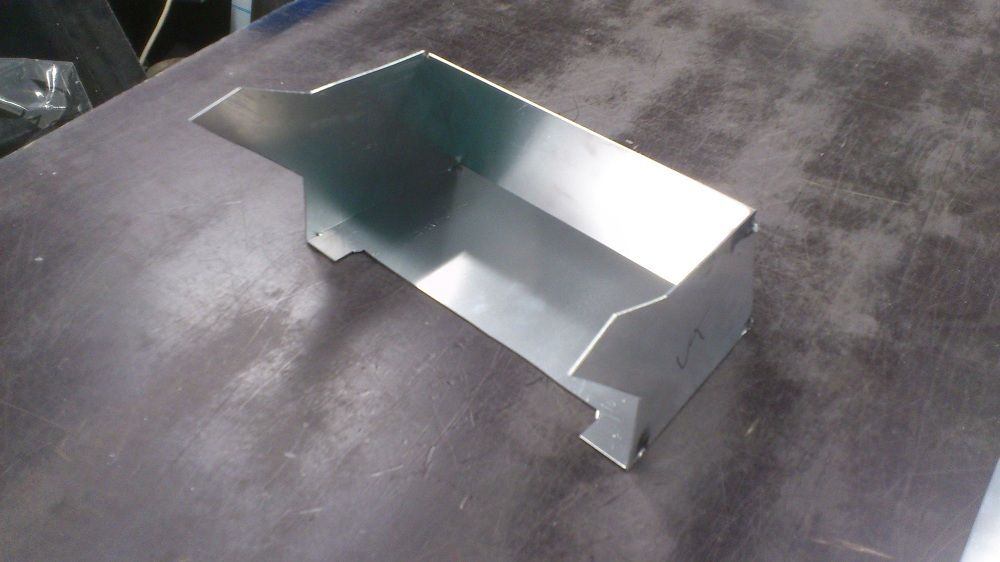
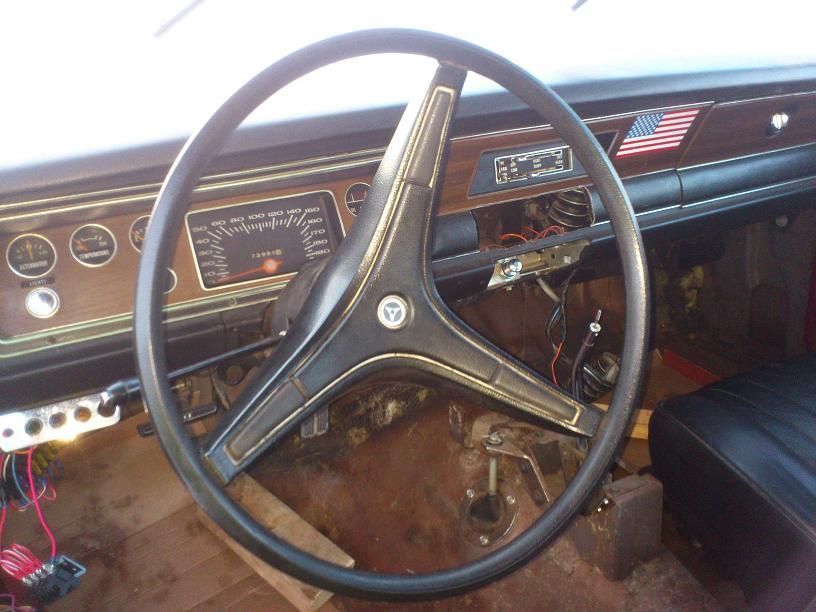
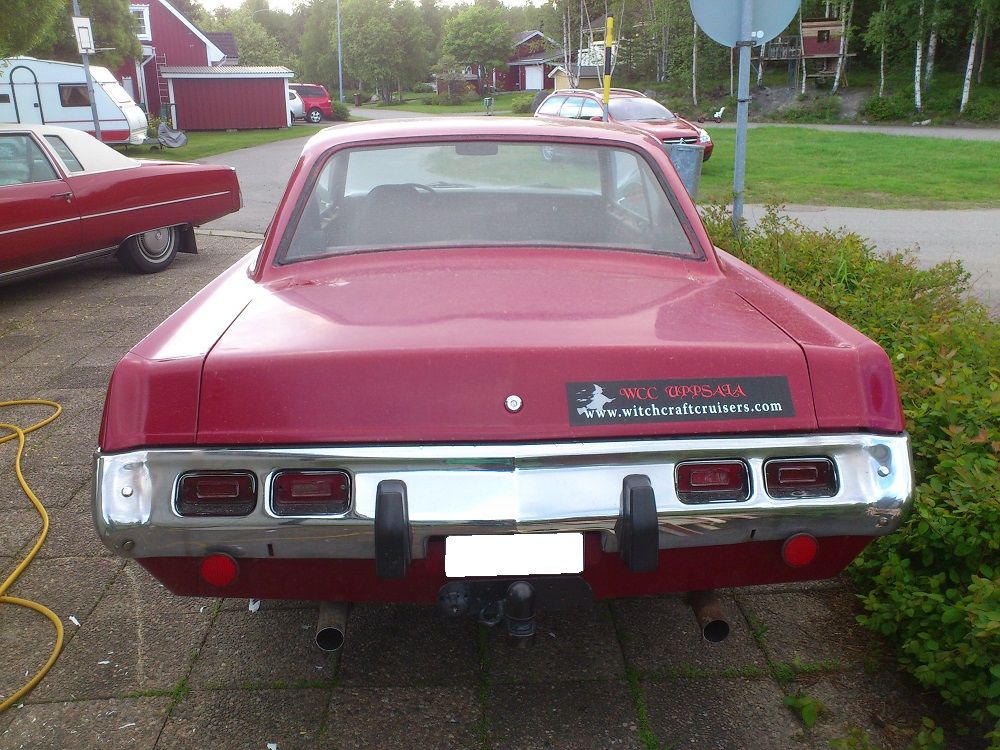
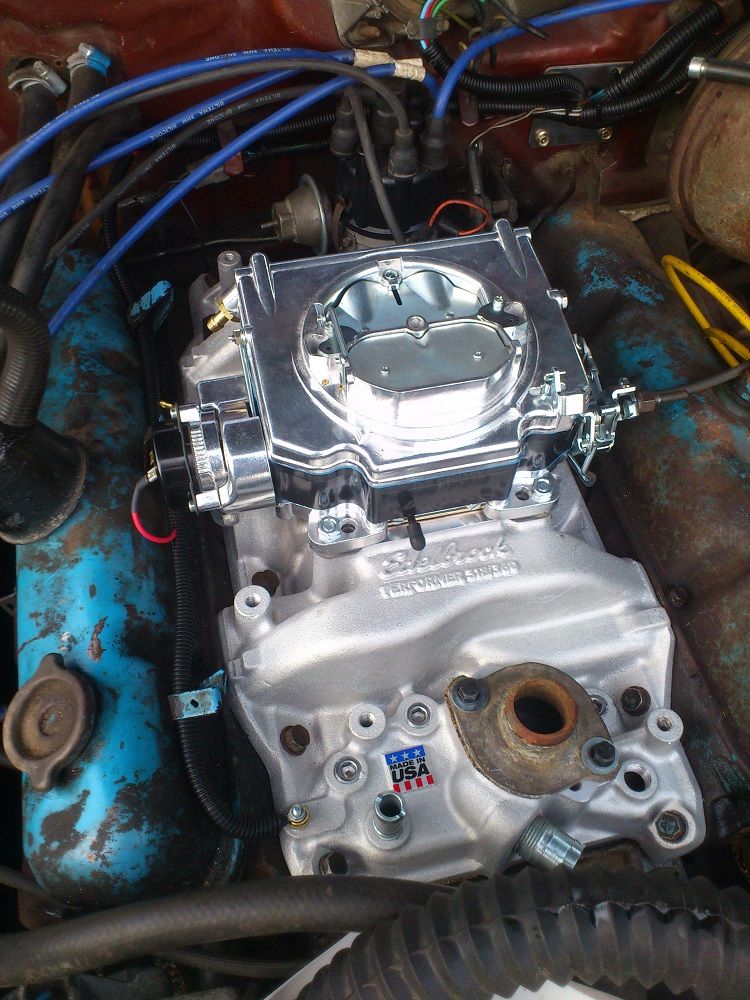
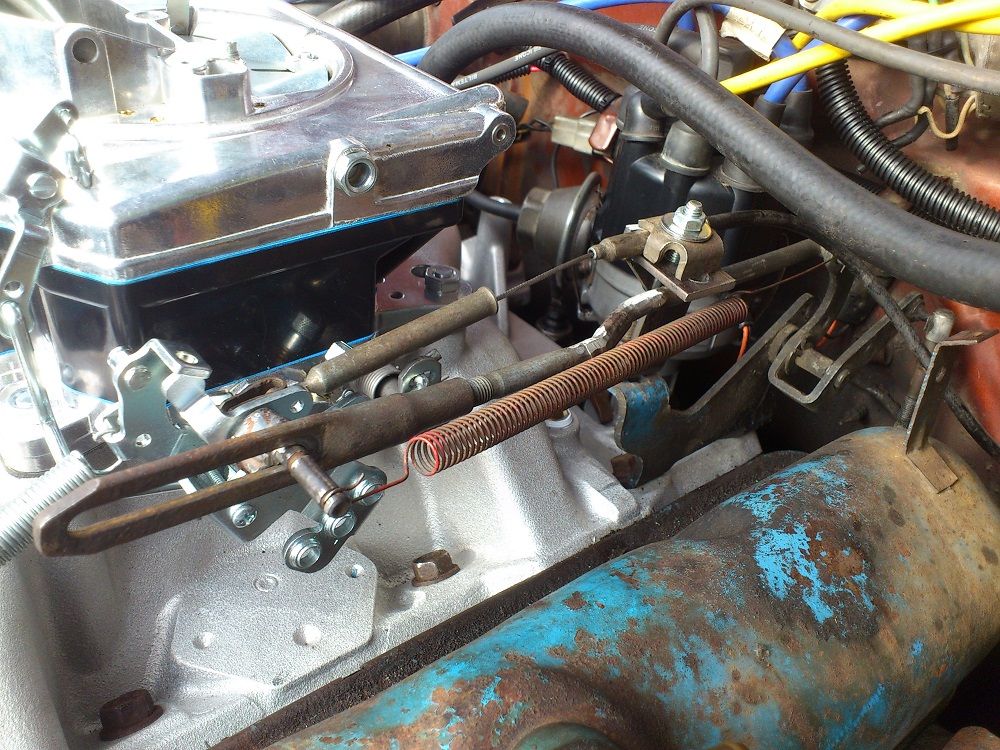
This thread will show you my progress on my Dart that i'm going to restore. Here are some pics started in December and the goal for now is to get it in running condition to this summer. It has a 318 with a A-904 trans and the rear is a 8.25. The interior is black with bucket seats and console. The floor have rust holes that i'm going to fix soon. The car didn't run when i bought it but i cleaned the carb because the previous owner said it was fuel related problem. After the carb was cleaned up it didn't start up any way so i found out that the firing order was the problem... More info and pics coming soon.

DSC_0967.jpg


DSC_1016.jpg


DSC_1069.jpg


DSC_1079.jpg


DSC_1080.jpg


DSC_1081.jpg


DSC_1077.jpg


DSC_1005.jpg


DSC_1058.jpg


DSC_1098.jpg
 
Yes!!! Another '73 coming back to life. Good luck on your project, should be a nice car.
 
The firing order was sorted and now the car started up. It did not run right so a I took the distributor apart to check the pick up clearance and it was way off. When the clearance were right the car runned pretty good. But the second time I started the car it ran good and i took it around the street. When I left the car on idle it suddenly stopped and since then it will not start. The ballast is cracked and the wiring harness is a mess so for now I waiting for a new ballast. Going to sort out all of the wiring and replace the wiring harness. The first pic shows how bad the cables runs.

DSC_1292_zpsb15ac9e8.jpg


DSC_1295_zps3b18171a.jpg


My old glove box was bad and I got an idea because we have a lot scrap aluminium sheets just lying around at work. So I made a new glove box out of it. The old one off of paper can fold so it pops into place but my can't so i must mount it from behind so i have to disassemble the dash. Will dress it in some black fabric. This one will last better then the old one.

DSC_1263_zps2f6e6e06.jpg


DSC_1267_zps71b8d0c5.jpg


DSC_1268_zps459fc52f.jpg


DSC_1269_zps9fcce933.jpg


DSC_1270_zps12539584.jpg


DSC_1272_zps3e998001.jpg


DSC_1273_zpse6e50318.jpg
 
That was a good idea with a extra ballast.

The "Hazard" button was of so I got a donor column for free that I used to repair my "Hazard" button. Made a puller for the steering wheel to take the column apart to salvage the parts I needed. To repair and replace the damaged button I was forced to remove three small rivets to take the bad button out. Used 2 component glue to put i together and used steel wire instead of rivets because I did not find the right rivets. It became better and steadier than I would thought. Painted the thing in the last pic is it a key light?

DSC_1137_zps1b686bd2.jpg


DSC_1296_zps62a95551.jpg


DSC_1298_zpsf67c855b.jpg


DSC_1299_zps72e08e69.jpg


DSC_1301_zps5117ad52.jpg


DSC_1313_zps233c5931.jpg


DSC_1316_zps21a8314d.jpg


DSC_1318_zps40f2bd85.jpg


DSC_1319_zpsd8ef88d5.jpg


DSC_1321_zpsbe22f84b.jpg


DSC_1327_zpsa9cabafe.jpg


DSC_1348_zps50f521fc.jpg
 
The fender tag decoder showed me that it was a high class car with vinyl top, fender turn signal, drip rail moldings and body side moldings. My car missing all of that and the front and rear window trim so I plan to restore those things. Thanks to Moparparts on FABO he selled me the rear window, drip rail and vinyl top moldings in very good shape. But I still miss front window, a-pillar and the right body side moldings. Even hunts the fender turn signal.

DSC_1332_zpsa2ba1e5b.jpg


DSC_1347_zps91a6bfeb.jpg


DSC_1353_zps1f65086b.jpg
 
Thanks, got it cheap for being in Sweden to. It is hard if I compare this forum how much there is here instead of Sweden.
 
Today I have replaced the wiper pivot gaskets. Pretty straight forward job and it's feels good to come one step further to get it waterproof. Now it's the drip rails left to get the interior water and rust free.

Bad shape. Maybe time to replace?
DSC_1495_zps11863443.jpg


The other wiper pivot had a different gasket.
DSC_1493_zps7909b394.jpg


DSC_1497_zpse5d02b86.jpg


Ready for caulk.
DSC_1498_zpsd071e9c1.jpg


Caulk, keep it cold before apply it.
DSC_1499_zps8f835f23.jpg


Ready to wipe some window!
DSC_1500_zps147b8bc6.jpg


DSC_1501_zps77530c1b.jpg
 
Thanks! Forgot this picture. Managed to damage the paint when I removed the old gasket remainings but it's going to get new paint anyway.

DSC_1503_zps65c65899.jpg
 
Looks good, man. Just did wiper seals myself. Glad I won't have to worry about that anymore. Keep up the good work.
 
Thanks! Find some more pics from this winter. The console became very nice I think. Cleaned it with mild cleaning product then used some metal polish and vinyl care. The console had been in the trunk for at least 2 years.

DSC_0983.jpg


DSC_0984.jpg


DSC_1063_zpscb4fa461.jpg


DSC_1065.jpg
 
Console came out nice, I'm working on the exact same thing myself right now. Are the holes on the console face where a tach was once mounted?
 
I saw yours console and it looks great. I think it's old tach hole. My plan is to mount in that place with this tach i've bought.

DSC_1288_zpsfa633db8.jpg
 
Thanks for the comments.

I have mounted a trunk lock.

Something is missing.
DSC_1528_zps3a4cd4e6.jpg


We try to cover the hole with this thing then.
DSC_1529_zps728051b5.jpg


Maybe too long for my taste.
DSC_1531_zpsbd343cb2.jpg


DSC_1532_zps63548d59.jpg


DSC_1533_zpse23967cf.jpg


Looks way better than the hole.
DSC_1534_zpsc854ae01.jpg
 
It's amazing how the little details like lock cylinders dramatically affect the look.
 
I agree with you it became much better. Here is another picture before and after. Have cut down the protruding rusty tailpipes in the second pic also. Think that became much better too.

DSC_1422_zps61ca9974.jpg


DSC_1668_zps26c1aab3.jpg
 
Here are some progress so far. Have changed carb and intake to a Street Demon 625cfm and Edelbrock Performer 2176. Waiting for some new parts to arrive: Comp Cams XE250H and lifter kit CL20-220-3, 901-16 springs, Comp Cams double roller timing gear set and a engine gasket kit. Going to take the engine out the car because it's leaking from one of the freeze plug. At the same time I'm going to clean the heads and then paint the engine original blue.

Had to do some modification to make the 2 bbl linkage fit the 4 bbl carb and intake. Here are a thread I have posted how I did. http://www.forabodiesonly.com/mopar/showthread.php?t=241049
DSC_1784_zpsa289049c.jpg


DSC_1797_zps8d0ff728.jpg


Are in the process to change the window felt fuzzies and at the quarter back window the regulator didn't work right. Some previous owner had repaired the big sprocket. First they had cut out the existing bad part then cut a similar size part from some other regulator sprocket then welded the part together. The bad was the radius was wrong from the donor sprocket part so the window didn't run all the way down. I cut the repaired part out and aligned it better than it was and then welded material on so I could grind new sprocket teeths. Now the window works all the way down.
DSC_1807_zps6a722b19.jpg


DSC_1808_zps648f1652.jpg


I have installed a EZ wiring harness in the car. Here are a link to the installation. http://www.forabodiesonly.com/mopar/showthread.php?t=235066
 
-
Back
Top