72 Demon now underway

-
Tore into the tail end to get the tail light panel, trunk extensions, and trunk extension caps out. I'm keeping the trunk floor loose until everything goes back together; it is easier to work underneath without it.

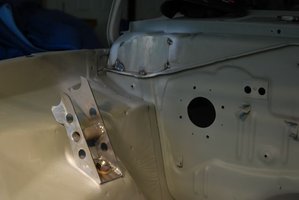
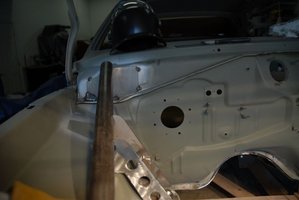
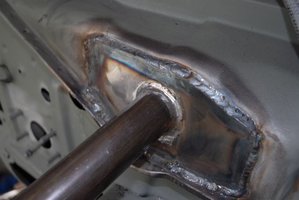
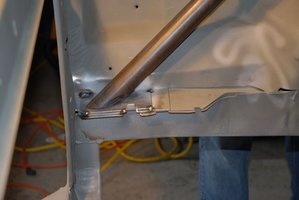
Continuing with the fabrication and welding tasks, here is pic of the Street Lynx bar welded in place. I had to fabricate some shims to close gap between the bracket and frame rails as the cars frame rails were over 1/8" wider than the Street Lynx.

StreetLynx1.jpg


TailPanel1.jpg


TailPanel2.jpg


TailPanel3.jpg
 
DSC_0065.jpg

DSC_0055.jpg

DSC_0058.jpg
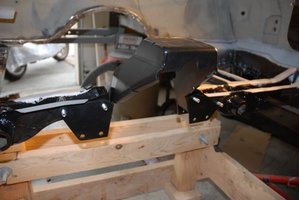
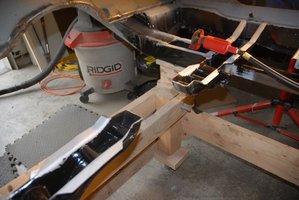
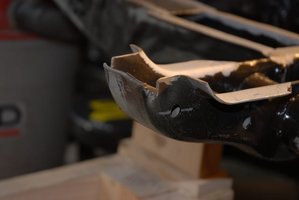
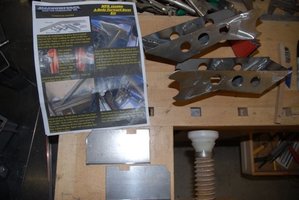
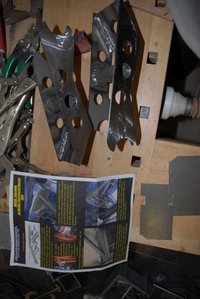
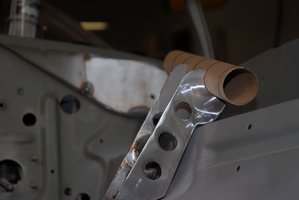
A number of mini-projects finished as progress continues. Here are pics of the crossmember mod required by the Hurst/Classic Tremec installation.

The transmission decision discussion is for a whole other time, but basically a TKO600 kit cost about 25% more than a 833 by the time everything was priced in that we didn't have - and we did start with a 225 S6/3 on the tree (clutch pedals, brackets, Z bar, etc). To get comparable comparisons to the very complete TKO kit, I had to price complete clutch, flywheel, bellhousing, shifter, shifter arms and levers, yoke, floor hump, plus the tranny work or outright - mighty spendy no matter which route you go.

This project was made MUCH easier since the new floorpan was still only tacked. Took it out again and the crossmember mod was simple; up to a point. As nice as all this looks on paper the new brace did not fit as advertised and I had to modify the ends of the cuts to radius tighter and allow the brace to slip fit. You can see the cut/weld/grind in the pics. This would be an untidy job to do from underneath with a solid floor above.

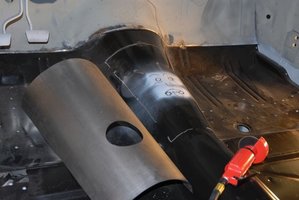
This kit also is a joke when it come to the new tunnel sheet metal. They say "pre-formed replacement tunnel patch" - NOT. Putting a sheet of metal through some slip rollers and cutting a hole in it is not a "pre-formed replacement tunnel patch". These guys will hear about this, usual story about production variances making it impossible to provide a good fitting part is BS. If AMD can reproduce the floor pan a proper tunnel patch is not a problem for a committed vendor. I hate MickeyMouse crap. This is the only part of the kit that wasn't top quality.

More to follow as modified gas tank work and front frame rail support kit get attention

DSC_0055.jpg


DSC_0058.jpg


DSC_0065.jpg
 
Lets see a pic of this so called tunnel patch. I bet my blind and drunk money can make a better one equipped with a chain saw and a large chunk of tree branch,lol...

So a TKO is a six speed right? Same trans as the vipar sorta kinda. I think there are massive tunnel mods to get that sucker in.
 
Sweet. It will look great when you are done. Just an FYI. There is an interesting article in current Muscle Car Review regarding chassis stiffening. They mention how bad the 1974 Duster (project car) was from the factory, as it was quoted "this must be an infamous Monday-Friday car". Anyway, the article went on to say that it is a great idea to run small welds where the body is spot-welded together or in the article missing spot welds. Some of the seems were full of gaps that required a small amount of massaging to fix those 1/8 gaps where the two panels meet. Welding would improve the rigidity. Just a thought since you are already welding away...
 
Lets see a pic of this so called tunnel patch. I bet my blind and drunk money can make a better one equipped with a chain saw and a large chunk of tree branch,lol...

So a TKO is a six speed right? Same trans as the vipar sorta kinda. I think there are massive tunnel mods to get that sucker in.

Floor patch 1.jpg
This is what they supply with directions to use screws or pop rivets to cover the hole cut to the template they supply. If I wanted it to look like Jethro Bodine did the job that is exactly what I'd do.

You probably are referring to Bill Reilly's BigBlockDart.com story on putting a Viper T56 in an A-body..

The TKO600 is a 5 speed with 600 ft/lb torque rating. More importantly than upgraded torque handling over less expensive TKO500 brother is it has closer ratios particularly in 1-2 where TKO500 has 3.something first gear for high rear gear (later model economy) applications. Musclecars with lower rear gears (this will be 3.55) don't need the launch help or a granny first, so the TKO600 is going to be great combination with 408 and a 9.5CR + strong hydraulic cam.

It wasn't that important to have an 833 in this build, and the overdrive goes well with a bunch of the other mods to make this a smooth driver as well as a tire shredder!

Floor patch 1.jpg
 
Sweet. It will look great when you are done. Just an FYI. There is an interesting article in current Muscle Car Review regarding chassis stiffening. They mention how bad the 1974 Duster (project car) was from the factory, as it was quoted "this must be an infamous Monday-Friday car". Anyway, the article went on to say that it is a great idea to run small welds where the body is spot-welded together or in the article missing spot welds. Some of the seems were full of gaps that required a small amount of massaging to fix those 1/8 gaps where the two panels meet. Welding would improve the rigidity. Just a thought since you are already welding away...

Thanks for the props. Yep I'm going through a lot of MIG gas and wire on a lot of seams. The floorpan repair is all plug welded, but I also ran a lot of beads on the pinch weld and along the perimeter.

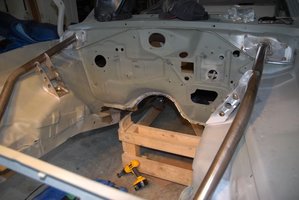
For really stiffening up the A body tho you set up the next batch of pics on the Magnum Force front frame rail brace kit we ended up going with. It is still a work in progress, and it was a major PITA, but it will definitely add a bit of "hood up appeal" to the Demon.

DSC_0052.jpg
DSC_0051.jpg


DSC_0021.jpg

DSC_0067.jpg
DSC_0063.jpg

You can sort of gather from the pictures that the kit is anything but "ready to install" and I do not recommend it for anyone doing this kind of modification for the first time. Requires a lot of fitting, grinding, welding and all the tools (and time) that implies. It also seemed to be an E body kit in many ways; the cowl plates were close enough, and the bent tube was marked A body, but the frame plates and tower pieces don't even begin to fit an A body as the pictures show.

I took exception to this kit being sold with instructions and a web site picture that showed the shock tower brace assembled. Enough that I told Magnum Force I wanted to return it just on principle. It didn't ultimately dissuade me enough to bag it, but again if you don't have jig tools like magnets, a good weld table, etc this isn't the kit for you.
DSC_0029.jpg
DSC_0031.jpg


DSC_0049.jpg

DSC_0052.jpg


DSC_0049.jpg


DSC_0051.jpg


DSC_0063.jpg


DSC_0067.jpg


DSC_0021.jpg


DSC_0029.jpg


DSC_0031.jpg
 
Thats a shame it doesnt fit very well.Common thing with aftermarket stuff.I like thier idea of the bar going past the shock mount but why did they stop before the rad support? I would have it extend a bit further so as to tie into a new lower rad support.
 
Thats a shame it doesnt fit very well.Common thing with aftermarket stuff.I like thier idea of the bar going past the shock mount but why did they stop before the rad support? I would have it extend a bit further so as to tie into a new lower rad support.

Its tied - as a system, the Magnum Force brace has 3/16 top plate on top of welded-up front frame rail to XV lower rad support
 

Attachments

  • Demon fender emblem 1.jpg
    24.1 KB · Views: 558
And to catch up some more
the gull wing goes on and dash frame goes back in
 

Attachments

  • Demon gull wing1.jpg
    44.4 KB · Views: 554
  • Demon Dash frame 2.jpg
    49.1 KB · Views: 586
  • Demon Dash frame 1.jpg
    54.2 KB · Views: 539
Now that I can hang the 8 3/4 and start Street Lynx work, things are getting wrapped up at the rear
 

Attachments

  • RMS SLynx 0.jpg
    51.4 KB · Views: 553
  • RMS SLynx 5.jpg
    62.8 KB · Views: 532
  • RMS SLynx 6.jpg
    55.3 KB · Views: 556
I'm not partial to yellows, but I must admit it really looks great on the Duster - KUDOS

Nice work. Keep us posted on the Street Lynx work.
 
Subscribed,,,,,keep posting updates even if responses get low from time to time, there are always people lurking & learnin.
 
it really looks great on the Duster.


It's a Dodge Demon not a Plymouth Duster lol.

Close but different, basically different fenders,hoods,grilles,front end treatment,tail panels and badging.

Anyhow.....I am digging the color! looks like butterscotch.

are you going with any type of a black stripe ?

I was subscribed to your thread when you first started it but somehow I ended up not being subscribed anymore so I lost the thread.

Awesome progress and keep at it, I hope to get my duster scooting further along this spring when the winter cold takes a hike lol
 
It's a Dodge Demon not a Plymouth Duster lol.
Close but different, basically different fenders,hoods,grilles,front end treatment,tail panels and badging.

Yep familiar with the differences like them both -

Mr. Mom (whom I agree with on this statement at least) "220 - 221, whatever it takes".

Diggin the "Joe Dirt" Avatar - he was a MoPar guy too so we'll let him slide on the Mullet hair head.:-D
 
Thanks to everyone above for all the props and interest in following the thread.

Finally getting the kinks out of my install of custom Hot Rod City fuel tank. Since we cut the spare tire well out of the new trunk floor and designed the fit for everything around a flat floor, I had the tank built without the "seat" and picked up a bunch of capacity and a clean look from the rear.

The front-to-rear brake line from Inline Tube went right in. Amazing fit. I am bending the fuel line out of 1/2 stainless straight lengths as the last time I had an oversize line bent to restoration fitment it got real expensive and I ended up having to cut it up and splice anyway. More pics when I cross that bridge.
 

Attachments

  • fuel tank 2.jpg
    46.1 KB · Views: 464
  • fuel tank 3.jpg
    43.6 KB · Views: 467
  • fuel tank 1.jpg
    30 KB · Views: 490
-
Back
Top