AlV 69 Dodge GTS project

-
Thanks for posting Geezer! I don't want to hijack this thread but I'll say that I am still collecting parts and money for my build and have yet to post or start a thread for my Swinger.

I'll keep my out for your thread, Definitely give me a heads up when you get it started and let me know if there is anyway I can help.
 
Thought I should post an update but I haven't done much work on the car though.

I built a shed and moved all the stuff out To make room in the garage for the Dart.

10570499_735468616535515_4242018397821692532_n.jpg


I adjusted the ride height to level out the car.

1510512_735468633202180_1063264432132003830_n.jpg


Other than that I've been studying for the PMP exam so the project is in hibernation.

Once I get through the exam I'll get back to work in the garage.
 
Well I'm still studying for the exam,so I haven't done much on the car.
I was able to clean and Paint a few small pieces I picked over the last few weeks but not much else.

Some of you may have noticed all of the pictures are vanishing from my thread :( THAT was really disappointing but I am working through that in my spare time.
I've recovered the pictures for up through post 143 and working on The rest. Once I have all the pictures I'll re construct each Post and upload them.
It just takes a lot of time to sort out.
I hope to have them online by next month.
Happy new year to All
 
Got to see this car yesterday. The pictures don't lie. If anything they don't do it justice. This paint job is amazing! Even sitting covered up... Al peeled the cover back and it looked like wet glass. How many coats of clear does it take to get that?
Will be following your progress and hope to see more of the early pics as you get them back on.
Keith

Thanks Keith!

Sorry it took so long to respond.. I've been spending a lot of time reconstructing the thread that I haven't come back to it for awhile.

On the upside, I'm almost at the point where I can start rebuilding the posts.
I've recovered all (most) of the photos and now I can rebuild the post and new photo links.

On the Dart I'm starting to install the soft stuff (seal and gaskets.

I also picked up a cheap airbrush to paint some of the remaining pieces including the hood bumper nut you brought over (thanks!).

I'm working on the driver side door first. Rebuilding the latch mechanisms and lock linkages, then installing the window hardware kit I picked up from Mr Moparts.

Will start posting some pics soon.

And hopefully can get the thread back on it's feet soon.

AlV
 
Hey! hey! hey!

With the help of 6pk2goDemon this thread is getting back it's pictures!

Slowly but surely working through the first page!

Thanks C. !

AlV
 
Page two almost done, page 3 on deck.

It's a great feeling getting the pictures back up!

6pk2goDemon is awesome! thanks for helping :)
 
top bearing:19-14-4

Hey Al,
Hope you don't mind me chiming in. After cross referencing the 19-14-4 location in your parts manual, the Chrysler number for that upper bearing is: 2265656. It may have been superseded by another number but your local dealer can check that for you. I do know that it is still good from Chrysler, I bought one when I rebuilt my column. Hope this helps....

Hi Martin!
No, I don't mind at all.. Thanks for jumping in with the part number. :)
 
I'm back on the clock!
Going to order the brake lines and some soft stuff this week.

10931509_760245554057821_1690765587030114147_n_zpsszddg19i.jpg
 
Al, Your build is spectacular!! I'm happy to assist you in fixing the lost pics. We're up to Page 11...almost there :)

Your attention to detail is inspiring....Keep up the GREAT work :D
 
Good to see you back!


It's good to be back. :0 I have some catching up to do lol

Al, Your build is spectacular!! I'm happy to assist you in fixing the lost pics. We're up to Page 11...almost there :)

Your attention to detail is inspiring....Keep up the GREAT work :D

Thank you Sooo Much C! You've been super! helping fix the thread.
Not only did you help me with the thread but now with the safety latch you sent my 69 hood will stay shut thanks to you!
:cheers:
 
The Metro mini weatherstrip kit arrived. It includes the door wind lace trunk lip seal and the drip rail window seals.

The Big news is I won the FABO Superbowl contest sponsored by PST Performance Suspension Technology!
I guessed the patriots would win with a total point value of 52. The contest was for a poly front end rebuild Kit. But I already bought and installed their poly super kit last year lol

They were really cool and we worked it out for a set of torsion bars.

10445517_771411889607854_6829959659934746484_n_zps36hjxchf.jpg


1.03" Torsion Bar
Part #: TOR4820 1.03" Torsion Bar

20° clocking

James from PST tells me the spring rate on the bars is 265lbs/inch

10983315_768276556588054_4728681567193478504_o_zpseeivilnk.jpg


Oh Yeaaaa!:D

We'll be looking into Matching leafs soon. :glasses7:
 
Since the soft seal Kit is here we're going to move on with the Doors. Do you see what I did there?

We went and pulled the door latches from the Dart. It's time to see what's good. We are still trying to save as much of the original car as possible..

I've already ordered a linkage clip kit for the re assembly.

The plan is to clean and repair the original mechanisms and linkages.

10615547_774917032590673_5893633089456157121_n_zpstchoydlm.jpg


First we removed the clip holding the linkage to the interior release lever.

11058401_787650144650695_8545776083704708252_n_zpsrmp6zvvz.jpg


With that piece disconnected it was just a matter of removing the 3 screws that hold it to the door. Keep in mind that the door handles and knobs were removed for paint and the latch was reinstalled to keep the doors shut for the ride home.

Onto the bench it goes and it's actually in good shape I just need to clean it up and see what's what.

10435101_787650161317360_6817449957136350503_n_zps3niqfniy.jpg


You can see the over spray from the previous repaint. The previous paint was a darker version of the metallic blue.

1924359_787650177984025_5901527469957585727_n_zpsr81gyo6z.jpg


11028000_787650211317355_5442398225976634240_n_zpsec4os7pq.jpg


10645283_787650227984020_2784452566859518301_n_zps5ve5wyj3.jpg


10422936_787650274650682_3039185212352610103_n_zpsvjj3lbpo.jpg


This is what it looks like laid out exactly how it goes back into the car. I'll use this for reference later.

11062135_787650191317357_4408144550539363051_n_zpsega8cw4e.jpg


now we clean lol
 
The latch mechanism plus the lock and button linkage cleaned and ready for lithium.
These things are quite interesting in the way they function which by chance these are still in great operation condition.

The latching process consists of two stages when it engages the pin on the door jamb. As you slowly shut the door you will hear two clicks. the first grabs and the second secures.

lock%20anot_zpsczwceps0.jpg


lock%202%20anot_zpsjq1emio6.jpg


Working on the internal linkages and the handles and locks next.
 
Thanks for the heads up C! :)
I am to much of a bone head for a neat trick like that lol
I'd likely be the one to lock my keys in the car.. doh.

Now, if there was a way to be able to unlock the car by pulling on the indoor latch release that would be cool.
 
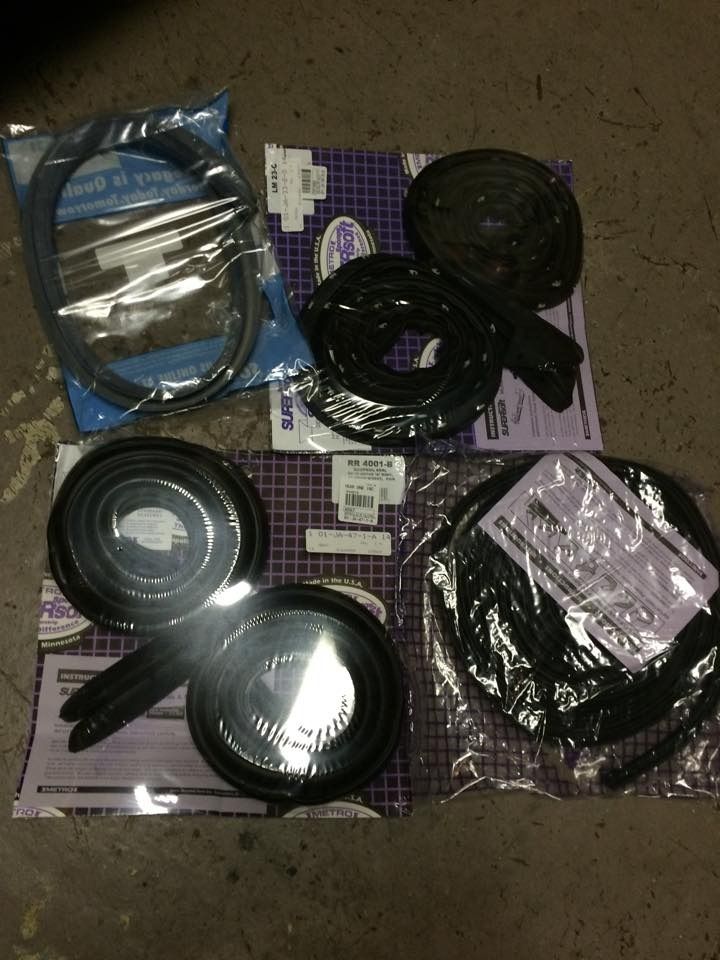
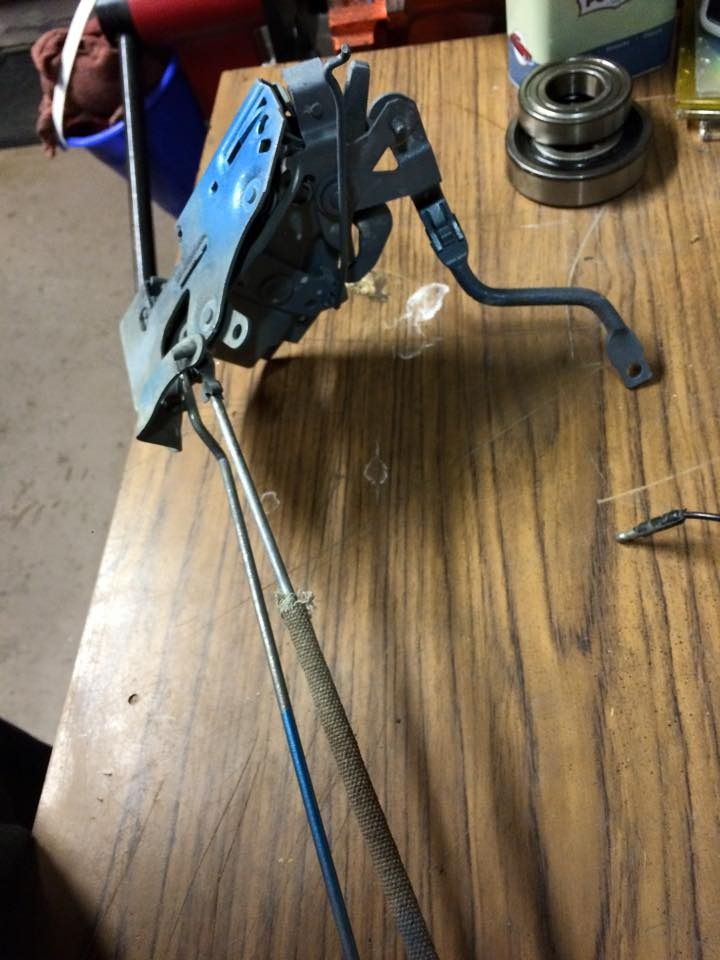
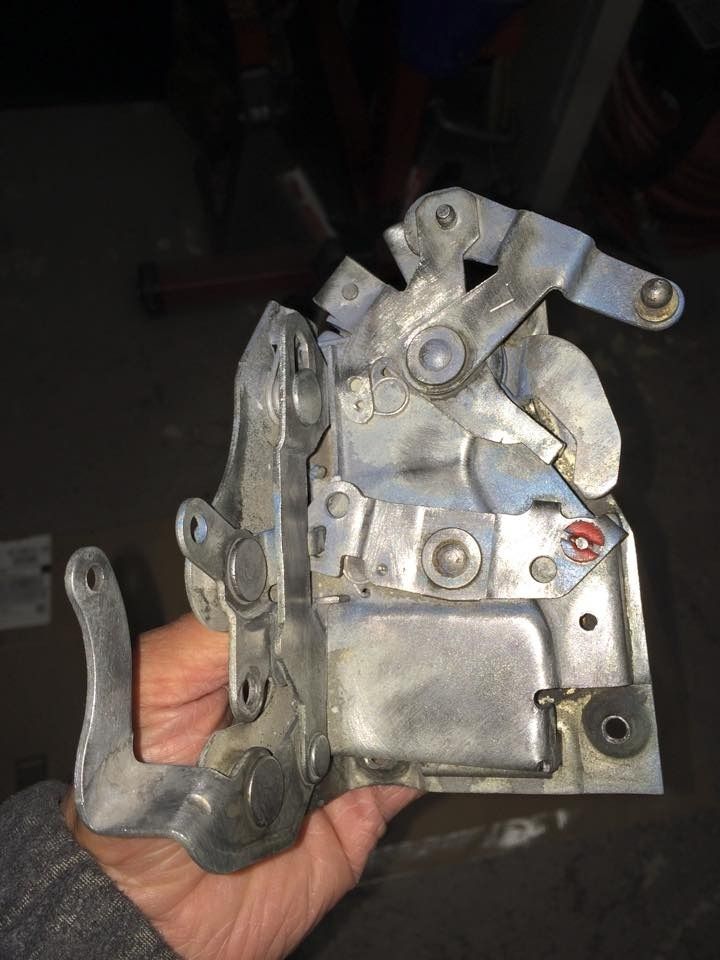
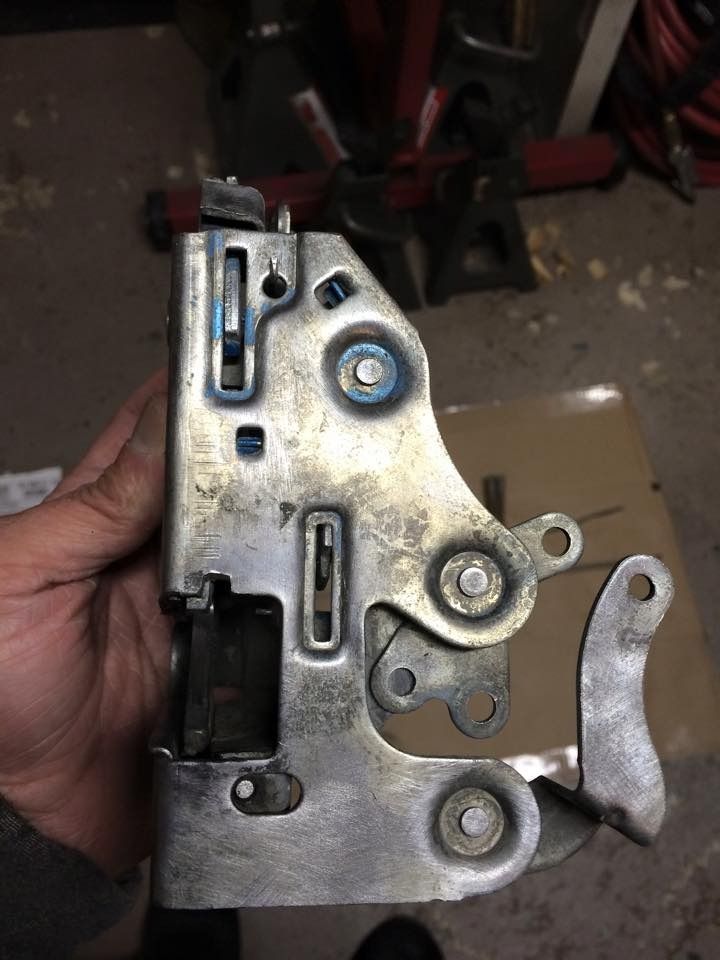
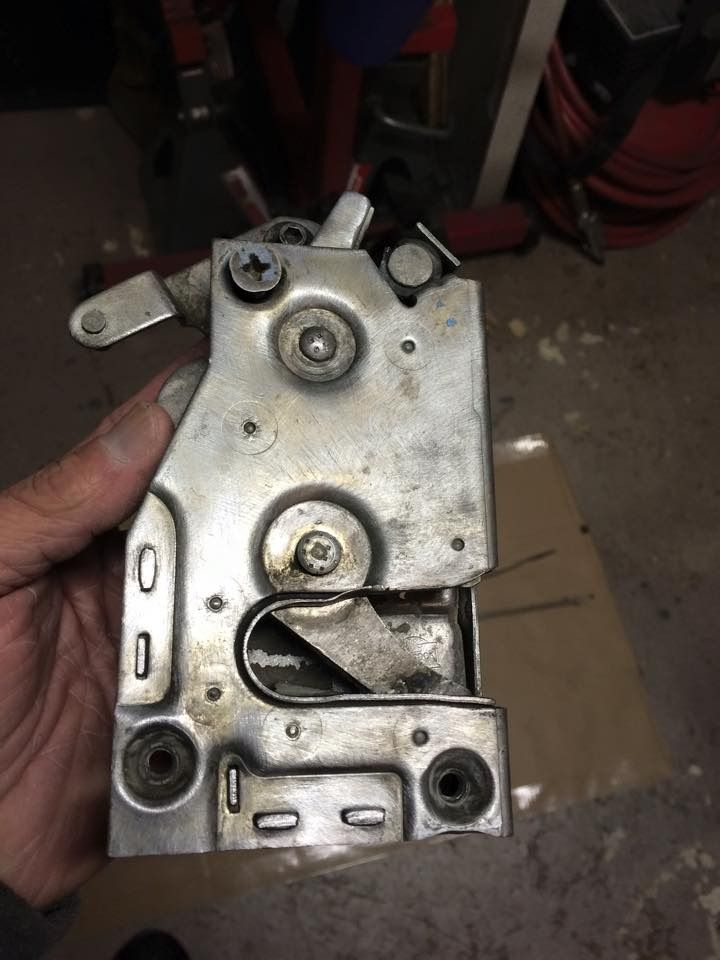
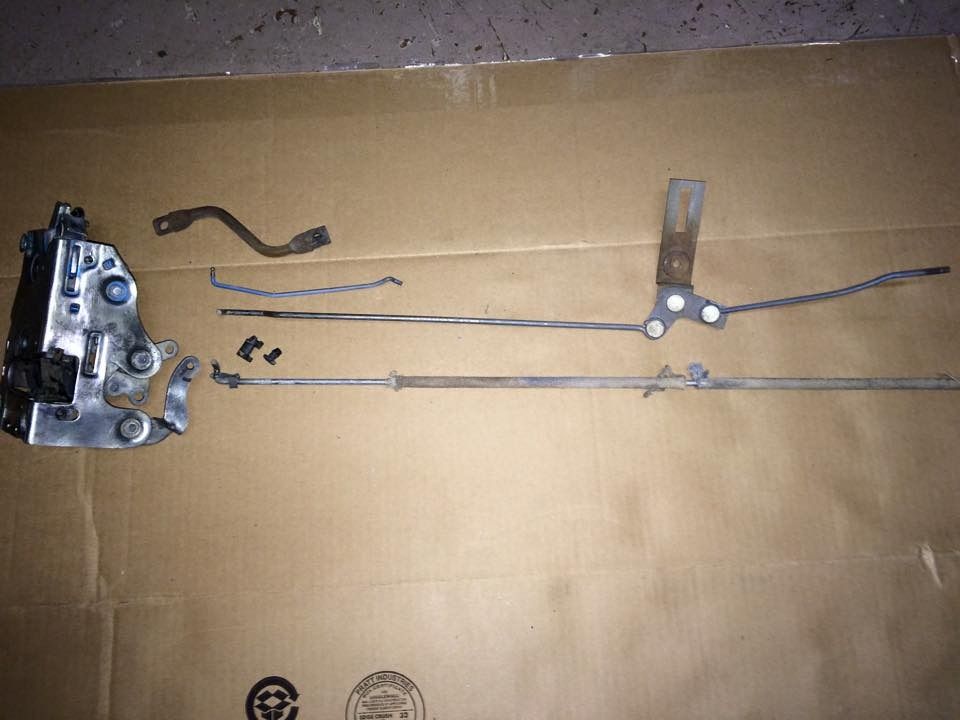
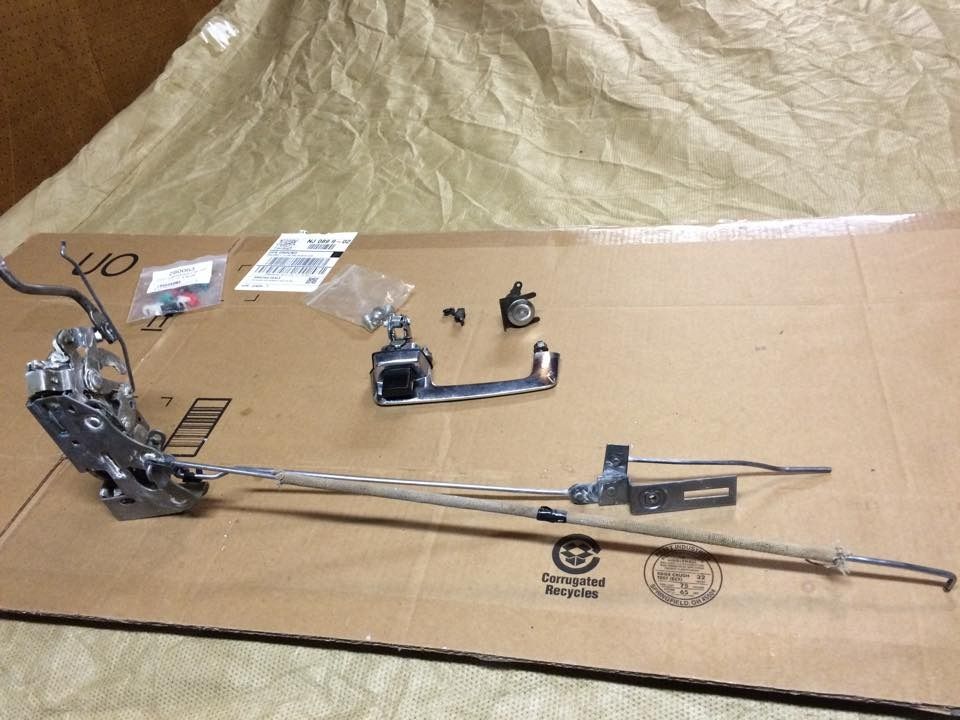
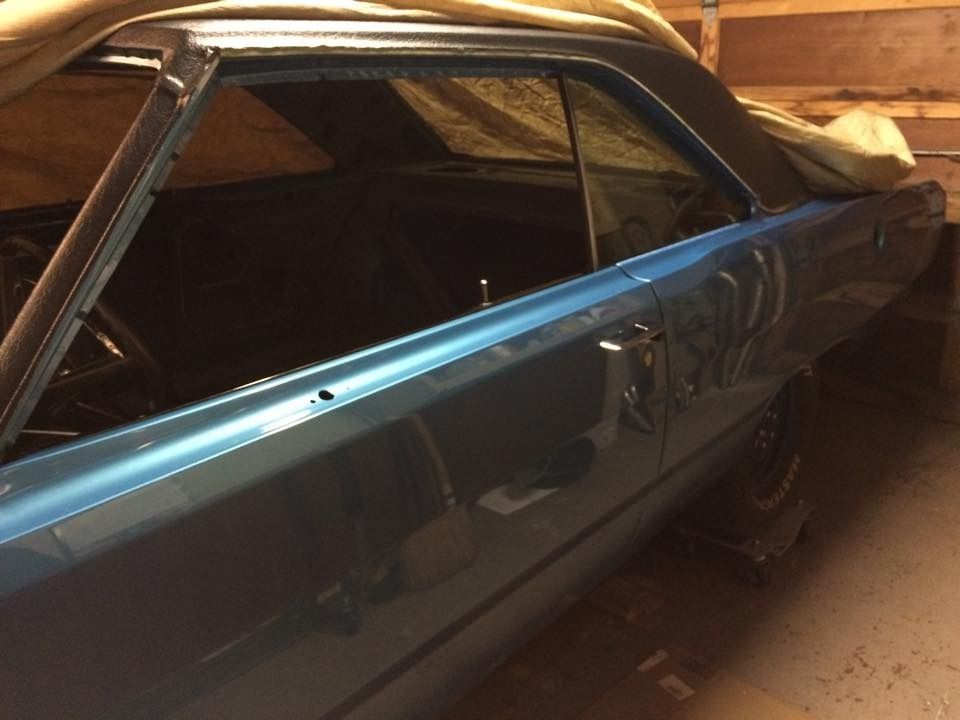
All of the original pieces for the drivers door are cleaned and ready to install with new clips.
The mechanisms received a liberal amount of lithium grease.

But before I got to far ahead I picked up a new set of door handles and locks.
A quick search on FABO yielded a discovery that the later model Dodge Trucks and Vans (Circa 85 -90) used the same handles :)
I was missing also missing the hold down screws for the locking hinge and have to track them down.

11149233_799442816804761_1077484409222330721_n_zpstvm5s9yn.jpg


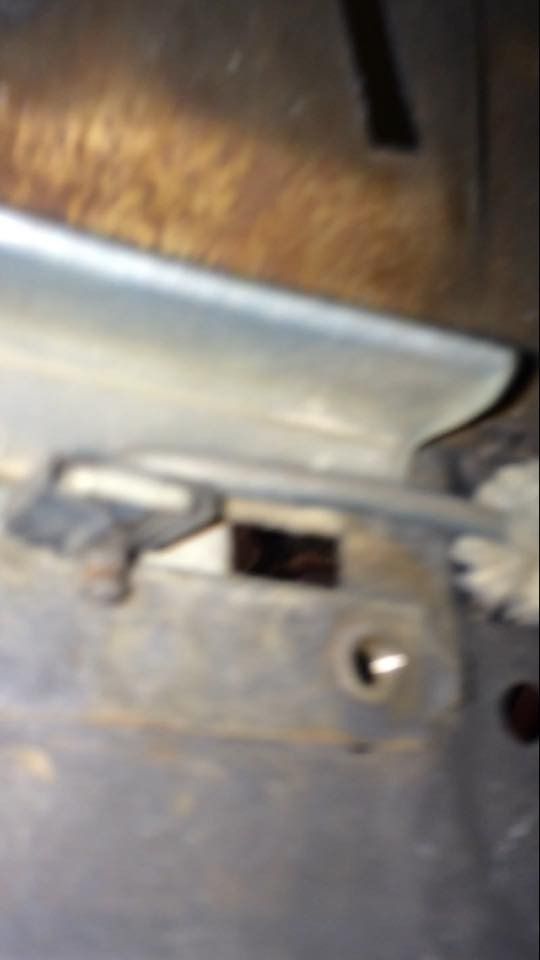
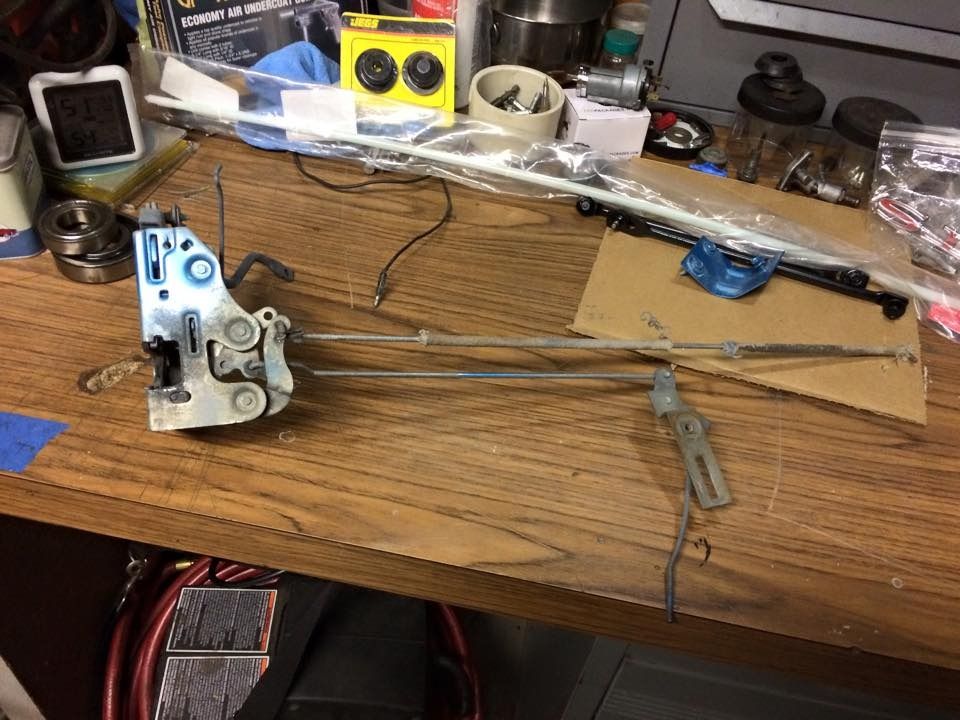
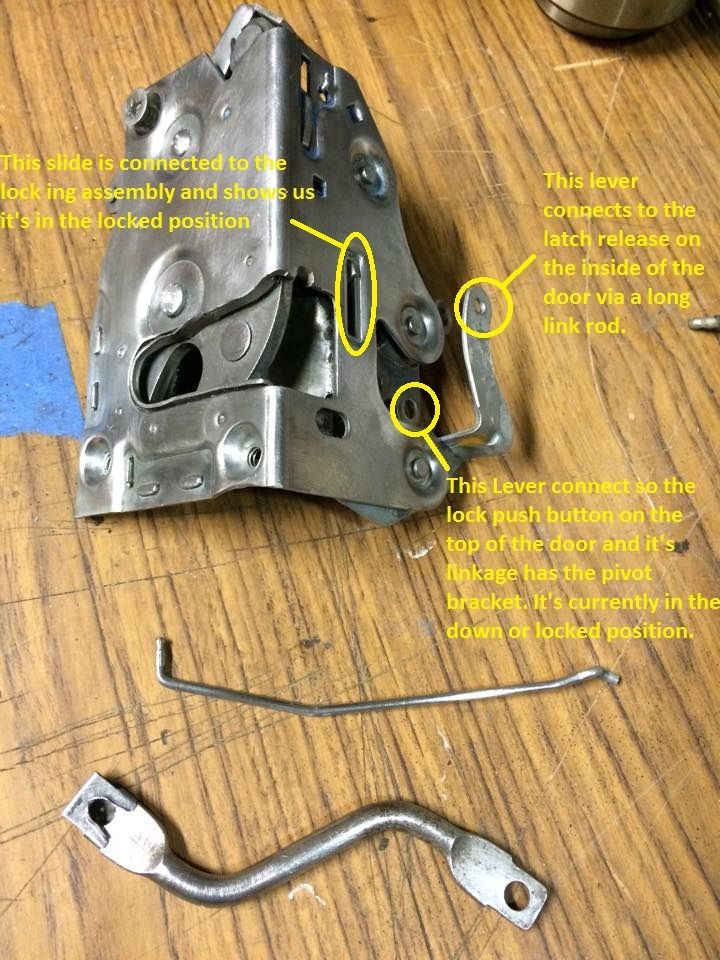
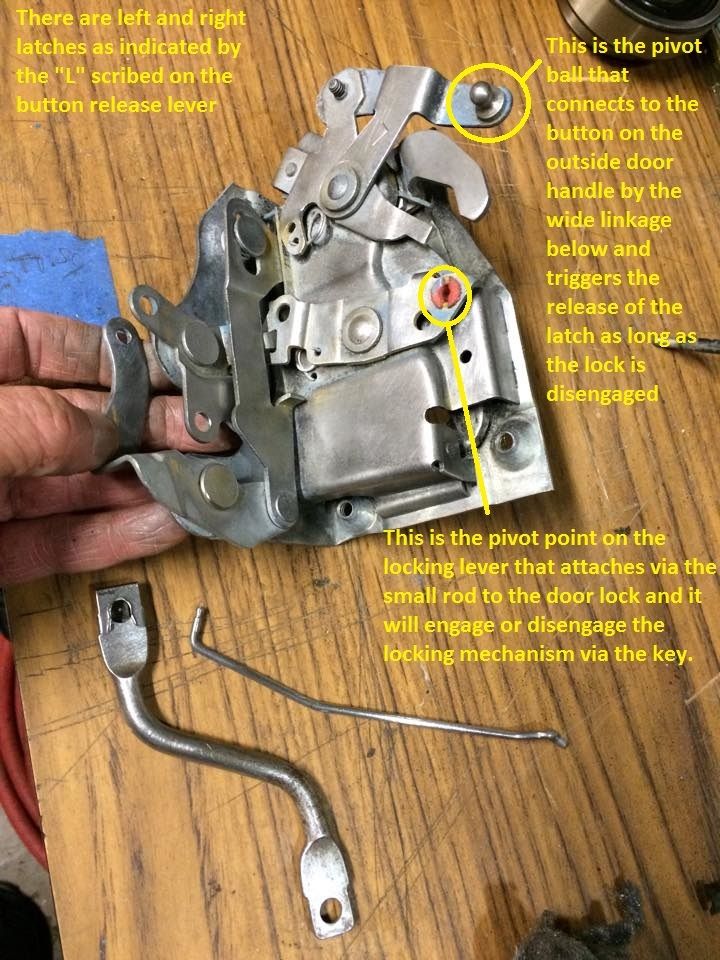
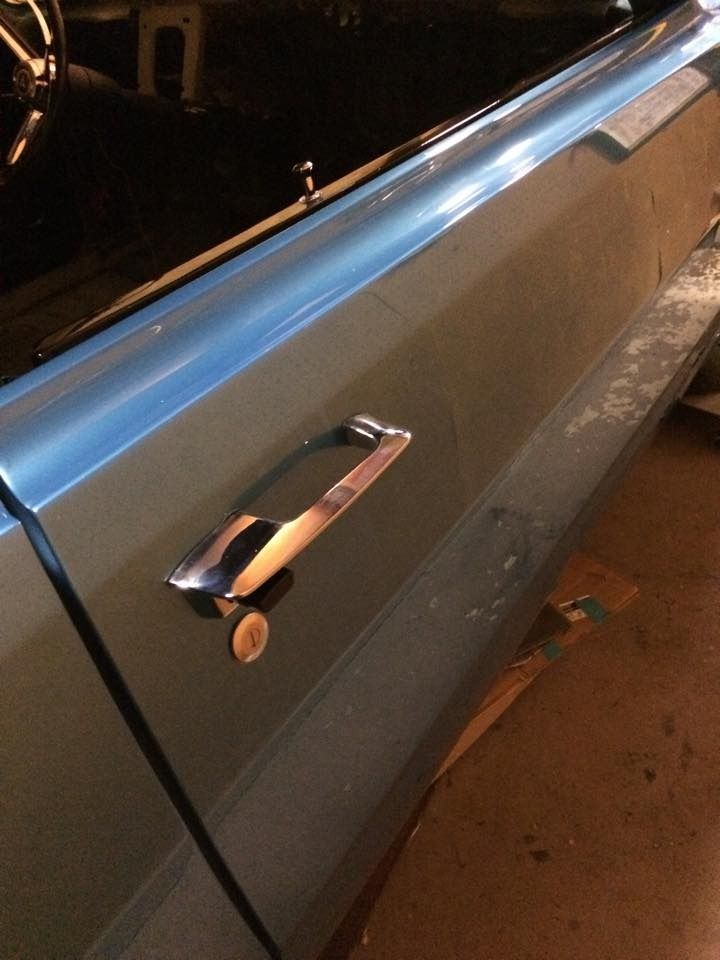
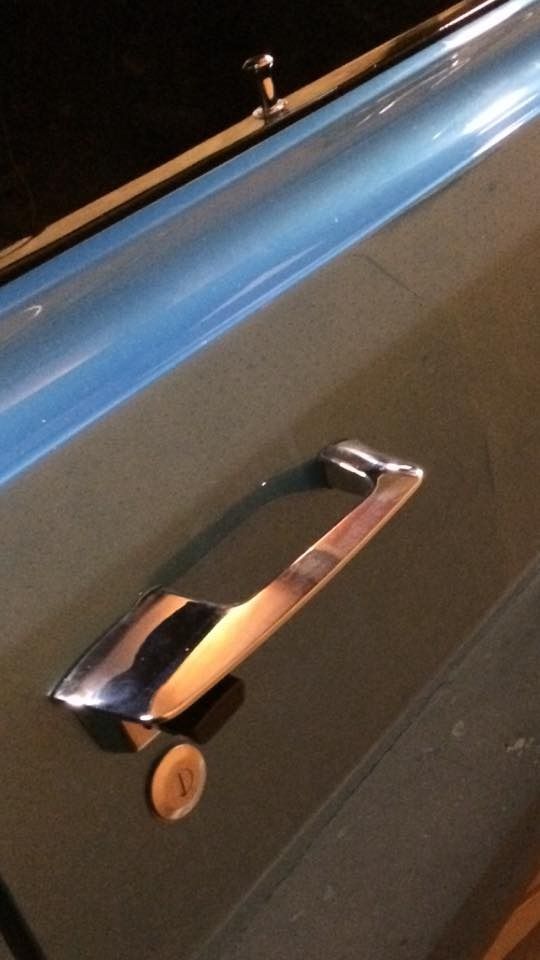
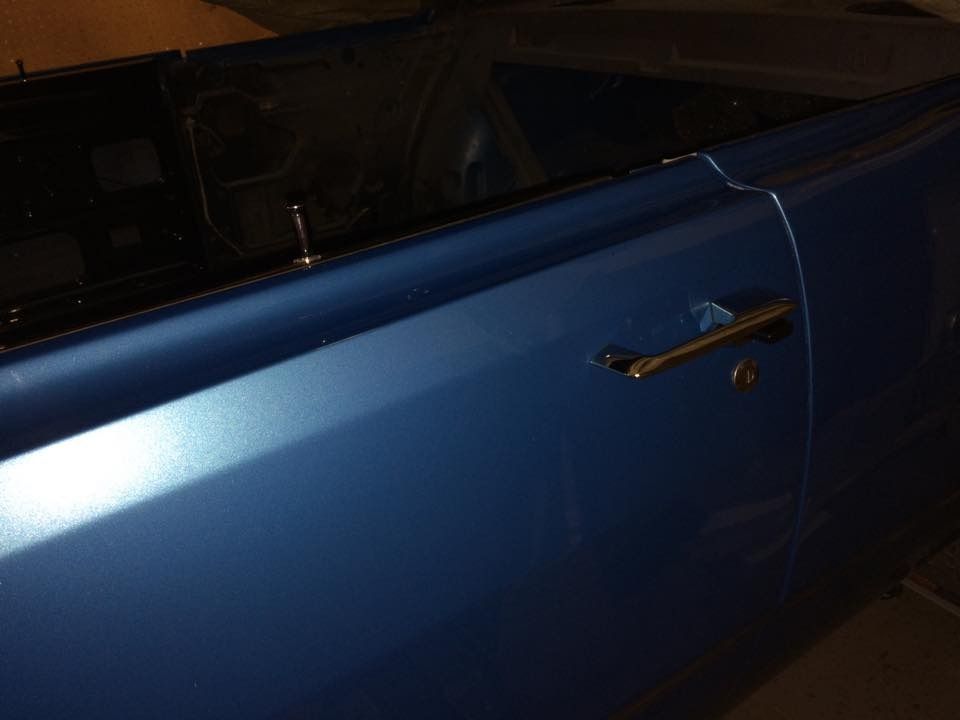
Latch and linkage and door hardware installed.

11182093_807545872661122_6991223098473129535_n_zpsayy0sbrg.jpg


11150862_807545899327786_2266518733978978605_n_zpsvkgajlfm.jpg


10410647_807545922661117_7871841058045246336_n_zpsewhmr7ln.jpg


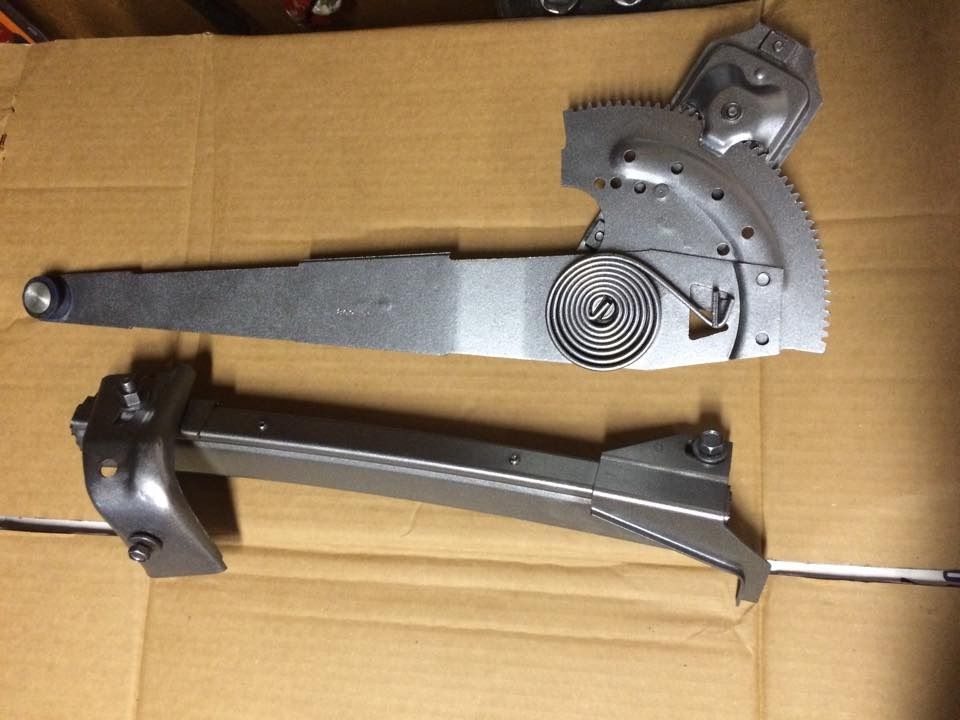
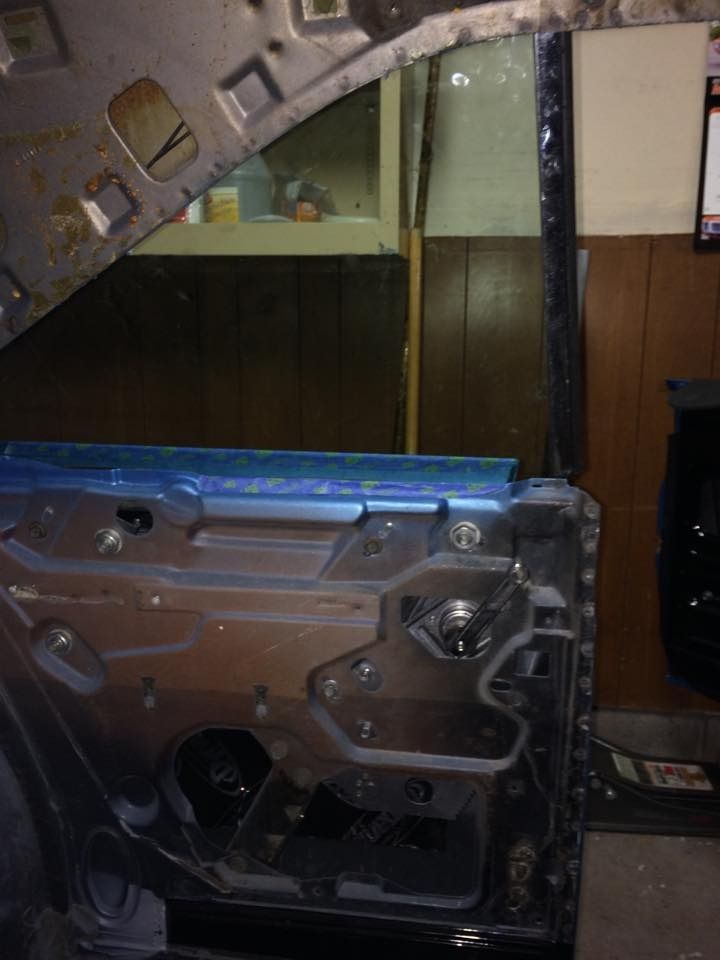
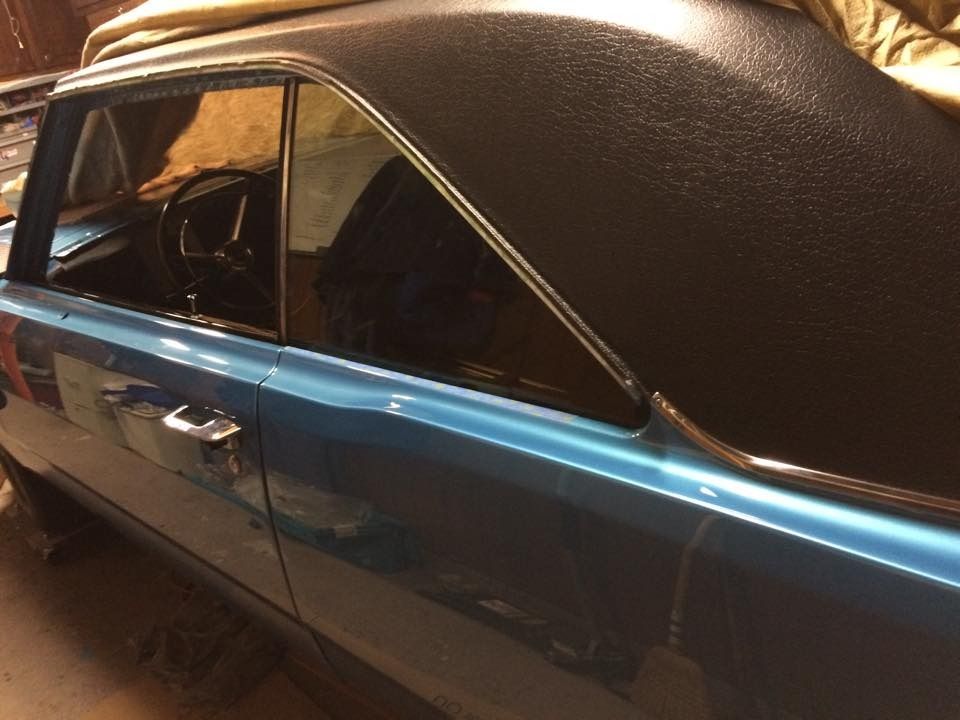
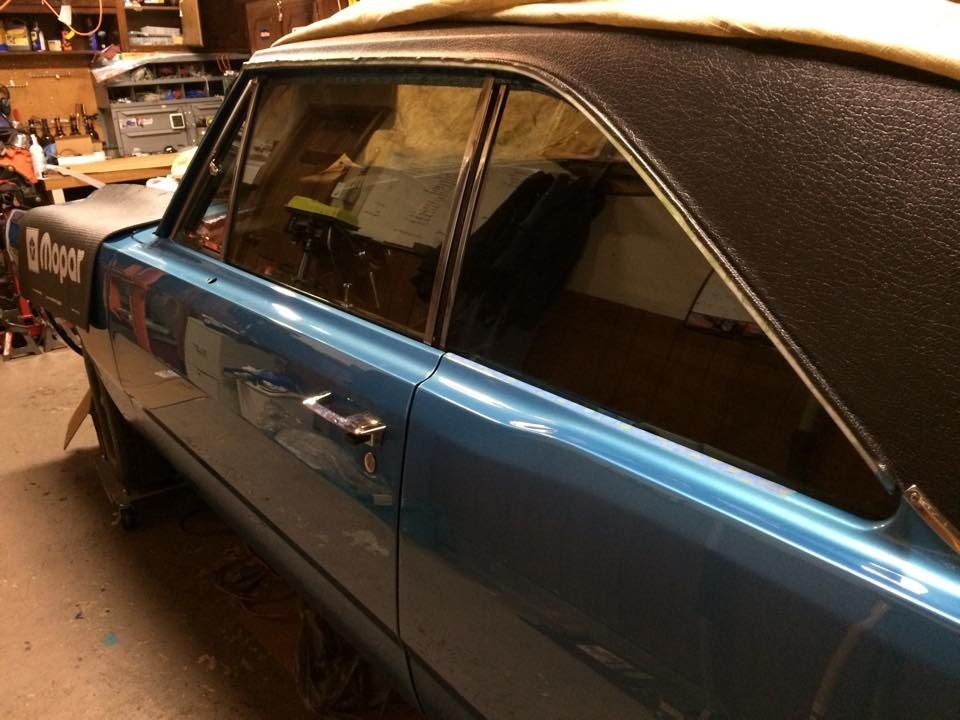
Afterward, I dug into the window regulators and hardware.This is the final result.

Drivers door regulator and window track.

11150421_804701582945551_2844106910748481923_n_zpsfqov0gws.jpg


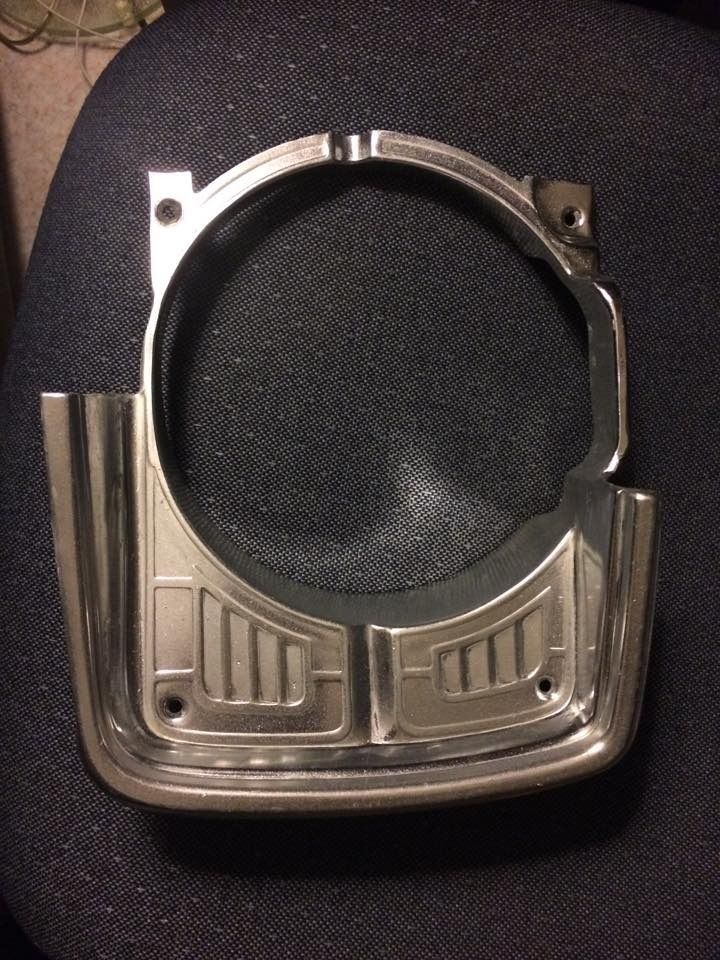
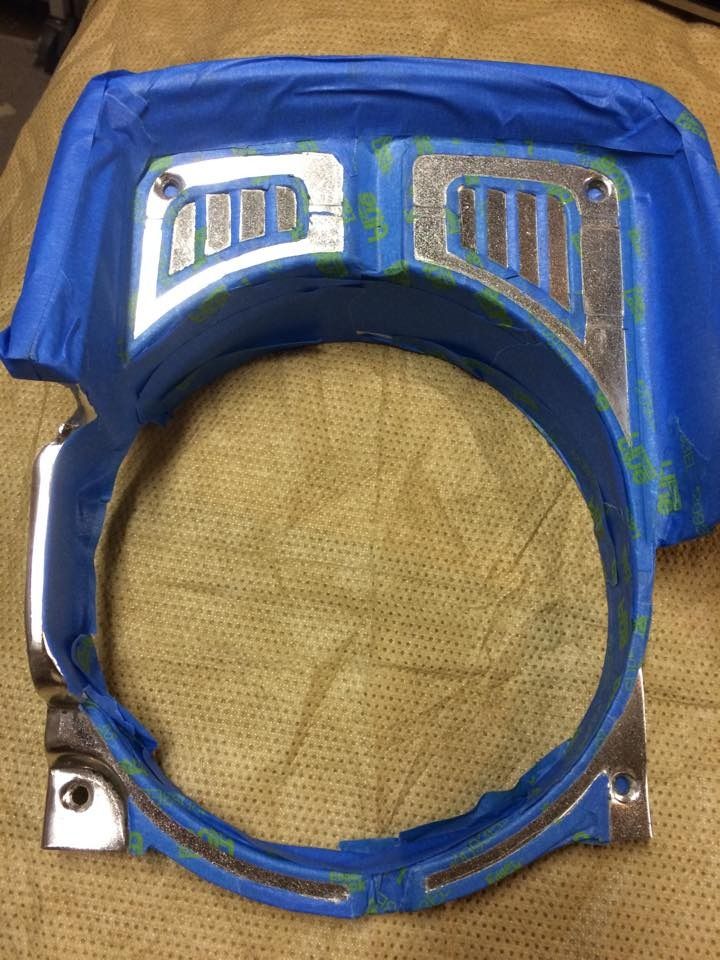
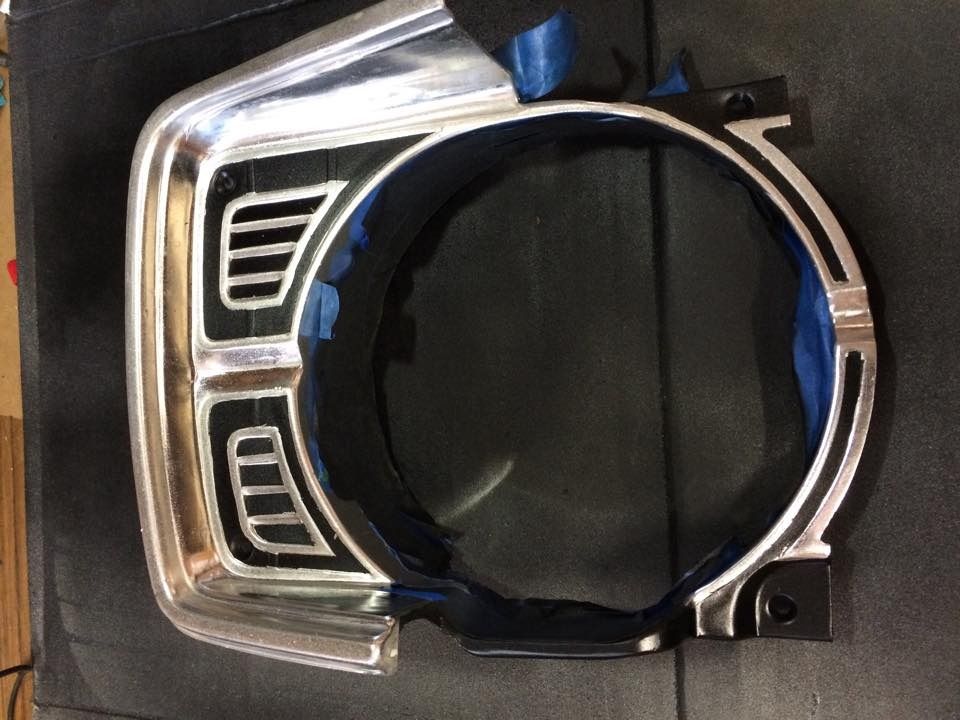
Am I nuts for putting this much work into a part no one will ever see?

I think we need to install the Dynamat before the window hardware and glass go in.

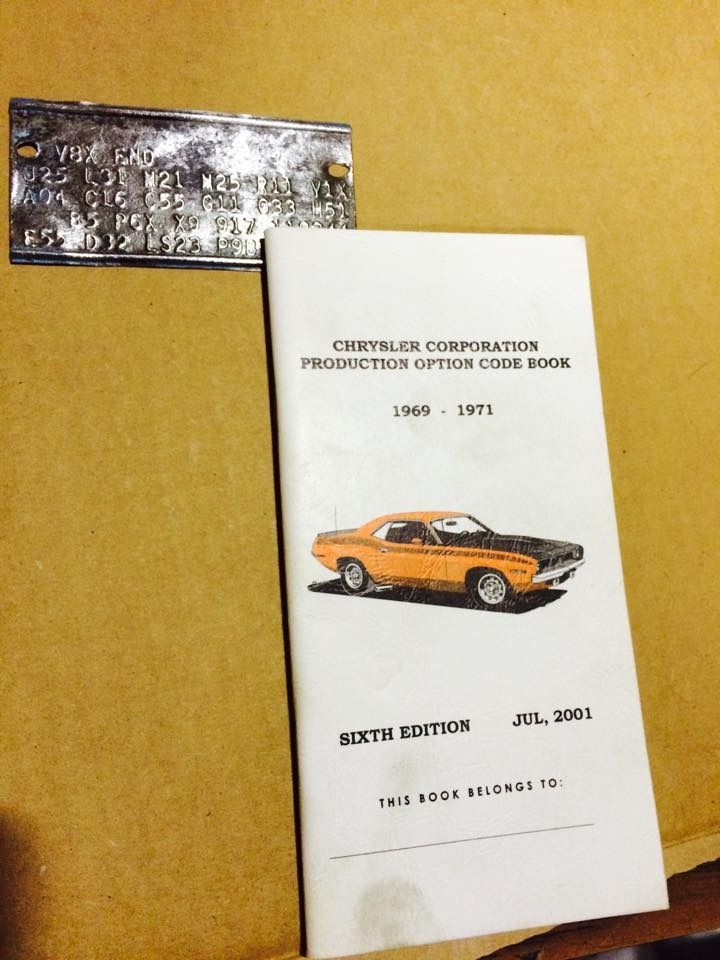
I'll thumb through thie option codes while we wait.

10959493_771219189627124_4928529209060360134_n_zpscycynjiy.jpg


still stumbling along :glasses7:
 
Figured I'd see what I could do with the headlight bezels and picked one off of the wall to experiment with.

11193288_813404065408636_3790704596599888899_n_zpstxxgplbq.jpg


First some paint stripper.

11242428_813404075408635_6942977565918878304_n_zpscu7yaw87.jpg


11193361_813404088741967_7212160356211744215_n_zpsx8v7bxae.jpg


First try laying the black... Had some tape issues but not bad. I'll let it dry and try to touch up the paint wit a fine brush and an exacting.

11210443_813404098741966_3681056993770726993_n_zpsokixapos.jpg


11161343_813882395360803_961029031963996249_n_zpsmsi1tuqf.jpg


Next is the argent but I'm really toying with the idea of leaving the rest polished.
 
Okay, maybe you didn't see the movie Unbreakable :) you're not missing out. lol

I love the fact that things are going back into the car.

Now I have to play with the fitment, how does a person come up with the design for mechanisms the geometry.
It tips down then back, the pushes out, and forward all before it gets to the top of the guide. lol

Drivers side is in :) and pretty close fitment for the first shot. while the glass was out I installed new qtr. seals from Metro soft.

Tomorrow I'll make the fine adjustments and install the top window channel and seal.

11078260_815221175226925_3328175557233990142_n_zpswb4lfmax.jpg


10429823_815221165226926_1777159513174660480_n_zpsxg1mupvg.jpg


10957753_815221151893594_1177594426400356877_n_zpswzqdamyl.jpg


11059529_815601051855604_6386276502440411026_n_zpse2u1u1zz.jpg


11233000_815601061855603_7975393048580339313_n_zps5knzfhet.jpg


Summit had Dynamat on sale so I bought a 9 piece kit to install in the quarters doors and floors. I'll start that after the glass is done.
 
-
Back
Top