Does anyone know where I can get new foam for bench seats in a 66 Canadian Valiant???
Or an idea of what it would cost to have them re done....Just basic covers....black with maybe a red piping? Leather or just fabric...looking for a rough estimate on cost...
Thanks
I vote to redo them yourself. It's much easier than you think and costs half as much. Are the seat backs still in good shape? Normally you can just reuse the cotton batting from the backs because they don't get much wear.
You'll need:
Seat cover from legendary
Hog ring pliers/hog rings
Foam
3M Spray glue
Burlap (if necessary)
Go down to your upholstery shop and ask for two 1" topper pads. They are just 1" sheets of high density foam, should cost you $10 a piece (beats the $80 or so Legendary wants for foam).
Remove the seat from the vehicle and remove the seat backs. Flip the bottom of the seat over and cut all the hog rings off and remove the cover. Then remove the listing wires from the seat cover and install them in your new cover. If they are too broken, bent and beat up, then just go down to your local hardware store and get some bailing type wire that's a similar diameter.
Slowly peel the old foam from the seat while taking note how it's curved and glued on. This is the best time to replace the burlap. You can either use similar burlap or any kind of felt or whatever you think will work. The point of it is to keep from seat springs from cutting into the foam when you sit on it. Take your new foam topper pad and place it centered and glue the corners down to the seat. You don't need a ton of glue, just to tack the corners and edges so it forms around the seat frame. Then take your other topper pad and center it on top of the pad you just glued down. I personally didn't glue this one down at the corners because I wanted it to kind of "fill" the corners of the upholstery better once it's all on.
Heat the seat cover up by either setting out in the sun, throwing in a car with the heater on high or by using a blow dryer. Turn it inside out basically and fold it down over the corners. Spend some time making sure it's all centered. Once you have the 4 corners folded down and centered, turn the seat frame over and start hog ringing. I start from the center of the front and work my way out symmetrically. Once I get to the corners I go to the back of the frame and work from the center out symmetrically. After that I do the sides since they are the toughest. Make sure you're holding the seat cover tight when hog ringing. Most of the time you may need to use pliers to pull the cover up tight. The covers are really good quality and can be tugged on more than you may think.
The seat backs are the easiest to put on because you just have to turn the covers inside out and roll them over the frame. Take your time and just make sure everything is centered and not twisted. If you get halfway down and realize it's not going to work, just take it back off, recenter and roll it back down again until it looks good. You can tug on the vinyl and sort of turn it on the seat back to straighten it out. Once you get it on and you're happy with the fit, you can hog ring from the center out.
Unless you have crazy wrinkles, they will work themselves out relatively quickly. I had wrinkles on my seat back cover that I could not get out by tightening the cover over the frame. After it was in my car for a couple days, the wrinkles were completely gone. Upholstery is actually way easier than I thought it would be. It used to seem like some kind of crazy thing that only highly skilled people with practice would do. Once I just bit the bullet and did it myself, it was much easier and took a lot less skill than I thought it would.
Legendary has videos on their page of how to do everything. Watch them so you know exactly what to expect when you take your own apart.
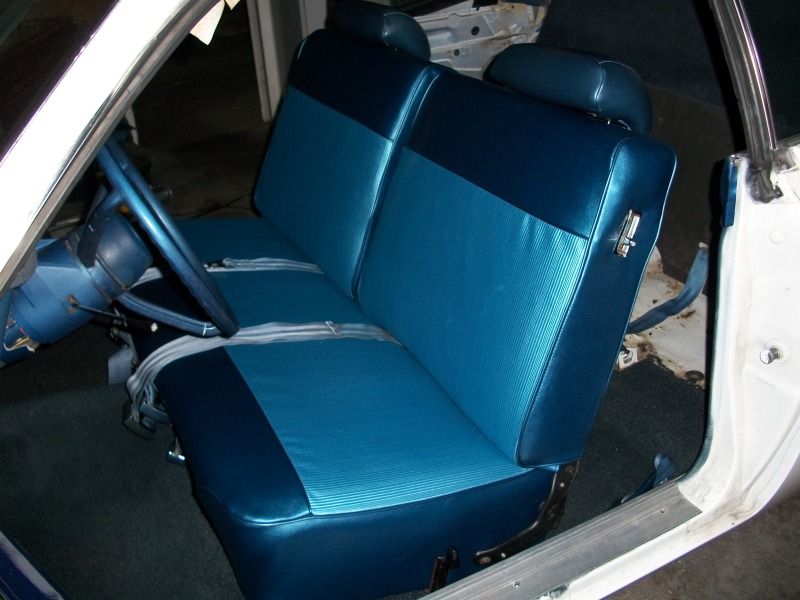
Here is a picture of my seat after I first put it in. All those wrinkles you see were gone in a couple days.