That cruise unit is a 69 mopar unit, the stalk is 72 and later. I would leave it on there.
You are using an out of date browser. It may not display this or other websites correctly.
You should upgrade or use an alternative browser.
You should upgrade or use an alternative browser.
Biohazard
- Thread starter Teeth & Tires
- Start date
-
Little late for that. Cruise unit belongs to someone else now.
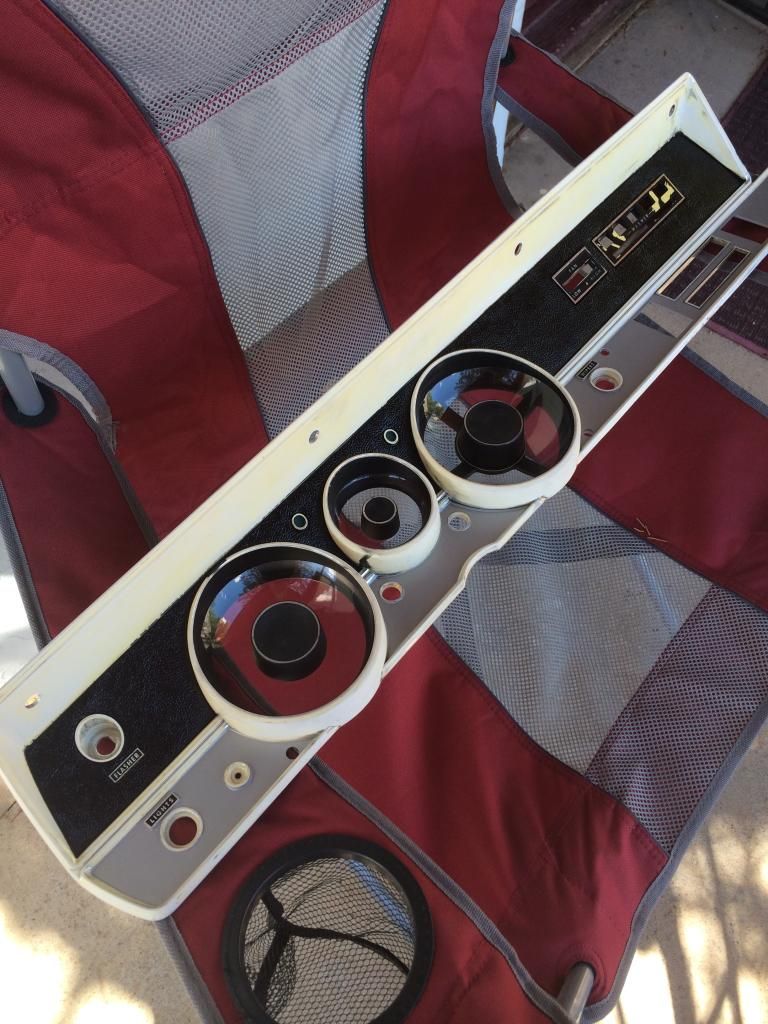
So far, so good.
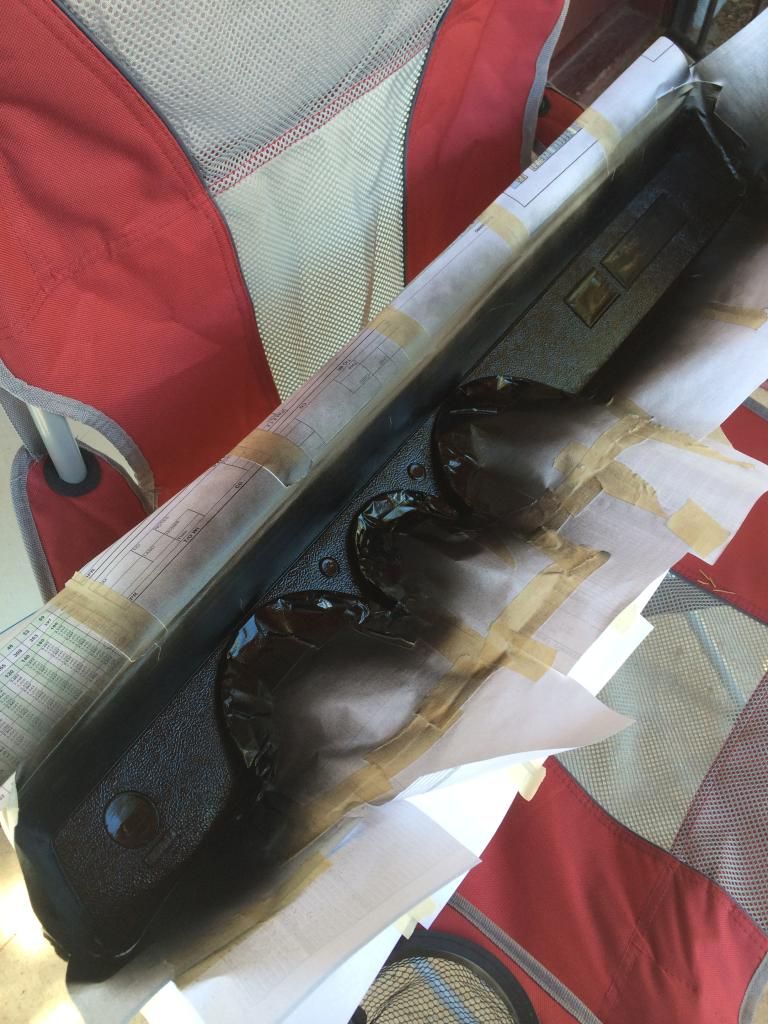
What remains is shooting the chrome-effect paint onto the trim areas. First, though, need to let the paint fully cure.


What remains is shooting the chrome-effect paint onto the trim areas. First, though, need to let the paint fully cure.
Took care of this yesterday -
Actually went as far as swabbing out the inside of the chrome pushbutton caps.
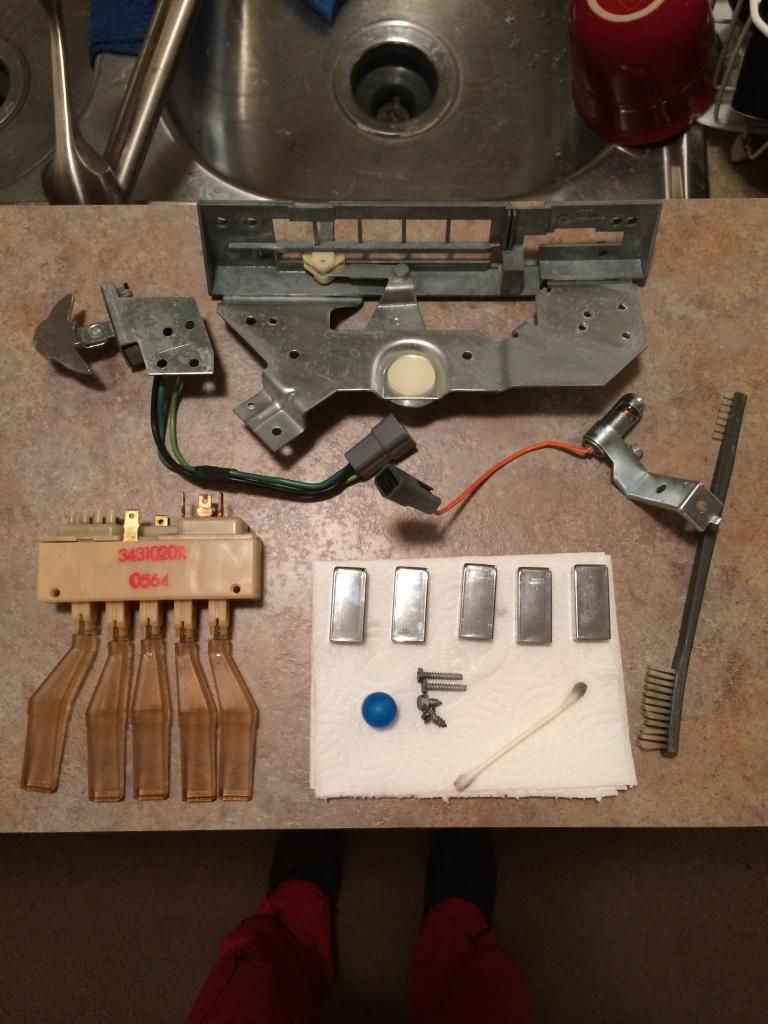
Cleaned and disinfected, parts laid out to dry -

Actually went as far as swabbing out the inside of the chrome pushbutton caps.

Cleaned and disinfected, parts laid out to dry -

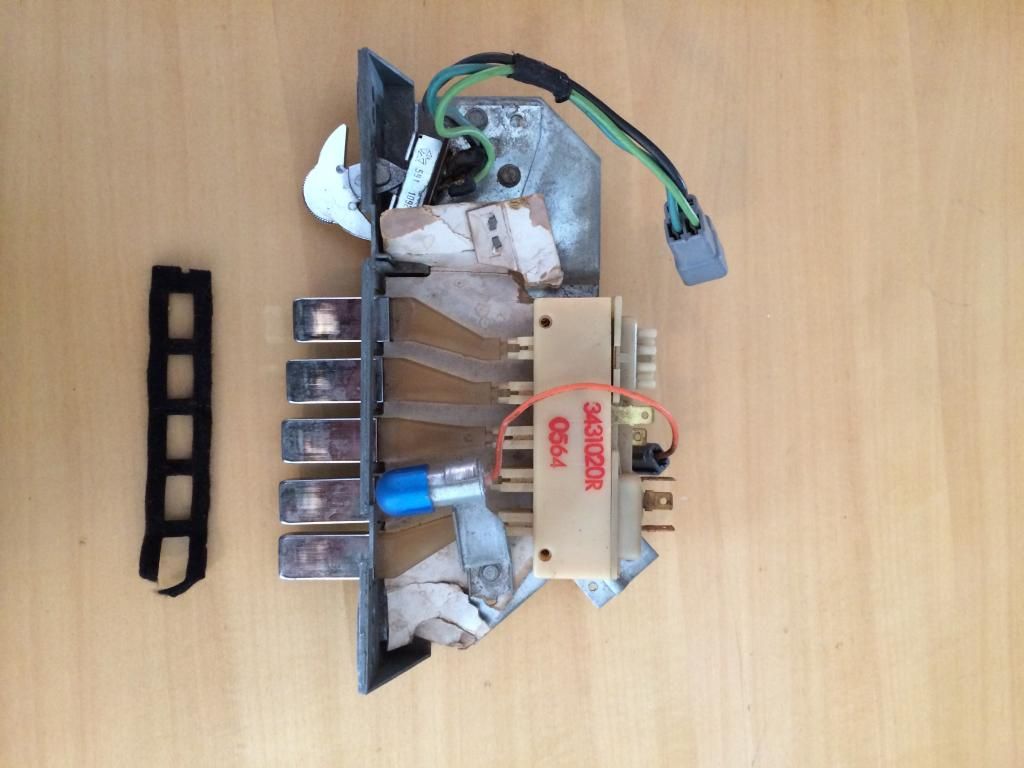
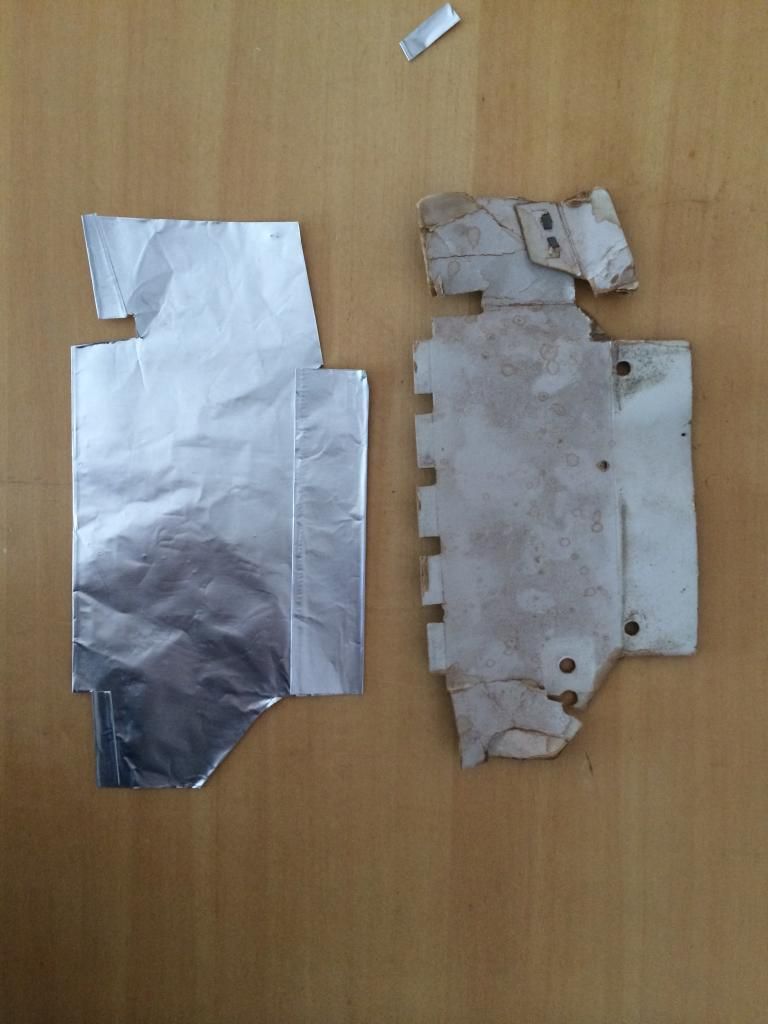
One more thing with the HVAC controller: if you look at the following picture, you'll see a white piece of cardboard sitting under the pushbutton arms. This piece serves two purposes: to reflect more light into the plastic buttons so they light up real nice and, 2: to keep extra light from spilling out under the dash.
Being made of cardboard this piece was as foul with mold as I expected it would be so it would have to be replaced. Anybody know where I can find one? Yeah, me neither. Here's how I got around it for fractions of a penny.
Gonna make my own out of tin foil folded over itself.
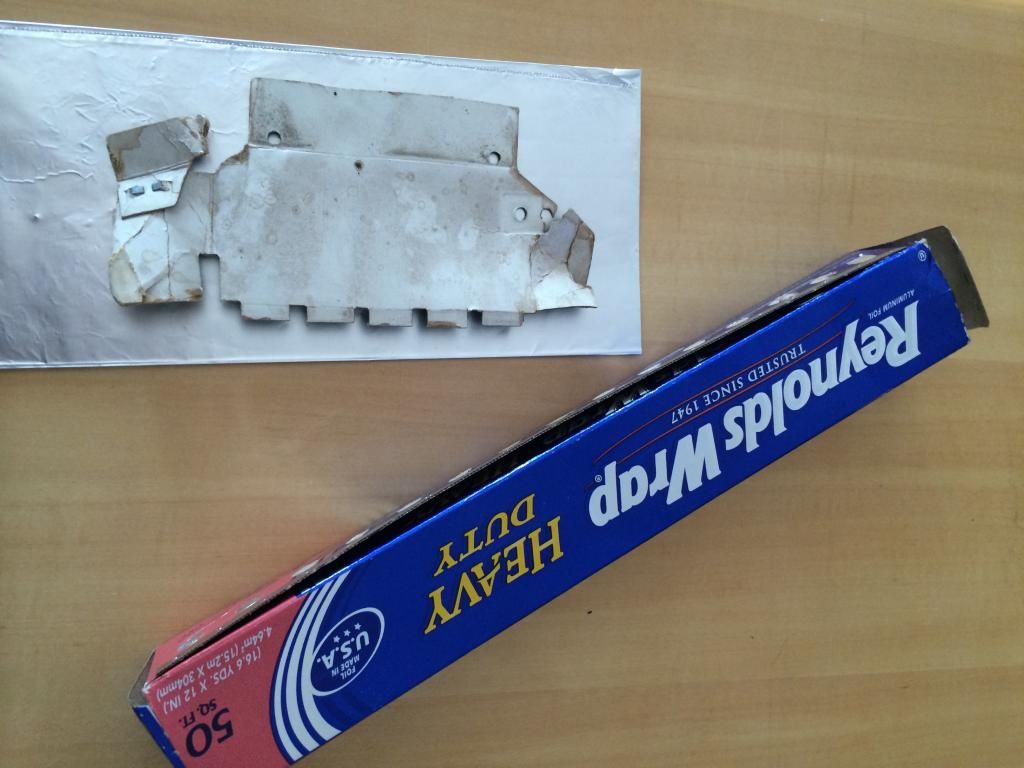
The foil will do a better job reflecting light back to the button arms and is not the sort of surface to, in any way, foster any mold growth
After folding it over, I've got a four layer thick sheet of foil.
I then cut the length down to match the cardboard piece.
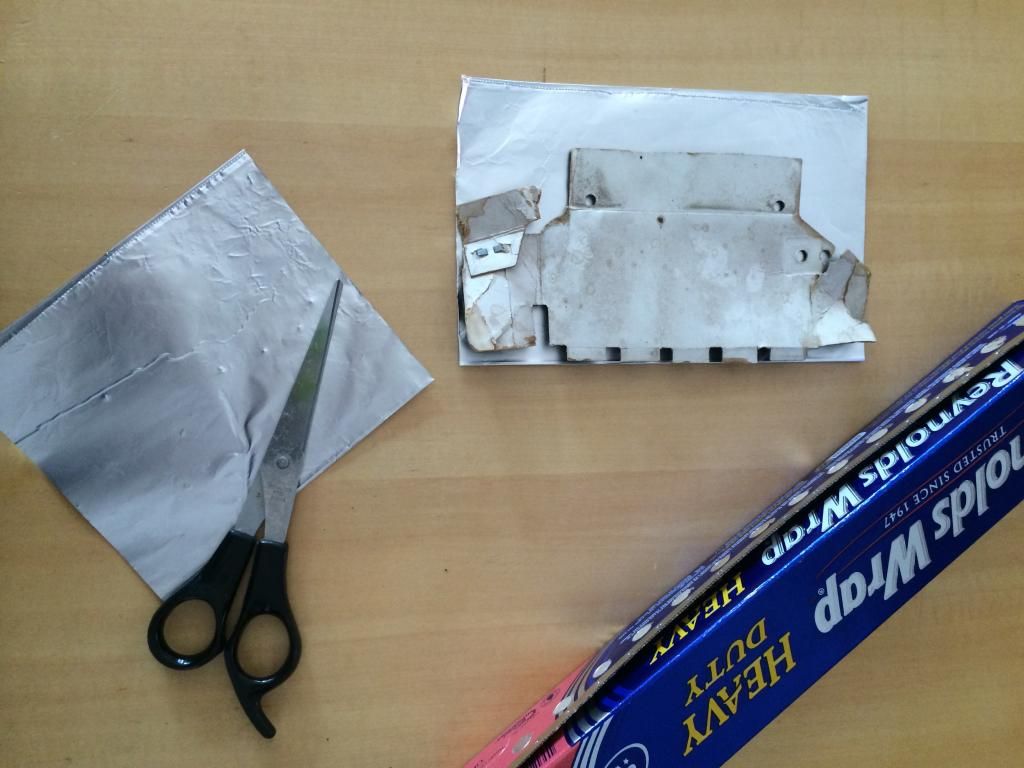
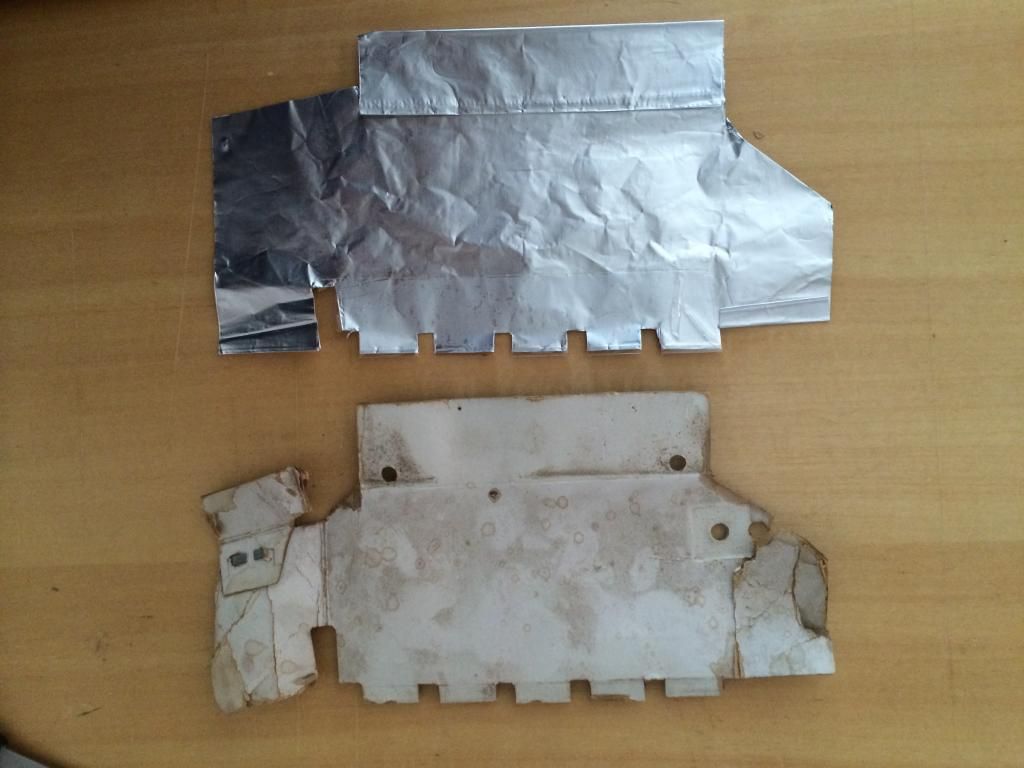
A little more bulk trimming.
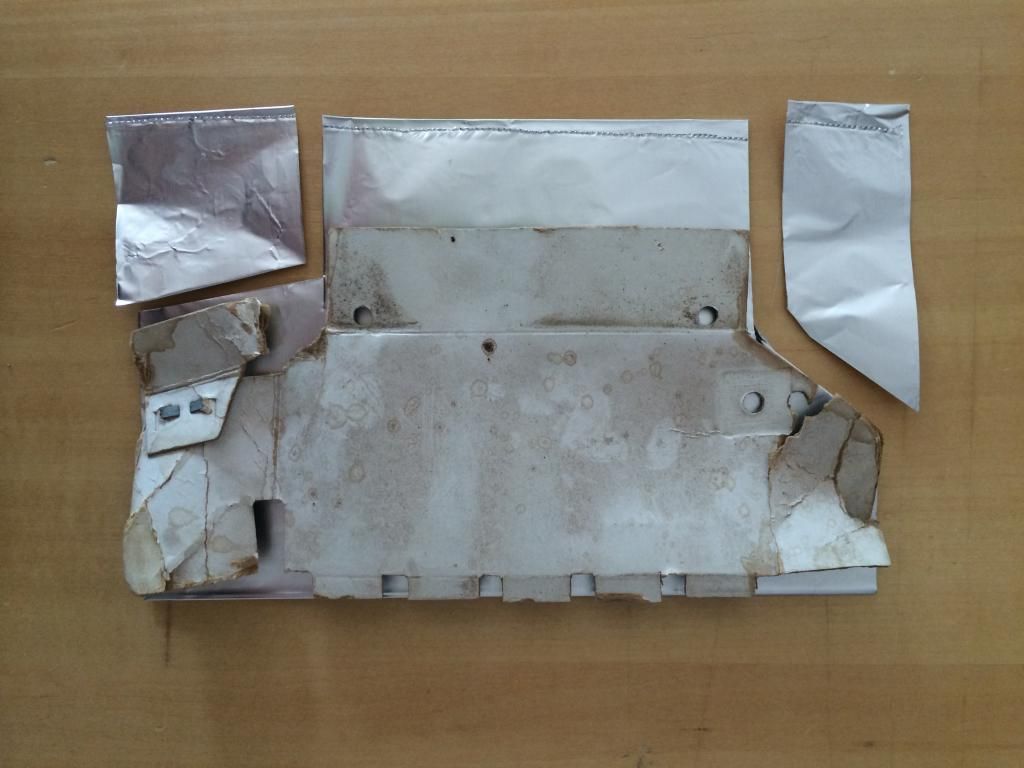
Working in some of the detail cuts. Also folded in the back end to get the depth right. You don't want to cut here or you'll have 4 separate layers of foil floating about.
Look carefully- there's a wide strip of clear packing tape folded over the front end for added reinforcement. Then I cut the notches with my X-acto.
Being made of cardboard this piece was as foul with mold as I expected it would be so it would have to be replaced. Anybody know where I can find one? Yeah, me neither. Here's how I got around it for fractions of a penny.
Gonna make my own out of tin foil folded over itself.

The foil will do a better job reflecting light back to the button arms and is not the sort of surface to, in any way, foster any mold growth
After folding it over, I've got a four layer thick sheet of foil.
I then cut the length down to match the cardboard piece.

A little more bulk trimming.

Working in some of the detail cuts. Also folded in the back end to get the depth right. You don't want to cut here or you'll have 4 separate layers of foil floating about.

Look carefully- there's a wide strip of clear packing tape folded over the front end for added reinforcement. Then I cut the notches with my X-acto.

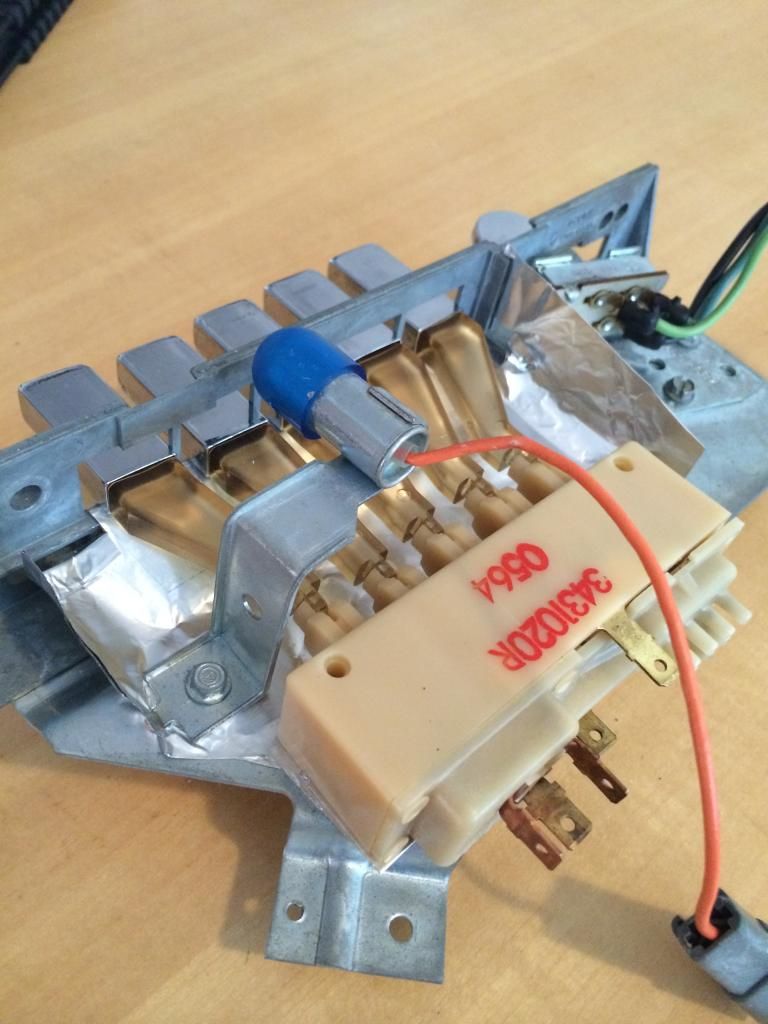
Took a moment to wipe the completed product due to its proximity with the nasty original part.
Then set it into place and reinstalled the two sub components that go on top of it. The screws that secure these two parts also hold the foil sheet in place.
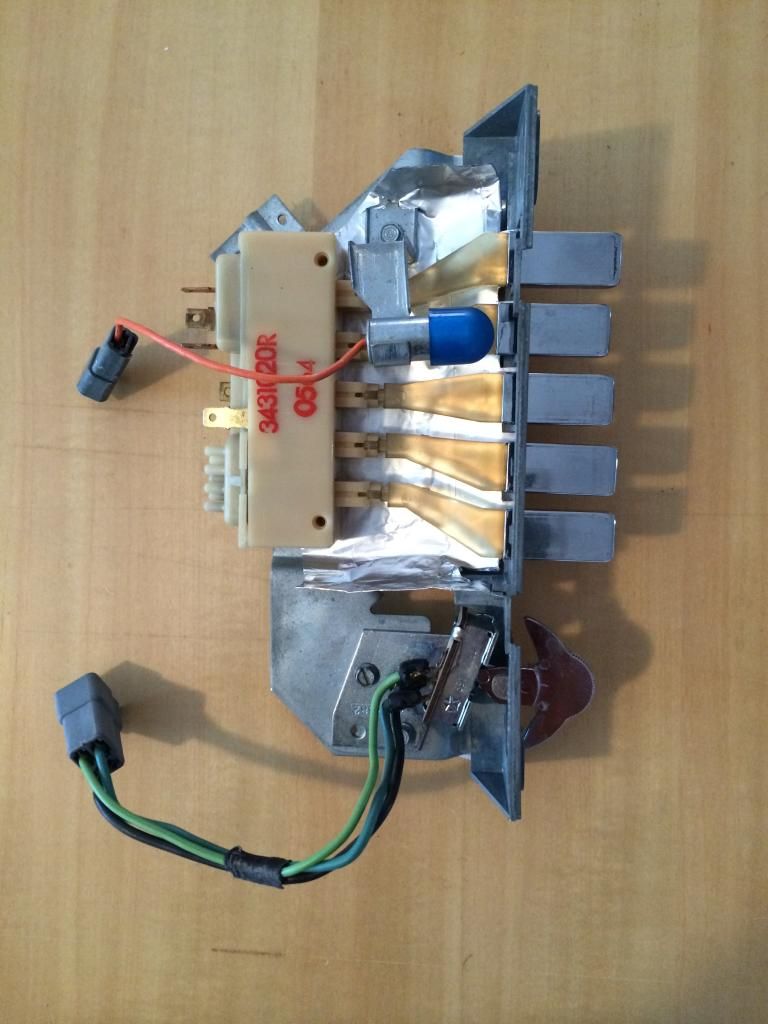
After putting the foil in, I had to do just a small amount of careful bending and trimming to get everything exactly as it needs to be.
Last issue pending on my HVAC controller is the thick felt that goes around the push buttons.
Then set it into place and reinstalled the two sub components that go on top of it. The screws that secure these two parts also hold the foil sheet in place.

After putting the foil in, I had to do just a small amount of careful bending and trimming to get everything exactly as it needs to be.

Last issue pending on my HVAC controller is the thick felt that goes around the push buttons.
Regarding the felt, had to begin with a little decon. I figured that a highly fibrous, porous material in such an awful environment would surely be as soiled as all that insulation under the dash. Some if you might be thinking, "oh come on - how bad could that little thing be?"
Here it is after soaking in a bag of ammonia for 1/2 hour.

Here it is after soaking in a bag of ammonia for 1/2 hour.

sireland67
Well-Known Member
I would have not expected that out of that small of a part.
I think when you are finished, the car will be cleaner than an operating room.
Makes you think hard on how much storage units sweat with climate changes.
I think when you are finished, the car will be cleaner than an operating room.
Makes you think hard on how much storage units sweat with climate changes.
My immediate thought was that this was some of the pigment coming out of the felt. After all, it had certainly never been washed in 45 years but it remains as black as the day it was made.
We've actually talked about storage units and the thing that makes them scary is that you don't ever know what was kept in it before and you don't know what's being kept in the adjacent units. You probably would not have wanted this car for a neighbor.
We've actually talked about storage units and the thing that makes them scary is that you don't ever know what was kept in it before and you don't know what's being kept in the adjacent units. You probably would not have wanted this car for a neighbor.
d55dave
Well-Known Member
Or the car was heavy smoked in. The ashtray, right below the heater controls.....looks like cigarette residue / ash / nicotine. Definatelly gross but I have to say, you are going well above and beyond with your cleaning.
Haha! You're reading it. And hopefully my grand kids will, too.
As for the smoking: I won't say the car was never smoked in but ol' Grandad was a non-smoker and for all the stanks I've had to contend with, cigarette odor wasn't one of them.
Funny story: because there are just some questions you are programmed to ask when buying a car from somebody and I, naturally, asked, "Has the car been smoked in?"
-- Like it even matters at this point. Lol.
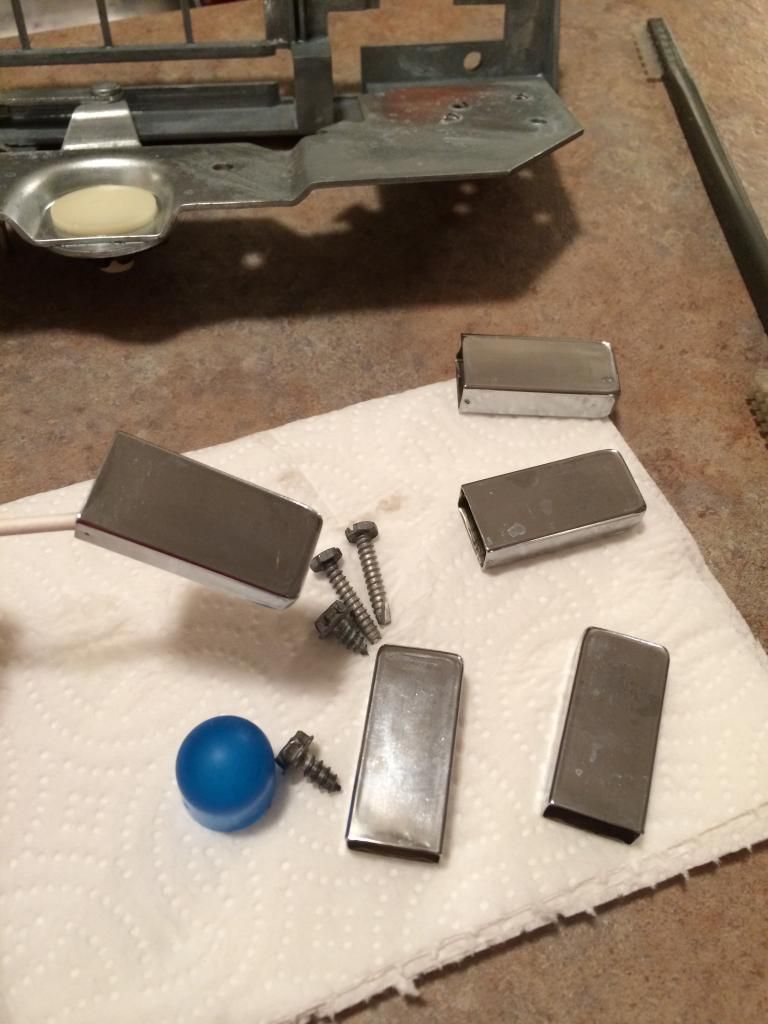
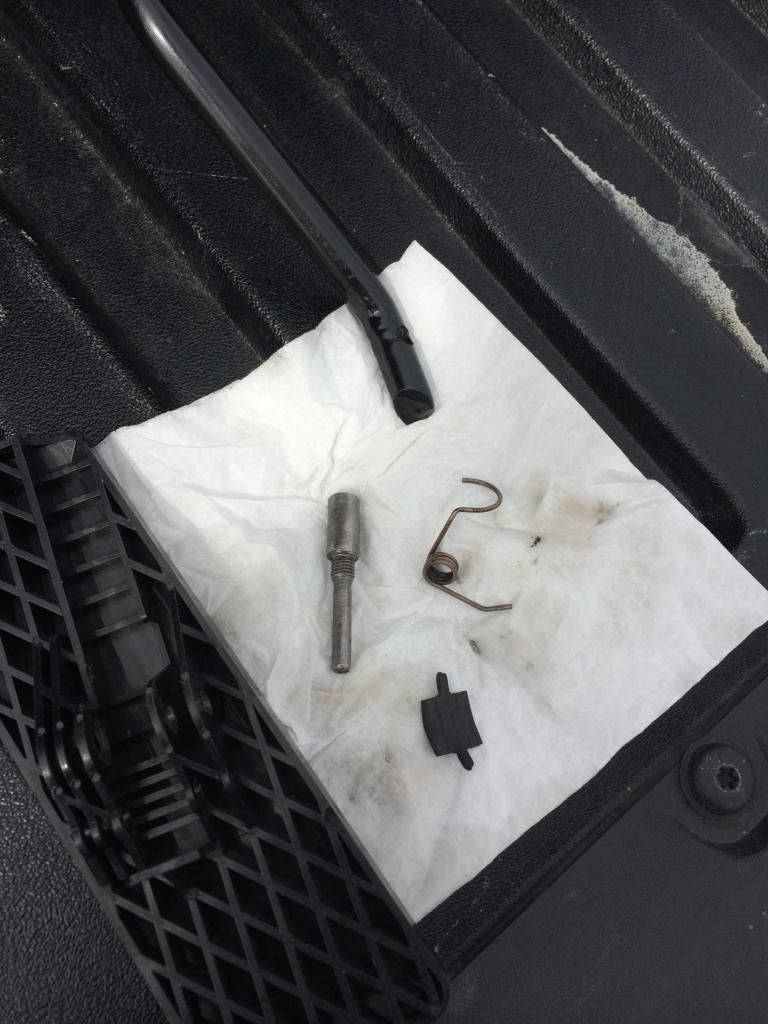
Hey, if this guy was really serious about details and cleaning, then why not disassemble, clean, and lubricate the gas pedal?
Done.
Done.

There was a lot of slop and play where the pedal pivots at the end of the rod so I thought some nylon washers would serve well here.
http://smg.photobucket.com/user/vr6...9-45B1-B5DA-21A4BCD4C837_zpsliuzzgue.jpg.html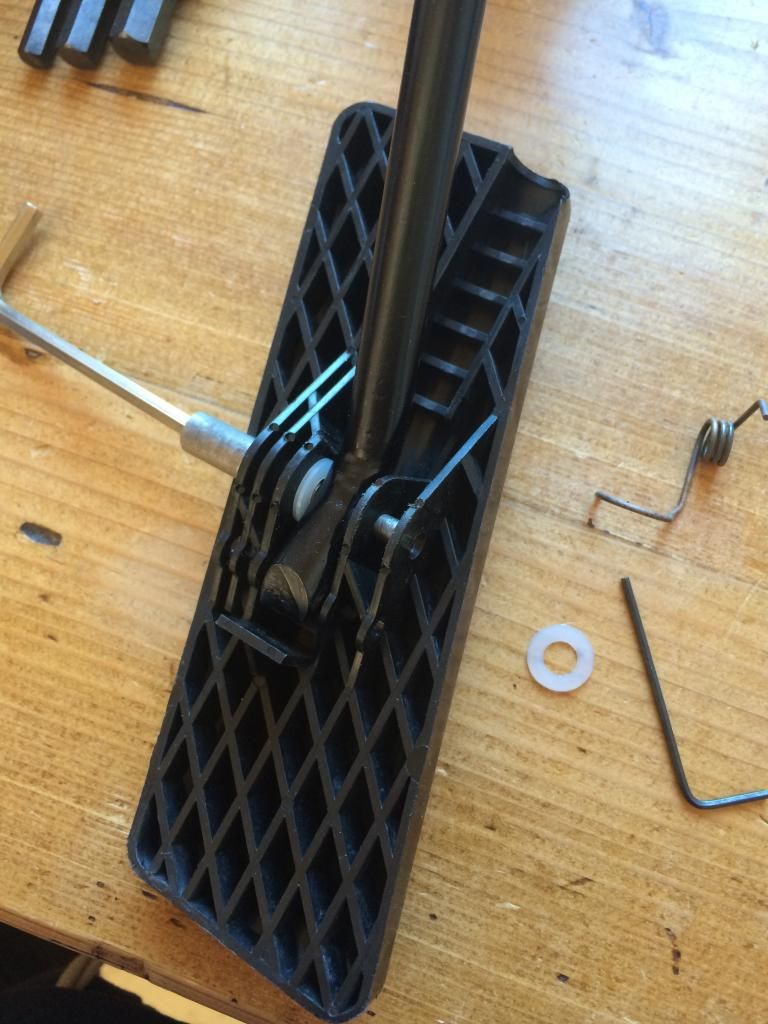
They were a trick to get into place but the slop is gone and there is no squeaking at all.
http://smg.photobucket.com/user/vr6...5-4D29-A361-996A464B7B77_zpssvkhwiks.jpg.html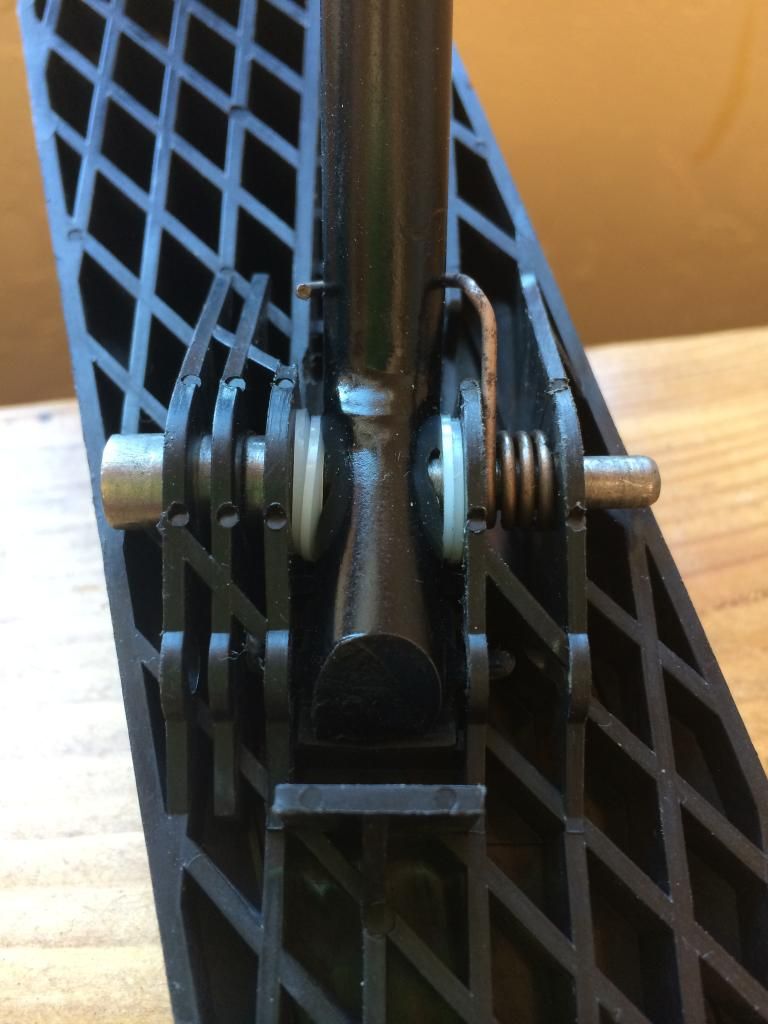
And since I was 'upping' the quality feel of this particular component, I decided some squishy bumpers to take the clank out the pedal return were in order.
http://smg.photobucket.com/user/vr6...2-4EDF-9B74-EFE1F75455E2_zpsegpxnrcn.jpg.html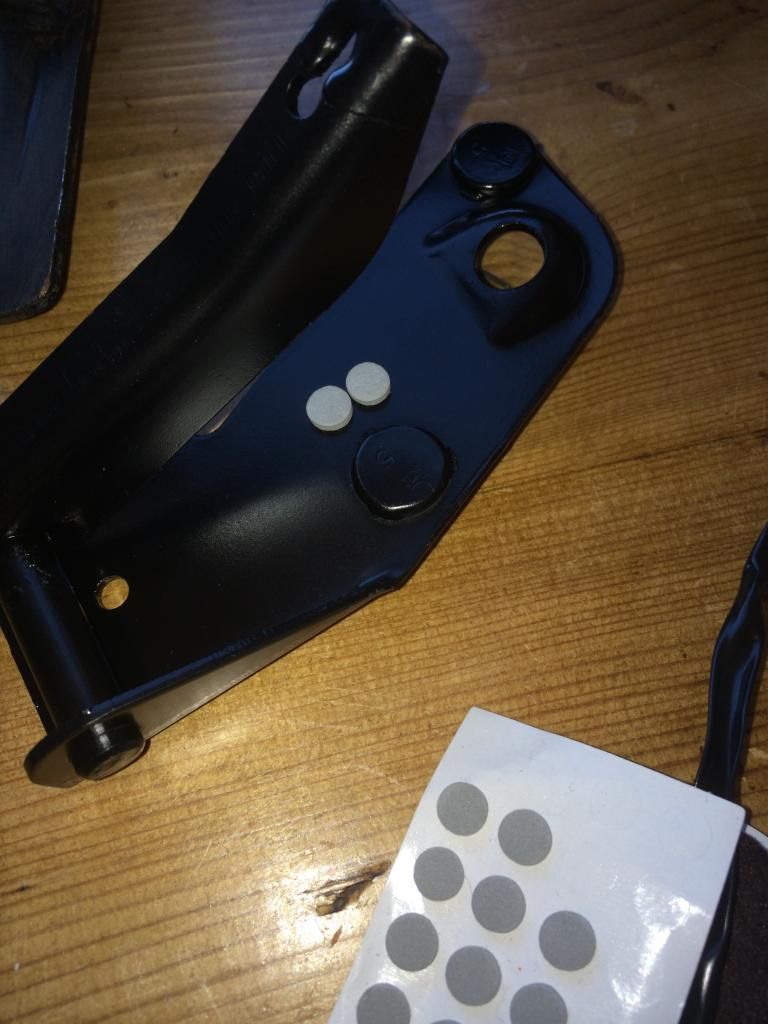
She'll never be a Lexus but there is much room for 'better' in the tactile quality department.
...and on that note...
Its the start of another week in the Western part of the state and I brought a trunk full of stuff to work on (of course). Since I was just talking about the car's "feel" - one of the biggest "feel" parts is the steering wheel assembly which, in my car, includes the automatic transmission gear selector as well as the wheel and turn signal. Cleaning - naturally - but also a fresh coat of R6 all the way down the column to match the rest of the dash and black on the firewall plates. I'll clean and repack the steering coupler and may need to replace the bearing near the driver.
I meant to bring the instrument panel to finish trimming for the chrome paint but...forgot it. Nevertheless, I have a few other small bits needing attention that I did manage to pack. The weather is forecast to be poo for most of the week due to some tropical weather thing (thought I left all that behind in Alabama??) so I should have no problems getting stuff done. It should be a good week.
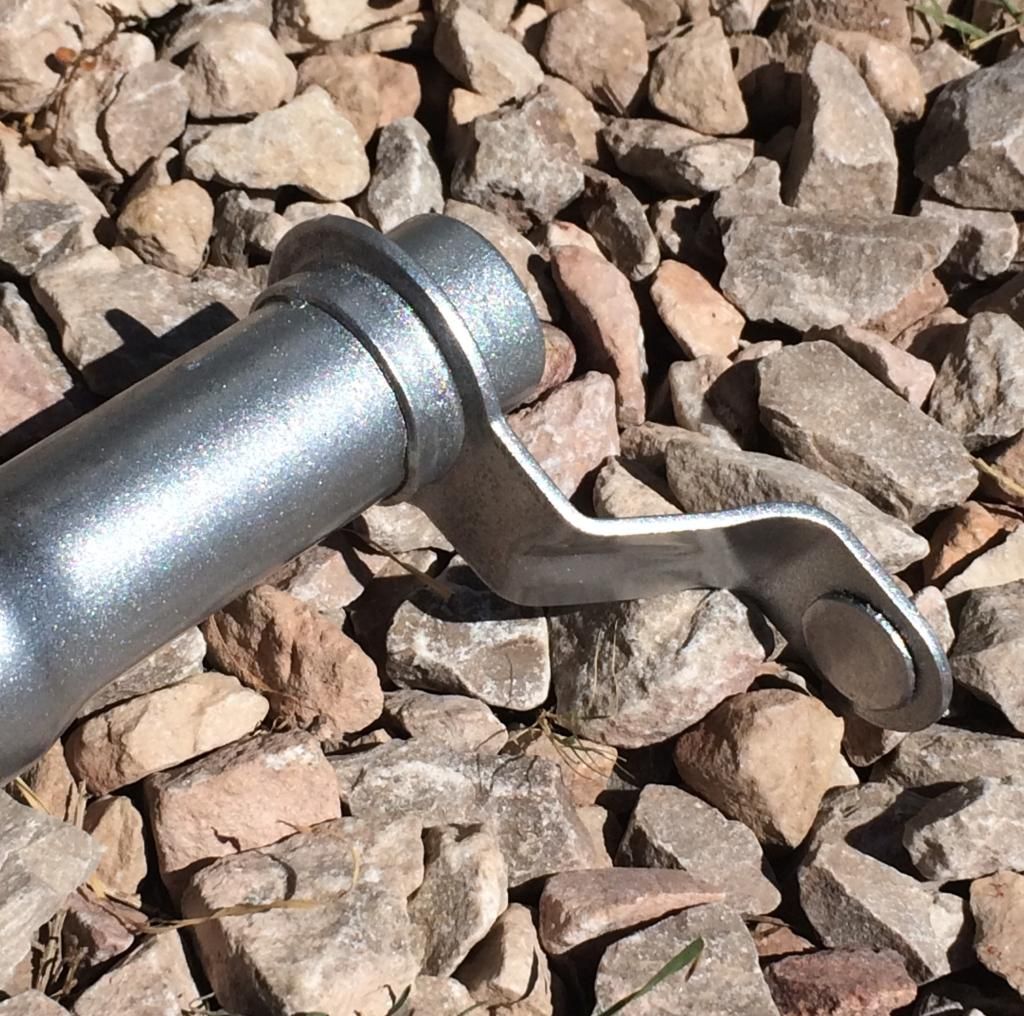
Perhaps a bit out of order I would, however, like to present some of last week's work. Shown below are some of the things found under the dash which were bare metal, albeit with a few splotches here and there. Now, all nicely cleaned up and finished with a silver paint. Please note the parking brake lever: this unit is many pieces in one requiring a few different colors to be completed correctly. I'll be working on that this week as well. 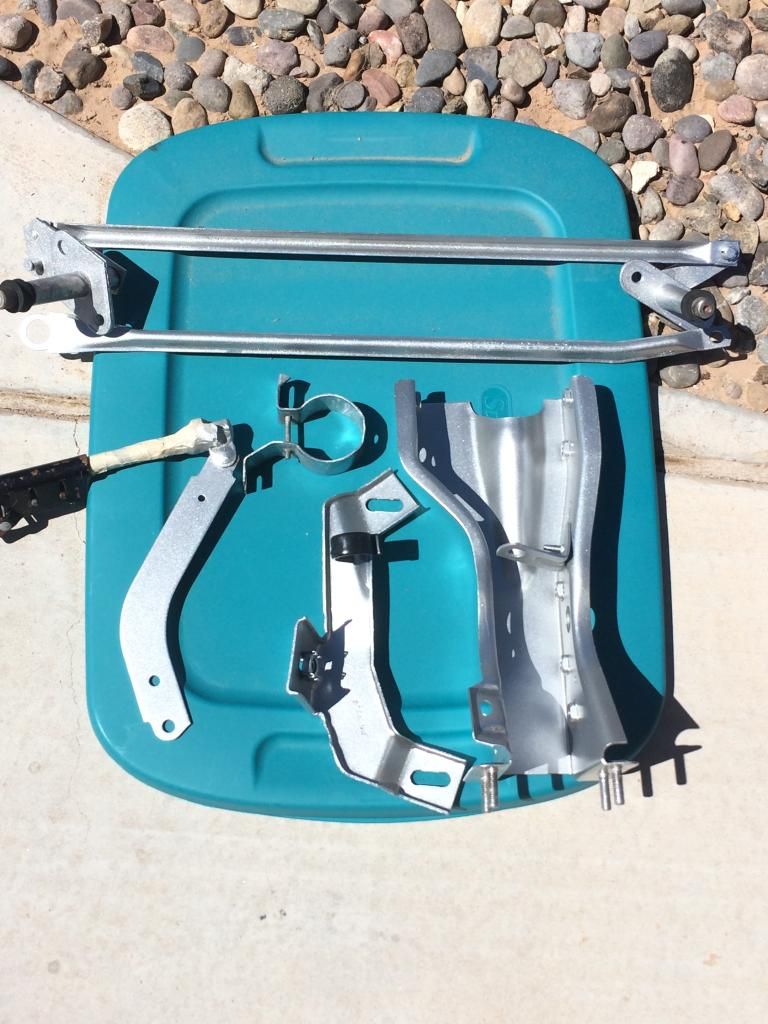

Getting the guts out from under the steering wheel was not difficult. Some of this stuff had already been cleaned off when I pulled out the cruise control system.
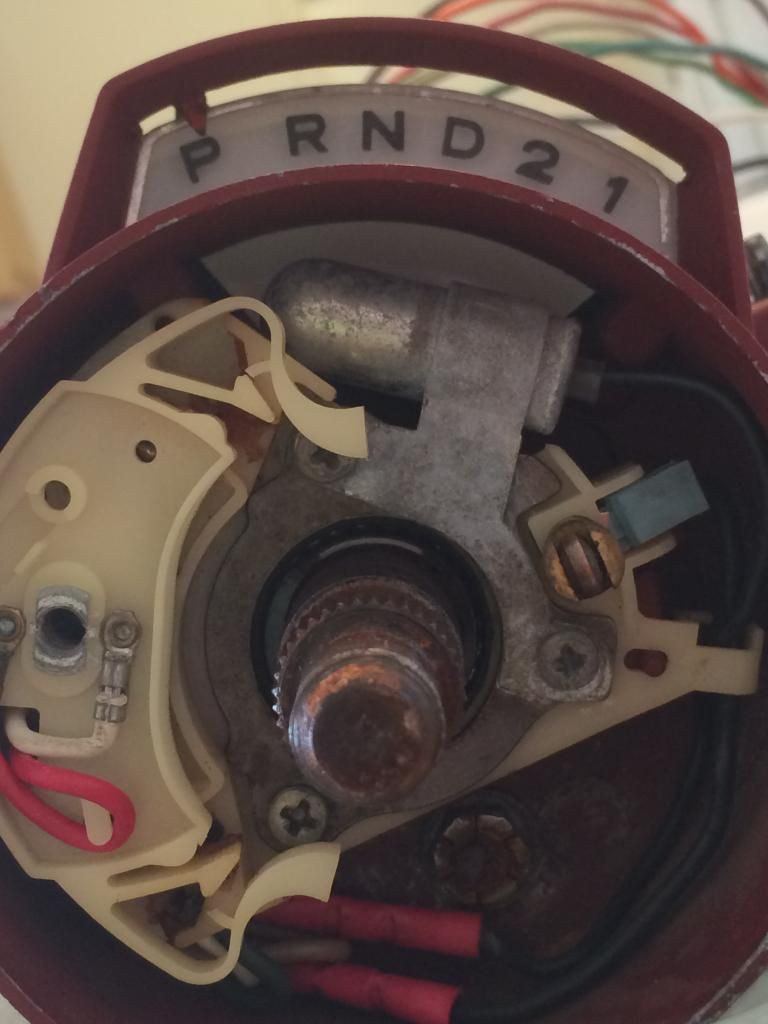
Here's the major components laid out for the "before" shot.
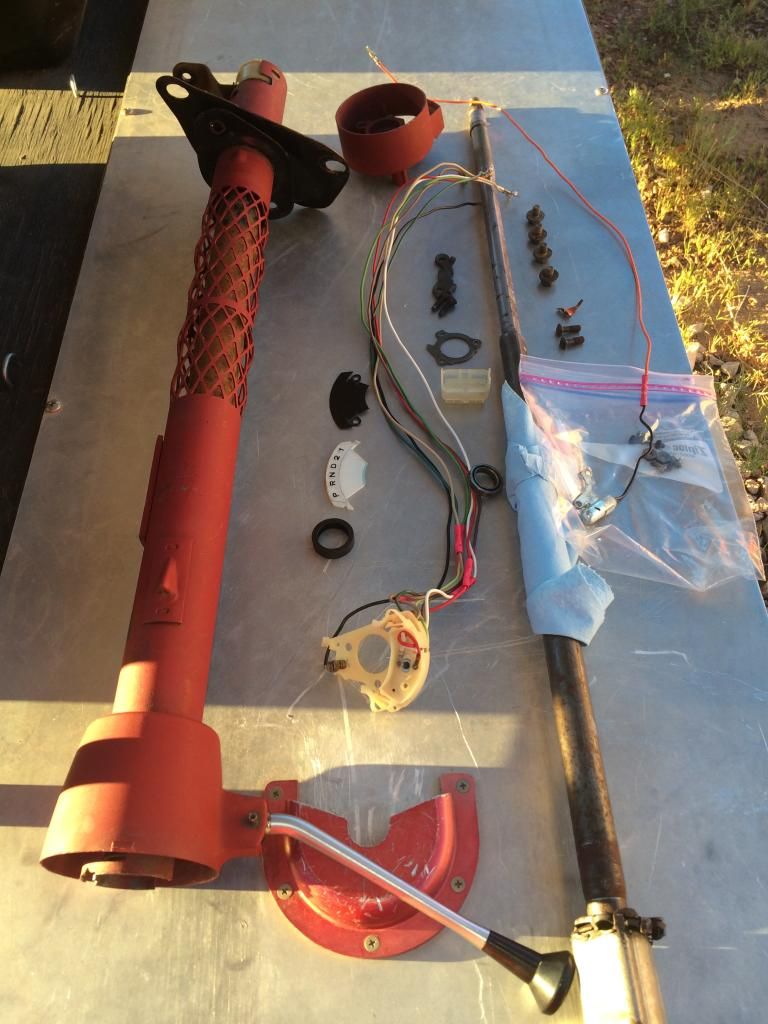
Gotta make sure I can get all the wires back in the right order. Photos like this May even help another rebuilder.
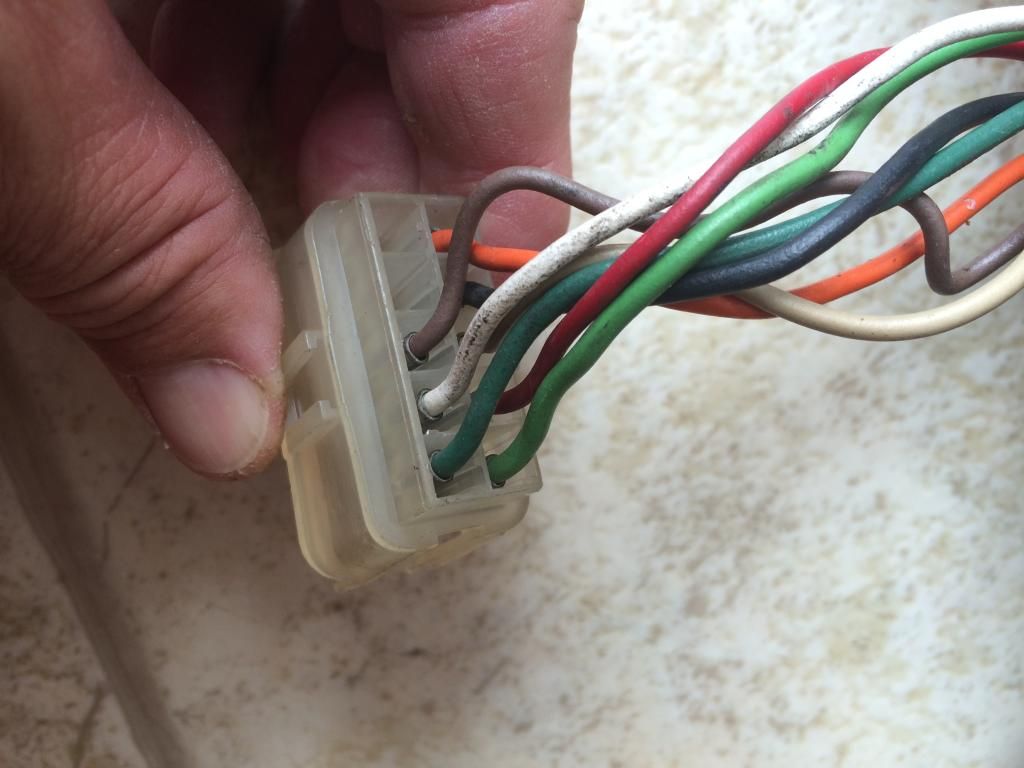
More dirty parts...

Here's the major components laid out for the "before" shot.

Gotta make sure I can get all the wires back in the right order. Photos like this May even help another rebuilder.

More dirty parts...


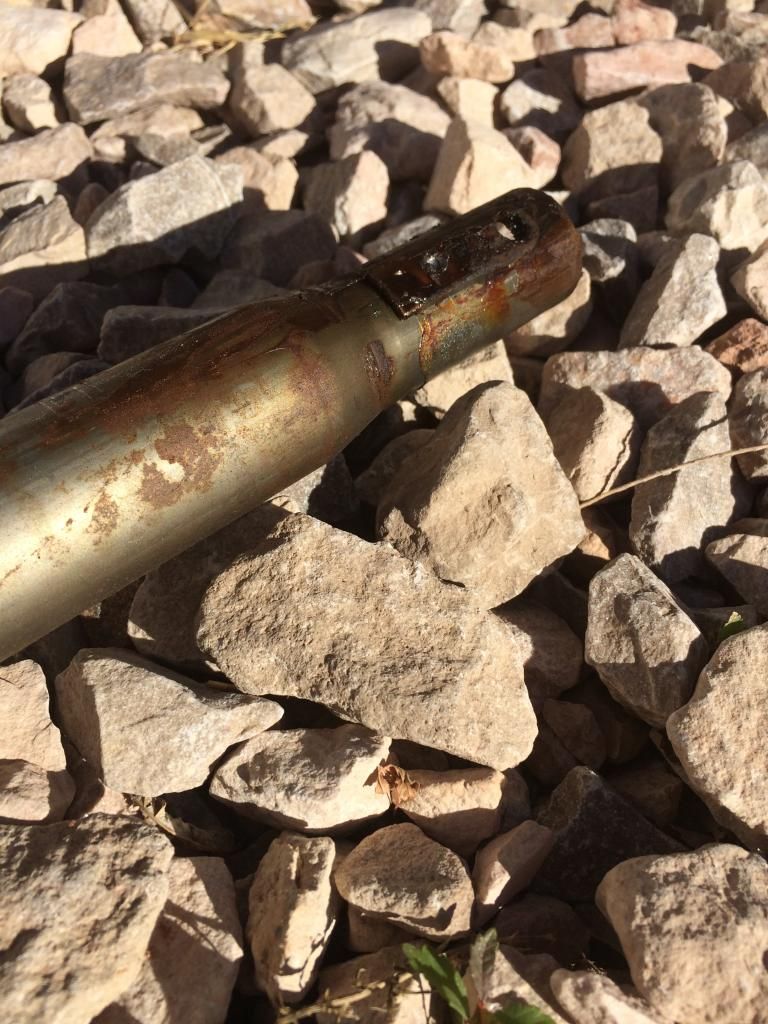
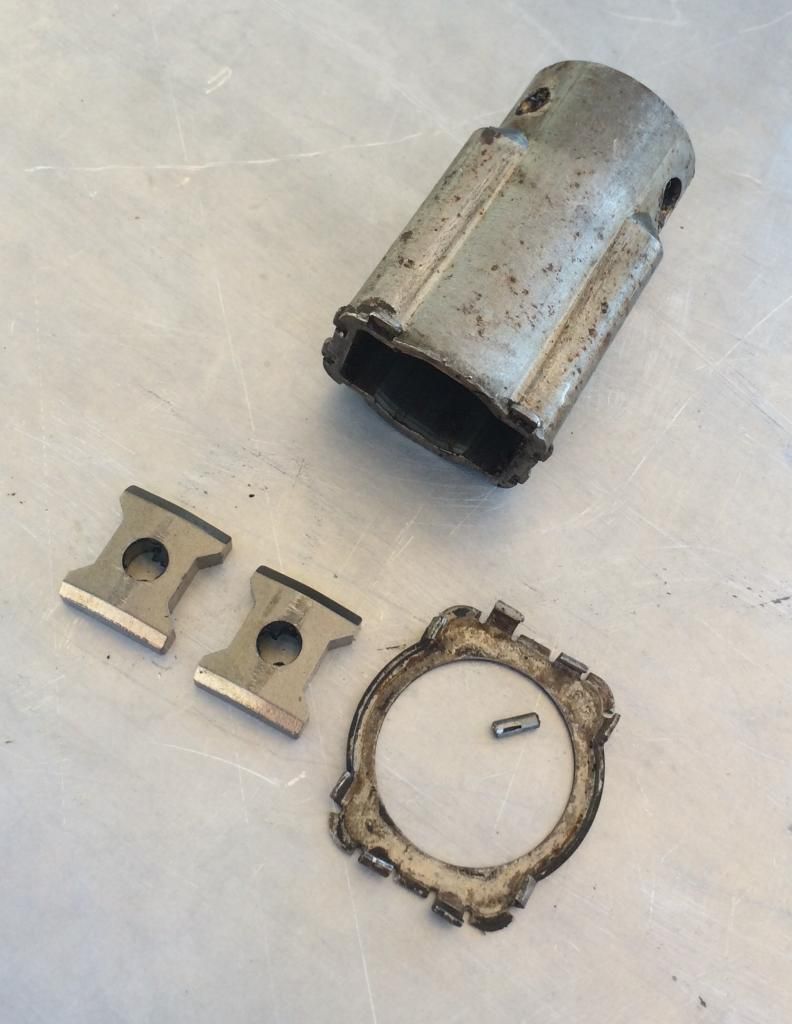
This afternoon, I will separate the housing, gear select shaft, and steering shaft. Provided I can find a 7/32 Allen wrench around here.
Allen wrench found and I was able to finish breaking the column down.
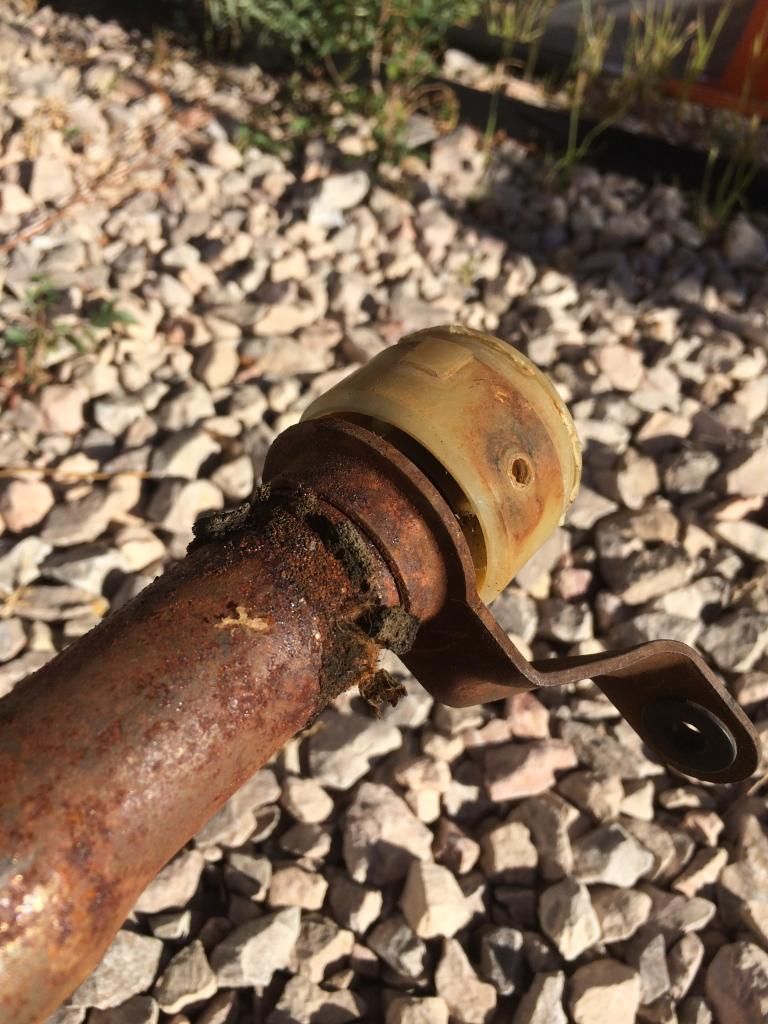
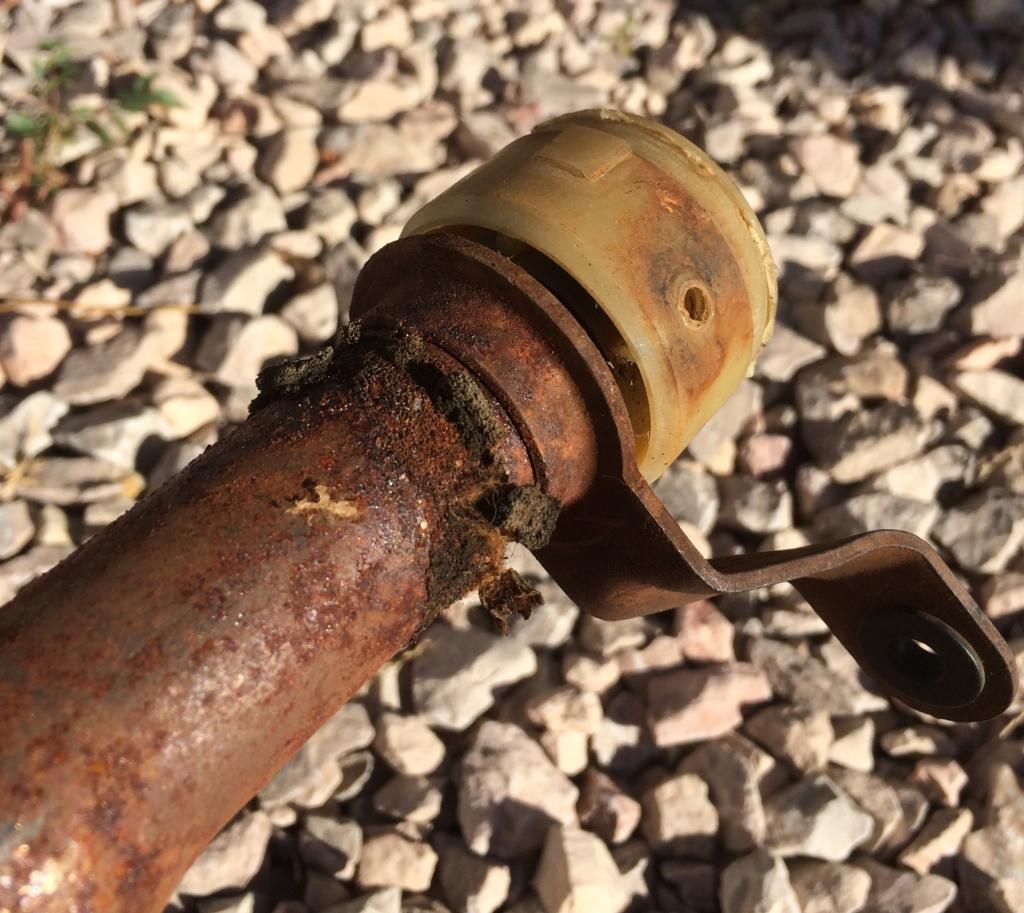
Sadly, my lower bearing looks like it's life is over. The balls in the race are badly rusted and the whole bearing spins inside the nylon bushing.
Sadly, my lower bearing looks like it's life is over. The balls in the race are badly rusted and the whole bearing spins inside the nylon bushing.
Useless.


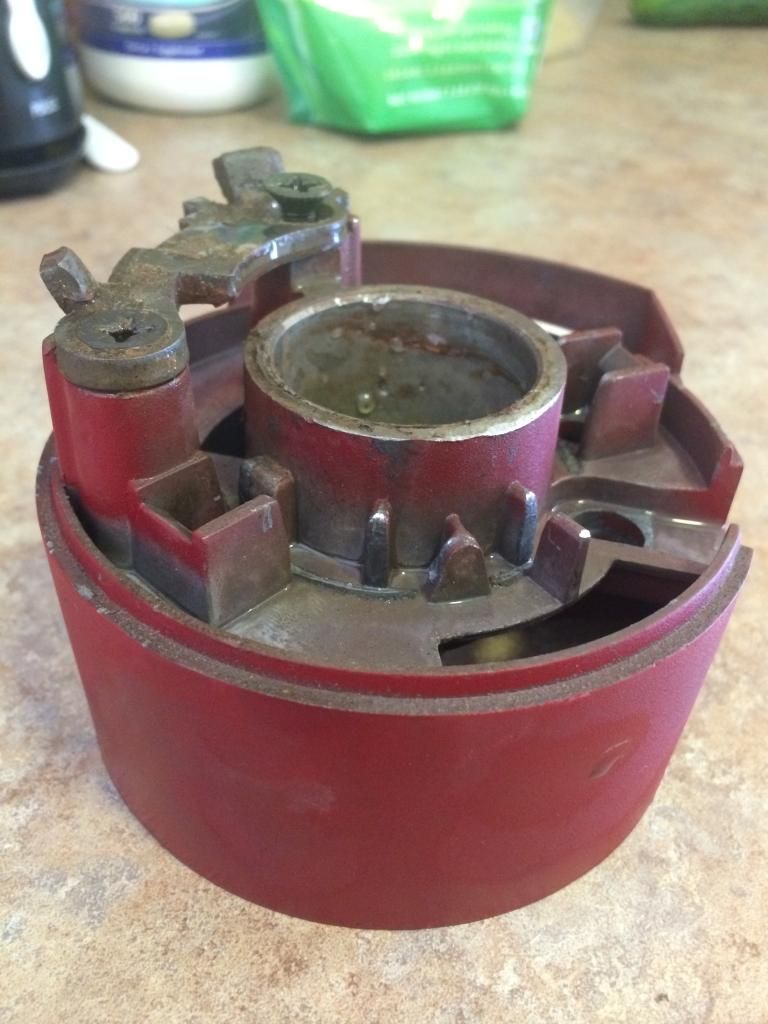
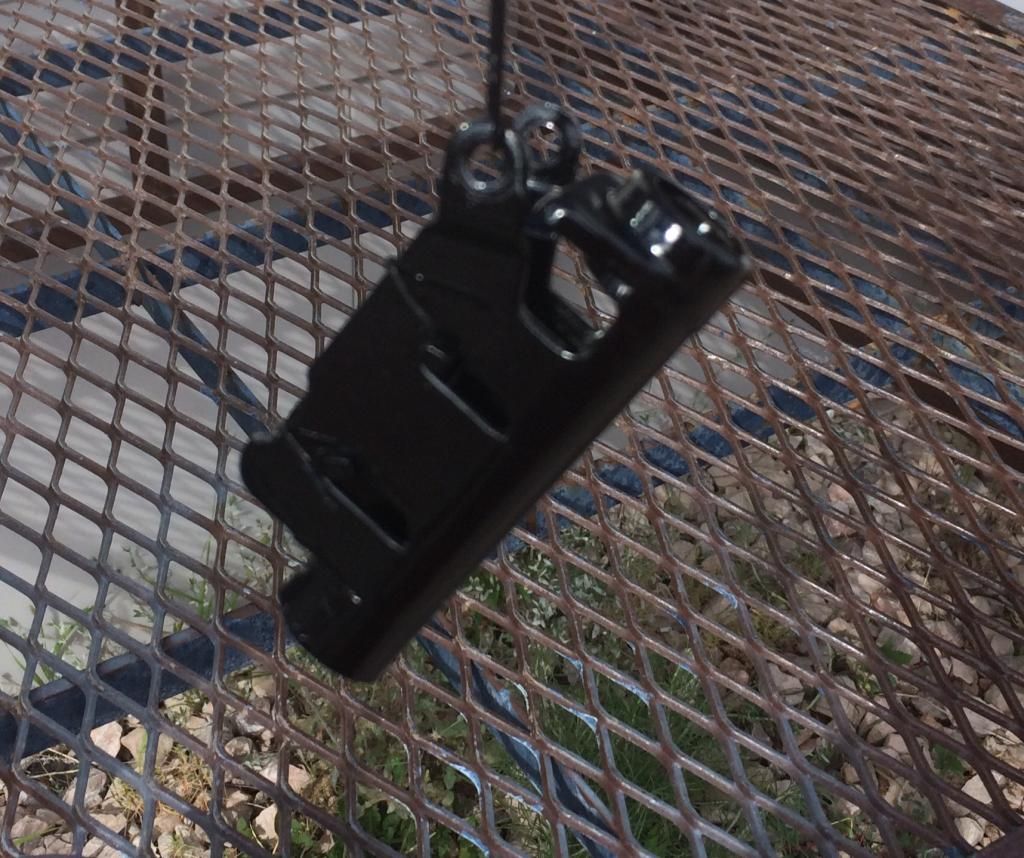
I definitely call this 'detail' work. Here is the sleeve through which the park brake rod passes.
I made the mistake of allowing the two steel ratchet teeth and their spring to fall out. It's easy to do with the rod removed. After struggling to get all the parts back in place, I secured them with some paper clip wire.

I made the mistake of allowing the two steel ratchet teeth and their spring to fall out. It's easy to do with the rod removed. After struggling to get all the parts back in place, I secured them with some paper clip wire.

Here's my makeshift retaining rig. 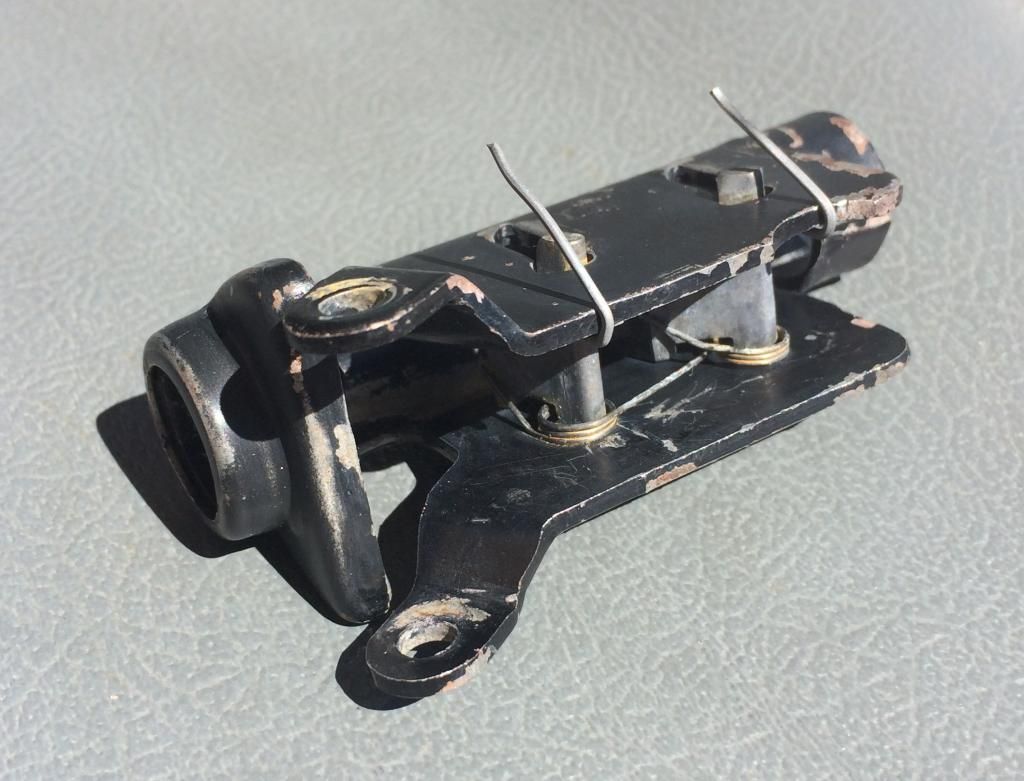
Its one continuous wire that I ran under both ratchet plates, pulled upward so the tips couldn't drop down low in the slots, and folded the ends of the wire over the edge of the mount.

Its one continuous wire that I ran under both ratchet plates, pulled upward so the tips couldn't drop down low in the slots, and folded the ends of the wire over the edge of the mount.
Much better.
Sometimes, it's the little things.

Sometimes, it's the little things.
Getting back to the column...
...turned this--
...into this---
That rubber grommet for the shift linkage was fine (maybe the only thing that was) so I just taped it off. Ran outta silver so only got half of this shaft painted.
...turned this--

...into this---

That rubber grommet for the shift linkage was fine (maybe the only thing that was) so I just taped it off. Ran outta silver so only got half of this shaft painted.
Got the coupler apart and cleaned all the guts out. Ordering a refresh kit with the "improved" orange seal, a new lid, and the rest. Really just showing this as a means of documenting what did and didn't git done.

-
Similar threads
- Replies
- 9
- Views
- 317
- Replies
- 41
- Views
- 2K


