change out 67 dart remote mirror glass

-

dartpower

dartpower
Joined
Sep 13, 2009
Messages
86
Reaction score
10
Location
dartmouth ns canada
can any one tell me how do u take the mirror glass out of my driver door remote mirror .I have broke glass and how do you put in a new glass and where can I buy a new mirror glass .
thanks
dartpower...
 
The black adhesive from hell holds the glass to a thin tin backing plate. To start peeling at a broken glass will likely distort that backing plate. Heat gun, putty knife, and leather gloves. As for replacement glass,,, I don't know who sells exact diameter/fit. You could buy a entire mirror assembly cheap from Summit and cut that glass down to size. A whole lot of time wasted if the proper adhesive isn't re applied.
 
The black adhesive from hell holds the glass to a thin tin backing plate. To start peeling at a broken glass will likely distort that backing plate. Heat gun, putty knife, and leather gloves. As for replacement glass,,, I don't know who sells exact diameter/fit. You could buy a entire mirror assembly cheap from Summit and cut that glass down to size. A whole lot of time wasted if the proper adhesive isn't re applied.
so what's the catch to hooking up the remote cable that has like these little like probe fingers that are the movements when u move the interior post stem that's where I don't get how that hooks up to the back side of a mirror .cause I think a guy big in mopar parts here locale got that for me .he's not even sure how that reconnects to the back side of the mirror .
 
so what's the catch to hooking up the remote cable that has like these little like probe fingers that are the movements when u move the interior post stem that's where I don't get how that hooks up to the back side of a mirror .cause I think a guy big in mopar parts here locale got that for me .he's not even sure how that reconnects to the back side of the mirror .
the same way they hook to the adjuster on the opposite end. you can pull them apart , I like to mark a couple of them first. I have a remote mirror in pretty darn good shape, that I`m not going to use. I forgot to drill the extra hole for it before I painted my car.
 
The black adhesive from hell holds the glass to a thin tin backing plate. ..............................

So with this "black adhesive from hell" it is impossible to save the original mirror?
 
OK I'm confused I guess, for I read "save a broken mirror glass" ?
 
OK I'm confused I guess, for I read "save a broken mirror glass" ?
If the mirror in one of these side views is good can it be removed without destroying it? I have a "floppy" mirror I'm considering repairing. TIA
 
the same way they hook to the adjuster on the opposite end. you can pull them apart , I like to mark a couple of them first. I have a remote mirror in pretty darn good shape, that I`m not going to use. I forgot to drill the extra hole for it before I painted my car.
can you take a few pic's top bottom all around and what are you asking for in price wise ,
 
OK, what I know whether it helps or not. 3 cables have crimped terminals, different at each end that for all practical purposes are not removable/reusable. The end you can't see lives between the glass and the tin back plate. That back plate has 3 holes large enough for the controller end terminal will pass through but other larger half ball shaped terminal will not pass through. So imagine a bunch of separate parts at pre assembly. I should add that here is a head post attached to the pretty chrome housing with one screw from bottom up. cables inserted through back plate, mirror glued, cables trapped. Color coded cable sheathes attached to head post, this much passed through the chrome housing.
Other cable ends, ( being color keyed ) , are crimp staked to pot metal spring loaded controller.
How to disassemble... the right small c-clamp and some sort of wood or plastic guide foot protecting the wand will compress the spring generating slack in the cables. Rather than destroy the pot metal crimping/staking at either end, the cable sheathe is spiral steel so the sheathe will unscrew. Unscrewing these cable sheathes without kinking, and counting revolutions so the go back exactly the same, its doable but none fun.
My 67 fish has a long cable right remote mirror with that control wand mounted in a second ignition switch bezel. Only handy pic from early into that project.
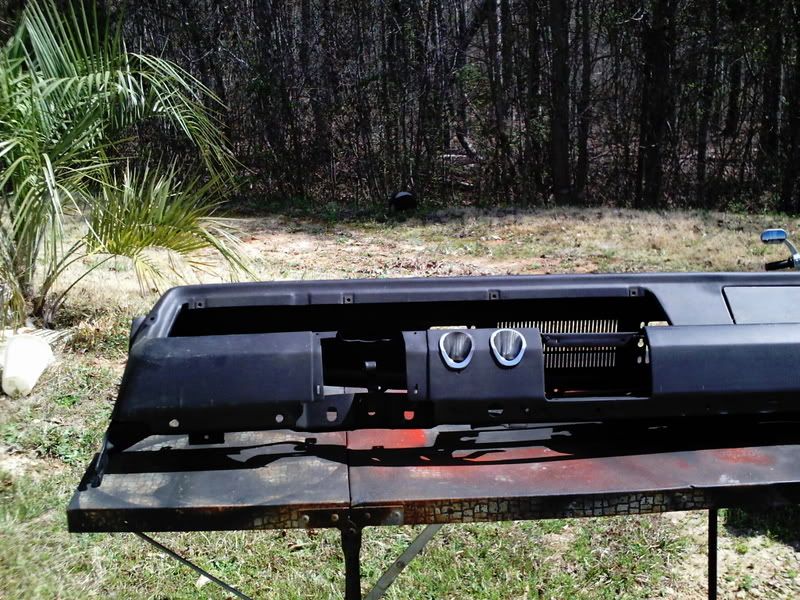
 
wow that's a lot of info ,I see what you mean not a lot of fun but can be done with a lot of patience's .best info I got yet how to take a 67 dart remote mirror apart ..see what happens ,thanks very much taking time to assist a fellow mopar guy .
 
the same way they hook to the adjuster on the opposite end. you can pull them apart , I like to mark a couple of them first. I have a remote mirror in pretty darn good shape, that I`m not going to use. I forgot to drill the extra hole for it before I painted my car.
hi bob you were telling me you have one your not going to use and maybe I will take it off your hands send me pic's of it and a price that fair .sure like some info on it ,,thanks .Chris ,dartpower
 
hi bob you were telling me you have one your not going to use and maybe I will take it off your hands send me pic's of it and a price that fair .sure like some info on it ,,thanks .Chris ,dartpower
thanks to all for the info on the mirror and the guys that had ones for sale I was able to get fixed up with a 67 A-Body mirror
 
-
Back
Top