Hood hinge attachment question w/PICTURES

-

Max Max Wedge

Well-Known Member
Joined
Jul 16, 2009
Messages
78
Reaction score
1
Location
SLC, Utah
[FONT=&quot]Has anyone ever had to make repairs to the hood like this? It’s for my 69 Swinger. I have already detached the bracket with the nuts and put new nuts in, it seems like this hood has been on and off about a gazillion times. I was thinking about putting a piece of 10 ga. on the back side of the hood and spot welding it in. I would create the same oval openings before I welded it in. What do you guys suggest?

IMG_2526.jpg


IMG_2529.jpg


IMG_2533.jpg


IMG_2534.jpg


IMG_2540.jpg


IMG_2541.jpg


IMG_2543.jpg


IMG_2544.jpg

[/FONT]
 
I've had atleast 4 body men tell me that a hood couldn't be seperated like that then welded back together. They say the heat will warp the skin.
Most said "just by a hood". One old school body man used a marker to outline where the understructure could be cut and welded back thus avoiding the perimiter spot welds and heating the skin. In the end he said the same though, "just buy a hood".
I know this didn't answer your question but I really would like to see your proving them all wrong. Good luck
It might be more work than it's worth, but I can't imagine why you wouldn't be able to re-skin a hood like that. It's only spot-welded along the perimeter; can't imagine why you couldn;t prevent warpage by spreading the welds out. Although, I'm no body man, so I could be completely wrong. How did the factory do it without warpage?


BTW - looks like a Swinger/GTS hood, so probably worth fixing rather than replacing.
 
The factory had a jig they placed it in. They used copper pinch welding tips that are water cooled. Any bodywork on a hood of the older cars is a bad plan simply because you are always looking right at it from the drivers seat.
 
You guys are going to force me to spend 1000 hrs. on this hood to get it right, just to prove a point.
 
Geez - you guys are picky! That hood is not all that rusty - in fact, from what I can see, it looks like was in decent shape. For the price of those original hoods, I wouldn't think twice about thrying to save that one because of a couple rusty holes. Maybe I'm missing something, but that shouldn;t bee too hard to fix - although I wouldn't have torn the hood apart - i would have just cut out that portion and repaired it.
 
Geez - you guys are picky! That hood is not all that rusty - in fact, from what I can see, it looks like was in decent shape. For the price of those original hoods, I wouldn't think twice about thrying to save that one because of a couple rusty holes. Maybe I'm missing something, but that shouldn;t bee too hard to fix - although I wouldn't have torn the hood apart - i would have just cut out that portion and repaired it.

Agreed... around here.. thats almost as good as NOS! :toothy10:
 
Weld in some new metal. Take some wet rags and place around the areas where you are spot welding it back together to absorb the heat. should be ok.
 
Phosphoric acid treatment will help the surface rust areas, the inner structure could be sand blasted. I've fixed worse.
 
Hood, what hood? I haven't got past your avatar yet...
C
 
The hood is pretty clean, as is the whole car. I think the problems in this area are from removing and reinstalling the hood numerous times. Where the big peice is missing, there was a big METRIC bolt jammed in there. I'm going to give it shot and see how it turns out.
 
Man I wish someone had told me you can't take things apart with a spotweld cutter repair them and put them back together. I never would have repaired all those trunklids, hoods (including the hood for my 69 Dart), doors, tailgates, fenders, roofs..... I've repaired over the years.
 
Man I wish someone had told me you can't take things apart with a spotweld cutter repair them and put them back together. I never would have repaired all those trunklids, hoods (including the hood for my 69 Dart), doors, tailgates, fenders, roofs..... I've repaired over the years.

Nobody said Can't and nobody mentioned other body parts. Al I did was repeat what I was told, "not worth the effort on a HOOD" due to the looking right at it factor. and " You wont be happy with it."
I'll post pics of my barrcuda hood in the same condition as the thread starters hood which prompted me to ask how to fix it. I was willing to seperate 2 hoods and use a part from each if nessesary.
Maybe you could post pics of hoods that you've done this to. That would inspire all of us.
 
Man I wish someone had told me you can't take things apart with a spotweld cutter repair them and put them back together. I never would have repaired all those trunklids, hoods (including the hood for my 69 Dart), doors, tailgates, fenders, roofs..... I've repaired over the years.

Show us some pictures, or give us some insight, what to do what not to do, what to look out for etc...
 
Someone else either on here or over on bigblock did the same thing. I hope it goes well for you and I'm anxious to see it when it's done.
 
A product to shield the part from some of the heat is available. Eastwood has one like this:http://www.eastwood.com/coldshield-thermal-paste.html. When we were working on the sheetmetal for our Barracuda the body man was playing with a similar material (not on our car) and the paint about an inch away was not damaged by welding heat.
 
1st I must apologize, I'm not one for taking pictures. Mind you this is not without regret, what I wouldn't give for pictures of some of my past cars and projects.

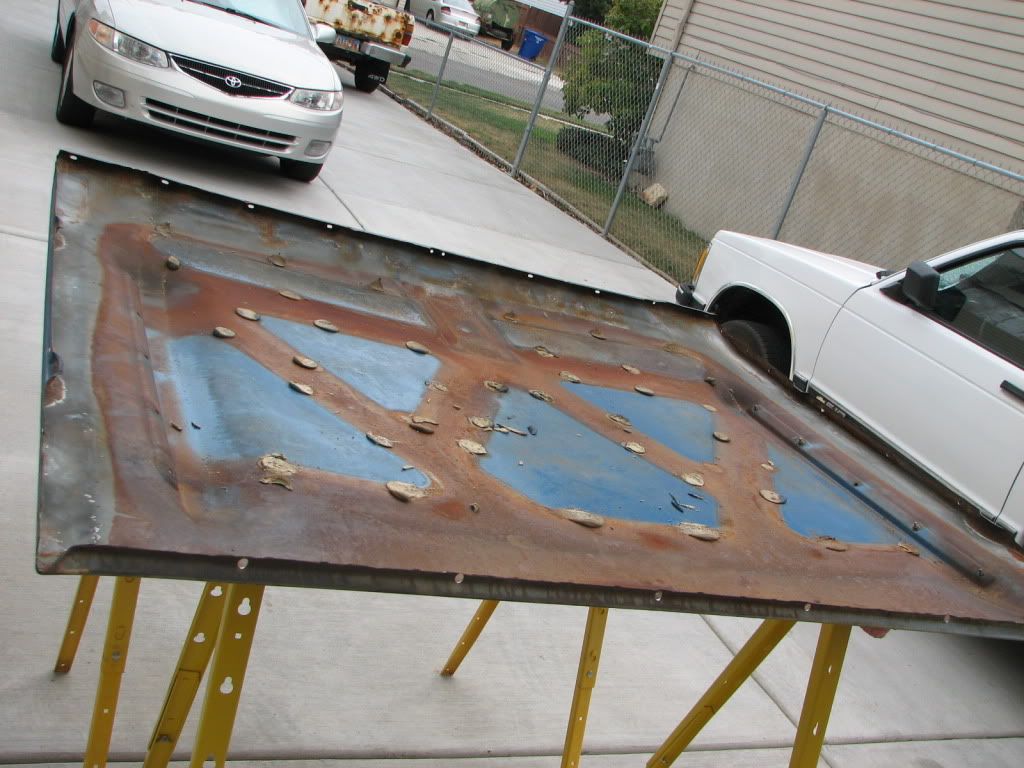
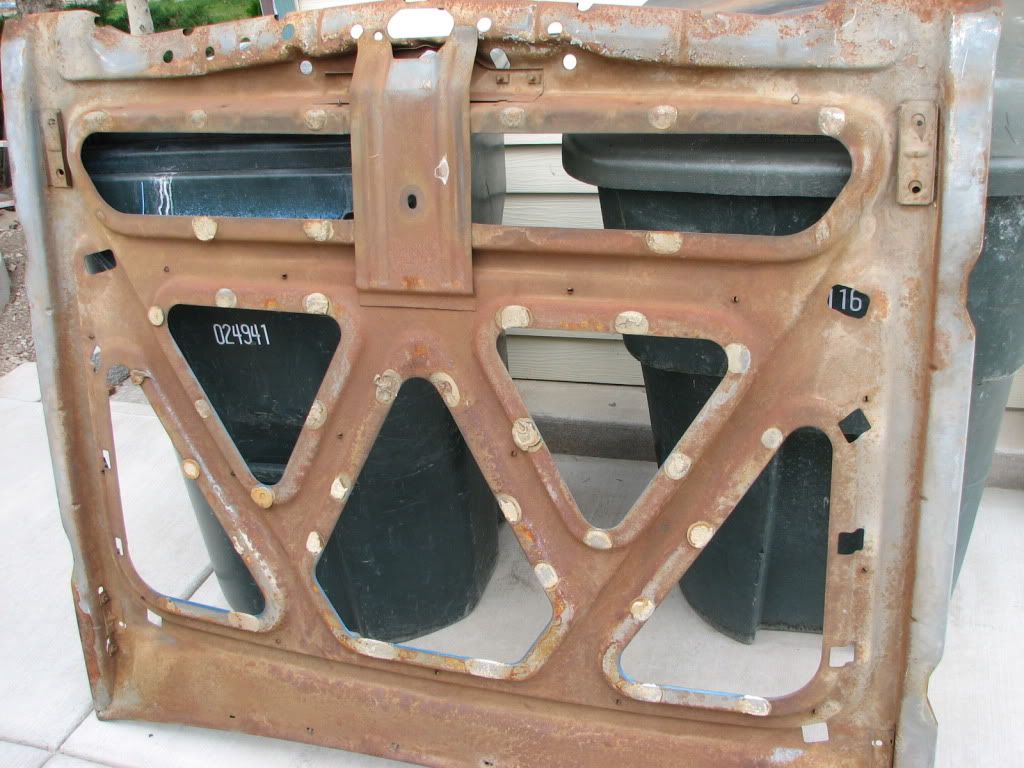
Having said that, taking hoods apart. I do this quite often to replace the sealer between the halfs (The Sandwich).

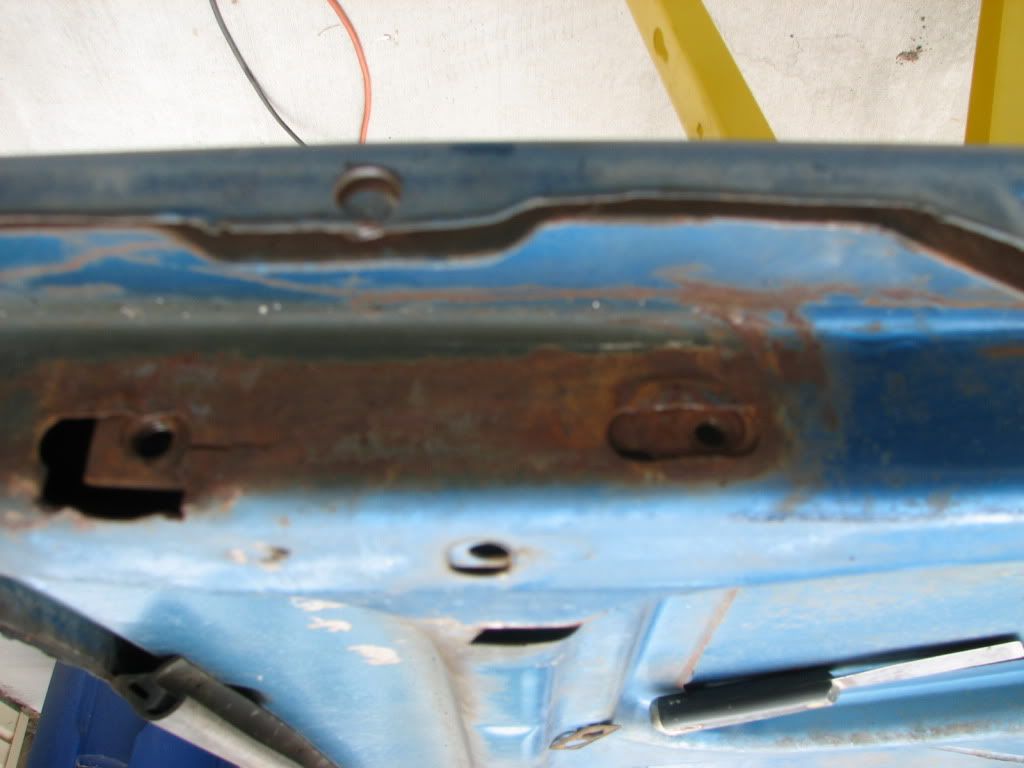
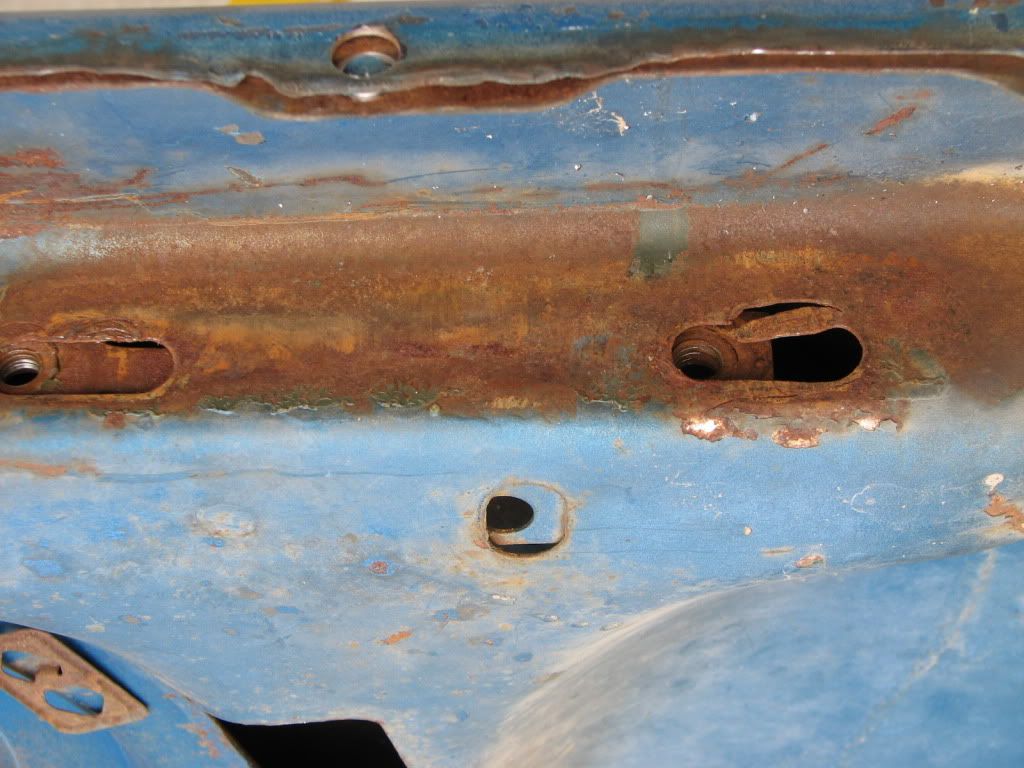
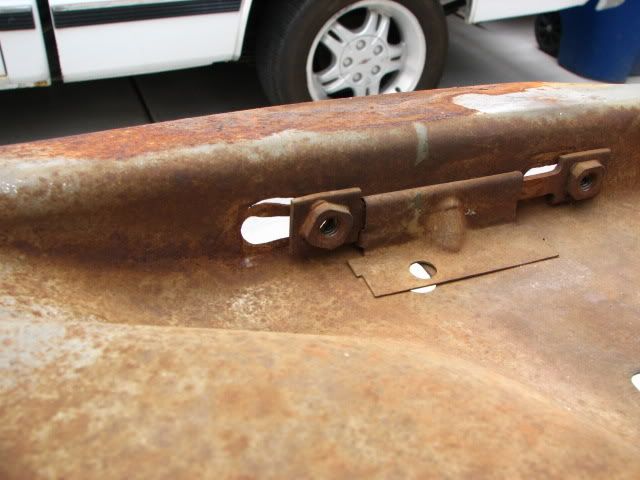
(1) Registers, someone mentioned marking with a pen, I go a bit further. I drill holes (3/16") for "Clecos" usually a half to two thirds as many as there is spotwelds ( don't drill any where there is a spot weld just near them).

(If you have taken the hood apart already just put the pieces back together line up the drilled spotwelds clamp with vice grips and drill holes for clecos).

(2) clean off the paint where the welds are all the way to clean metal (rotory wire brush works well) Mark each with a sharpy as you go so you don't have to look for them when you start cutting them. Specially if your an old fart like me and you can't see as well as I once could.

(3) Drill ALL the spotwelds (with a spotweld cutter not a drill)

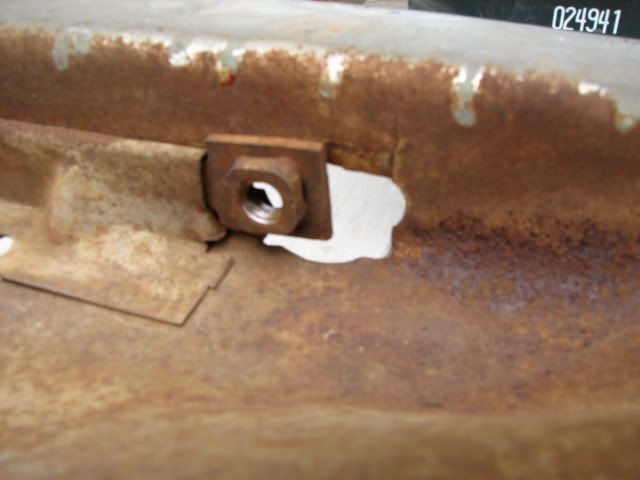
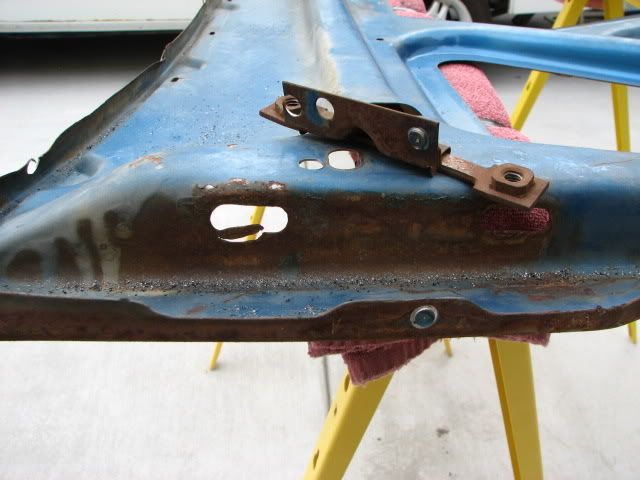
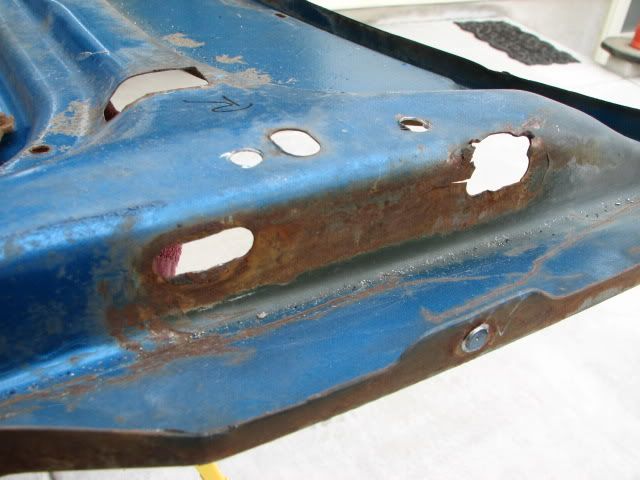
(4) Clean, Repair, Etc. ( Max Wedge, On your hood I'd put 16 gauge behind the bad bits mig it in where the metal is missing grind it smooth replicate the original holes with a burr, file whatever and put the speed nuts back where they were if the nuts are bad just clean the old one off and tack weld the right size in it's place. I like to use square nuts myself.

(5) Put the sandwich back together. I usually prime the parts that will be hidden with a good selfetch primer. put a generous amount of sealer pretty much the way the factory did. I use 3m dripcheck. But places like Eastwood sell chalk gun tubes of seam sealer that works well.

Clamp the entire hood back together with Clecos you will need 20 to 40 for a hood.

(6) Welding... Spot welders weld pieces together with minimal heat beyond the contact point of the welder. Best way to weld it back together if you have one (I don't) is a spot welder. I mig the original spot welds by filling the holes just don't weld one next to the other do one here and one there until they're all done. Take your time the idea is not to generate a lot of heat.

All you need to do is weld the same amount of metal together as the spot weld we're talking about a spot that's usually no more then a 1/4 of an inch of actual welded surface. That's all each weld needs to be.

If you have ever tried to separate a spot weld with a chisel you'll destroy the metal around the weld before you ever pull it apart. So don't over weld you don't need to. Just tack it back together where the spot welds were.

If you are putting the inner from one and the outer from another you have to match the two pieces clamp, drill, Cleco, Etc. Then weld it like the factory did. The spot welds won't line up but you can still mig weld the hole to the other layer.

Now if your working on something newer with 24 gauge metal find another at pick a part buy a repo from china .

But if your talken about a 69 Dart power hump hood or the like that's not an option (at least for me $600 for a repo made in who knows where and I've seen used for more and you still have to clean paint reseal etc) Just repair it. Me being 55 years old I don't know any better.

If you end up scratchin your head or get backed into a corner let me know and I'll try to help.

PS I usually takes me an hour or two to do a hood.
 
Thanks, that is some good info. I appreciate the time you took to write this up. I have a question about the caulking. I noticed that a lot of the caulking is different thicknesses and I don’t want to push out the hood with the caulking. Have you ever had it cause high spots on the hood skin?
 
Never had a problem with 3M Drip Chek. I suppose it's possible if it was allowed to set too long before assembly. I put it on and put it together within a couple of minutes.
 
Never had a problem with 3M Drip Chek. I suppose it's possible if it was allowed to set too long before assembly. I put it on and put it together within a couple of minutes.

How do you support the hood skin from underneath, foam pad saw horses, etc?
 
-
Back
Top