Meet Natalie

-
by the end of the afternoon i had the trans. in the car........i know things dont look very good in the car as far as greasy parts ....but my plan is, after the major stuff is assembled , i am going to trailer the car to a friends business across town and clean the drivetrain and underside of the whole car with a steam pressure washer
 

Attachments

  • CIMG0359.jpg
    61.7 KB · Views: 509
  • CIMG0371.jpg
    73.9 KB · Views: 502
Well Rani,
This is all temporary anyways so who cares about the greasy stuff...
Glad to see that you are full throttle on this project !!!
Congrats, and can not wait to see what is next.
 
Looks like you've got yourself a very nice project car. I love the Darts.
 
Dang girlie, you're kickin some Dart butt.
 
no im further south and way further east ...in the cow towns .....but its just a two hour buzz up to the springs...i like to go up there anyway for shopping at the Citidel or Chapel hills malls


I love it- A gal who will work on her own restoration and still know where the best malls are! You've got a great project going on there. Have fun driving it this summer, too. Looking forward to seeing it progress.

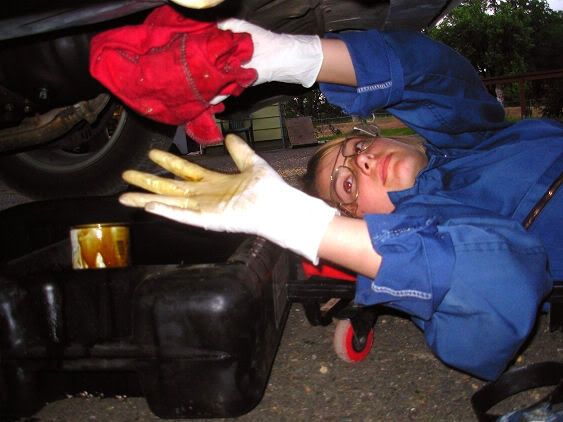
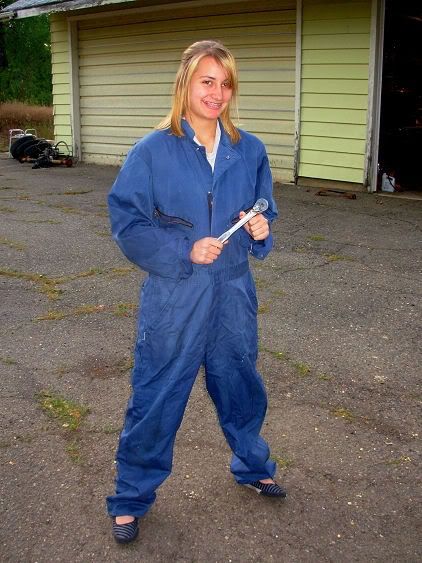
Here's my girly girl mechanic doing her first oil change a couple years ago. She is all girl but doesn't mind getting a little dirty either. I did let her wear gloves... She's a senior now and asked if she can drive my Dart to school before she graduates on the 31st. I've promised her that if it has paint and the bumpers back on by the end of the month she can drive it to school. Her dream car is a '59 El Camino of all things. It's not a Mopar but she does appreciate old iron!

fb2008051203.jpg


fb2008051201.jpg
 
i was feeling sick almost all weekend so i didnt get much done, but i managed to get the steering column pulled and the auto brake pedal out, i put the 4 speed pedals in but they dont look straight for some reason, before i put the column back in i will address those pedals to see whats wrong.
 

Attachments

  • CIMG0372.jpg
    88.1 KB · Views: 423
  • CIMG0373.jpg
    94.9 KB · Views: 418
i need to get a 4 speed hump in here bcoz the 4 speed is hitting the floor slightly, so i pulled the carpet back for the first while owning this this car and to my surprise was a big poorly done patch panel, with the size of the panel i thought the whole floor was toast.......i drilled the pop rivet holding the panel in and it wasnt so bad.......such a big panel to cover a hole much smaller ????
 

Attachments

  • CIMG0376.jpg
    99.8 KB · Views: 434
  • CIMG0377.jpg
    91.3 KB · Views: 429
so back on track i measured a four speed hump on a factory 4 speed car and outlined it it cut in an inch for the initial cut ......i would rather undercut than overcut.......played peek-a- boo with the 4 speed LOL. and later tonight i will do more trimming and tack the hump in .....time permitting.
 

Attachments

  • CIMG0379.jpg
    101.7 KB · Views: 416
  • CIMG0380.jpg
    110.6 KB · Views: 415
I love what your doing with the Dart, but I REALLY want to wander through that yard and drool a bit. :prayer:
 
i was feeling sick almost all weekend so i didnt get much done, but i managed to get the steering column pulled and the auto brake pedal out, i put the 4 speed pedals in but they dont look straight for some reason, before i put the column back in i will address those pedals to see whats wrong.
I knew that something was up.You always getting something done.
While you got the steering column out it would be a good time to remove the Instrument cluster and go ahead and bypass your amp gauge !!!
 
progress has been slow but over weekend aside from going to car shows and being lazy, i got a new transmission output shaft seal put in and i loctaed a driveshaft of the right length (need to replace U-joints though) then i got the shfter in and it took all evening one evening to get the shifter rods located from a storage shed and put in and lined up, and i test fit the shifter handle. the most time consuming thing about this project has been going through storage sheds and digging through boxes to locate the correct parts and bolts.
 

Attachments

  • CIMG0436.jpg
    88.5 KB · Views: 366
  • CIMG0431.jpg
    82.3 KB · Views: 365
Good to see that a little tranny problem didn't set you back. Keep plugging forward. I'll keep my ear to the ground on this one.:coffee2:
 
What a great thread Rani :cheers: and a belated welcome to this place I call home :glasses7:
Keep up the great work and have a great strongend :cheers: I don't have weekends :D
You are doing an outstanding job and allot of it :blob: stay safe and keep on keeping on :glasses7:
Dig'en this build big time 8-)8-)
 
great work Rani you are a true mopar woman and thats why i enjoy chatting with you
 
today i thought was as good of time as any to start the column build. the car came with a power steering auto on the column .........that needs to go .....but i need it for another car so i kept it intact, for Natalie i started with a 3 speed on the tree column.

i disassembled the column and and placed the tube in the car to measure how much to trim ...i am trimming it back in anticipation for a possible big block swap later

i also shaved the notch off the nylon bearing retainer on a bench grinder to be round and fit rcessed in the tube, since i am getting rid of the inner sleeve, so i will have a bearing on top and on bottom.
 

Attachments

  • CIMG0444.jpg
    66.9 KB · Views: 275
  • CIMG0443.jpg
    61.4 KB · Views: 276
  • CIMG0442.jpg
    53 KB · Views: 277
  • CIMG0441.jpg
    81.8 KB · Views: 272
  • CIMG0440.jpg
    77.5 KB · Views: 295
for the collar piece i cut off the raised part where the cloumn handle goes in and ground it flush with a grinder the i used panel bond rigid as a filler and sanded smooth, exactly the same process as body work.

and bcoz it was a three on the tree column the PRND12 indicator is not there anyway so it will look like an original floor shifter column ......i will update later after i get through the paint shop with these pieces and re-assemble.
 

Attachments

  • CIMG0455.jpg
    67.6 KB · Views: 269
  • CIMG0458.jpg
    53.1 KB · Views: 279
  • CIMG0457.jpg
    58.4 KB · Views: 273
  • CIMG0471.jpg
    60.4 KB · Views: 272
-
Back
Top