Rapom's Rocket - just another Duster build thread

-
Replaced my stock LCA bumpers with button head Poly bumpers from Energy Suspension. Final ride height and some big torsion bars will deem whether these are needed or not.

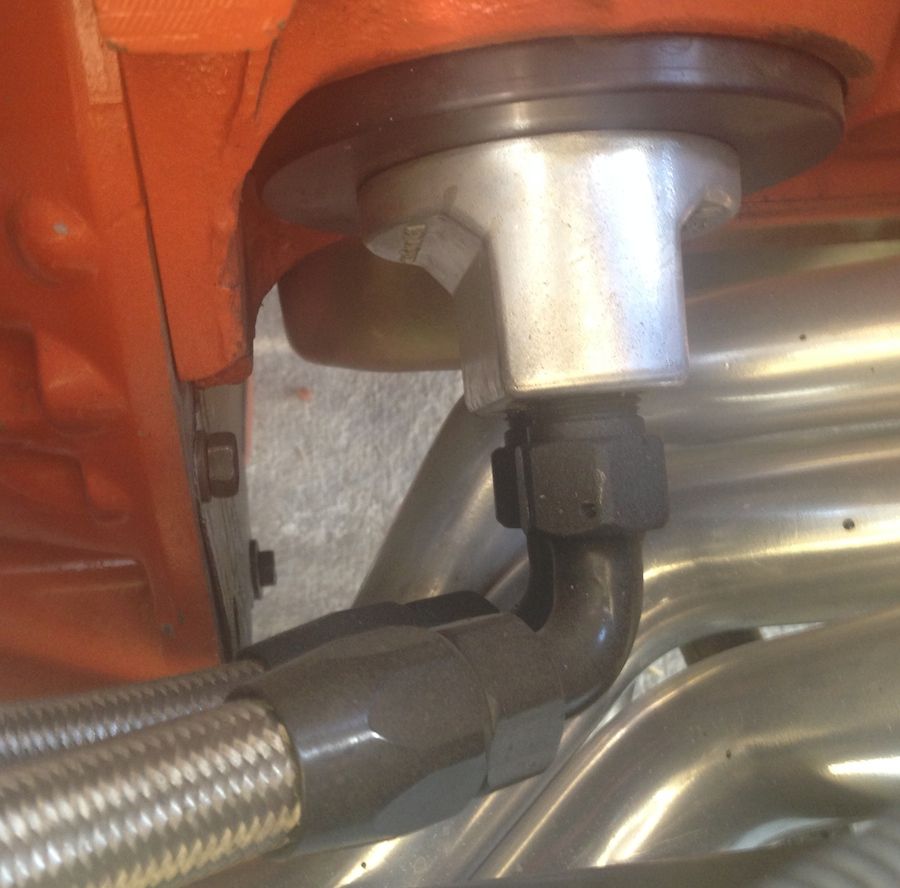
You'll want to remove the flange that sticks up from the mounting plate for the bumper. Otherwise you might end up metal on metal before the bumper compresses much.
 
Good to know, thanks for the tip.


Finished connections for the disconnect switch. Removed the Driver's fender in prep for ball joint and bushing replacement in the upper control arms and to clean, treat and paint. Work continues on the cowl hood install. Tape marks layout of punched holes in the flange, every 3", for spot welding (that's the air flanger/punch on the hood). Measurements taken for fab of block off panel around the new opening.
 

Attachments

  • IMG_2470.jpg
    40.5 KB · Views: 856
  • IMG_2471.jpg
    40.8 KB · Views: 825
  • IMG_2474.jpg
    37.1 KB · Views: 828
My new end links finally showed up so I got started on installing them today. Two MOOG-K750074 sway bar links with greaseable bearings will replace the stock bolt w/ bushings and spacer set up.
 

Attachments

  • IMG_2475.jpg
    30.6 KB · Views: 822
The stock links provided 4" exactly between my Hellwig 1.125" bar and the tab on the LCA (red arrows). The Moog links are 5.5" (yellow arrows) so we'll have to do something about that.
 

Attachments

  • IMG_2476.jpg
    46.5 KB · Views: 807
The plan is to take a section out of the middle of these. Threads will be cut on the stubs and inside the heavy wall seamless tubing in order to make threaded spacers which will allow us to assemble the links back together, hopefully 1.5" shorter.
 

Attachments

  • IMG_2477.jpg
    19.4 KB · Views: 798
Dissected! I got to cutting, threading and welding and totally boned taking in-progress shots. SORRY! I cut 1/2-13 threads onto the stubs of the bearing ends and the interior of the tubing, then cut two 5/8" long spacers out of the tube and screwed everything together. Because the stubs flaired at the bearing I couldn't cut the threads as far as planned which made the thread engagement less that anticipated. So I removed the rubber cups off the bearings and slowly welded them together.
 

Attachments

  • IMG_2481.jpg
    13.8 KB · Views: 798
A little paint and all done. Although this pic is of the suspension off the car and not at ride height you can see the deflection in the bearings that used to be taken up by bushing deformation. The pressures involved in smushing the bushings that much can input unwanted forces back into the suspension set up. The fellow I borrowed this idea from said he got instant response out of his sway bar and much better turn in when entering a corner (road course). My spacing ended up at 4.25" and I screwed up the offset of the zirk fittings when I welded this side together. They don't rub anywhere but it will have to be loosened and spun to get grease into them.
 

Attachments

  • IMG_2485.jpg
    40.3 KB · Views: 833
Got two hours free to work on the car yesterday so I spent the time grinding down the spot welds and truing up the edges of the opening in the hood in prep for making the block off panels.
Pic 1: String was used to get an accurate measurement for length of the panel. Don't succumb to the urge to pull the string tight as it will stretch. When you measure your going to come up short every time.
Pic 2: Layout of panels on what remained of my original trunk skin. The curve in the trunk skin provided a nice start to the bend needed for the front of the opening. Very light tack welds held the two panels together and then the curved end was tacked to a piece of 2" pipe to finish the sharp bend identically on both pieces.
Pic 3: How it sits now. Curved ends will have to be trimmed where they overlap and then welded together. Then the fun of fitting this between the hood and the scoop will begin. Hopefully I will make some progress on this today.
 

Attachments

  • IMG_2486.jpg
    25.1 KB · Views: 747
  • IMG_2490.jpg
    19.4 KB · Views: 761
  • IMG_2491.jpg
    20.2 KB · Views: 761
Not as much progress today as I had hoped but some none the less. Filler panel tacked in for initial fitment check. Back sides need trimming to lower the back of the scoop down and a little fitting to clean up the fit in front. Not bad.
 

Attachments

  • IMG_2496.jpg
    29 KB · Views: 744
No huge progress to report. I did do a couple of trim cuts on the block off panel for the scoop yesterday but it looks like I'll need one or two more to get everything fitting nice. I spent an hour or so with the car taking an assessment of progress (really just admiring my work) and planning out the next few steps in construction. I was kind of taken back by the realization of just how much I have gotten done even though it seems like its taking forever to make progress. I counted no less than 11 large system mods made in just the engine compartment and that is excluding the work on the engine/K/suspension group.

I didn't show this when I did the post on making and installing the sub-frame connectors. This is something new I did and have no idea if it will make a difference in the stiffness of the chassis. I took the curved cutout from the rear frame pockets and used them to box in the rear front seat supports under the floor. This ties the rocker and part of the floor pan to the 2x3 sub-frame tube. The problem that caused was it covered access to put the nut on the seat bolt. A hole saw fixed that issue allowing a deep well socket to get to the bolt.

View attachment IMG_1865.jpg

View attachment IMG_1866.jpg

View attachment IMG_1869.jpg
 
Last edited:
Nice! Every little bit helps. Pretty creative use of those leftover frame pieces too! :thumbup:

Although, I think a set of torque boxes would probably be more effective. Still, anything tying the frame connectors to the rocker is a good thing.
 
A little paint and all done. Although this pic is of the suspension off the car and not at ride height you can see the deflection in the bearings that used to be taken up by bushing deformation. The pressures involved in smushing the bushings that much can input unwanted forces back into the suspension set up. The fellow I borrowed this idea from said he got instant response out of his sway bar and much better turn in when entering a corner (road course). My spacing ended up at 4.25" and I screwed up the offset of the zirk fittings when I welded this side together. They don't rub anywhere but it will have to be loosened and spun to get grease into them.

I never saw these sway bar links before. I like the theory of freeing up the suspension movement. It's the same reason I installed aftermarket strut rods with heim joints. I tried to install urethane sway bar links, but couldn't compress them enough to get them bolted up. I ended up with some stock replacement ones. Mine is a pre 73 car so the sway bar mounting is opposite. Those links look like they might be the right length for me out of the box.
 

Attachments

  • IMG_2548.jpg
    46.8 KB · Views: 700
  • IMG_2542.jpg
    41.7 KB · Views: 678
  • IMG_2570.jpg
    42.7 KB · Views: 678
  • IMG_2571.jpg
    32.5 KB · Views: 653
I doubt you would ever notice the difference on a stock suspension but when you begin lowering and stiffening the suspension for better handling these little improvements start to make a difference. Ucoog1, over on Moparts, has spent a lot of time and effort into doing just that to his Duster. He reported that when tightening the end links (compressing the poly bushings) that his front ride height would rise an inch in comparison to the bearing links. Makes a difference.

On a completely stock car the flat on the sway bar ends and the LCA sway bar tabs are parallel (in plane). As you lower the suspension settings the angles start changing and the flats and tabs start moving out of plane. The bearings do a better job of handling the angles vs the bushings and since the give of the bushings is taken out of the system the bearing links will providing an instant response from the sway bar to any suspension loads.

The K750074 end links are used on Ford and IIRC Dodge 4x4s so they are plenty HD for our use of them. They are just too long and need to be shortened (so far I have not found an application with shorter bearing links). To keep some factory engineering in the equation measure the lengths of your end links with them tightened down and try to mimic that distance with the bearing links. I had not considered the '72 and earlier design. I would think they would function very similarly to the latter versions.
 
I was looking at your thread and you mentioned you had a remote oil filter set up on your engine. Any pics/info?

Yes, I run a summit oil filter relocation kit that I made stainless braided AN hoses for. It's so much easier to change the filter it's not even funny. I'll get some pictures and part numbers up for you tomorrow.
 
Sorry for the crappy phone pictures, I forgot I was going to do this.

It's a Summit oil filter relocation kit, just the single filter kit. I used a Canton racing oil filter plate, and replaced the 1/2" rubber hose that came with the kit with -10 AN stainless braided hose and -10 AN fittings from Summit.

Finding a spot for it was a little challenging with the J bars. I didn't want to run it all the way up front and have a ton of hose, but I also had to make sure I had enough room to get at the fittings and still be able to remove the filter. Plus the -10 AN hose doesn't make very tight turns, which I suppose is good for flow, but it takes some mounting locations off the table too.

Oil filter relocation kit
http://www.summitracing.com/parts/sum-g4985-1

Canton oil filter plate (eliminates the stock paper gasket and improves flow)
http://www.summitracing.com/parts/ctr-22-575m

IMG_1807_zpsee55ed1d.jpg


IMG_1806_zps034ab8ef.jpg
 
Where did you get your cables for your wiring? Trying to figure out where to buy my stuff so I can get an idea of how much the project will cost me (after I double the estimate) and can't seem to nail down a good place to get it.

Sorry about not posting here, been watching your build but don't log on much. More just lurk and sift info recently. Keep up the good work, can't wait to see it on the road.
 
Sorry for the lack of updates lately. Went on vacation for a week to Glacier National Park and visit relatives. I started to come down with something so we decided to cut our trip short a day. Woke up the morning of the 11 hour drive back home in the full grip of the flu. What a miserable experience that was. All over that and back to work on the car again so I'll be posting updates more frequently.

DionR - I searched Ebay for wiring suppliers and purchased from two sources. 20' of 1/0 cable through acdcelectricparts for $53 (free shipping) and 25' each of red and black 4awg cable from temco_industrial_power for $53 + 5 for shipping. That was plenty of wire length to do the car front to back. Had an issue with temco's shipping as they coiled the wire up in a tight roll and stuffed it in a shipping bag. The outer coils of wire got quite beat up from the lack of protection. They offered to replace it. If ordering from them I would get assurance that they would box it first.

Just been doing some cleaning up of surface rust and painting in the front wheel well areas. Removed the UCAs and pressed the bushings out in prep for painting and installation of the MOOG K7103 offset bushings. Need to borrow my friends ball joint socket to get the old uppers out and the new ones installed. Then I'll probably temporarily install the engine and K to finish up a bunch of wiring and other niggly items needing attention.
 
Rust control work underway behind the front fenders. Surface rust nibbling away at the sheet metal and some wire wheel and brush work aftermath. Next is neutralizing with a converter and then some primer and paint to seal it up. Maybe some fresh undercoating where needed.
 

Attachments

  • IMG_2505.jpg
    30.6 KB · Views: 547
  • IMG_2506.jpg
    41.6 KB · Views: 545
  • IMG_2508.jpg
    38.7 KB · Views: 532
  • IMG_2507.jpg
    41.5 KB · Views: 546
Just to let ya know I look at what you are doing get ideas and fixes just don't post much unless I have a question. Great Work!
 
This wont be much of an update. There is nothing exciting, unlike shinny new performance parts, about scraping rust and dirt off suspension parts in prep for paint. But in the interest of keeping the thread alive here is the latest: Pic 1 Upper A arms removed, de-gunked and wire wheeled back to bare steel. I will try to blast these before painting as there are places that you just can't get to any other way. I made my own bushing puller which worked ok but I'm borrowing my friends tool set to press them back in and change out the ball joints so until I can get a hold of them progress is at a stand still on this phase of the project. Pic 2 Moog upper ball joints and K7103 offset bushings. Pic 3 Horrible blurry pic of the offset in these bushings. The arrow points away from the offset. By different combinations of the bushings you can get more camber or caster than stock bushings offer. In a handling application we're shooting for more positive caster for higher speed stability in the steering. Pic 4 These installation instructions have been posted all over the web but for those who haven't seen this before here it is again:
 

Attachments

  • IMG_2512.jpg
    27.4 KB · Views: 498
  • IMG_2514.jpg
    32.1 KB · Views: 508
  • IMG_2515.jpg
    16.9 KB · Views: 510
  • Moog K7103 bushings.jpg
    34.5 KB · Views: 507
thanks for posting your update. just been searching these offset bushings. seems like a good choice to use instead of using the regular ones.
 
If you want the ability to take the alignment past what is possible with stock bushings then this is the only way to go. Tubular uppers are available, at significant expense, that allow even greater leeway in alignment settings. I don't THINK I will need that much adjustability so I'm sticking with the stock A arms. However I'm learning that the stock arms can limit rim selection over aftermarket arms. So in the pursuit of big front rollers I may have to rethink my position.
 
Last edited:
where is the issue with the stock arms when wanting to run bigger rims?
 
-
Back
Top