Street / Strip 72 Swinger

-

draginmopars

Well-Known Member
Joined
Jan 25, 2013
Messages
1,264
Reaction score
425
Location
Shady Hills, Florida
Same car, different thread
while fixing my pc, decided to clean up my photo bucket files
Well,,, that messed up my other thread,
lost a lot of pics, trying to salvage what i can
so, re doing the time line here.

013_zps0441dce9.jpg


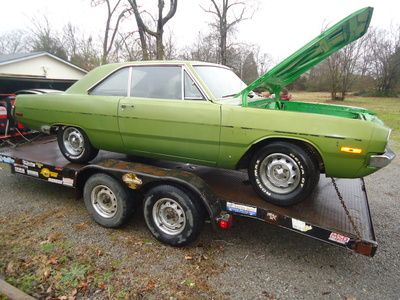
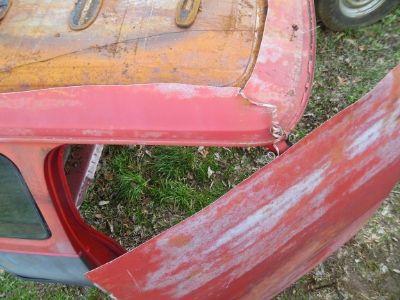
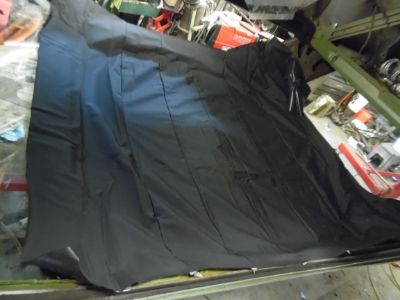
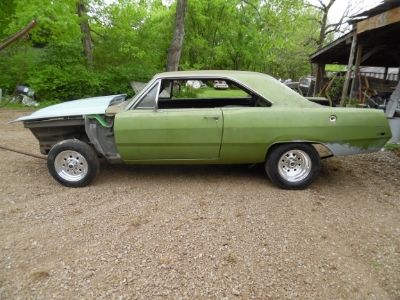
We ended up buying this car jan 2013, While searching for a roof for a 71 dart
the 72 sat while gathering parts
nov 2014, started this project

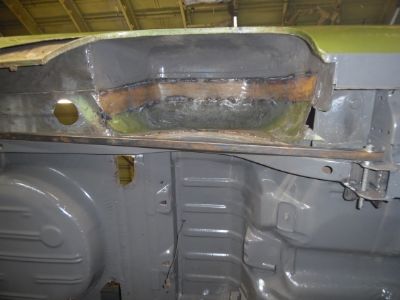
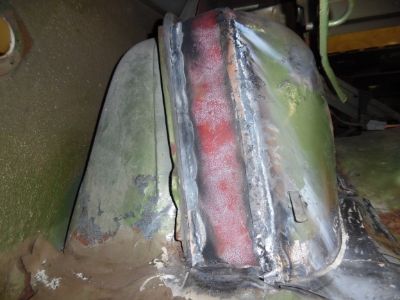
We knew it needed quarter work

002-3_zps915e25fa.jpg


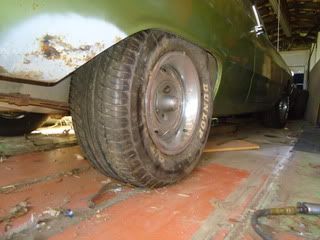
We had a plan, but, the more we took the car apart, the more that plan changed

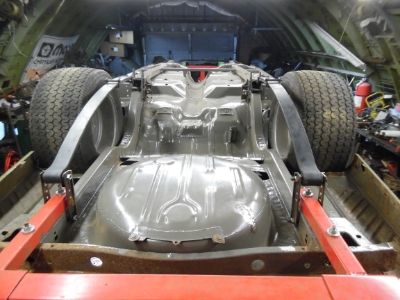
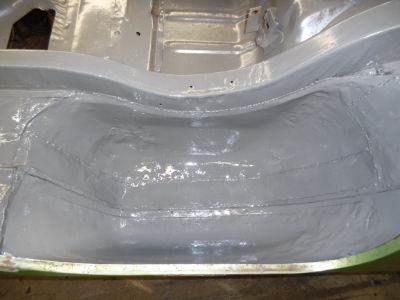
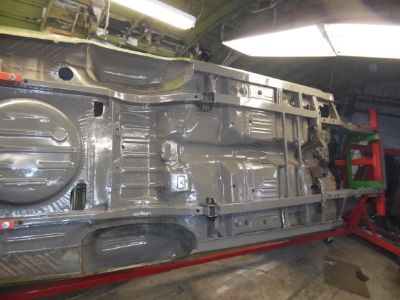
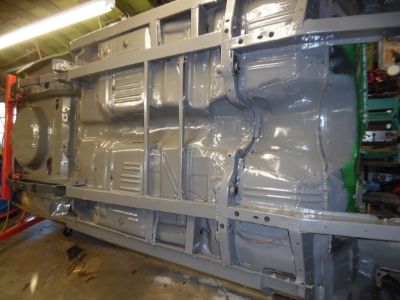
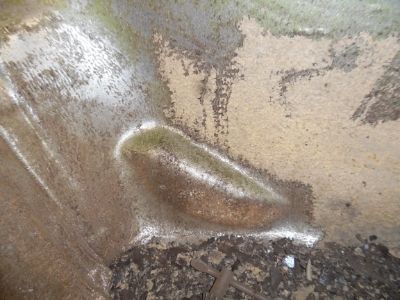
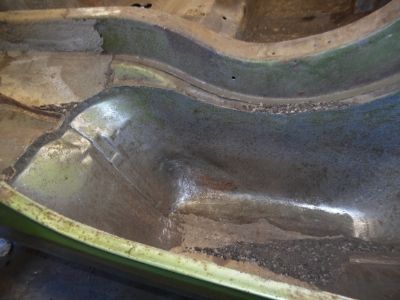
While on the rotisserie , might as well, remove all the under coating
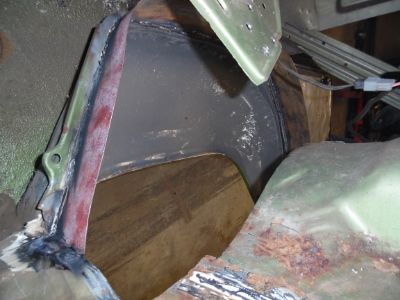
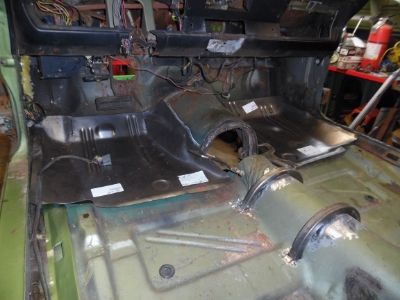
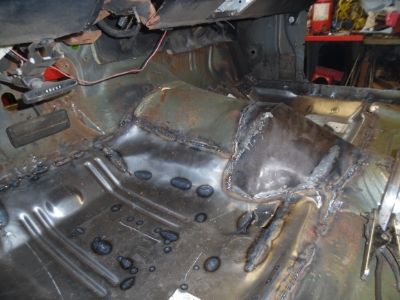
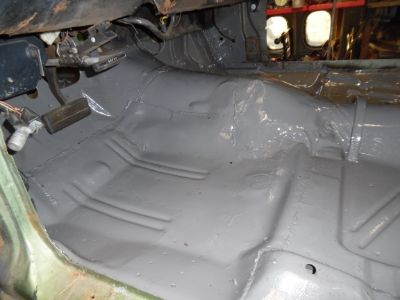
then discovered it really needed both front floor sections

003-1_zps7440307c.jpg


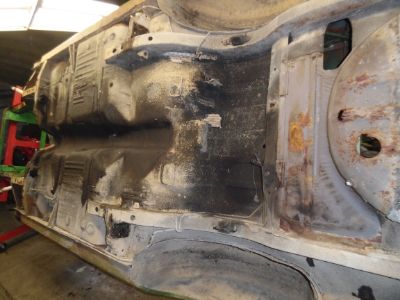
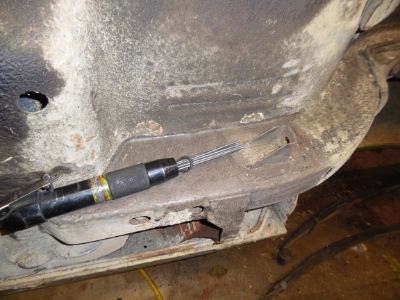
it came off really good using a needle scaler

006_zpscd2ec24d.jpg


ko_zps869bfa69.jpg


xgg_zps20d53ff1.jpg


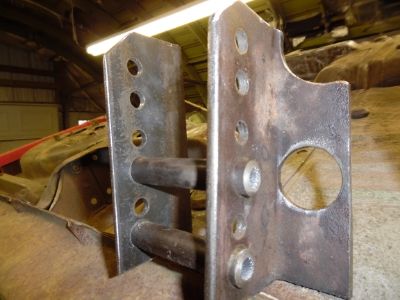
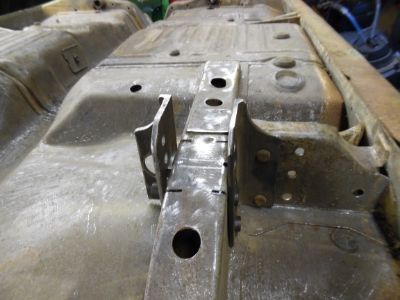
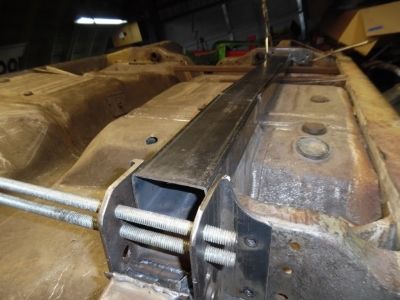
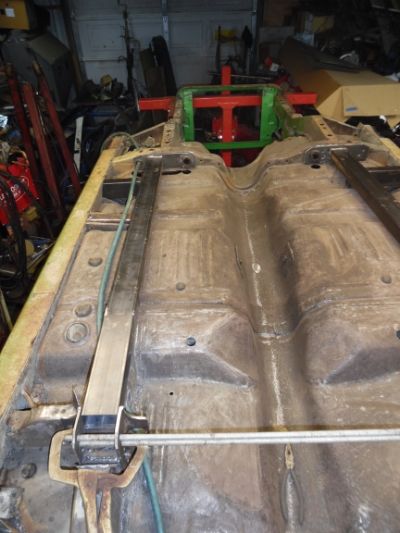
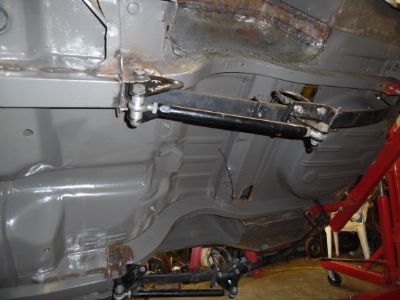
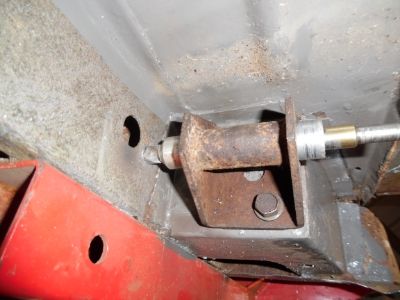
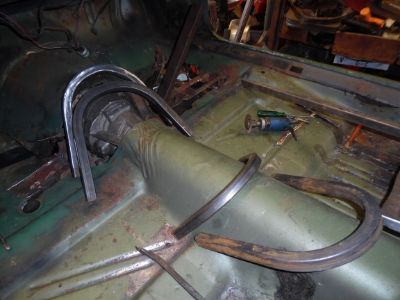
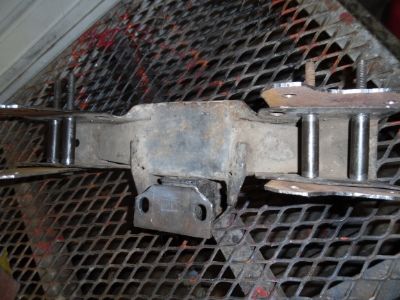
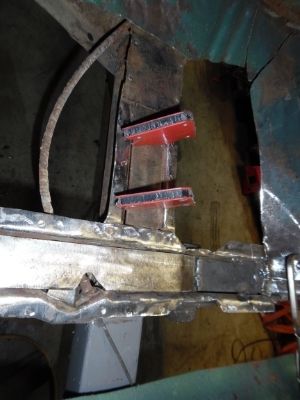
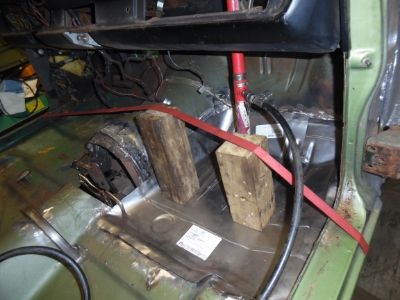
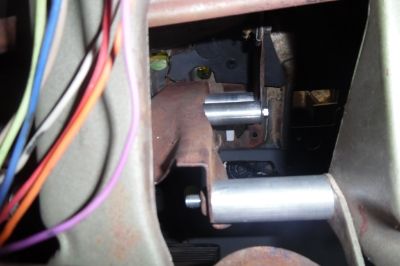
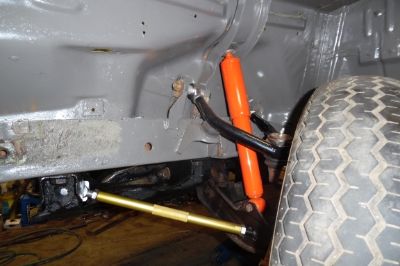
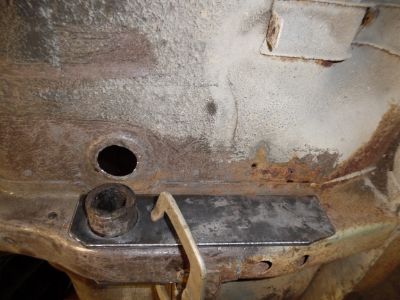
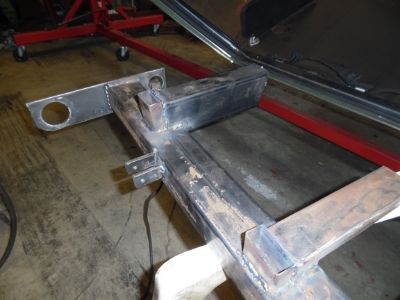
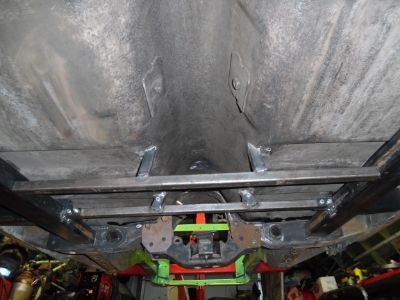
first we tied the frame together, added extra cross members and out riggers under the seat area, to stiffen the floor, before we remove the front floor sections

003-2_zps087cec6c.jpg


002-6_zps3f0e85fd.jpg


006-4_zpscb12f004.jpg
 
might as well, move the springs in and widen the tubs, while we are there.

004-1-1_zps5b5ad227.jpg


006-1_zps5a4fce8f.jpg


024_zpsbc27baea.jpg


p0--9_zpsf5997753.jpg


rear shackel height is in correct, due to interference with the rotisserie bracket

001_zps7155e950.jpg


o58h_zpsc0c9ac94.jpg


this is how i located the rear shackel position
iii_zps3ef1e476.jpg
 
wanting to keep as much trans cross member as possible
we split it in the middle
spread it open then installed 2
1" square tubing, bent into a "U" shape
to tie them back together

008-2_zps322a73aa.jpg


jtyiuo_zps017fbd5e.jpg


in this pic 2 of the"U" pieces are under the raised trans tunnel

the other rearward "U" are for the cross members under the floor and frame connectors
also serve as drive shaft safety loops
the front cross member can be un-bolted to remove the trans

002-5_zps52f2bdc7.jpg


006-4_zpscb12f004.jpg
 
married a "B" body cross member to the 518 trans plate to install the trans
it had the right off set for the mount position

the 4 spacers are to prevent crushing the cross member when tightened

008-3_zpsaa5273c7.jpg


003-4_zps8cf9855e.jpg


012_zps3bec2cb7.jpg
 
with the front floor sections out
we plated the front frame rails

jii76o_zps32cb70c6.jpg


cut a notch in the driver side
in case we needed to replace the emergency brake cable

010-3_zps150656de.jpg


applied a little pressure to spot / mig the floor back in
sjytyi_zpse2205aa6.jpg


025_zps71b26119.jpg


056_zpsc50370d4.jpg


003-6_zps10c5591d.jpg


034_zps8c61b6fa.jpg
 
moving to the rear
to get things rolling

narrowed a 81 ford Van Dana
like it for the thick tubes
010_zps3ea0bbe8.jpg


005_zps297bd883.jpg


install a Dr.diff bearing kit, Yukon gears (3.54) with Tru-trac and 1350 yokes

006_zps5abf8a63.jpg


moser welded on the ends and spring pads,
supplied the 35 spline axles, long wheel studs

227_zpsnxndairc.jpg
 
gonna pull the 540 out of the Satellite

010s1_zps60744ed7.jpg


stick it in the dart with a modded 518

006_zps296c4eba.jpg


That brings us up to date

Am modding a k-frame for the spool mounted engine

007_zpsisqnrjai.jpg
 
got the big block k frame made and installed
eng/ trans is in final positions

014_zpszvqdhpr3.jpg


move the master cylinder over 2"
to get it away from the exhaust manifold

took me 4 days to mod the firewall into a flat mount area, for the master cylinder,
then weld in fill patches, to close up the original holes

001_zpsodqivmgr.jpg


then made 4 spacers for the master cylinder / pedal mount
(there is one hiding on the left side)

003_zpsrnafelbk.jpg


still have to make 2 more spacers that go from the pedal mount to the steering column mount

put the front suspension back on
to get it rolling again

006_zps18padafr.jpg
 
thanks- Dartn440

Tqfastfish-kept the spare tire well, can put- jumper cables ect. in there
the tank sets on a section of 1/2" plywood, the size of the tank
the plywood sets level to the trunk floor, with 2- 1" x 1/2" U channel steel
spaced and welded to the floor
same as used on the top,
the top also has a strip of plywood inserted into the U channel
to keep from scratching the tank

there is a PVC wedge, mounted into the trunk lock area, to keep the tank from shifting rearward.

the pump is mounted below the tank, but in front, cause i wanted the tank as far back as possible.

the round hole to the right, is just a patch panel i haven't finished in the pic, it is now been welded in

the red cap on the front right is for the fuel return> haven't ran fuel lines yet

I still have to build a spare tire mount to go in front of the fuel cell, there is room


150_zpsafxvrhpl.jpg


014_zps4nike3uj.jpg
 
still sets just a little high in the rear

I think it will squat, by the time I reinstall all the body parts
and 17 gallons of fuel

If not I built some height adjustments into the spring mounts

004_zpsjjldnu95.jpg


(AAR) cowl hood for Dominator carb and breather clearance..

008_zpsgidenn5t.jpg
 
Are you going to put a door in the trunk lid or open the trunk to re-fuel? Love the hood!

I'm thinking about

just open the trunk, to fill, to prevent fuel theft,and secure the factory fuel cap, from the inside, so it can't be removed

but, also thinking about a fuel inlet adapter to splice into the fuel tube
to be able to fuel it like factory
 
Thanks- Abodybomber and jdsduster

This has been an interesting build
bought the car with no eng/trans, but a bunch of parts in the trunk.

went to secure the disc brake hose to the uni-body, found out it is the wrong bracket
was a drum brake car from the factory (/6)

While building the spool mount k-frame
had to allow for the mid plate (1/8")
because the JW bell and converter, didn't want to play well

014_zps4id9bjnq.jpg


then when ready to bolt the manual steering box in> couldn't fine the bolts.
car was in the air- looked every where for the bolts
finally let the car down, found the bolts- laying on the cowl.... LOL

004_zpsj2jfbj2p.jpg


never thought it would take most of the day
just to install longer wheel studs
the factory stud head is .765" then found out the moroso is .865"
so that they wouldn't seat square

rather than chuck the rotor into a indexing vice> (would have to borrow)
decided to make a locating pin to center each hole for spot facing them .100" larger
in the mill.

007_zpsgy2sajnm.jpg


003_zpstfayxovb.jpg


then while turning the rotor decided to shave off the rough casting and true it up
should help with balancing,

010_zpsfusxouvi.jpg


015_zpsvxt9dxnz.jpg

In case I want to try "The standing mile run"

I've notice a few cars that like to run the mile
I might give it a try> OD trans with lock up converter.
 
not much today
after studying the exhaust layout

decided to move the water inlet to the passenger side

027_zpss56ppykq.jpg


005_zpsprgpyffy.jpg


got some more bends today>> time for chop and fit..weld
to make it easier for my exhaust guy to hook up to the head pipes.

there is 2 TIGHT "S" bends, plus 2 90's to get the exhaust pointed in the right direction

My labor is a lot cheaper than letting the shop do it (time consuming)

007_zpskri2z5nh.jpg
 
got the head pipes made

004_zpskfn53aa8.jpg


will have to wait til Monday to get the 2 elbows, swedged
to see where to fit them, then I can cut off the excess down pipe
but that's ok,
got lots of other things to assemble
 
finished the head pipes

024_zpsef6yrons.jpg


017_zpsj8rb1b4r.jpg


decided to install "poor boy" torque straps

welded a 5/8" nut onto the back side of each mount

025_zps8qrvfm8s.jpg


and then a 1/4" x 1" strap welded to the k-frame

061_zps94ostzs8.jpg


065_zpsn7z0m6l8.jpg


next
needed to temp seal the carb to keep anything from jumping into the carb
didn't have a base for a dominator
so cut another top to fit

075_zpsg1aszwfm.jpg


076_zpspe9tlj9w.jpg


Once I know the correct height, for the air filter
I'll build a base plate to seal to the Cowl hood and a New air filter

078_zpsjwscf1dy.jpg
 
-
Back
Top