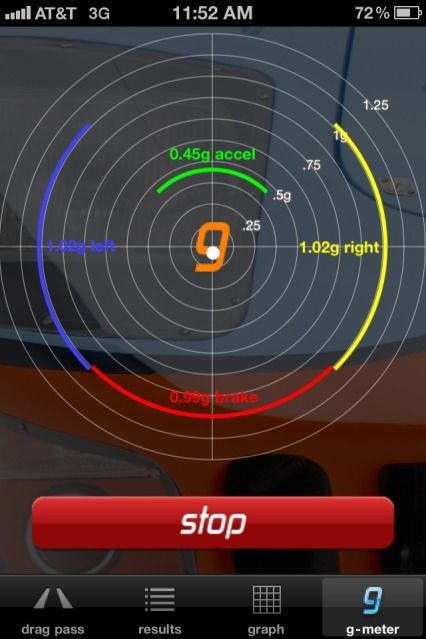
Those number look pretty impressive. I didn't think you could get an A-Body to pull 1-G. Sorry to hear about the MS3, hopefully it is a simple and CHEAP problem to solve.
Hopefully you only blew the 3 amp power fuse to the MS unit. You did fuse protect the computer, didn't you? ;)
I notice the app has a 1/4 mile calculator, wonder how accurate. Let's see some of those numbers.
Noticed in reading through the thread that you're running 275 40 18, how well do they fit up front?
Regards,
Joe Dokes
I didn't blow the fuse to the Megasquirt (had it on a 5A fuse- prob need to go to a 3A fuse!). I've been emailing with Matt at DIYautotune today. He had me pull the box apart and check a bunch of things with my multimeter. I've got 12v just about everywhere I'm supposed to (one is 11v instead of 12v), but I don't have 5v anywhere I'm supposed to! (mostly 1.2v). DIYautotune is helping me troubleshoot. I'll update ya'll once fixed to let you know how it went.
I'll also say this- for those who are considering building their megasquirt - go for it! Doesn't look too bad.
Regarding the 1G - that app just registers the max value hit, not a constant. I need to get it on a true 200 ft skidpad and time it so I have more reliable numbers. Regardless, I'm pleased with the direction it's headed. I never felt out of control on the skidpad, just had more understeer the more I pushed the go pedal. I thought it would eventually swing the rear out with more gas, but it did not.
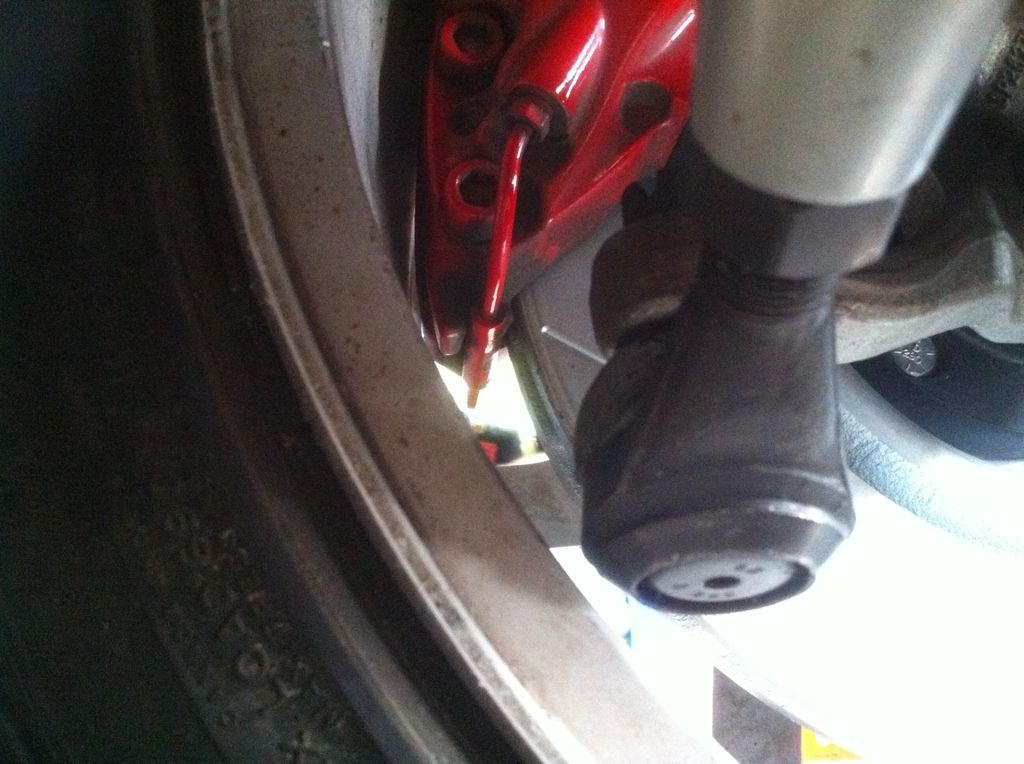
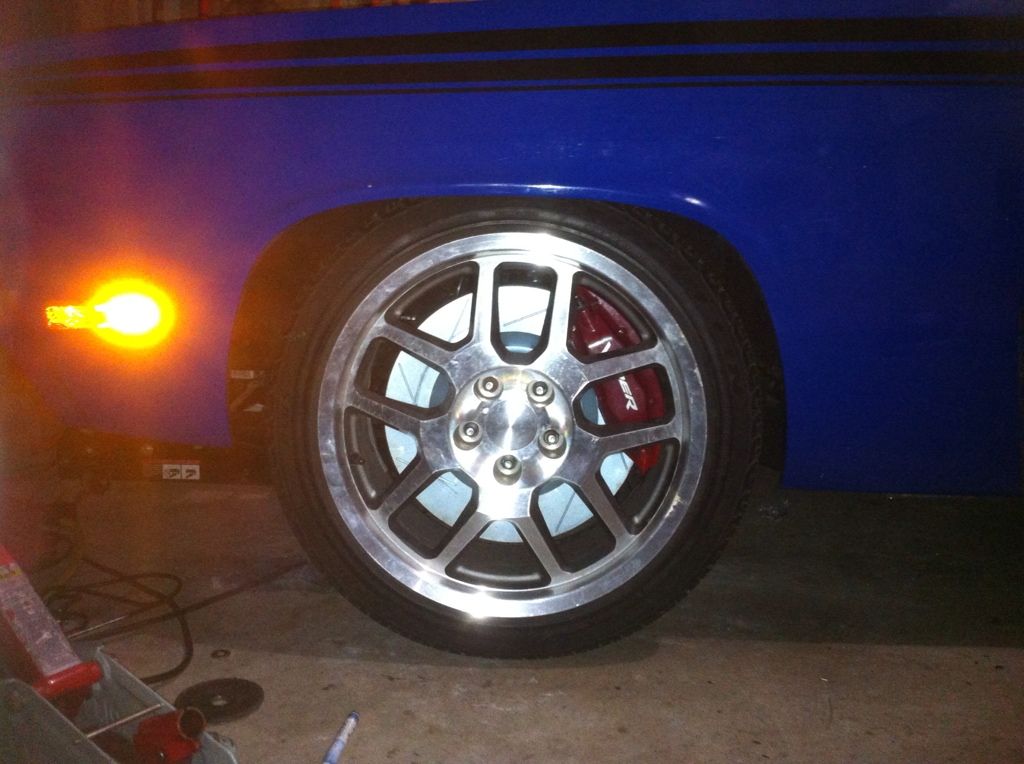
The 275/40/18's are a little big up front, that's for sure. They're mounted on 18x9.5 wheels with 7.2" of backspacing (the wheels go around the tie rod - less than 1/8" clearance). I've lost turning radius as well, as the inside tire will rub on the frame rail prior to full lock (and the outside will rub on the upper fender about the same time). The tire contacts the frame rail at 1.5 turns from center. I try to keep my steering input to 1 turn in each direction for driving, but will go a little further for parking lot maneuvers.
The biggest rubbing area is the back of the front wheelwell. It rubs/cuts the tire about 1/2 turn or less. I trimmed it as much as I was comfortable and then adjusted the strut rods to pull the tire forward a bit. I now clear the 275/40/18 under pretty much all driving conditions, including the skidpad test I did yesterday. Time to put the nice tires on!
My 'nice' tires are actually 265/40/18. This particular tire has the same tread width, but is .3" shorter. Michelin Pilot Super Sports.
I'm up to 447 miles. Trying to get the full 500 miles for clutch break in before I really push the car. Don't worry, I'll dyno the car and take it to the track (on street tires) as soon as I can. This car will not wear drag slicks with the current axles and center chunk, though (nascar center, lightened gears, Roush said do not throw slicks at it).
I have 5 gallons of 104 octane unleaded waiting for me to get everything broken in. I plan to do some tuning on 104 octane while using the knock headphones, and then start over with 93 octane, pull timing, and slowly advance timing listening for new noises that were not there when using 104.
I wonder if now would be a good time to put the knock module in the megasquirt? hmm