72 duster Build progress

-
wow, nice under the hood.. nice and clean, is the plan for mine as well. strip everything down and then paint it. I like your choice of plum crazy as well. Favorite color of mine. Girls like the color as well
 
ya once i get back i might have to come get some eyes on since your just short drive down the road
 
Well, today we had a break in the weather.....well....kind of.

it was raining all day BUT it was in the mid 60's! and it has been in the 30's lately.....so I made sure I got out to the garage and did some tinkering on the duster (hate working in the cold so my projects always slow way down in the winter....plus christmas season takes any "extra" cash).

anyhow.

the duster is "pretty much" down to body work and paint.(still some interior stuff to finish and some minor mechanical stuff but they are close enough to being done that I don't mind putting my attention on the body for the winter).

so as some of you may have noticed in a couple pictures.....my passenger side front fender had been hit at the very front before right where it wraps around the headlight...and when that happened it tweaked the fender outword at the front lip so there was a HUGE gap between the headlight bezel and the fender lip.....I am talking over a half inch gap ( i could stick my finger in it).....the person before my bondoed the dent and the cut in the metal from it being such a hard creased dent ....so it was "hidden" but the gap was still there.

so, I like to not spend money unless its a MUST and I figured either spend good money on a fender and even more to have it shipped...OR find someone with a fender they wouldnt mind cutting up.

and a member here just happened to have one and he cut me out a section of fender and shipped it to me for a good deal.

so what I did was sat and did a bunch of measuring,marking cutlines and so on,drilled all the spot welds off the inner lip,cut out a section of my existing fender where all the bad spots were....and then cut out an identical section from the chunk of fender the fabo member sent me and wire wheeled and primed the inside.

once the chunk of fender was cut out of the existing fender I had access to bump the inner metal back out to its original position.

then I did some tweaking here and there, ground everything down,got it sitting where I wanted it to and then started tacking in place.

it was getting late so I called it a night but I did get it all tacked in place, now just need to do a little more welding, some grinding and some light filler to smooth it all off.

I feel alot better not putting a bunch of bondo in a car to "FIX" it like some people would do.

thats why I am going to save to get my lower quarter patch panels and a tail panel because I don't want a bondo bucket, I am building it to enjoy and know that its done right.

pictures below of what it looked like before.....the fender chunk I received, what I cut out,with headlight and ring in place to show the difference in how much better it all fits together now that there is no huge gap between headlight and fender and so on.

sorry for the long post, just havent posted in awhile and I am a bit excited that I made some progress even as little as it may be.

P.S. don't mind the picture quality, I took them with my phone, I will post better pictures when I get around to finishing up the patch
 

Attachments

  • IMG_0077.jpg
    93.9 KB · Views: 952
  • IMG_0286.jpg
    95.2 KB · Views: 917
  • IMG_0288.jpg
    65.1 KB · Views: 931
  • IMG_0290.jpg
    97.7 KB · Views: 918
  • IMG_0292.jpg
    80 KB · Views: 923
  • IMG_0293.jpg
    64.4 KB · Views: 903
  • IMG_0296.jpg
    79.2 KB · Views: 899
  • IMG_0297.jpg
    102.1 KB · Views: 932
Damn fine job...

I been meaning to ask. Are you going to put hood pins on your car?

If so can me give a short DIY guide?

Thx
 
I was thinking of doing pins.....but I am not sure yet since It would mainly be for the link rather than the serving a purpose since my factory latch set up is all there and I don't have a lift off hood.

but if i do, I would be glad to do a write up on it
 
I admire your sheet metal abilities.


thank you.

keep tabs on my thread because in a couple months I think I should have enough saved up to get the new patch panels I need and I will be doing this stuff alot more.
 
well, today was a "warm" day.....got up to around 50 but has been raining.....now it is calling for snow for most of the rest of week.

our durango had some abs wire that were cut once before so I fixed them a few weeks ago and then just yesterday they rubbed on the wheel again and got cut and shorted out and now even after fixing them again ....the ABS and brake lights stay on so I have been screwing around with that.

ANYHOW, I did take some time to mess with the duster today and I finished the metal work on the fender patch I made up (check the page before this one on the thread to catch pictures and info on how I have done it).

so I pretty much just did a bunch of tack welds and then ran short beads of welded in between tacks.....and after every weld I would cool it off with a wet rag. then in all the factory spot weld holes that I had to drill out ...I pooled welds in there....the patch is very sturdy and is not going anywhere!.

then I took a grinding disc and went over all my welds and smoothed them out and then took a egg shaped carbide bit and used it to grind away all the welds in the contours of the inner fender around where the headlight sits and what not.

after getting it all cleaned up, I then busted the welder out again and welded back over and spots where there were still gaps between my welds and filled them in.....and then i repeated the grinding process again.

there are still a few little pin holes in my welds but no biggy.

I need to get some paint stripper and remove all the old paint from the fender and then I will take some body filler and put a light smear over the fender and get it all nice and straight and smooth (all depends on what the weather is like and how cold).

anyways, thats where the progress is at.......here are some pictures for you all!

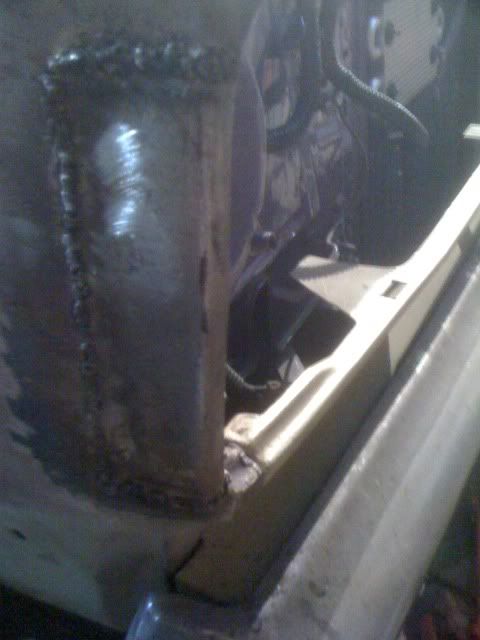
Here is just after welding
IMG_0299.jpg


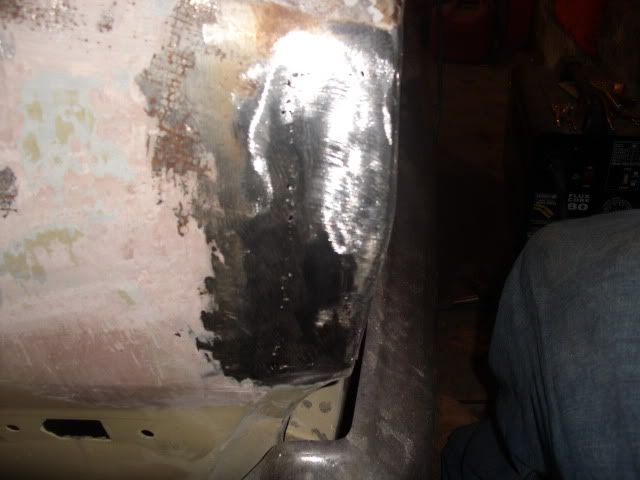
Here is just after the first grinding
DSCI1516.jpg


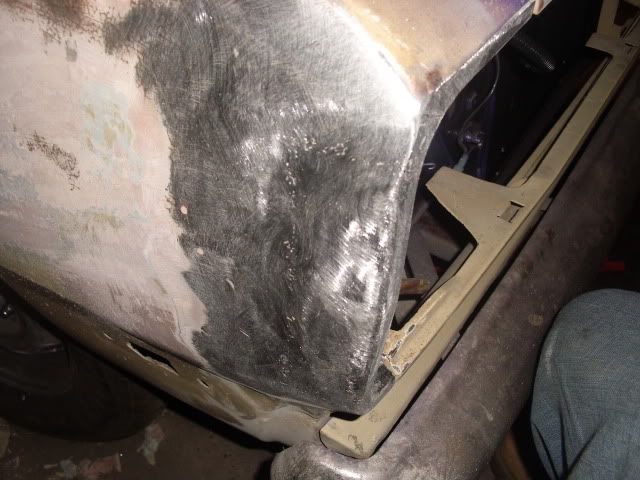
here is after welding in a few of the pinholes and resanding
DSCI1519.jpg


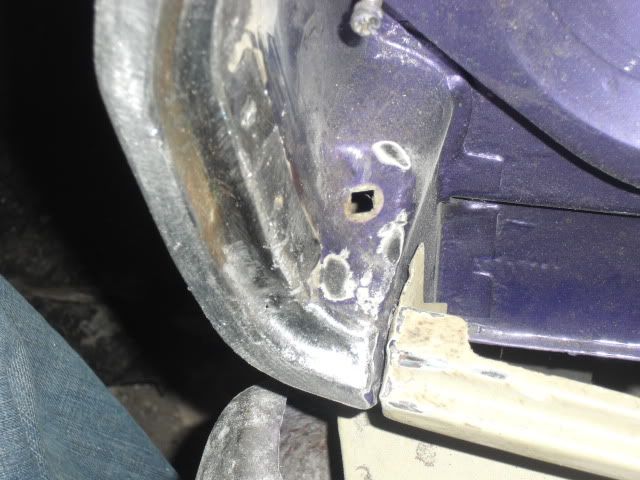
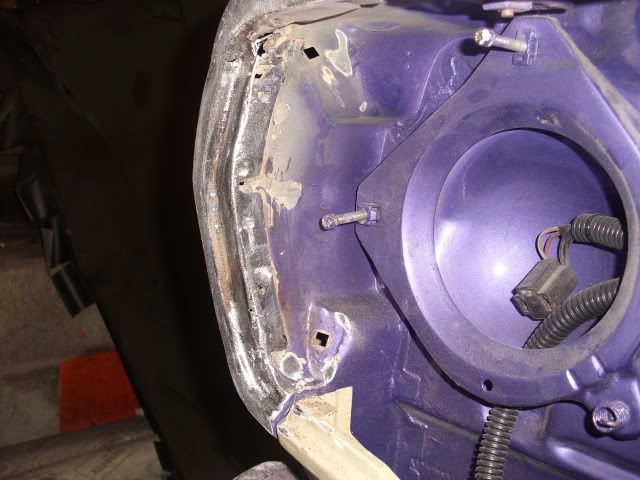
A picture of the inside lip after I smoothed off all the contours (still a couple little imperfections but body filler will take care of the final finish)
DSCI1527.jpg


Here you can see the inner lip again and you can also see where I took my carbide bit and ground into my welds so they will look like the factory divots left from the factory spot welds
DSCI1528.jpg
 
Cool progress DusterDude outstanding work, but you already new that :). Can't wait for more snow......I mean Pictures lol
Brad
 
Cool progress DusterDude outstanding work, but you already new that :). Can't wait for more snow......I mean Pictures lol
Brad

NO don't say snow lol

snow means COLD and cold means the duster gets lonely waiting to be worked on lol
 
Pictures Pictures Pictures it is then, lol NO SNOW!!!! I will pray to the gods.....oh wait maybe not......NO SNOW!!!! MORE PICS
 
keep it up. i wonder who is done first, you or me? lol j/k
 
keep it up. i wonder who is done first, you or me? lol j/k


Probably you lol...you seem to knock your work out pretty quick.

P.S. your Scamp build is looking awesome ( check it out anyone who has not done so yet!)
 
Great job, car looks nice.
For heat in the grarage look at kerosene torpeto heaters.
My garage is 12 x 20 and last night I warmed mine from 20F to 80F in under 10 minutes.
Mine is a 155,000 btu model.
 
Great job, car looks nice.
For heat in the grarage look at kerosene torpeto heaters.
My garage is 12 x 20 and last night I warmed mine from 20F to 80F in under 10 minutes.
Mine is a 155,000 btu model.


I already have a big billy bad *** torpedo ready heater....I think its atleast 200,000 btu.....the problem is that my garage is to dang small to have it set up and to have room to get around...plus I don't have the extra cash to put kerosene in the hog right now.

But I will get back to work on it soon ...just waiting until after the holidays when cash won't be as tight.

thanks for checking out the thread!
 
Hey! That's my intake!!! : ) Nice going with the Plum Crazy!!! Any pics of the paint job?

Paint job? what is that? never heard of it?

HAHAHA no I have not got around to painting the hole car yet, just the engine bay.

engine bay is done,engine is done, interior is 90% done and exterior I am waiting until probably febuary or so before I can order what body panels I need and then I will have it all in primer before spring I am hoping and hopfully have some paint on it by summer
 
Hey DusterDude72,love your thread.I'm gonna try the insulation you used on your floor's for my 72 Twister,did you use that under the package tray.Also which type of primer and paint you use for the inside of your door's?Spray gun or can.Keep up the great work,it's looking great.
 
-
Back
Top