408 Build Thread

-
Sorry for stepping into the conversation but....

your guy wanted to use an adhesion promoter, on a already painted metal surface? Why not just use a high-build 2K primer and save some money. If your helping out on the prep work, get a few wire tooth brushes and clean every seam, corner and crevasse with wax and grease remover.. use white towels and keep cleaning till the towels are no longer dirty. Because know matta what you spray on, It will bubble up, or not stick at all, if ANY contaminates are under the paint.

So please I'm not trying to offend anyone, I just see this thing come back and bite guys time and time again re: surface prep and primers for the last 35 years.... just trying to help... I call it my rule of pie. for every 1 hour of paint...3.16 hours of prep : D
 
No need to be sorry, I'm always looking for additional input. I trust what he does and what he tells me. He painted my vintage motorcycle a couple of years back and I'm very happy with the way it turned out.

I already have a set of brushes and a gallon of de-greaser. We use pump up sprayers at work instead of aerosol cans so I figured I would borrow one for the weekend and clean the hell out of everything. It's been so cold out lately that I haven't felt like going back out into the cold garage after working outside all day. But soon, spring will be here and the days will start warming back up. At least that's what I'm hoping.
 
Doc from the machine shop called today and said that I need to bring the rest of my parts out to him, he's ready to start assembling the rest of the engine! The rotating assembly is balanced using no mallory metal or holes. He said that Pat was able to get it into balance by lightening the throws a little by grinding their edges. All of the head work is done and the intake is gasket matched. He hopes to have my engine assembled and on the dyno by next weekend (7-10 days). They've got a race Hemi on there now that they need to finish tuning first.

I'm going run the last load of parts out to him next week sometime and hopefully I'll be able to grab some pics while I'm out there.
 
I've had this car for eight years next month and it's needed a new engine the whole time. It was good enough to get me back and forth to cruise nights but it was really loose and worn out. I've been building this engine in my head and on various scraps for paper the whole time. I've had a "wish list" on the Summit Racing website that I've been adding to and chipping away at for a long time now.

Almost everything I've done up to this point, brakes, suspension, rear end, mini tub, etc has all been in preparation for adding a torque monster engine to my car. My friends all think that I'm crazy. "Why do you need big tires on it with that worn out 340?!?" "Subframe connectors and a Dana 60?!? Lol" "Why did you buy such expensive headers, they won't help that oil burner?!?" The look on their faces when I mash down on the loud pedal with be worth the time and wait. Most are brand X guys and don't have any idea what I've been up to. They've heard me mention stroker a few times, but they don't have a clue what kind of torque we're getting ready to make. Should be a fun summer!

Brian: Do it once, do it right. In my book, you have. Enjoy, the damn thing.
 
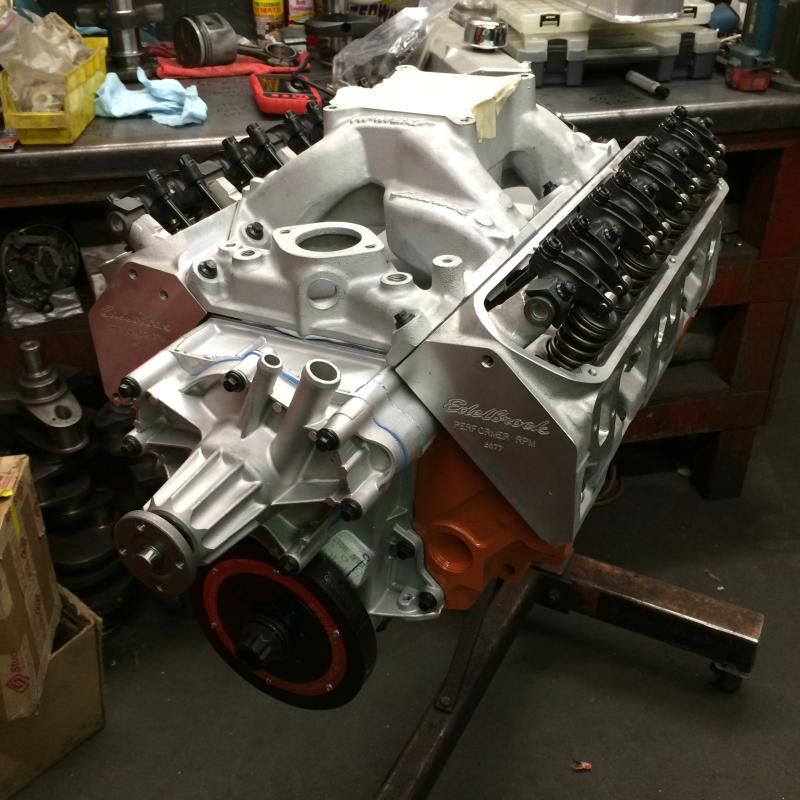
I took another load of new parts out to the machine shop today and was pleasantly surprised. My long block is completely assembled!

767099DC-C965-4620-8166-5D0921263E1B_zpsiivgw2vh.jpg


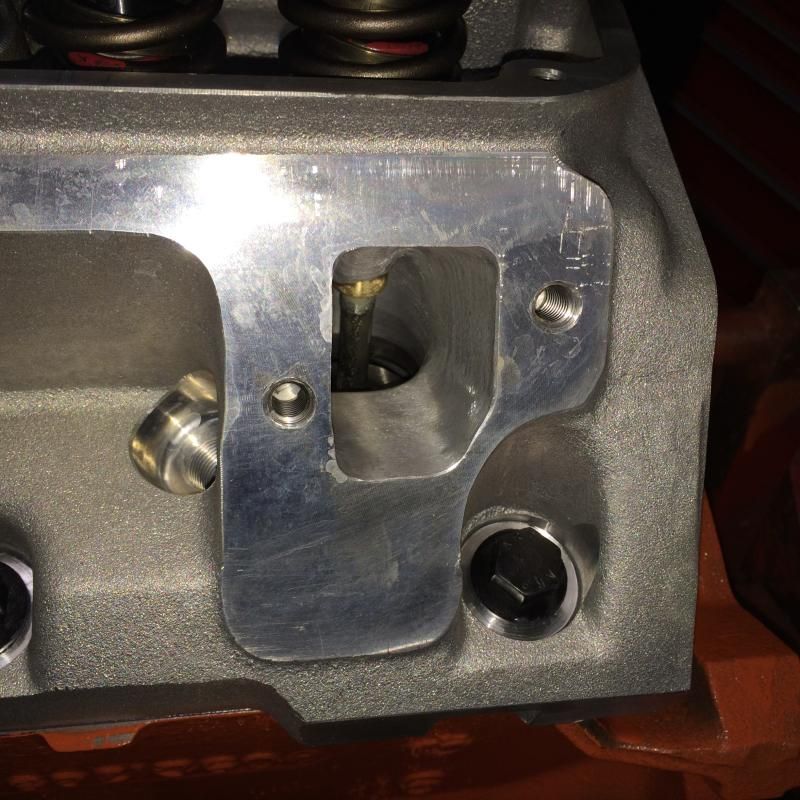
It was early still and no one was there yet, so Doc took about a hour and went over everything that had been done up to that point. He said that he got a little carried away with the heads. We had talked about just cleaning up the intake ports and the short sides a bit, but he did both intake AND exhaust runners and blended out the bowls also. He said he had the tools out and was already working so he just kept on going. Hope that doesn't cost me too much?!? I asked about the gasket match on the intake and he took a bore scope out and showed me how nice he blended the manifold into the intake port. It all looked very nice! Here's a shot of an exhaust port.

BA81B3A8-48DF-461F-92C3-C00BEF501E62_zpsspvjjolg.jpg


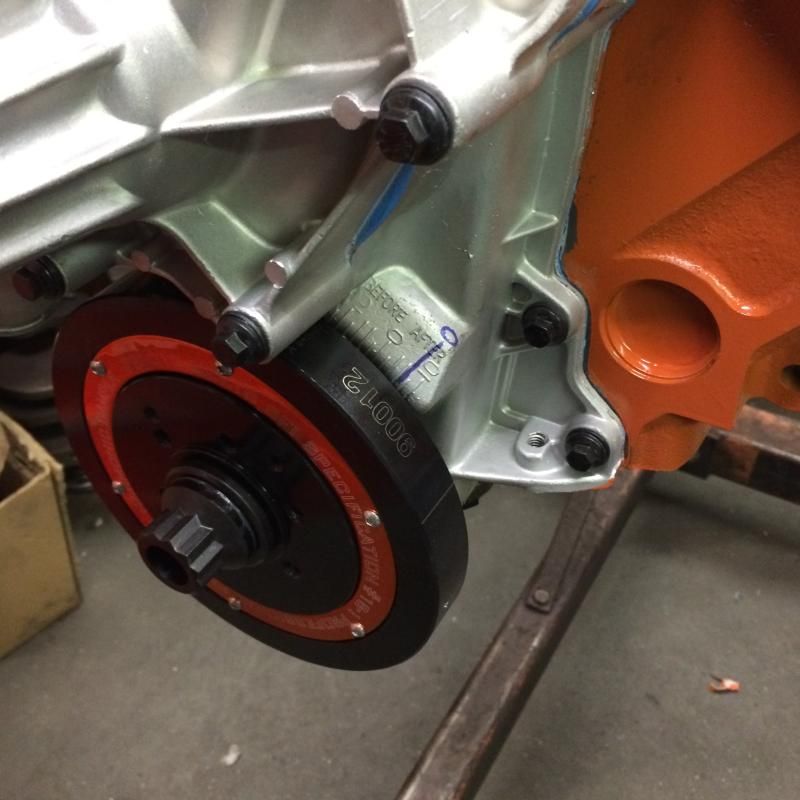
He said that he measured for custom push rods and then figured out that Manley offers them in that length. They are intended for a Ford application, but I won't tell anyone else that. The cam is degreed in and when he determined top dead center, he noticed that the balancer was off? So he marked it with the true TDC. I'm not sure why it would be off so much?!?

D685B58F-5F99-4E33-893B-4172C4D29813_zpsl9z3vizc.jpg


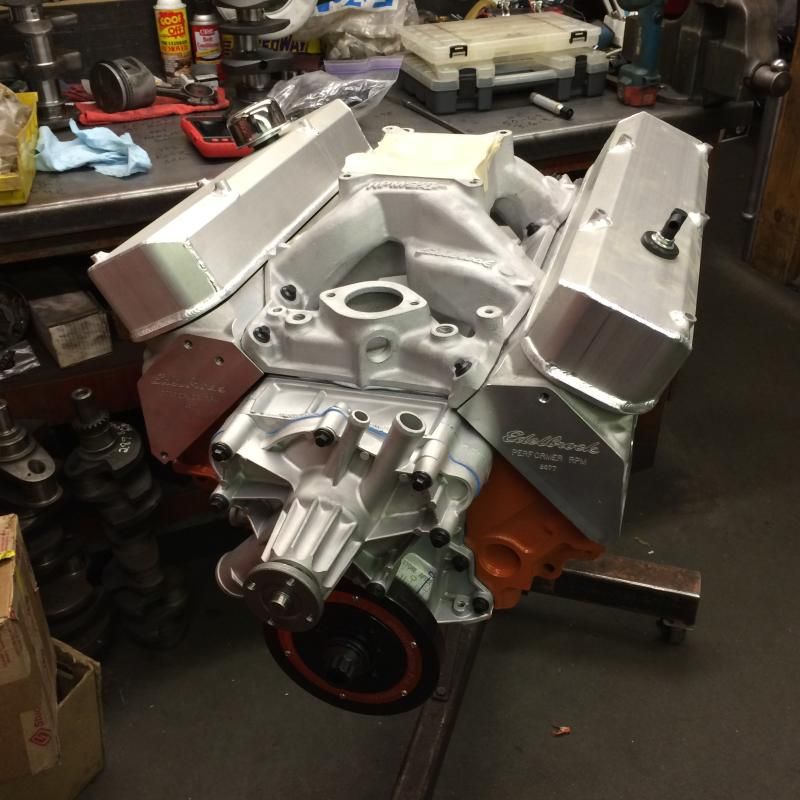
Overall, I'm very pleased with the work that they did. Their attention to detail was very impressive. Doc really enjoys this type of work and it shows. He could have talked for another hour but I had to get to work so that I could pay for all of this. I couldn't resist setting my valve covers on top for one more picture before I left.

6451853E-9F6A-4D58-9A3A-01D277DC629F_zps5qsjjjud.jpg
 
We're getting close! I forgot to mention Doc showed me a 800hp Gen II Hemi that was on the dyno. They were building it for a customer who was gonna run his Challenger in FAST competition. As soon as they are done with that, mine will be going on the dyno.
 
Good to see this quality work coming out of a great shop on Lawrence.
 
Do we have any of that sweet noise yet Brian! j/k... Looks nice. I ran into the same thing with Chevy and Ford buddies not really understanding how much of an improvement in power a well built stroker makes.
 
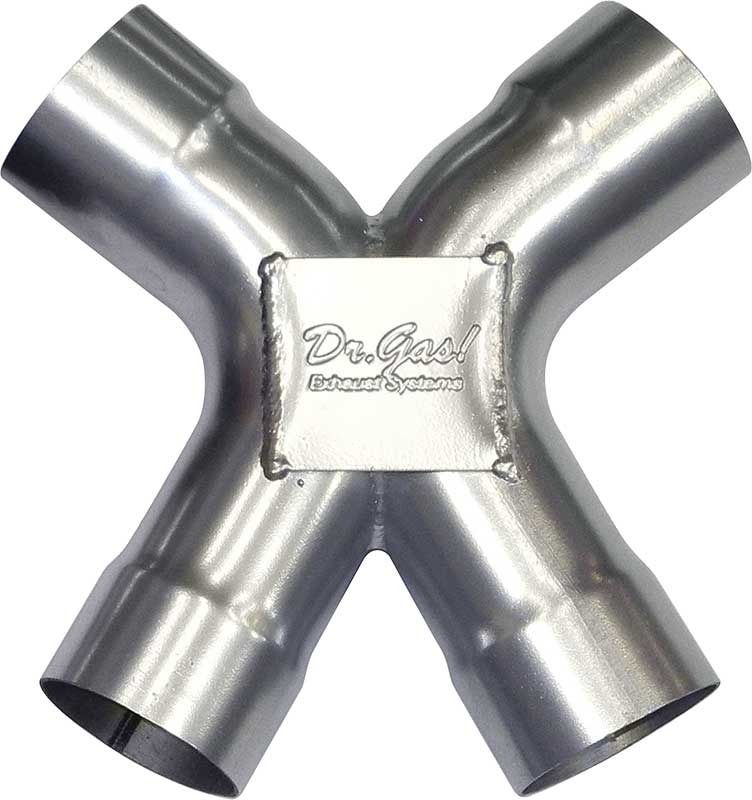
It's been a couple of weeks, and I haven't heard anything yet. That's not surprising, they don't usually contact me, I have to call them. I ordered some new parts yesterday from Classic Industries and saved 20%. I bought a new X pipe from Dr. Gas, it was a little pricey but the discount helped. Member VOETOM who is building my exhaust didn't like the X pipe I picked up at a swap meet, so I followed his recommendation and bought this one.

Dr.%20Gas_zpsj3lubvdv.jpg


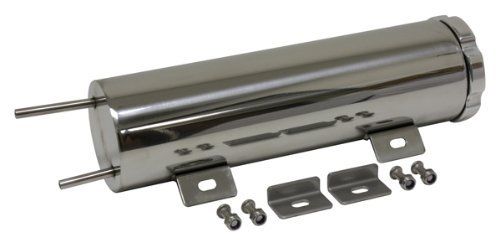
I also bought this polished overflow tank to go with my polished Champion radiator. It should look better than the Mountain Dew can that the previous owner was using!

41bZvtOmcNL_zps4ivzdxrb.jpg


The list of parts that I need keeps getting smaller and smaller. The torque converter is the only big dollar item left. The rest is just small stuff that I can grab at the local parts house.
 
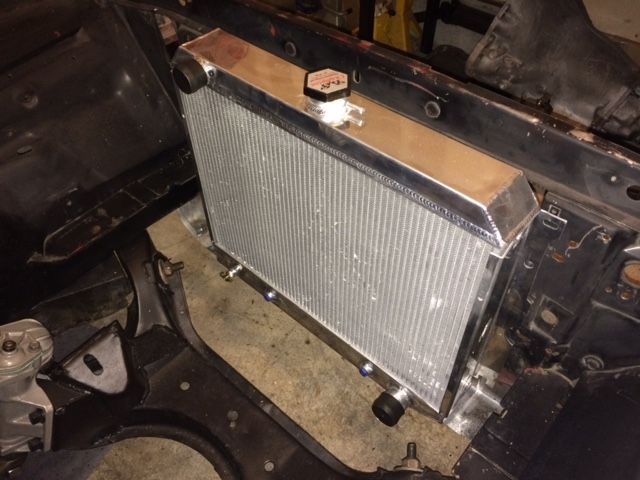
I got a little bored after dinner tonight and it was still a little light out, so I went out into the garage to check the width of the Champion radiator and it's mounting holes and also the group of holes, factory and custom that are in my core support. To my surprise the Champion radiator lines up perfectly with the four factory mounting holes. All I'll need to do is go to the hardware store and buy four nice bolts and my radiator mock up will be done!!

IMG_0946_zpsc8dmkn65.jpg


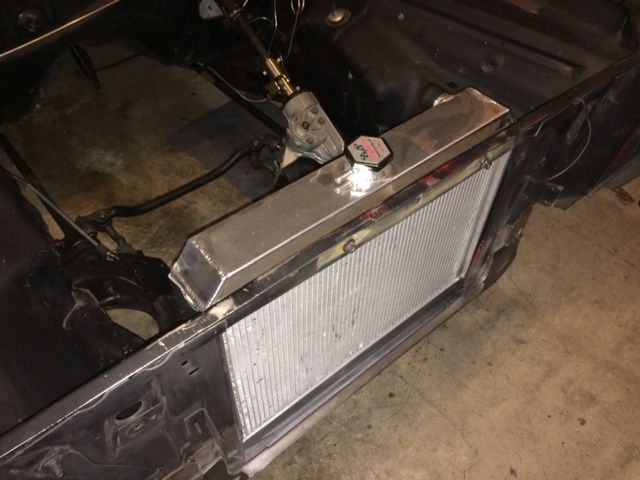
I was afraid before mock up that the radiator might sit up too high, I was pleasantly surprised. The radiator actually sits lower than I probably would have mounted it, but I'm not going to argue with the factory. I think it looks pretty good sitting where it does?

IMG_0947_zpscdiest7e.jpg


I still need to mount the shroud/fans assembly to it so it'll be coming back out, but I'm glad I test fitted it and all went well. That's just one less thing I have to worry about!
 
You lucked out. The Champion radiator I bought was garbage. It was so twisted that when you installed 3 mounting bolts the forth corner of the radiator was over 1/4" away from the radiator support, and the radiator support was straight. Lost $35 shipping it back and had to call 3 times and wait 2 months before I got my money back. Oh yeah, none of the holes lined up either. Would have had to drill new ones.
 
You lucked out. The Champion radiator I bought was garbage. It was so twisted that when you installed 3 mounting bolts the forth corner of the radiator was over 1/4" away from the radiator support, and the radiator support was straight. Lost $35 shipping it back and had to call 3 times and wait 2 months before I got my money back. Oh yeah, none of the holes lined up either. Would have had to drill new ones.

I guess I did! I had one corner that was a little bent, but I just took some pliers and a shop rag and bent it back straight. I bought this from a member who changed his mind and went a different direction, so there would be no returning this radiator. I'm gonna play around with the shroud and fans tonight after work to see how well they fit together. It all came from Champion, so I'll let you know.
 
Agreed, I also tried 2 different Champion radiators and both were twisted. I ended up going with one from Wizard cooling, cost a little more but a lot nicer product.
 
I guess I did! I had one corner that was a little bent, but I just took some pliers and a shop rag and bent it back straight. I bought this from a member who changed his mind and went a different direction, so there would be no returning this radiator. I'm gonna play around with the shroud and fans tonight after work to see how well they fit together. It all came from Champion, so I'll let you know.

Sounds like you'll be ok from your earlier post. Forgot to mention the welds on the one I had looked like chicken crap. That was another reason I sent it back.
 
Well, I guess I spoke to soon! I brought the radiator into the house today and laid it flat on my kitchen table, and surprisingly it laid flat no twist to it at all.

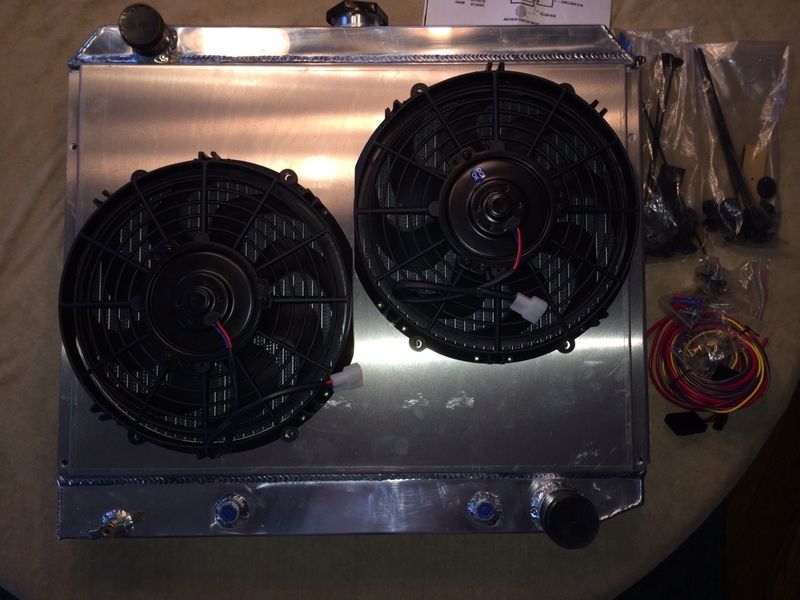
The problem arose when I went to mock up the shroud and fans. There is a bracket welded to each side of the radiator that the shroud bolts up to. The driver's side is fine and both of the holes lined up perfect. The problem is on the passenger side. The bracket seems to be bent out about 1/4 inch and only one of the holes has been drilled in the bracket. It's kind of hard to see in the picture below, but the left holes line up fine, the lower right hole is close but no cigar, and the upper right hole is non existent and the bracket is too far out to line up anyway.

shroud%20and%20fans_zpspqviok1n.jpg


Ledfoot Racing where the radiator was purchased referred me to the manufacturer, and of course no one was there to answer my call, so I left a message. There are a couple of ways that this can be resolved. I can get a sliding bar clamp and try to pull the right side bracket where it needs to be without bending the left side bracket. Or I can mount the fans directly to the radiator using the universal plastic zip tie thingy's that they included for some reason. This defeats the purpose of paying extra for the fan shroud though.

Before you scream return it for a replacement, this radiator/shroud/fans combo was bought new/used from a member here who went a different direction with his build. He bought it over a year ago, and I have had it sitting in my garage for almost a year, so the manufacturer probably isn't going to help out much. I think I can make it work, I just need to figure out how to bend the aluminum bracket in 1/4 inch without busting the welds or destroying the radiator. Isn't custom hot rodding great?!?!
 
Bummer. I'd try the sliding bar clamp since it's not that far off. You could also elongate the holes a little to help. When the bolts are in place the elongated hole will be covered so you'd never see it. I'd also drill some vent holes in it to let plenty of air through when the fans aren't running.
 
Yeah, I think I can get it pulled back in close enough to work. This should have been caught in quality control or when someone was marking the holes for the shroud. Here is a pic of the offending corner. You can see where the hole is marked correctly, but someone drilled a hole a half inch lower for some reason?!?

BAE7A7A6-AD19-4B82-B538-9CE787C0A4CE_zps0qorfxid.jpg


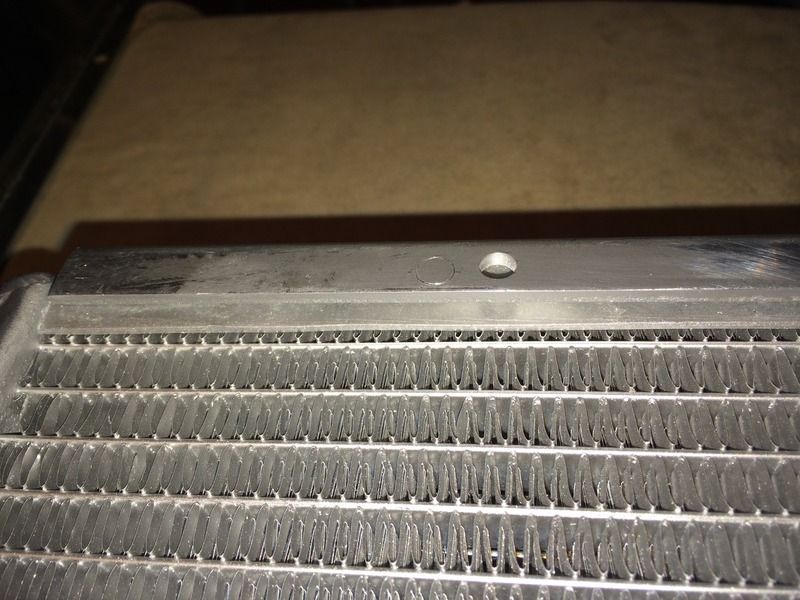
The next problem will be, once I get the bracket straight, how am I going to attach the shroud to the radiator. As you can see in the picture, there is barely enough room to slide a small nut in there? Once the shroud is on, there would be no way to get a wrench in there to hold it. Plus, the bolt would have to be super short to keep any extra from damaging the core of the radiator. This whole bracket/shroud thing isn't engineered very well, maybe that's why Champion "doesn't include any mounting hardware" with any of it?!?! I was thinking maybe I could have a small machine screw TIG welded into each mounting hole and then use them as studs. I'm open to any and all ideas. Thanks!
 
What about using one of these? I think they call them speed nuts. NAPA has them in numerous different sizes/styles and the one on the lower right takes a #8 screw which is pretty small. You'd still have to be careful on the length so it doesn't puncture the radiator.

EDIT: I don't know why but I can't upload pictures today. The link is there but is dead. OK here's a link to pictures of them I found on the web

https://www.google.com/search?biw=1...source=og&sa=N&tab=wi&ei=TBkUVfTRG8WvggSljoEI
 
My buddy Monte at work brought up speed nuts today. I think I may have some small ones left over from a car speaker installation. I'll check when I get home. My buddy also has a bar clamp to try and pull the bracket in a bit.
 
Dude....no aftermarket parts fit on my car....Literally NOTHING without some modification (except for a few internal engine parts). Why not just drill a hole and bolt it up? Am I missing something??:coffee2:
 
The bracket that the shroud bolts to is bent and needs to be straightened. Once straight, I can drill a hole. The bracket is too close to the radiator to just slip a nut and bolt in there, so I'm going to look for a speed nut that fits. Even if I find a speed nut that fits, I'll have to use a very short machine screw to keep it from screwing into the radiator that sits 1/4" behind the bracket. Not anything impossible, but not as simple as "drill a hole and bolt it up".
 
-
Back
Top