69 340 Dart

-
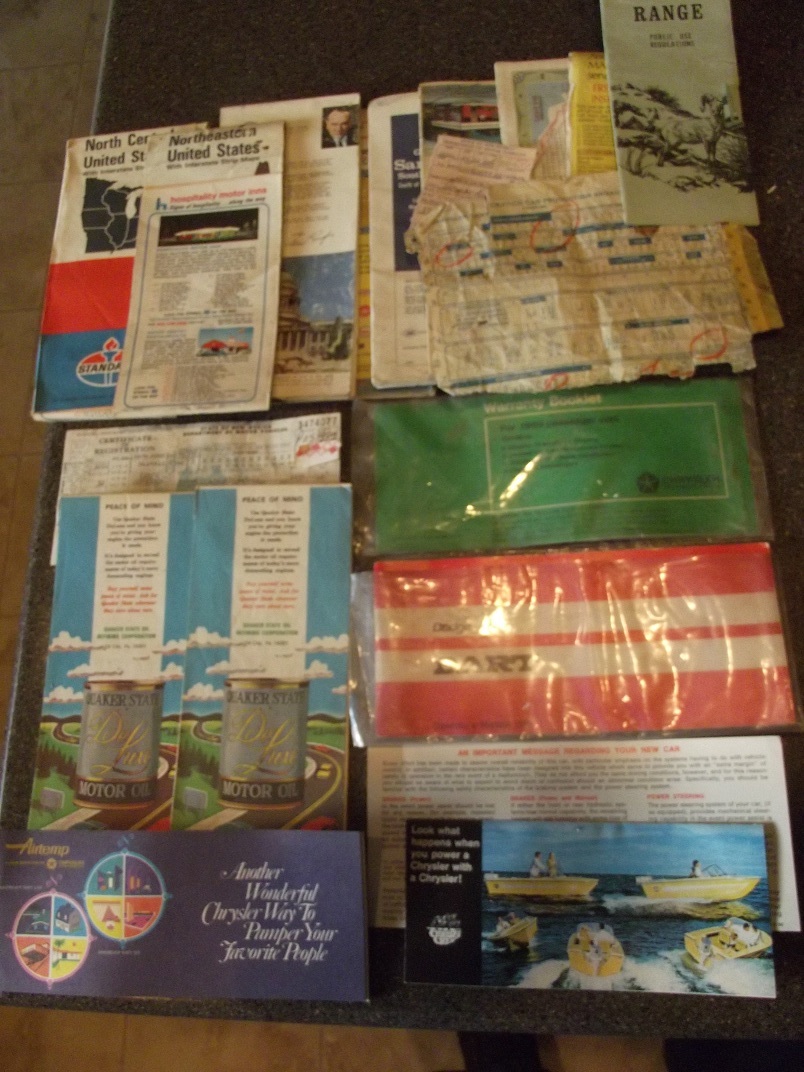
Great story, that is the A-body I/we all dream of!!!!!!!!!!!! Great documentation, pics of wedding, just married poster, window sticker, build sheet, original title........
HOLY CRAP!!!!!!!!!!!!!!! Can't get any better than that!!!!!!!!!!!!
 
The Darts saga continues.

By coincicence George my military friend from long ago actually retired here to Alb NM too. He lives just 7 miles from me. After a little garage fun George has really started to take to the Dart and wants one. I took him to actually see my Duster yesterday, so I've finally made good on my boast from about 1987.

Irony is I found an orange 1970 340 4spd Duster that I hope will be buyable and will be Georges new A-body

7469307-340Dusterdr.jpg
 
I was running out of things to do at work about 2 weeks ago. I decided to take off and hit the junk yards in search of some minor mopar parts.

I did not find what I was after but stumbled on 2 AMX's that were complete and had just arrived. The yard manager would not sell them and I tried several times. I stripped the cars at the yard and am selling off the parts. I've made a ton.... A TON of money that I can use on the dart

7699197-imagejpeg_8.jpg
 
I started cleaning up the 340, and the carbs done now too. I saved the original Master cylinder and will rebuild it. Same with the wheel cylinders etc.

7689155-darts340evolution.jpg
 
The AMX's are going to help fund required items. I have my headliner seen compared to the original material, and some of my Legendary stuff arrived.

I bought new lock sets since the original owners could not find the keys, I had removed the tumblers. I installed the ignition

The water pump was shot and a bolt broke in the block. I have it moving very little but haven't been able to remove it yet.
 

Attachments

  • headliner.jpg
    47 KB · Views: 309
  • DSCF1478.jpg
    54.3 KB · Views: 292
Examples of the OEM part fan stampings for the resto crowd. The last is the back side that reads "ENGINE SIDE"
 

Attachments

  • DSCF1473.jpg
    36.5 KB · Views: 280
  • DSCF1474.jpg
    47.7 KB · Views: 311
  • DSCF1475.jpg
    42.6 KB · Views: 298
Distributor stamping a 51 in a circle
OEM air cleaner decal, shows shrinkage and paint texture
OEM wheel seals, note P/N's
 

Attachments

  • Distributor stamping.jpg
    83.8 KB · Views: 296
  • DSCF1263.jpg
    45.6 KB · Views: 301
  • DSCF1280.jpg
    65.6 KB · Views: 283
The OEM master cylinder and wheel cylinders...note the date code
 

Attachments

  • wheel cyl rear.jpg
    60.5 KB · Views: 280
  • wheel cyl front.jpg
    64.6 KB · Views: 271
  • Mast cyl pn.jpg
    54.1 KB · Views: 287
  • Mast cyl date.jpg
    33.6 KB · Views: 282
Have you ever seen a sample of the original factory installed trunk mat stampings?
 

Attachments

  • Trunk mat stamping sample.jpg
    19.6 KB · Views: 305
I got the bolt out and installed an after market water pump (for now) I purcahsed an AB&E Dash pad and Legendary seat skins and I am curently installing them. Excuse the fact that it's not done in the picture, I just pulled that tight and then set it in the sun. WOW it came out NICE
 

Attachments

  • water pump.jpg
    82.5 KB · Views: 268
  • Dart interior BEFORE.jpg
    65.6 KB · Views: 278
  • Drivers seat.jpg
    66.3 KB · Views: 276
  • seat and dash.jpg
    63.3 KB · Views: 288
Thanks guys I appreciate the kind words. I've waited while I patiently decided how to proceed with this car. Here is a comparison of the original seat material and the Legendary reproduction seat skins. I'll never use anything else. GREAT PRODUCTS

Also the BE & A tan repop dash pad. This is a nice pad but the color is not a good match for the original pad but matches the dash frame. I might assume that later years used this color? The grain is not a match to the OEM grain either. It appears it will take a little trimming of the vinyl and maybe the layer of material on the frame. A stud is short and the corners don't fit tight yet. Looks nice though....
 

Attachments

  • Dash grain and color.jpg
    80.7 KB · Views: 267
  • Legendary match.jpg
    74.3 KB · Views: 288
Here's the tire and jack decals, the door jamb decal, and a shot of one of the date coded wheels
 

Attachments

  • tire decal.jpg
    103.5 KB · Views: 276
  • jack decal.jpg
    101.7 KB · Views: 283
  • date coded wheels.jpg
    43.6 KB · Views: 276
Emissions decal
Hood latch/release and spring finishes
Rear ground wire was painted turquoise with the engine (sorry that shot was before cleaning)
 

Attachments

  • emmisions decal.jpg
    66.2 KB · Views: 276
  • Hoodcatch.jpg
    35.8 KB · Views: 258
  • hoodreleasefinishes.jpg
    77.9 KB · Views: 286
  • ground wire paint.jpg
    104.4 KB · Views: 267
A shot of the underside over spray and runs from dipping etc

The door jamb decal
 

Attachments

  • sparetirewellunderside.jpg
    45.2 KB · Views: 276
  • jamb decal.jpg
    55.1 KB · Views: 276
The Radiator support got some black out paint
Drivers heat shield paint
Spark plug looms no evidence of paint
 

Attachments

  • Radblackout2.jpg
    53.8 KB · Views: 284
  • heatshieldpaint.jpg
    52.4 KB · Views: 268
  • no paint on looms.jpg
    53.2 KB · Views: 276
Seat almost done I still need to get new retainers for the hinges, install the set tracks and seat belt storage assemblies. The head rest still need to be stapled and the zippers handles removed
 

Attachments

  • seat nearing completion.jpg
    41.5 KB · Views: 291
Rear seat bottom done, I need foam before I can do the top
 

Attachments

  • rear seat bottom.jpg
    119.8 KB · Views: 248
Unable to buy everything I want at this time I came up with a temp solution to the carpet issue. I dyed it and bought mats to cover the holes/thin spots. I cleaned up a little too. Disregard the light tan kickpanel

FYI I THINK all 4speed Swingers had black carpet
 

Attachments

  • Carpet dyed.jpg
    47.7 KB · Views: 249
-
Back
Top