Battery drains only when car is running... Help

-

BooStat

63 Valiant 225
Joined
Nov 16, 2011
Messages
8
Reaction score
0
Location
AZ
i have a 63 Valiant with the /6.

When the car is running, the battery just drains out til its dead!

The battery is good, just had it tested. it holds a charge when the car is OFF, with key in any position.

The alternator is good as well, it will keep the car alive but won't charge the battery.

I've checked for loose connections and found none, there are no exposed live wires to arc out on either.

I'm pounding my head against the wall here guys..

Any ideas?
 
If the battery is draining while the engine is running, the charging system is not working correctly. How do you know the alternator and regulator are working?
 
The alternator will keep the car running and driving, with headlights, wipers and heater on. the battery drained in less than ten minutes of drive time on a 100% charge.

I don't think that's it.
 
With the battery terminals disconnected it still runs. Plus we checked the Alt with a volt meter and it's putting out 12v. 13v+ high idle.
 
This could be a lot of things. Alternator with some bad windings or diodes, and can't keep up. Bad regulator. Bad wiring between the alternator and battery.

So One--At--A--Time

1 See if you can determine that A the alternator can put out a fair amount of amperage, and B that the wiring between the alternator and battery is in fair shape

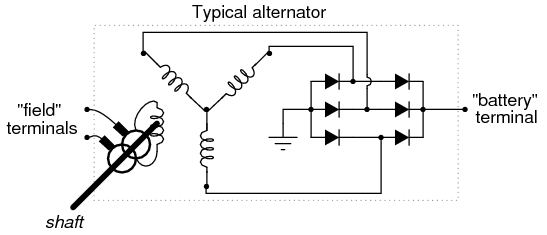
A Unhook the field connector at the alternator. I assume you have the 69/ earlier charging system, IE the type that came with the car? IF so, you should only have one "push on" connector at the alternator. Unhook this wire, and use a big clip lead to jumper from the alternator push-on field connector to the battery. Bear in mind, to unhook when done testing.

B Hook your voltmeter with clips to the battery, and prop it up so you can see it inside the car. Start the engine, and be careful with the throttle, because if the alternator is healthy, you may "overvoltage" the system.

C Now bring up the RPM and watch the ammeter and voltmeter. This is just a quick and dirty test. The battery, by the way, should be charged up for this test. Bring the RPM up until the voltmeter is showing 15V. The ammeter should be charging some amount. Now turn on everything you can think of, lights, heater, radio/ stereo, 4 way flashers, brake lights. The ammeter should be pegged or nearly so with the voltage at 15V

D IF you cannot achieve this condition, move the voltmeter to the alternator output stud. Bring the RPM up to "about" where you had it previously. Read the voltmeter. If it is SIGNIFICANTLY higher than when hooked to the battery, IE 15V at battery, 17 or higher at alternator, CHECK the wiring between the battery and alternator, and pay PARTICULAR attention to the bulkhead feed-through, and the ammeter connections. Immediately after this test, feel at the alternator stud, the ammeter studs, and around as close as you can to the bulkhead feedthrough, looking for warm/ hot wiring.

IF the voltage between the battery and alternater is nearly the same, IE within 1 or 2 volts, then the wiring is OK but if you cannot get a good charge reading in the above test, you PROBABLY have a defective alternator.

IT IS IMPORTANT to realize that alternators do not just "quit". A 40 A alternator, fer example, with 2 open diodes, is NOT dropped by a third of it's output (6 diodes total) because 2 bad out of 6 diodes causes inefficiency which FURTHER drops the output, probably nearly in half

OK Let's say that the above test was OK, that is, you had a pegged ammeter, and the voltmeter was showing no higher than 16V or so.

This shows that the alternator is most probably OK, and the wiring is also.

NEXT, check the field/ regulator circuit.

Hook everything back up "normal." Turn off the engine. Turn the key to "run" with engine OFF

If you have points ignition, make sure the points are CLOSED. To do that, measure from the coil neg. terminal to the block. IF the voltage is near battery, the points are OPEN. Bump the engine until the voltage goes to a very low value, and move on

Now take your meter and put one probe directly onto the battery positive post, the other probe on the regulator IGN terminal. You are looking for a very low reading, the lower the better. Over .2V (two tenths of a volt) is getting to be too much, 1/2 volt is WAY too much. You are measuring, here, the supply voltage drop from the battery, fuse link, through the bulkhead connector, through the ignition switch connector, the switch, back out the ignition switch connector, and back out the bulkhead connector.

IF THIS VOLTAGE shows a drop, FIX it. Either use the dark blue "ignition run" wire to run a relay and the relay to run the ignition and regulator, or track back and find where the drop is.

Let's say this checked out OK

SO FAR we have showns that the alternator is capable of outputting amperage, and that the regulator IGN supply is OK.

IF THESE CHECKS above show this to be true, replace the regulator.

Make SURE the regulator is grounded.
 
The alternator will keep the car running and driving, with headlights, wipers and heater on. the battery drained in less than ten minutes of drive time on a 100% charge.

I don't think that's it.

This proves nothing. What is the ammeter doing while all this is going on? The alternator may only be capable of putting part of its rated output, I.E. it may have a problem


With the battery terminals disconnected it still runs. Plus we checked the Alt with a volt meter and it's putting out 12v. 13v+ high idle.

DO NOT EVER disconnect battery cables from a running car. I wish I could bury this old wives tale. You will NEVER read about, or be taught this in any class, text book, shop manual, or tune up course.

12--13V is LOW

DO you have a shop manual?

Download one here:

Scroll down the pages, somewhere in that thread is a link to a 66 manual.

http://www.forabodiesonly.com/mopar/showthread.php?t=132309&highlight=manual,+download
 
Take a voltage measurement right at the battery with the engine runnning at a high idle. If it's the same as at the alternator, I would still bet on the battery being bad. I guess you could have a wiring problem where you're getting the proper voltage but not enough amperage. Look your cables over real good for corrosion or bad terminals.
 
Sounds like your altenator is wired reversed to me. If you say it runs fine "without" the battery hooked up and drains it when it is, your altenator is sucking and not adding voltage.
 
Sounds like your altenator is wired reversed to me. If you say it runs fine "without" the battery hooked up and drains it when it is, your altenator is sucking and not adding voltage.

I would like to see an explanation of just how a person could accomplish that feat right there.
 
Its not the alt. you know that little metal box on the firewall? The not the ecu but the ballast? I replaced that and fixed it all! I had the same issue, try it only like 20 dollars
 
I would like to see an explanation of just how a person could accomplish that feat right there.

No problem chief! Here is how you do it:

See, you just pull the battery cables off at high idle for a bit. It helps if you connect / disconnect them for a few cycles. Bonus points if you manage to burn out a few light bulbs.

When you are finished, the alternator has a few blown diodes. If you got lucky, they failed shorted & the alternator will draw as much as 50 amps from the battery. If the diodes fail open, the field winding will still draw about 4 to 5 amps, helping to suck battery dry.

Now, once you kill the battery with the "reverse charging" alternator you can charge the battery with a 110v charger overnight. After you do this a few times, the battery will become a little easier to suck dry - probably only have about 10 minutes of capacity eventually.

See? easy. Rape the entire charging & storage system. No problem.

.
 
My 70 Super Bee used to burn out one diode in the alt about every three weeks. I used to keep a box of stators/ bridges and alternator halfs in the trunk. Every now and then you could find me off the side of the road "rebuilding" the alt. I got to where I could tell by the ammeter needle and the brightness of the lights, if it had burned one, and got to where it only took about 15-20 min to disassebble/reassemble. I'd take the bridge back home and swap out the bad diode, then put the rebuilt one back in the trunk for next time.

Changed the regulator several times, but never figured out what was causing it.

All kidding aside, I've had a couple of alternators "get out of line." What I mean by that is, at high RPM, the case would loosen just enough to allow the stator/ cases to vibrate and wear out of alignment. When it gets bad enough it will do one of two things----

either allow the rotor to rub on the stator

and/ or the vibration will loosen the stator windings and then they will vibrate against winding -- to -- winding and rub the insulation off the windings, which obviously causes internal shorting.

On my 69, when I finally found the source of the problem---one night I had the hood up with the engine running, and it was putting on a min-light show inside the alternator --thunder' n' lighnin' 'n everything
 
Its not the alt. you know that little metal box on the firewall? The not the ecu but the ballast? I replaced that and fixed it all! I had the same issue, try it only like 20 dollars

Start simple right... Fixed the problem for 30$ and in ten minutes.
Thank you!
 
When I read the OP on this, I too guessed that the regulator might be at fault, but after reading 67Dart's reply, I realized that following the procedure that he outlined made a lot more sense. Doing so would have verified the condition of all the components and given the OP real insight into the operation of the charging system. Anyone can replace parts, it takes a mechanic to diagnose a problem. He gambled his $30 and lucked out. If he had guessed wrong. he'd be out $30 and no closer to a repair.

BTW, just because his immediate problem is solved doesn't mean the alternator's good, it could still have a couple of bad diodes and marginal output.
JMHO

Thank you. What is going on here is known as "throwing parts at a problem."

While some of my posts may appear complicated, they are pretty simple, and you can always post back questions

THE FACT IS that it takes only minutes to make a couple of "quick checks" and reduce your guessing to a more sure thing.

I"ve know a LOT of guys who started with "a new battery," then "an alternator,", then the regulator, and GUESS WHAT? IT still didn't work right because some wire connection was broken, that could have been found and repaired in a few minutes.
 
When I read the OP on this, I too guessed that the regulator might be at fault, but after reading 67Dart's reply, I realized that following the procedure that he outlined made a lot more sense. Doing so would have verified the condition of all the components and given the OP real insight into the operation of the charging system. Anyone can replace parts, it takes a mechanic to diagnose a problem. He gambled his $30 and lucked out. If he had guessed wrong. he'd be out $30 and no closer to a repair.

BTW, just because his immediate problem is solved doesn't mean the alternator's good, it could still have a couple of bad diodes and marginal output.
JMHO

be out 30? Its called return for your money back...Most Kragens and Autozones will do so with the reciept :evil3:
 
My charging system in my Duster was not working and the problem was the gauge on the dash had a burned out post. May want to check the Ammeter gauge for a short.
 
be out 30? Its called return for your money back...Most Kragens and Autozones will do so with the reciept :evil3:

I don't know about nowadays, but when I sold auto parts, NOBODY would take back an electrical part, especially if there was evidence that it had been installed.


Would YOU want a "new part" that had been tried about by someone? EIGHT someones?

This is NOT how you troubleshoot a problem. I've even had a customer bring back a greasy, scratched up gas filled fuel pump. I said "what's the matter with it?" He said, "nothing, it wasn't the problem."

I wouldn't want that pump on MY car, would you?

Nope, I believe they send the part back and they check it all out, but IDK.
 
Simple. The interior poles are reversed in the alt. That would reverse the DC current.

Sorry, nice try. The reason "they" that is, "the thems" call these "alternators" is because, internally, they actually produce AC, which in this case has no real polarity. In fact alternators in autos and trucks are THREE PHASE AC devices, and so that is why there are SIX diodes, instead of one or two.

The only way possible to invert the DC output polarity of an alternator is to take it apart and install the diodes differently. I'm not even sure if this is possible in many designs. In the old style Mopars which used six individually pressed in diodes, you would have to press all six out of the alternator and the insulated mount, and reinstall them in the opposite mountings. That is, swap the 3 negative for the 3 positive diodes.

Below is a simplified diagram of an alternator. Notice that 3 of the diodes have the "back of the arrows" (anodes) tied together and grounded. In the old style Mopar, these would be the 3 diodes that are pressed into the main part of the rear case.

Notice that the other three have the "bar" end (cathodes) tied together and feeding the output stud. These 3, in the old style Mopars, are the 3 that are pressed into the insulated sub assembly, connected to the output.

05019.png


In the diagram below, a poor drawing of an early style Mopar, the 3 diodes in the little C or triangle shaped section near the top are insulated from the case, hooked to the output stud

The three around the big part of the case are grounded

32.5.6.7c.GIF
 
-
Back
Top