Console Project

-
How did you mount your speakers under the dash ?

thanx

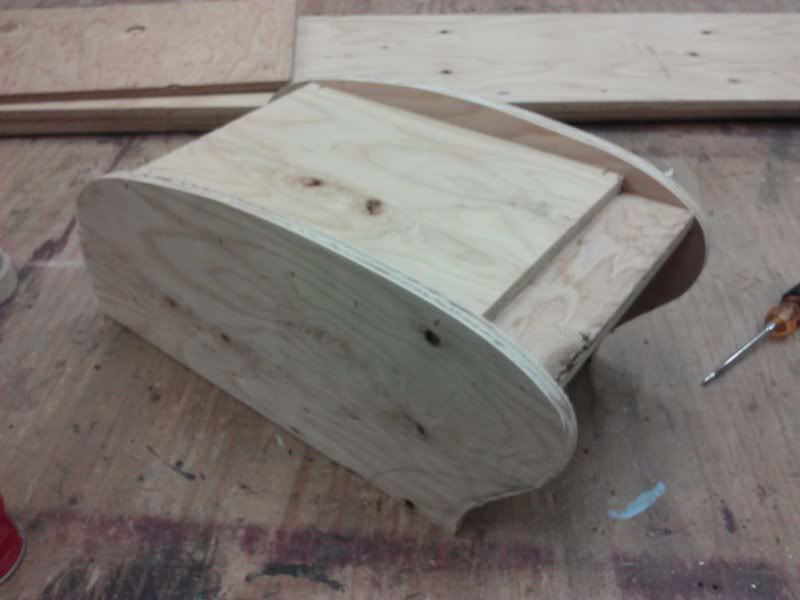
Where is it you want to put the wood on the console Ian?

I mounted them by making two abs plastic rings and putting two screw holes in the kick panels. I'll have pics of them in a sec.


They only make two holes in the kick panel so the kick panel can be reused again in the future with little work to be done.

CAM00301_zpsfb2b1374.jpg


CAM00338_zps8df19437.jpg


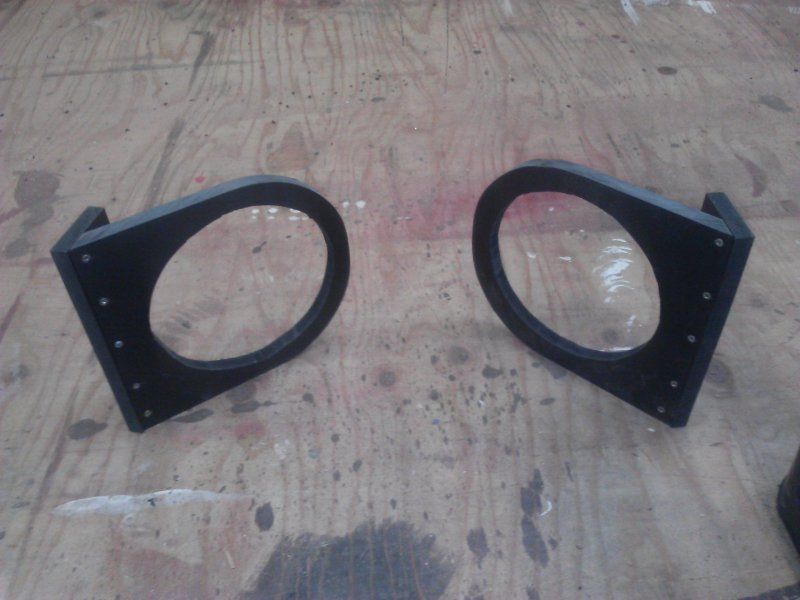
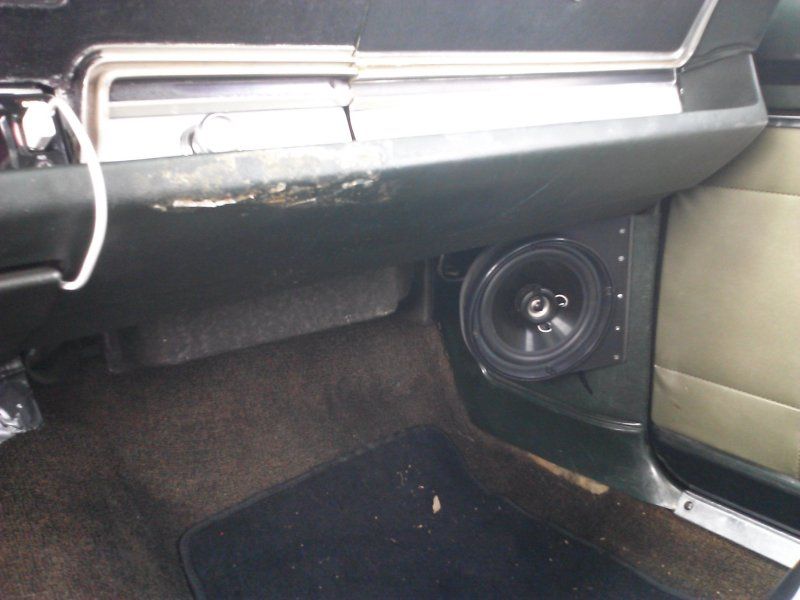
They are for 6 1/2" speakers and the footprint when removed like I said is two screw holes. I'll make molds of them eventually so that I can make my own kick panels without trashing the originals,and still allowing access to the vent doors.

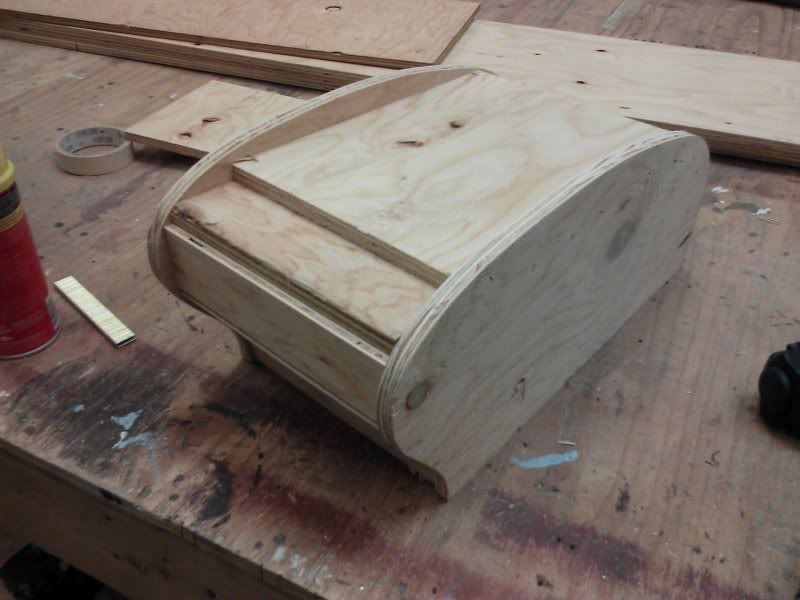
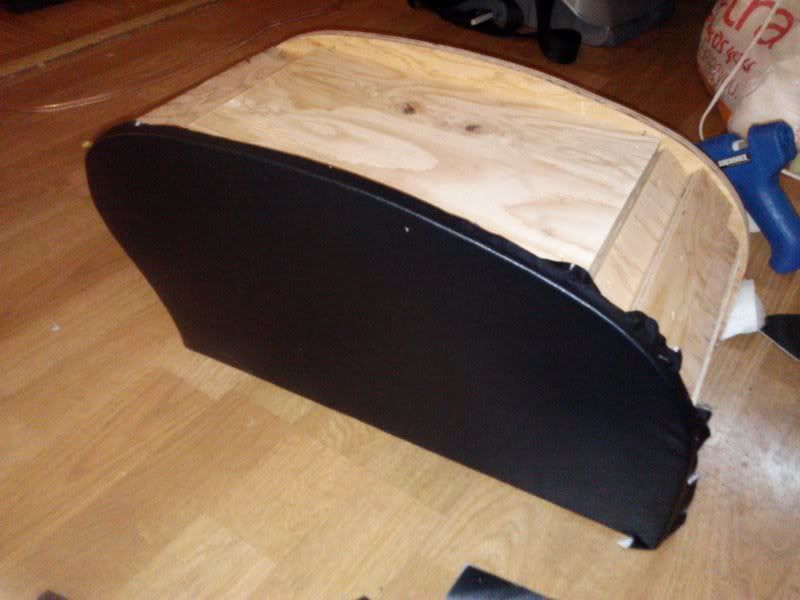
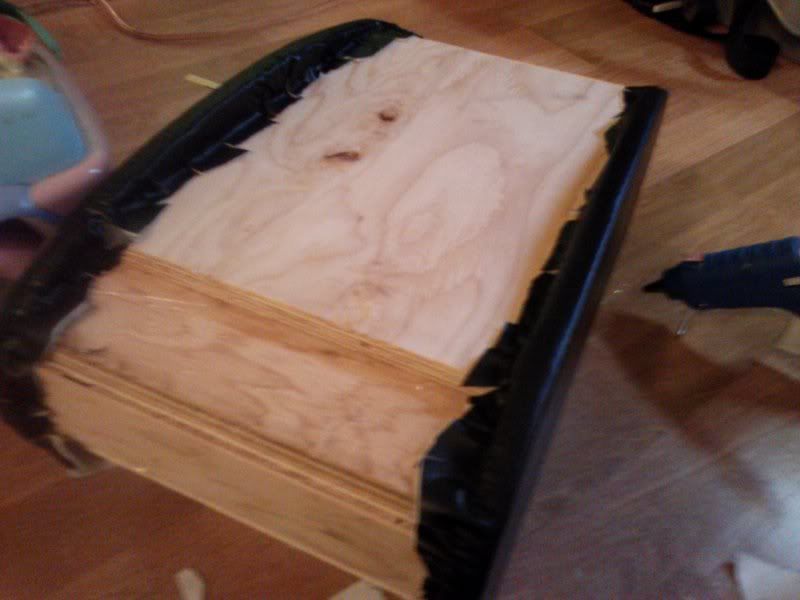
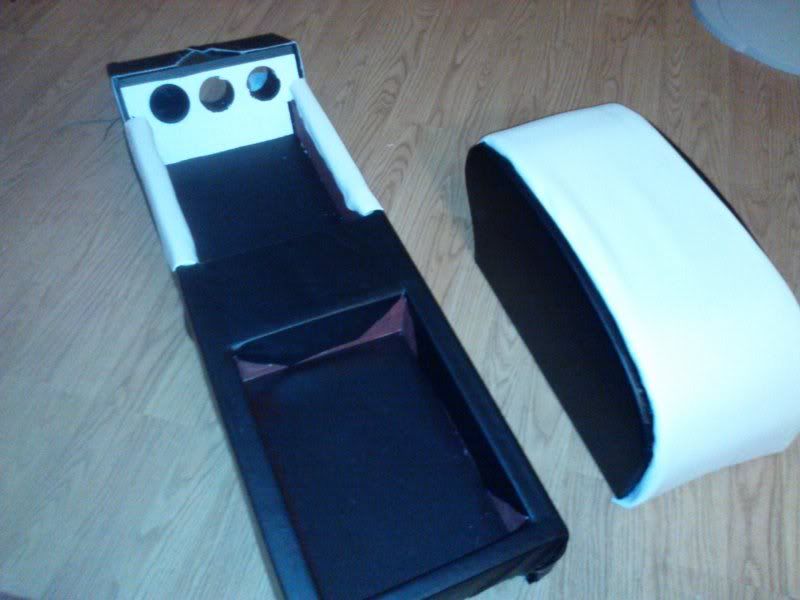
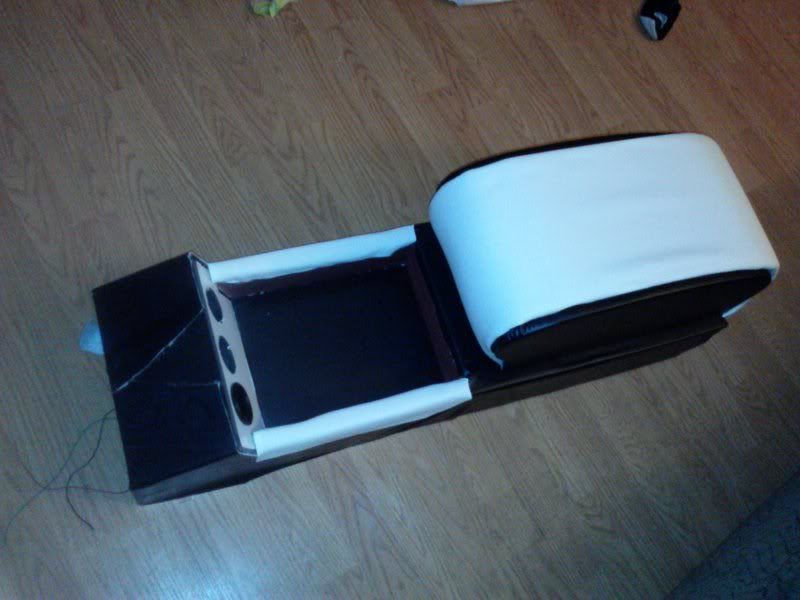
I'm happy this thread is popular, just know i really try and work on stuff everyday. But sometimes I have to do the regular job work too. lol. Sorry bout that. Right now the console is sitting in my kitchen. Tomorrow I'm helping some guys work o na boat owned by Joe Dimagio at one point (so it's a neat project) and then I'll be back on the console!
 
Serj22,

I appreciate you time. Without this board, I would still be deep in hot water.

Go some pics of the boat ? That is one hobby my wife won't tolerate even though she grew up on the water.

We run a duster. I need to make a console. We are moving from a auto to a ratchet...so building the box isn't a big issue for me..it is attaching it to the hump. And I am conflicted between wood and sheet metal. My kids are driving this thing and it has to be tough.

I love the speaker design holder. The kids front tri axles will not fit the kick panel that is being sold. Tried to make a set with 'glass and wood but they suck. Do you lose any sound quality by them not being in a box ?

Thanks
Ian.
 
I'm sure that not having them in a sealed enclosure is hurting the SQ, yes, but I still think it's aeons better than the one in the center of the dash, which is also not enclosed anyway. That one is open air on both sides. They're tough and I've kicked them a few times, no issues.

The boat I'm working on:

P1000172.jpg


IMG_20110707_152716.jpg


IMG_20110707_152752.jpg


I3D_20110707_153035_00.jpg


Also, I am planning on making a set out of glass using a mold of the actual kick panel. Maybe I'll see em if I can get a market of them. I can do fiberglass or carbon fiber. painted, unpainted, etc... but have to make them first.

As for the box, and mounting it to the hump, if you hug it up to the edges of the hump, it kind of sits on its own. I may just run two screws into the body in different spots. That's how it's held down on modern cars anyway. If you make it out of wood, it will be sturdy. If it's going to be covered I recommend 3/4" MDF. It's cheap and tough, but if you get it wet, it starts to suck. You could also use metal, but know that it will wind up heavy, but sturdy. You can always build a frame out of something soft, like redwood, and glass it. It will be as strong as needed, and not weigh anything.

Another option for mounting is to cover your hump with aluminum foil, and masking tape. Then wax it. Then wet some fiberglass and lay it on top. Keep layering it on, and then let it dry. You will then have an exact mold of the hump. Cut it to a rectangle shape and then build your console on top of it, then glass both pieces together. It will fit down with exact contact, and very minimal holding necessary.
 
Serj,

damn, that boat is sexy...looks like you are replacing most of it..I am a bit time reader of wooden boat mag.. fiberglass hulls just don't look (or handle) as well.You are a hell of a wood worker..I know how much skill it takes to do the job you are doing and you are definitely, out of my league.

With the speaker and console, you have given me lots to think of and explore.

Many thanks !

It is good to be back.

Ian.
 
Actually we let this one rot on purpose before the restoration. Technically to be a good restoration, 30% of the original boat must be there. For an acceptable one, it's 15%. This one is near the 15% left mark, but it'll be worth it. we're replacing pretty much the whole thing, but you got to be careful, because if you do replace it all, then you've made a copy, it's not a restoration. The oiginal is destroyed.
 
I know similar rules apply to furniture but not nearly as lenient...however, chairs don't exist in the same environment.

updates with pics would be appreciated..for me, anyway. Love to see a voat as pretty as that, brought back. I assume you are doing the engine as well..what it is's petagree ?

Cheers
ian.
 
Luckily the client bought the engine.

$40,000

1941 Rolls Royce V12 originally inside a spitfire mustang
Supercharged
Near 1200hp, and it will all go right to the shaft
 
Wowza!
Got any pics of one like it on the water?
 
Actually this is a one and only. Hacker made it as a custom order. The only thing close would be the thunderbird at lake Tahoe. That is a 62 foot boat and has stainless steel top that will not be on this boat. So no pictures of one on the water. This will be a $2,000,000 boat when it's done. Easily. Then dude paying us to do it is a lawyer who makes book bux and has had us restore over 10 or so boats for him so he's a good click nt. He also gives us free legal aid for our business if we ever need it. He also stores his boats in town so we can use them whenever we want. And he's okay, with that.
 
please post more pic of that boat !!!!!!!!!!!!!!!
 
please post more pic of that boat !!!!!!!!!!!!!!!
Lol. Ok. No problem. Here's some more recent ones:

P1000109.jpg


P1000171.jpg


P1000169-1.jpg


This boat is unique because the entire shape has no edge on the main lip. The hull curves over completely onto the deck, and each piece going from the hull up to the deck are about 16ft long, or less, and had to all be hand carved to the shape of the ribs out of 6" thick mahogany using a 1" chisel and an axe. The end plank is only 5/8" thick. Each piece took about a week.

P1000171-1_zps0463859d.jpg


P1000170_zpsc7414a9d.jpg


This is thunderbird. I did not restore it, and neither did my dad. Some company in Lake tahoe did it as a Charter. It's a pretty boat, but just imagine this shape, without all the metal on top. That is what the boat we're working on will look like. Color and chrome on the sides will be the same.

thunderbird_at_tahoe.jpg


IMG_0667.JPG
 
Awesome. You are one of few who gets to practise fine woodworking to produce an object of great beauty such as this.
 
love this...wish I had seen this earlier...just made kick panels with speakers and started my console today... I will post pics on another thread later on...
 
I actually saw your kick panels. How do they mount being flat? I really liked the idea of bedliner as well since they get abused regularly.
 
that Rust Oleum bed liner actually isnt the toughest stuff since its not catalyzed, but it does work well on a lot things...using it on the console as well....
 
I actually really dislike Rustoleum anything. If you ever try to recoat something it turns into a wrinkled mess. Almost like it has infinite solvent crack. But that's my experience, and it has ruined many of my 1940's Radio hot rods. Don't anyone ask for pictures of those or I'll never get back on track...

I like Mar-Hyde. I sprayed a bumper with it and it stayed on for years. It's sold in rattle cans as well.
 
Absolutely stunning. When we lived in Ottawa there was a yearly old boat festival where I could get my fill.....the boat shows down in NS tend to be more sail than old power. The first time I took my wife (mid 80's) she was blown away by the value..but you just explained it all.

Thanks
ian
 
Sounds awesome actually. I've done sailboats in the past as well. I also used to have a 2 story shop to do them in. Not anymore.

But I do have a simple update. I have finished the lower portion of the console. Next is the arm rest with a hinge, and the arm rest itself will fold all the way over into the back with two more cupholders for the back seat when fully opened. I think it will be cool.

Added white vinyl to the gauge face, and did a simple cabernet stain of the redwood to make it more "red" Some spots are missed that i got with a art brush. Don't worry. I know what I'm doing. lol. I just forgot to snap a photo. I also got the Oil Pressure digital gauge mounted. Waiting till I can afford the water temp (that will hopefully work better than the stock one) and vacuum gauge. Then I will make a harness with the vacuum hose and everything to rig up.

CAM00474_zps2f20e30f.jpg


CAM00475_zps248774ba.jpg


Having stain on the abs won't matter. It will be covered with thick vinyl and some kind of matting anyway.
 
Ok, this is another slow update, I'll be back in the shop tomorrow building the arm rest. I started stretching and gluing vinyl for the exterior portion of the console and inside of the arm rest. I filled in the area between the cup holders with spray foam, and then coated and sanded with bondo to smooth, then layered a piece of peal n seal to pad it slightly higher than the rest of the arm rest.

CAM00495_zps6cdd6d64.jpg


CAM00496_zpsdf04ff56.jpg


CAM00497_zpsf75a8acb.jpg


Still more to stretch and glue, and I'm still waiting on gauges and tomorrow I start the arm rest portion so more will be happening.:blob:
 
To start mine is about 9 1/2" wide and 32" long. You may have to go smaller width because I have small bucket seats that give a lot of room in the middle.

This is a big update for 2 days. Good thing is that this console is starting to look nothing like my original drawing -which I said would happen.

I started building the arm rest yesterday. I opted for 1/2" plywood.

I cut 2 outer edge panels and then nailed them together, and used a belt sander to make them EXACTLY the same shape -

CAM00498_zpsef690aec.jpg


CAM00499_zpsd151917a.jpg


I then cut various pieces of 8" wide ply and made a small channel along the inner side of the two pieces to make the shape I wanted for the arm rest.

CAM00500_zpsa0322953.jpg


CAM00501_zps445d2c68.jpg


CAM00502_zps9f9ea87a.jpg


I then dressed in the inside portion using the same method.

CAM00503_zps5d64ebe5.jpg


I took the piece inside and then layed out the 1" foam I got before I trimmed it. I made sure to make it just slightly wider than the channel so that it fit snugly.

CAM00504_zps5925b373.jpg


I stretched black vinyl over both sides:

CAM00505_zpsca55213b.jpg


CAM00506_zps669abcac.jpg


CAM00507_zps32cd6b88.jpg


Then I wrapped the arm rest with white vinyl on the foam, tucked and attached the foam in the channel. I made similar smaller foam rests on the outside edge of the front tray. So far my plan is to put cup holders in the arm rest as well for the back seat. It'll make sense when I'm done... don't worry. There's still more to do with vinyl, some carpet, and the lower section of the console still needs to be made to mount it to the hump.

CAM00510_zpse284dc1f.jpg


CAM00508_zpsaa0e8688.jpg


CAM00509_zps090575c8.jpg


The visual line on the arm rest still allows you to see the gauges perfectly...
 
-
Back
Top