Dirtbag Duster

-

fourspeed

Well-Known Member
Joined
May 26, 2004
Messages
581
Reaction score
29
Location
Milwaukee, WI
I bought my '72 Duster in 1985, I think. It was a nice clean car with a six cylinder, automatic, and air conditioning. Oddly enough, it had 340 stripes on it and small bolt pattern rayyle wheels. A sheep in wolf's clothing.

One day my dad asked if I wanted a 340 for my car. I said "Huh? Yeah." He knew a guy who had the 340 out of a '69 Barracuda. A friend of my dad's bought the car brand new and had low miles on it when the car was totalled while parked! I bought the engine, which included bell housing, four speed trans, shifter, and pedal assembly.

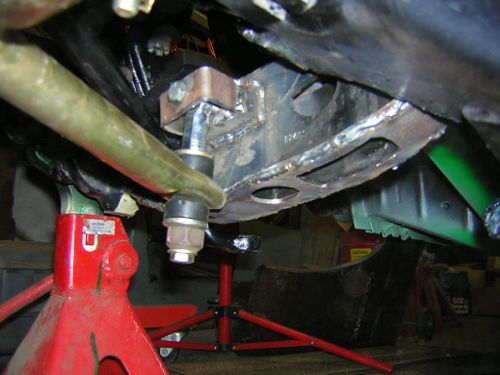
Dad and I put the 340 in the car. We used a '73 k member, '73 disc brakes, and an A body 8-3/4 I bought. I converted to electronic ignition at that time, too.

Later, I got 11" brakes off a big Chrysler in the junk yard and bought some Summers Brothers large bolt pattern axles.

I was living in apartments and the car went downhill. All the exhaust seats were eroded, the car would sometimes turn off, and occasionally the clutch rod would come off the clutch pedal.

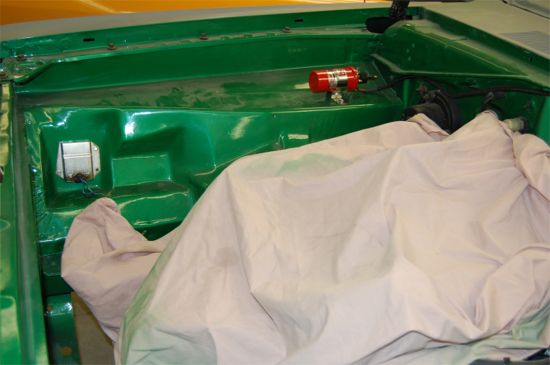
I started rebuilding the car a few years ago. I intended to rebuild the engine, do the necessary body work, and paint the car. Well, the project "grew" and is now much more car than I imagined.

Pics to follow.
 
The car when I started rebuilding it:
duster002.jpg


Original paint, not too bad. There were a couple small holes in the rear quarters, but the metal was thin in the whole area. Turned out the trunk floor was pretty rough too. The tail lights might look cool, but they leaked.
 
Replaced the trunk floor and extensions. I found bigblockdart.com and decided to widen the wheelwells while I was at it. Yep, this is the first time the project "grew".

Then, I realized that you can't run a wider wheel unless you also relocate the springs. Damn, the project grew again.

trunk01.jpg

trunk04.jpg

trunk07.jpg

trunk19.jpg
 
Next, I painted the underside of the car. I figured I would use some Eastwood Rust Encapsulator and some enamel.

Well, I had to remove any loose rust first. So I got under there with a wire wheel and did the WHOLE floor. Yes, it was a lot of work. Then I sprayed Rust Encapsulator. Then I thought, why not use some epoxy primer to seal it up good? So I did that. Then I thought, why not paint body color under there? It no more work then spraying some Rustoleum...

So I went with my wife and her friend to pick out a color. We picked one off a color sheet, and it turned out to be "Clapton Green Metallic" which is a Fender color.

springrelocation09.jpg

springrelocation10.jpg
 
The engine compartment was next. I found some rust here as well. It looked pretty good until I removed the paint. Fixed a couple rust spots, used the Eastwood, epoxy primer and enamel like underneath the car.

frontsuspension01.jpg

enginebay03.jpg

enginebay04.jpg

enginebay07.jpg

enginebay08.jpg

enginebay09.jpg

enginebay15.jpg
 
Rebuilt the front suspension. Used RMS strut rods. Very Nice.
frontsuspension04.jpg

I also used Bill's tubular upper control arms with sperical bearings.

I bought a '73 anti sway bar, which goes through the K member. Nice clean look. The '72 would have worked too, but it mounts in front of the k member. I had to make mounts for the lower conrol arms either way, so it didn't matter whether I used the narrower '73 bar, or the wider '72 bar. I also made some end links that eliminate the upper rubber bushings. Without tosion bars, you could move the spindle by hand, and the spindle on the other side would move with it. Nice. The lower control arm uses rubber bushings and the anti-sway bar has a couple poly bushings. All the other bushings are gone.
frontsuspension10.jpg
 
Looking really good...progressing nicely. I really like the color you picked and I look foward to seeing it painted with the black stripes back on.
 
Body work
Patches were fitted carefully, butted to the existing metal, and tacked in place. Then my friend Craig used his mini torch to gas weld the seam. (I did some seams in areas that are not conspicuous) It causes a lot of warpage, but the weld is malleable. He would weld a spot, then hammer and dolly it to flatten the weld and stretch the metal back out. Once the welding is done, you can hammer and dolly the panel without much cracking.
bodywork002.jpg

bodywork006.jpg

bodywork004.jpg

You can see an area here where a strip of metal was butt welded below the tail light. This is after sandblasting, but you can see the dimples where the weld is.
bodywork008.jpg

bodywork009.jpg

I got an AAR hood and it RULES! I always wanted a hood scoop. Kick ***.
bodywork003.jpg

bodywork011.jpg

bodywork014.jpg

bodywork015.JPG

bodywork016.JPG

bodywork017.JPG

This is how the body work looks now. It will stay like this until the mechanicals are done. That way we don't jag up the body work.
bodywork018.JPG
 
Engine

Every Mopar guy's favorite - the engine.

I was going o build my 340 myself, but was talked into having the race shop build it. Good decision. If I had done it, there's no way the engine would run as well as it does.

The specs, for those who need them:
The 340 got bored .030
The crank was ground.
SRP forged pistons
Eagle H beam rods
Edelbrock heads
Edelbrock RPM air gap dual plane intake
Milodon oil pan
MSD distributor
Comp Cams Pro Magnum rockers
Compression ratio is 10:1 because I wanted the engine to run on pump gas, with no blending.
The cam is a hydraulic roller with .530 lift and 230 degrees at .050 duration.

engine01.jpg

engine02.jpg

engine03.jpg

engine04.jpg

engine05.jpg

engine06.jpg

engine07.jpg

The dyno produces a chart of numbers, not a graph. So I made my own in Excel.
engine08.jpg

On race gas, it made 465HP at 6000RPM and 466 lb ft torque at 4400RPM. 38 degrees advance. Yow! Power dropped when we backed off to 36 degrees advance, so back to 38. On pump gas, 458HP at 6000RPM and 462 lb ft torque at 4300RPM. Ran fine on pump gas at 38 degrees advance. The engine builder was pleasantly surprised that the pump gas number was so close to the race gas number.
 
Mechanicals
The engine is in. Clutch is in - Centerforce dual-friction. Bellhousing is in - man, that thing has a lot of bolts. Trans was checked out, it looked good, so it just got new bearings, seals, and gaskets. TTI headers went in as the engine was lowered.
drivetrain001.jpg

drivetrain002.jpg

drivetrain004.jpg

drivetrain005.jpg

Before final body work, I still need to do fuel system, radiator, wiring (Painless kit), and exhaust.

Ok, that's it! The posts are up-to-date now.
 
Looking really good...progressing nicely. I really like the color you picked and I look foward to seeing it painted with the black stripes back on.

Thanks. Yeah, it'll get the stripes and a black hood. The black will help tone down the green a bit.
 
Fourspeed,your drivetrain is similar to mine except I had my 340 stroked to a 372,dynoed at 452hp 440ftlbs. X heads p/p,XEH284 cam,air gap with 750 holley v.s,msd 6al,pro billet dist. hooker headders.Centerforce d.friction with lakewood bell(heavy and lots of bolts)8 3/4 4.10 stange bbp axels with comp eng. slide-a-link traction.I take my car to the track often,but I think I baby it a little to much(don,t want to brake anything on the launch)Car ran 12.82 at 108mph,60ft. 1.80.Should be able to get it down in low 12,s this spring.Now building a 66 Dart for mostly strip so I can use the Dart Sport for more of a street car.Keep up the good work and keep posting as you go!

OCT 08 006.jpg
 
Fourspeed,your drivetrain is similar to mine except I had my 340 stroked to a 372,dynoed at 452hp 440ftlbs. X heads p/p,XEH284 cam,air gap with 750 holley v.s,msd 6al,pro billet dist. hooker headders.Centerforce d.friction with lakewood bell(heavy and lots of bolts)8 3/4 4.10 stange bbp axels with comp eng. slide-a-link traction.I take my car to the track often,but I think I baby it a little to much(don,t want to brake anything on the launch)Car ran 12.82 at 108mph,60ft. 1.80.Should be able to get it down in low 12,s this spring.Now building a 66 Dart for mostly strip so I can use the Dart Sport for more of a street car.Keep up the good work and keep posting as you go!

Cool, thanks for the info on your car. The engine builder, before the dyno runs, figured I would be in the low 12's. From your info, it looks like I should be in the ballpark.

Do you run slicks, or street tires?
 
Cool, thanks for the info on your car. The engine builder, before the dyno runs, figured I would be in the low 12's. From your info, it looks like I should be in the ballpark.

Do you run slicks, or street tires?
Yes I run 26x10 M/T drag slicks.Gonna put a 2 stage limiter on for better launch.We,ll see in spring!
 
Progress from the last couple weekends:

The trunk is painted. I used acrylic enamel with hardener, same as under the car and in the engine bay. Unfortunately, PPG no longer makes the stuff, it's only available in the Omni line. The Omni single stage paint is crap. It doesn't cover at all until you have about three coats on. There goes my money savings. Ah well, that does it for the enamel. The outside of the car will be in base/clear. Got the battery box and shutoff switch mounted.
trunk20.jpg


Pinion angle is set at 5 degrees, perches are welded, backing plates are on and axles are in. The 3.23 will go in for now, but I hope to have my hands on a 3.91 sure grip before long. Right now, the budget is an issue.
drivetrain006.jpg


This is one of my favorite pictures. The Milodon oil pan, Lakewood bellhousing, trans and headers are all visible. Sometimes I roll unde rthe car on a creeper just to look at it. Then I start to... uh, nevermind. Anyway, the driveshaft loop is in. The driveshaft itself needs to be shortened by about an inch.
drivetrain007.jpg


A shot of the bottom. You can see the spring sliders. The cable hanging down is the massive battery cable I got from my friend's dad. Saved me a small fortune.
drivetrain008.jpg


The line lock is in. I still need some brake plumbing that I have on order.
drivetrain009.jpg


That's it for now... until the weekend. I can't believe we're actually doing such small things. Soon the mechanicals will be done, then it's time for final bodywork and paint. Major expenditures coming up: radiator, gauges, and paint.
 
More progress. Not much to look at, but progress none the less.

Wired the relay. I'm using a Painless harness, so anything I want to change is pretty much fair game. All this will get covered when the wiring is in place.

enginebay20.jpg


Moved the coil to the inner fender. I didn't want it on the manifold because it gets too crowded with the distributor. The primary wires are there and they look nice with the "Powerbraid" covering. I actually found an electronics supply house that sells the same stuff at half the price that Painless charges. I moved the regulator next to the alternator. Looks like it was meant to be there. All the alternator wiring will go through the core support, across the front of the core support, and along the driver's side inner fender. NO WIRES LAYING ON MY ENGINE! :)

enginebay19.jpg


The positive battery cable is routed and the length is ok. That's awesome, because my buddy's dad got the cable for me and it is 17 feet, I think. It's just right without cutting, and without much extra.

trunk21.jpg


Fuel pump is mounted and electrical is half done.

trunk22.jpg
 
It's close now. Real close. I need to buy a carb and waterpump pulley, reassemble my steering column, paint the black hood/cowl/window area, and get glass.

bodywork038.JPG

bodywork039.JPG
 
Not too much happened this weekend, but here she is with wheels and tires. The rear tires are from my pickup because the wheels for the rear are back-ordered. The rear will get 15x9 Convo Pros with 6.5 backspacing. The tires will be one inch bigger in dia and of course, wider.

Bumpers are on, door latches and locks are in, tail lights are in (they cleaned up great), and the steering column is in. I still need a coupler though. I'm working on the shark tooth grille. It's cracked pretty bad, but all the pices are there, so it should turn out nice.

bodywork040.jpg


bodywork041.jpg
 
-
Back
Top